
Configure a Subform
To configure a subform, do the procedure in this topic.
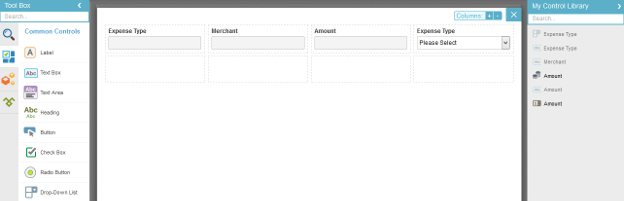
Video: Configure a Subform Form Control
Examples
- (Example) Create a Subprocess
- (Example) Configure the Leave Details Subform for the Example Create Absence Request eForm
- (Example) Create a Subform for Absence Details for the Create Absence Request eForm
- Examples - Step-by-step use case examples, information about what types of examples are provided in the AgilePoint NX Product Documentation, and other resources where you can find more examples.
Good to Know
- In most text fields, you can use process data variables as an alternative to literal data values.
- You can create up to three levels of nested subforms within a subform.
- Some form controls can not be used in a subform.
- You can not drag a subform from one form section to another.
How to Start
- On the Application Explorer screen, do one of these:
- Do one of these:
- Add a Subform
 control:
- On the eForm Builder screen, in the Toolbox, open the Common Controls
 tab.
tab. - On the Common Controls tab, drag a Subform
form control onto your eForm.
- On the eForm Builder screen, in the Toolbox, open the Common Controls
- Change a Subform control:
- On your eForm, click the control, and click Edit
 .
.
- On your eForm, click the control, and click Edit
- Add a Subform
- Complete the fields as necessary.
- On the eForm Builder screen,
click the Subform form control, and click Design Subform
 .
.
Procedure
- (Optional) If you want to change the columns on your subform, do one of these.
- To add a column to your subform, click Add Column
 .
. - To delete a column from your subform, click Remove Column
 .
.
- To add a column to your subform, click Add Column
- Do one of these
- Configure your form control as necessary.