
Configure Rules for a Form Control
To configure rules for a form control, do the procedure in this topic.
Video: Salesforce Query and Second Form
Video: eForms with SharePoint - Part 3
Video: Form Designer Overview
Video: eForm Builder Interface
Examples
- (Example) Use Rules in a Form Control
- (Example) Configure Rules for the Sequential Approval eForm
- (Example) Configure Rules for the Parallel Approval eForm
- Advanced Examples
For more advanced or complex examples or specific information about how to solve a specific business problem or use case, AgilePoint recommends the following resources:
- AgilePoint Community Forums - A free, AgilePoint-moderated, crowd-sourcing user forum where you can ask questions about specific techniques, the solutions to use cases, workarounds, or other topics that may not be covered in the Product Documentation.
- Video Portal - Video walkthroughs for a range of simple and advanced tasks in AgilePoint NX.
- Professional Services - If you can not find the information you need for your specific business problem, mentoring is available through AgilePoint Professional Services.
- Personalized Training - AgilePoint can provide personalized training for your organization. To request personalized training, contact AgilePoint Sales.
Good to Know
- In most text fields, you can use process data variables as an alternative to literal data values.
- This procedure shows how to create a rule for a form control. To create a rule for an eForm, refer to Configure Rules for an eForm.
- You can configure
validation rules and display rules for specific form sections. For more information, refer to:
How to Start
- On the Application Explorer screen, do one of these:
- Do one of these:
- Add a
form control:
- On the eForm Builder screen, in the Toolbox, open your tab.
- On your tab, drag a form control onto your eForm.
- Complete the fields as necessary.
- On the eForm Builder screen, put your mouse on your form control.
- Change a form control:
- On the eForm Builder screen, put your mouse on your form control.
- Add a
form control:
- Click Rules
 .
.
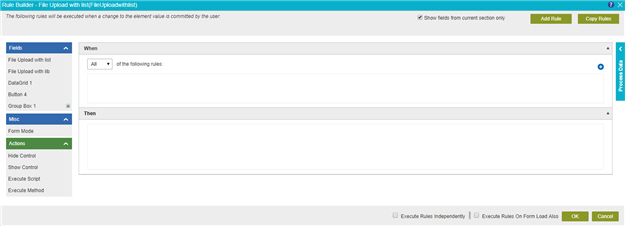
Procedure
- On the Rule Builder screen, select when the rule applies in the form.
Field Name Definition When
- Function:
- Specifies when to apply the rule in your eForm.
- Accepted Values:
-
- All - The rule is applied when all the conditions are met.
- Any - The rule is applied when any one of the conditions are met.
- None - The rule is applied when all of the conditions are not met.
- Default Value:
- All
- Example:
- Refer to:
- Drag a form control from the Fields field to the rule screen.
- In the Comparer field, select the operator to compare the values in your rule.
Field Name Definition Comparer
- Function:
- Specifies the operator to used to compare the two input values.
- Accepted Values:
-
- is present
- is blank
- is equal to
- is equal to (Ignore Case)
- is not equal to
- is not equal to (Ignore Case)
- is greater than
- is greater than or equal to
- is less than
- is lesser than or equal to
- contains
- contains (Ignore Case)
- not contains
- not contains (Ignore Case)
- matches regex
- files exist
- files does not exist
- does not contain data
- contains data
The operators available are different for different form controls.
- Default Value:
- is present
- Example:
- Refer to:
- Limitations:
-
The contains data option is available in these releases:
- AgilePoint NX OnDemand (public cloud)
- AgilePoint NX PrivateCloud or AgilePoint NX OnPremises v7.0 Software Update 2 or higher
- In the Rule Value field, enter the value to compare, or drag a process data variable from the Process Data screen.
- (Optional) Click Add Condition
 to add more than one condition.
 - Drag an action from the Actions list to the Then field.
- (Optional) To copy the rule from another form control, click Copy Rules.
Field Name Definition Copy Rules
- Function:
- Copies the rules.
- Select a form control where you want to apply the specified action, or run a JavaScript method.
- Complete these fields
as necessary.
Field Name Definition Javascript Method
- Function:
- Specifies the JavaScript method to execute if the rule condition is met.
- To Open this Field:
- Drag and drop the Execute Method action.
- Accepted Values:
-
- A valid JavaScript method configured for your
eForm or
application.
For more information, refer to JavaScript Methods.
- A valid JavaScript method configured for your
eForm or
application.
- Default Value:
- None
- Accepts Process Data Variables:
- No
Parameter
- Function:
- Specifies the parameter of the selected JavaScript method.
- To Open this Field:
- In the Then field, drag the Execute Method action.
- In the Fields list, select a JavaScript method.
- Accepted Values:
- A valid parameter for the JavaScript function.
- Default Value:
- The parameter of the JavaScript function which is selected.
- Example:
- destTextbox, triggerControl, trigger
Field Path
- Function:
- Specifies the path of the form control nested in a repeatable subform in your eForm to do the action when the rule condition is met.
- To Open this Field:
- In the Then field, drag one of these actions:
- Hide Control
- Show Control
- Set Minimum Date
- Set Maximum Date
- Set Field Value
- Enable Control
- Disable Control
- Set as Mandatory
- Set as Not Mandatory
- In the Fields list, select a Subform form control on your eform.
- In the Then field, drag one of these actions:
- Accepted Values:
- A valid path to a form control in a repeatable subform.
A path ends with one of these:
- :[this] - Does the action on a particular form control.
- :[*] - Does the action on all form controls in a repeatable subform.
- :[Number separated by ;] - Does the action on the specified form controls within a repeatable subform.
- Default Value:
- The field path of the subform selected.
- Example:
-
- sbfrm_saveComments/cmnt_SaveComments:[this]
- sbfrm_saveComments/cmnt_SaveComments:[*]
- sbfrm_saveComments/cmnt_SaveComments:[1;3]
- (Optional) Complete these fields
as necessary.
Field Name Definition Execute Rules Independently
- Function:
- Specifies whether the rule execution evaluates each condition in the list and executes for all the satisfied conditions if you have more than one condition in your rule.
- Accepted Values:
-
- Selected - If you have more than one condition in your rule, the rule
execution evaluates each condition in the list and executes the rule for
all the satisfied conditions.
This setting does not support the auto undo feature in the Rule Builder. Instead, you must enter Else conditions manually for the rule.
- Deselected - If you have more than one condition in your rule, the rule
execution evaluates each condition in the list
until it finds the first condition that is true. Once it finds the true condition,
the rule execution stops.
It setting supports the auto undo feature. With auto undo, it is not necessary to create an Else conditions for the rule.
- Selected - If you have more than one condition in your rule, the rule
execution evaluates each condition in the list and executes the rule for
all the satisfied conditions.
- Default Value:
- Deselected
Execute Rules On Form Load Also
- Function:
- Specifies whether to run the rule when the eForm loads and the form control value changes.
- Accepted Values:
-
- Selected - The rule runs when the eForm loads and the form control value changes.
- Deselected - The rule runs when the form control value changes.
- Default Value:
- Deselected