Add a JavaScript Function to an eForm Control
To add a JavaScript function to an eForm control, do the procedure in this topic.

Video: Common Configuration Settings in eForm Controls
Examples
- (Example) Use Custom JavaScript in an eForm
- JavaScript Methods for eForm Builder - Examples for JavaScript methods that are available out-of-the-box (OOTB) in AgilePoint NX.
- REST API - Code examples for implementing the REST API.
- Advanced Examples
For more advanced or complex examples or specific information about how to solve a specific business problem or use case, AgilePoint recommends the following resources:
- AgilePoint Community Forums - A free, AgilePoint-moderated, crowd-sourcing user forum where you can ask questions about specific techniques, the solutions to use cases, workarounds, or other topics that may not be covered in the Product Documentation.
- Video Portal - Video walkthroughs for a range of simple and advanced tasks in AgilePoint NX.
- Professional Services - If you can not find the information you need for your specific business problem, mentoring is available through AgilePoint Professional Services.
- Personalized Training - AgilePoint can provide personalized training for your organization. To request personalized training, contact AgilePoint Sales.
Prerequisites
How to Start
- On the Application Explorer screen, do one of these:
- Do one of these:
- Add a control:
- On the eForm Builder screen, in the Toolbox, open one of these tabs.
- Common Controls

- Advanced Controls

- Telerik Controls

- Common Controls
- On your tab, drag one of these form controls onto your form.
- Address Field

- Button

- Check Box

- Lookup DataGrid

- Date Time

- Date

- Date

- Drop-Down List

- E-mail

- Lookup SingleSelect

- Number Box

- Password Box

- Phone

- Range

- Social Security Number

- Time

- URL

- Postal Code

- Address Field
- On the eForm Builder screen, in the Toolbox, open one of these tabs.
- Change a control:
- On your eForm, click the control, and click Edit
 .
.
- On your eForm, click the control, and click Edit
- Add a control:
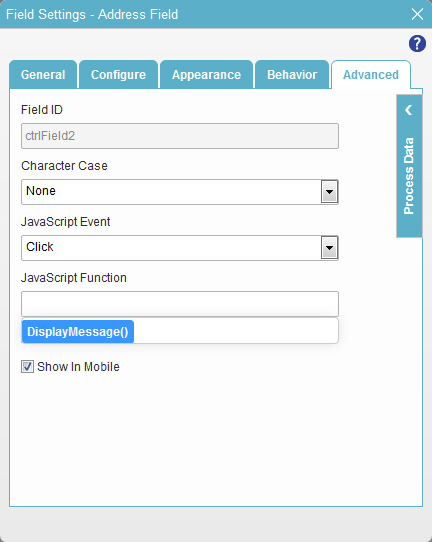
- On the configuration window for your control, click the Advanced tab.
Procedure
- On the Advanced tab, in the JavaScript Function list, select your function.


