(Example) Create an eForm to Start the Process (Create Absence Request)
This example shows how to create a Create Absence Request eForm to start the Absence Request app.
Background and Setup
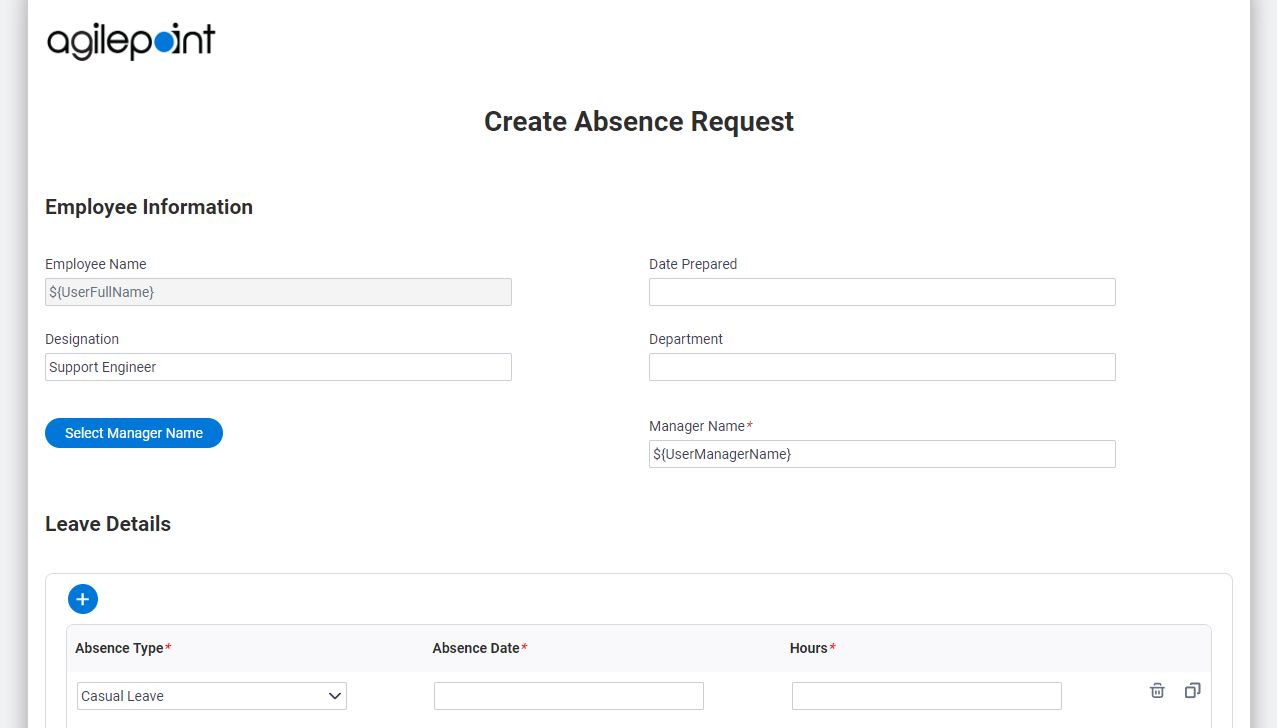
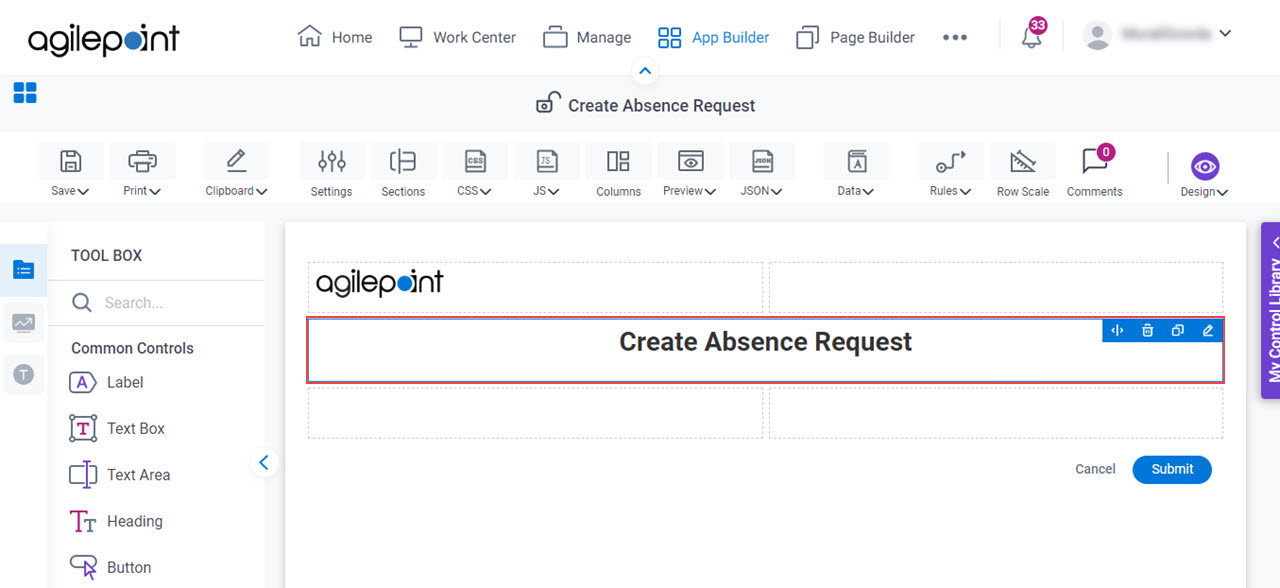
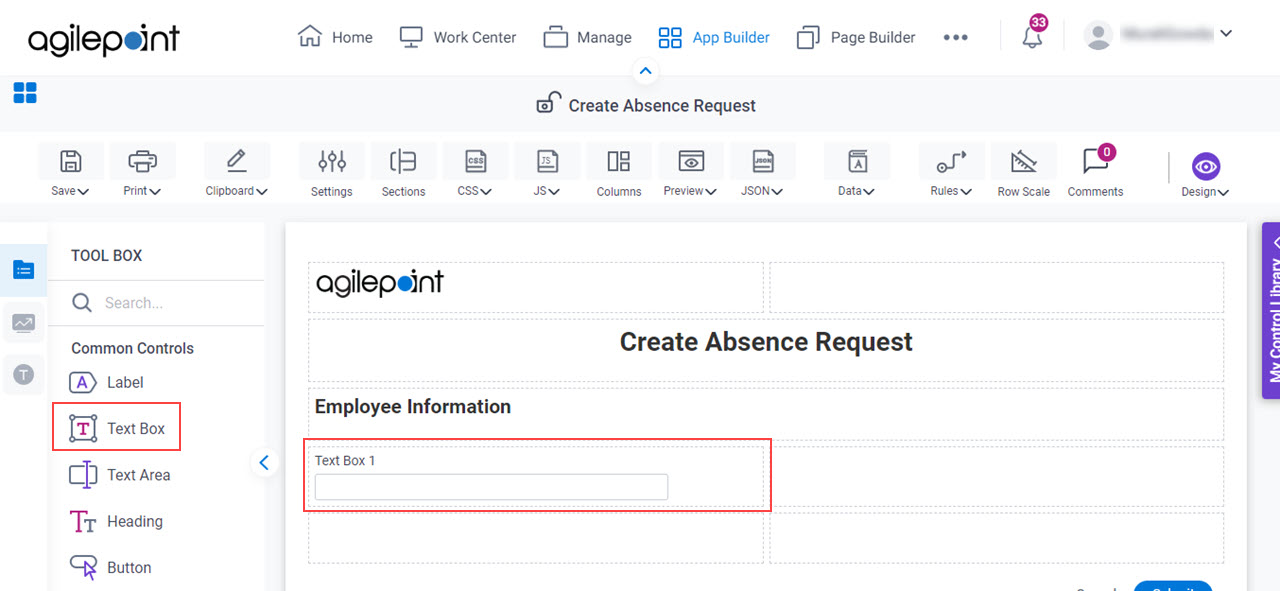
Target Result
When you complete this step, the finished eForm will look like this.
Good to Know
- The Create Absence Request form is used to submit an absence request with required information about an employee and leave details.
- An employee completes this form to request leave and submits it to HR and the Manager for approval.
Prerequisites
- This example uses the app created in (Example) Create a Process-Based App (Modern).
Refer to that topic for information about creating the app.
The app name is Absence Request app.
How to Start
- Open Process Builder.
For information about how to open this screen, refer to Process Builder.
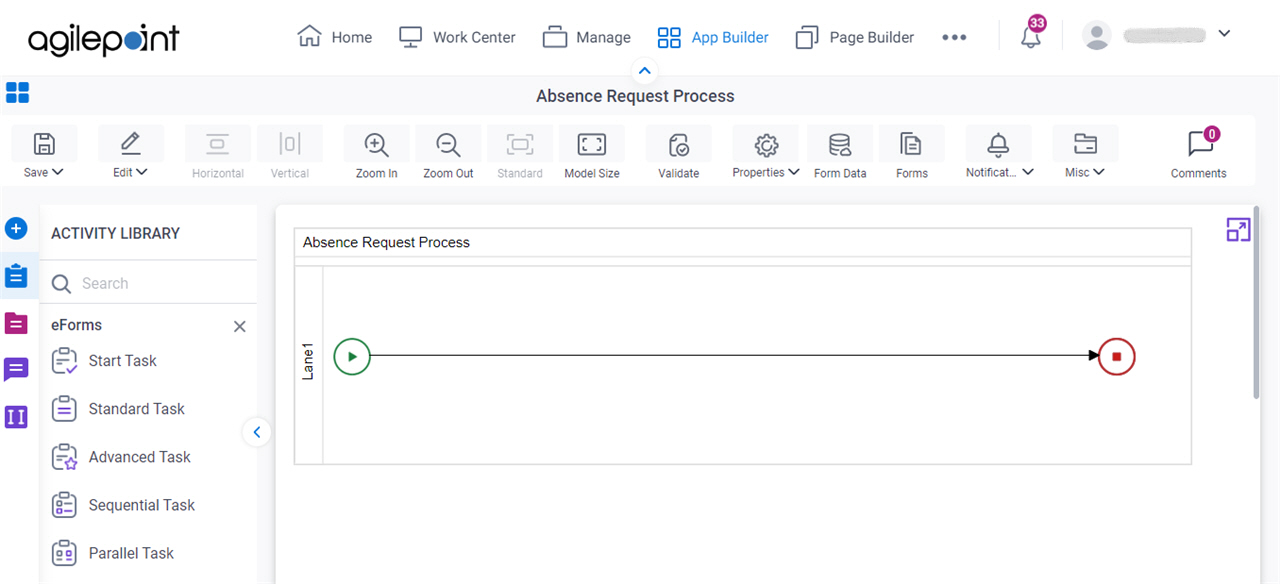
Step 1: Create an eForm (Create Absence Request)
First, create a Create Absence Request eForm to start the process in Absence Request app.
Procedure
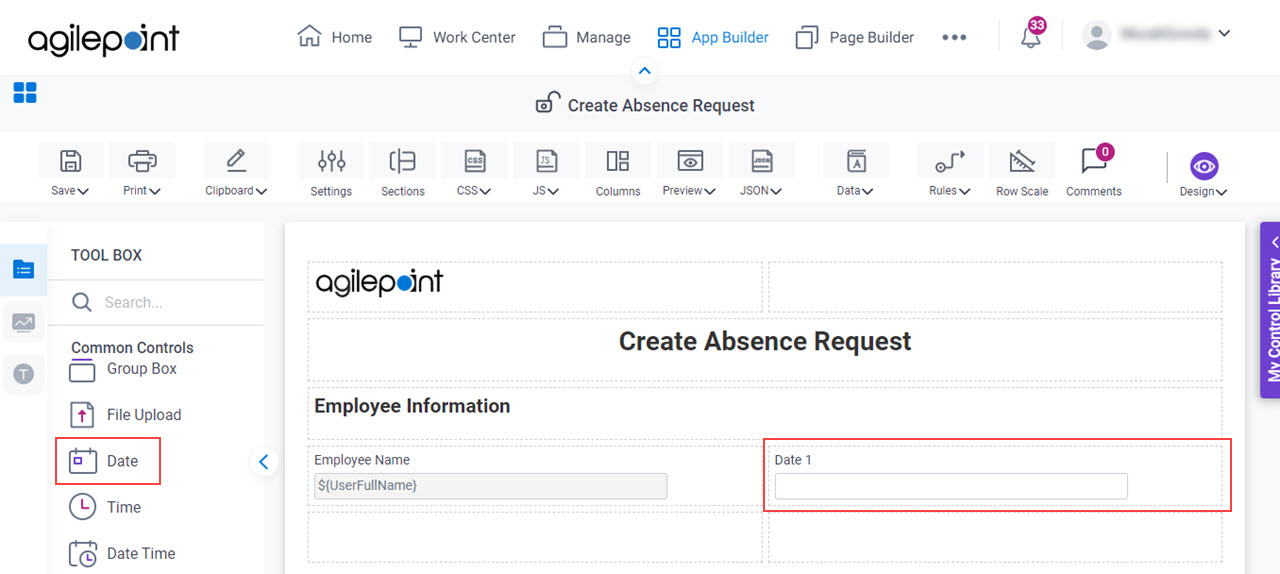
- In Process Builder, on the eForms tab, drag the Start Task activity onto your process.
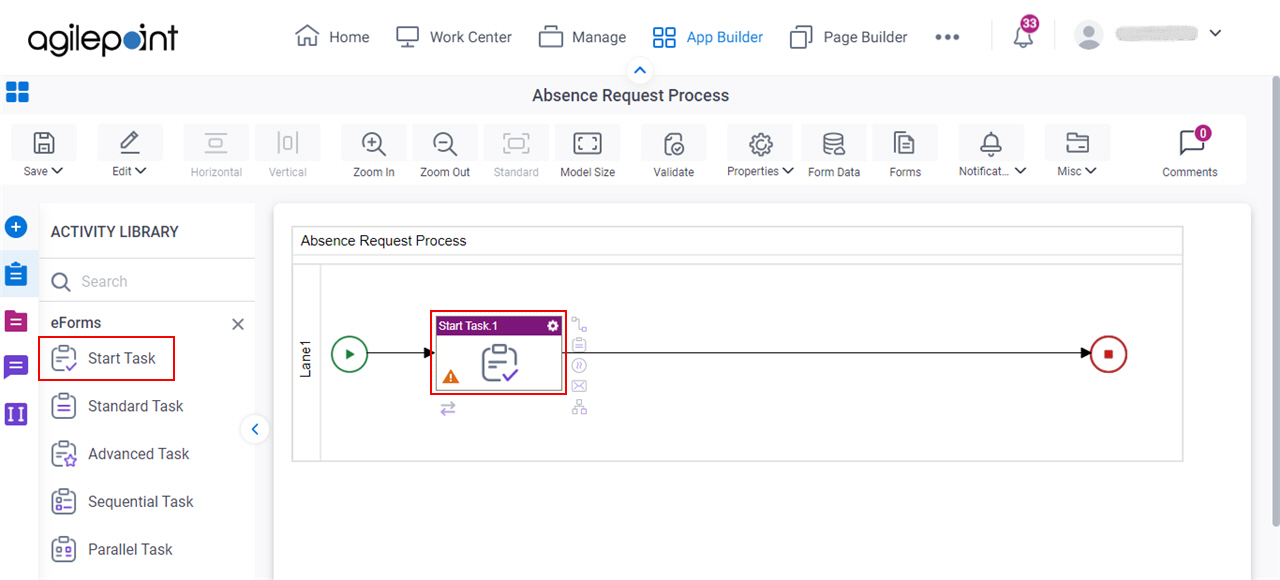
- On the eForm Configuration screen, click Add New Form.
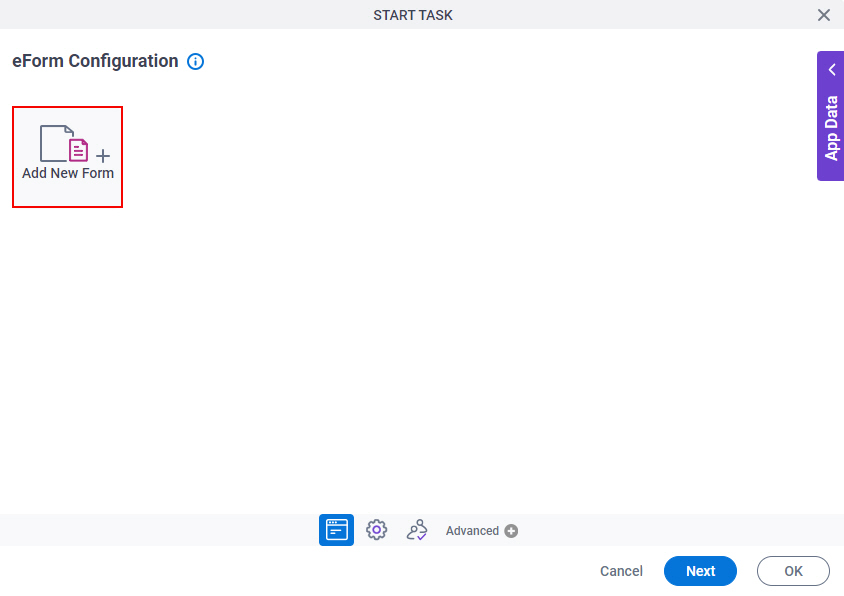
- On the Form Details screen, in the Form Name field, enter Create Absence Request.
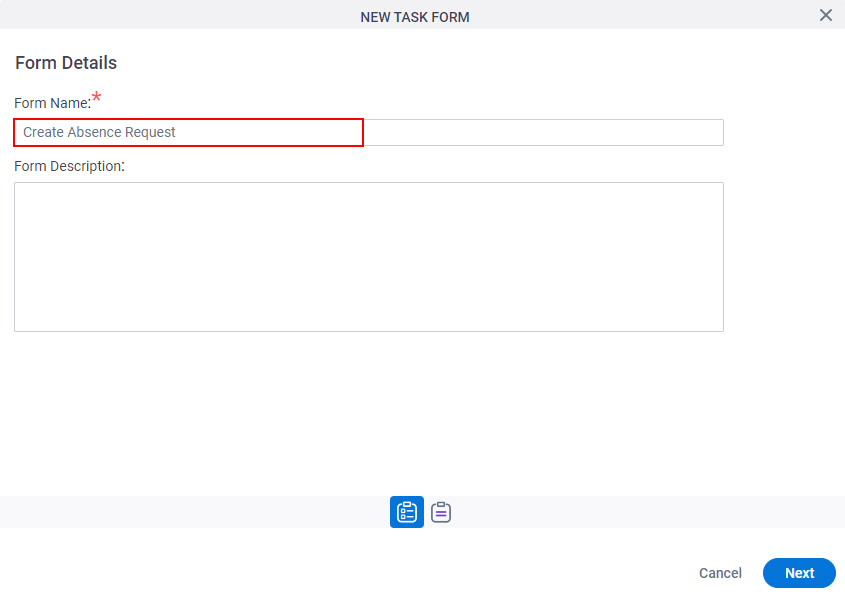
- Click Next.
- On the Choose Form Layout screen, click Blank Form.
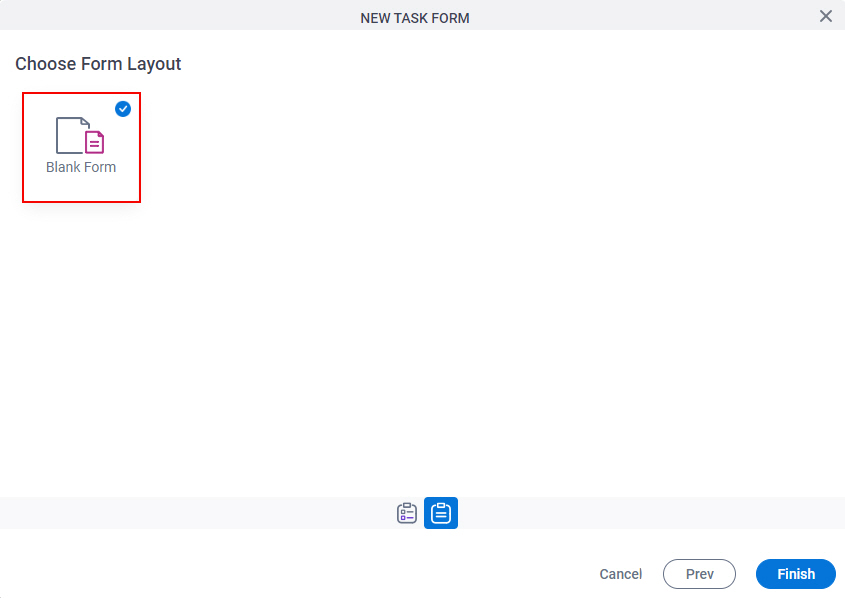
- Click Finish.
The eForm Builder shows the Form Settings screen for the Create Absence Request form.
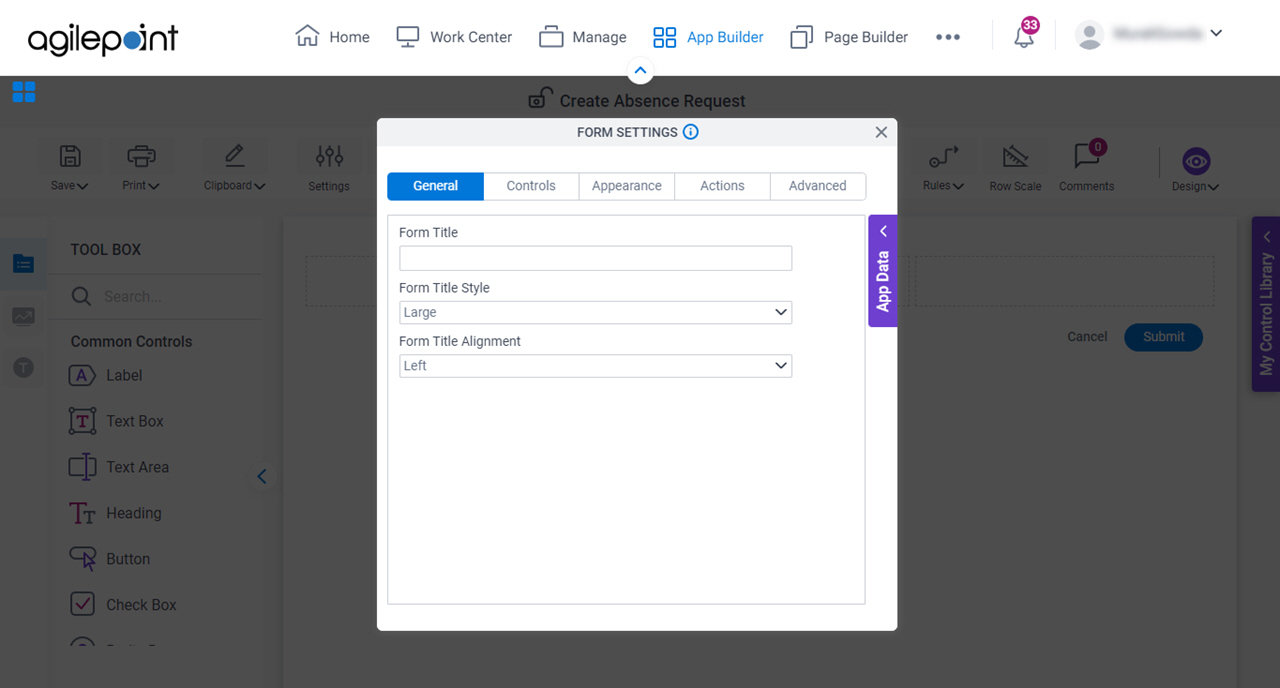
Step 2: Start Formatting the eForm
Next, format the columns for the Create Absence Request eForm.
How to Start
- On the Form Settings screen, click Close Screen
 .
.

Procedure
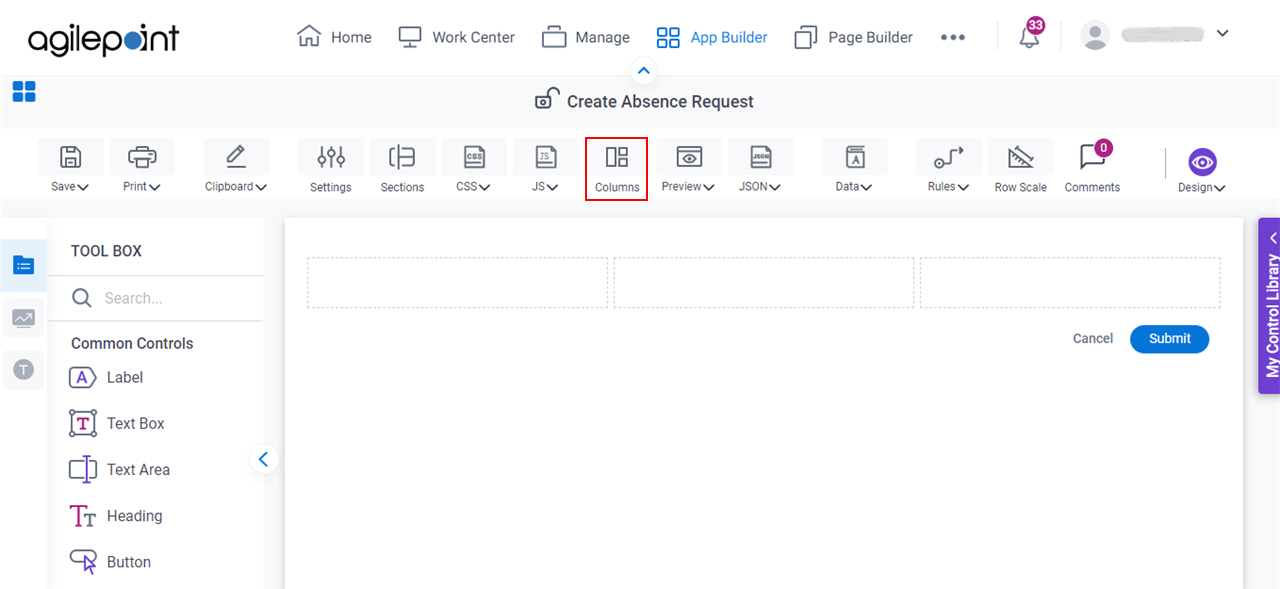
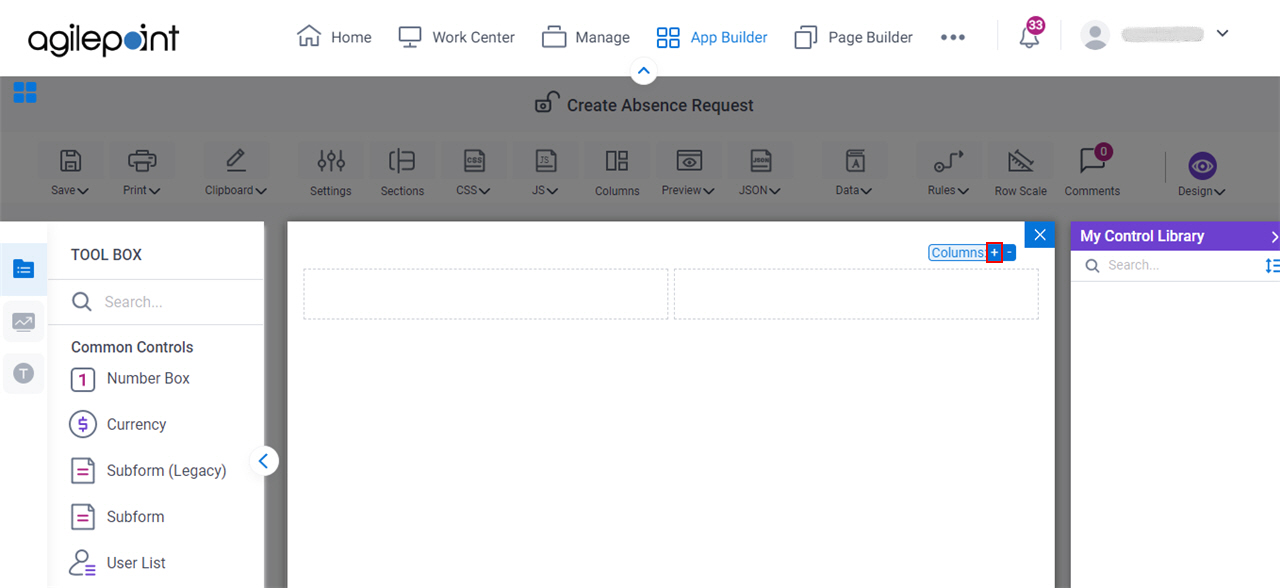
- On the eForm Builder screen, click Columns.
- On the Column Layout screen, click 2.
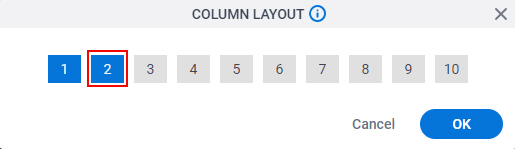
- Click OK.
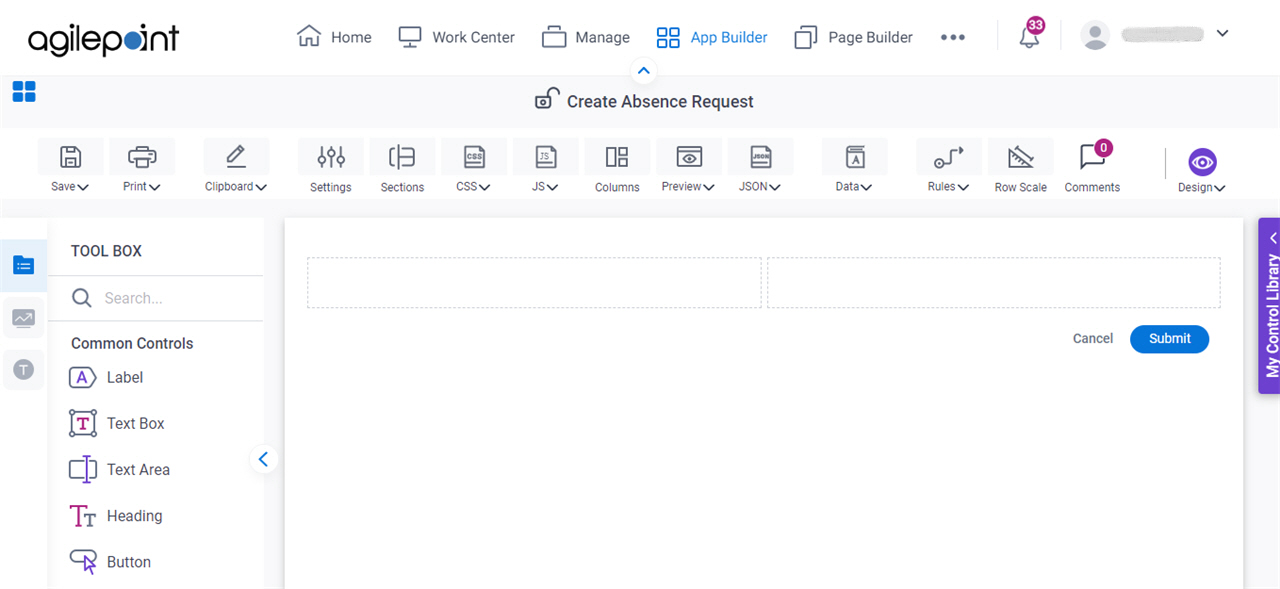
- The eForm Builder shows the Create Absence Request form with 2 columns.
Step 3: Show a Logo Image on the eForm
Next, show a logo image on the form using the Image form control.
Good to Know
- This example uses a logo image stored in App Builder.
There are other ways to reference a logo image:
- Upload an image with the Image form control.
- Upload a shared image for the app in App Builder.
- Use an image stored in an external location can be accessed by a URL from your app at runtime.
Procedure
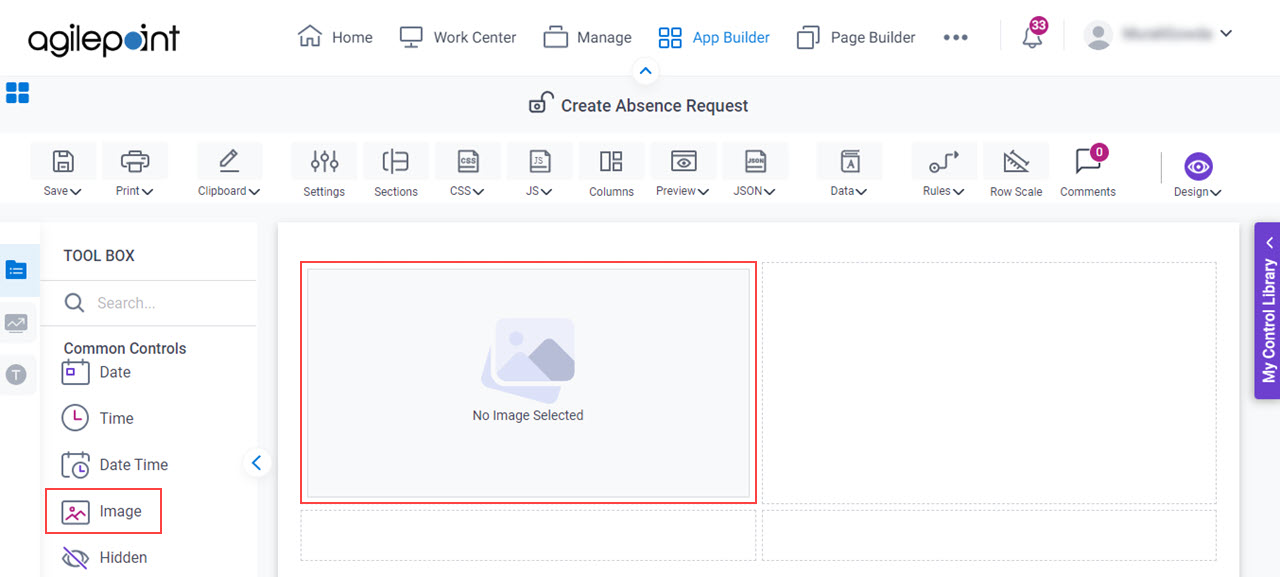
- On the eForm Builder screen, in the Tool Box, open the Common Controls
 tab.
tab.

- On the
Common Controls tab, drag a Image
 form control onto your eForm.
- On the Field Settings - Image screen, in the Label field, enter Company Logo.
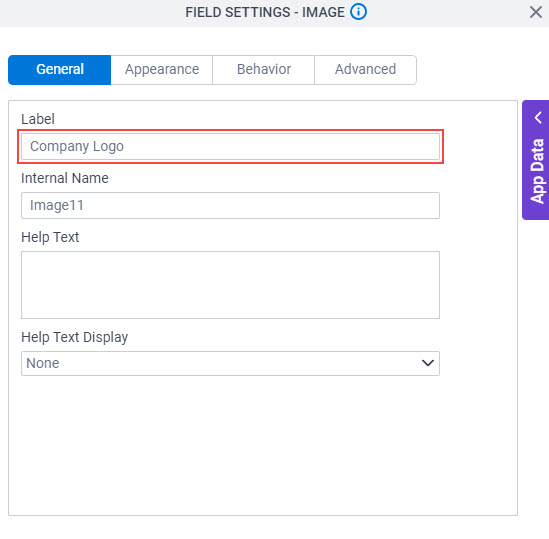
When you click the Internal Name field, the Internal Name field shows the value you entered in the Label field with no spaces.

- To save the changes, click Close Screen .
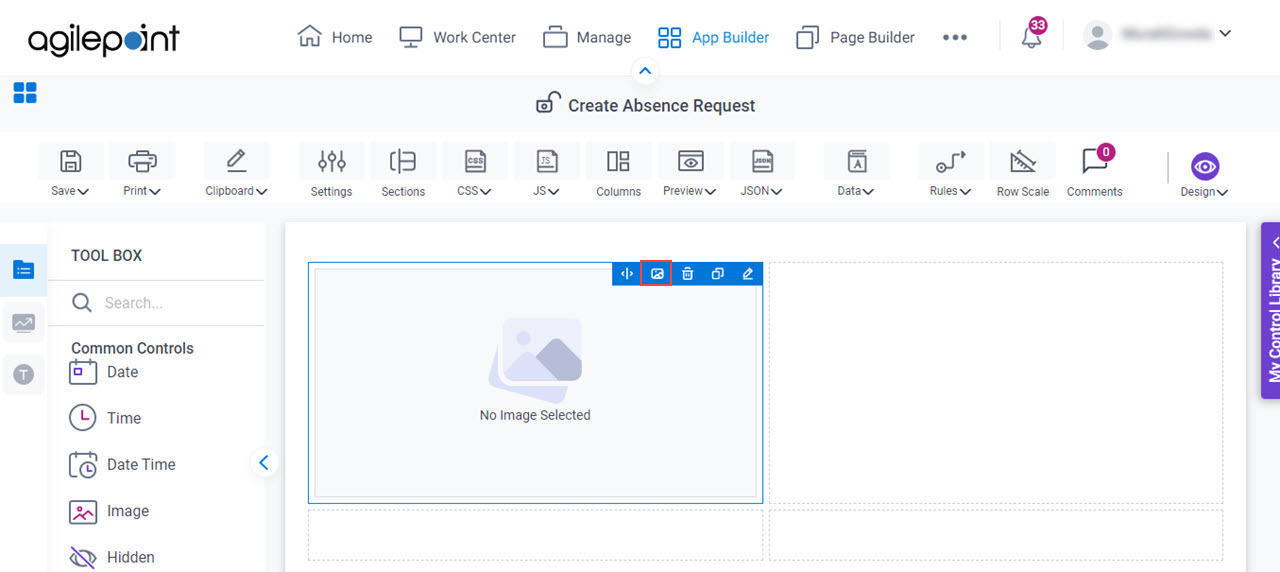
- On the Create Absence Request form, put your cursor over the Image form control, and the Form Control Quick Menu shows.

- On the Form Control Quick Menu, click Image Picker
 .
.
- On the Image Picker screen, select the logo image.
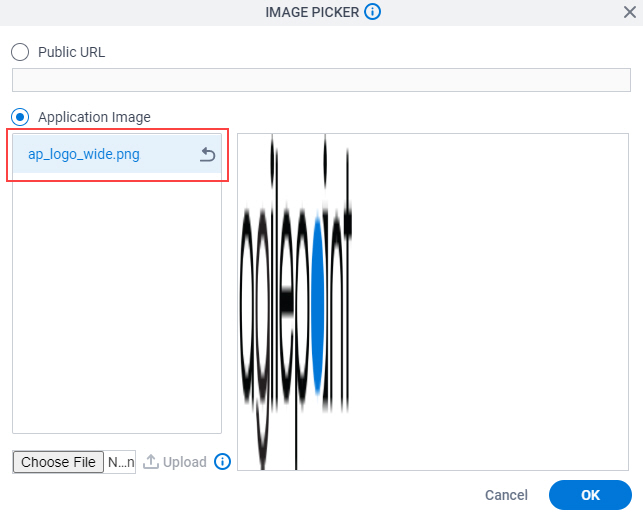
- Click OK.
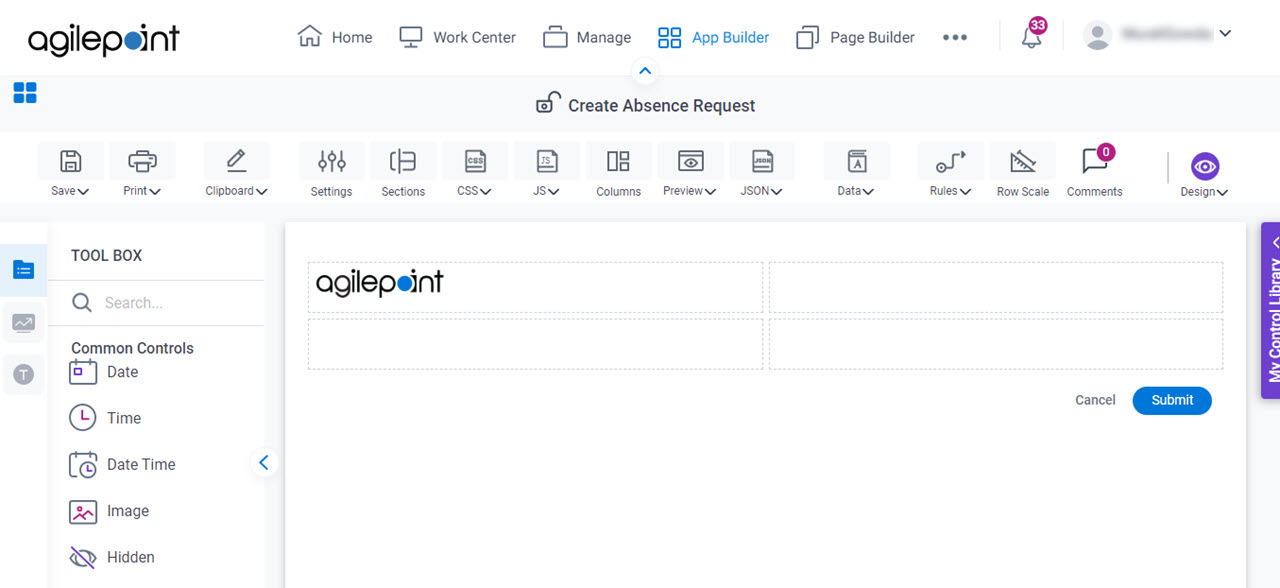
The form shows the logo image.
Step 4: Create a Title (Create Absence Request)
Next, create a title for the Create Absence Request form using the Heading form control.
Procedure
- On the
Common Controls tab, drag a Heading
 form control onto your eForm.
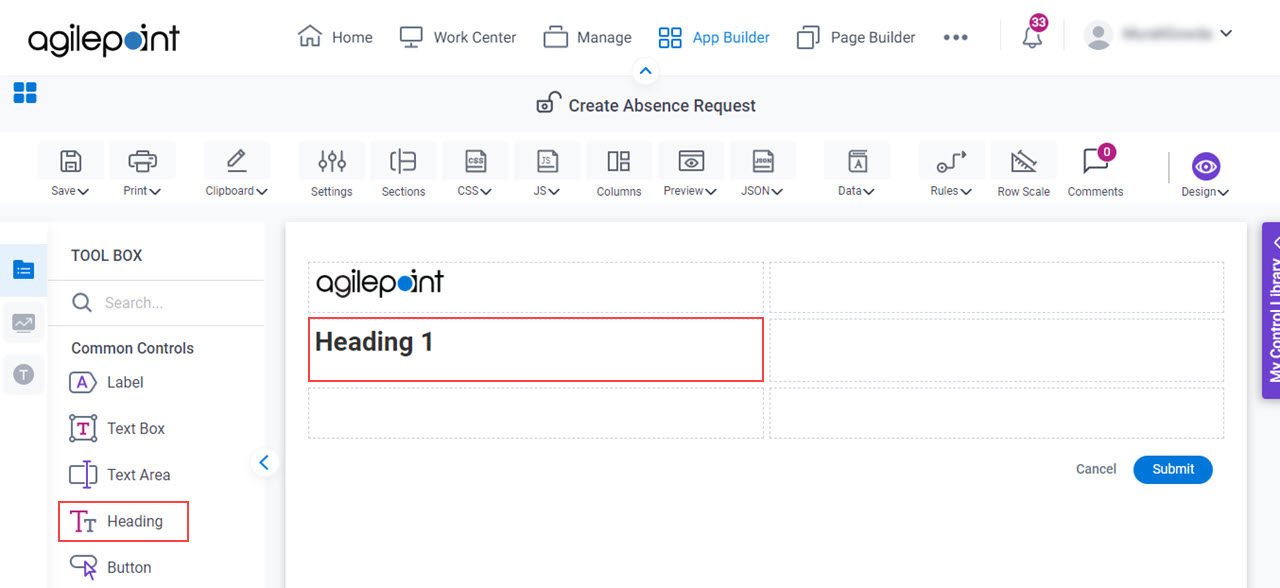
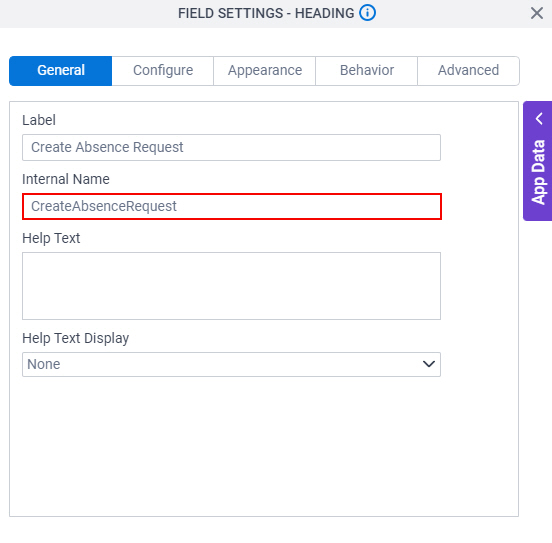
- On the Field Settings - Heading screen, in the Label field, enter Create Absence Request.

When you click the Internal Name field, the Internal Name field shows the value you entered in the Label field with no spaces.
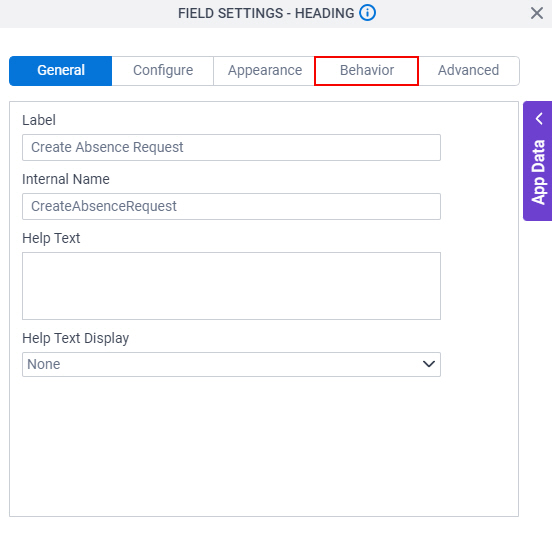
- Click the Behavior tab.
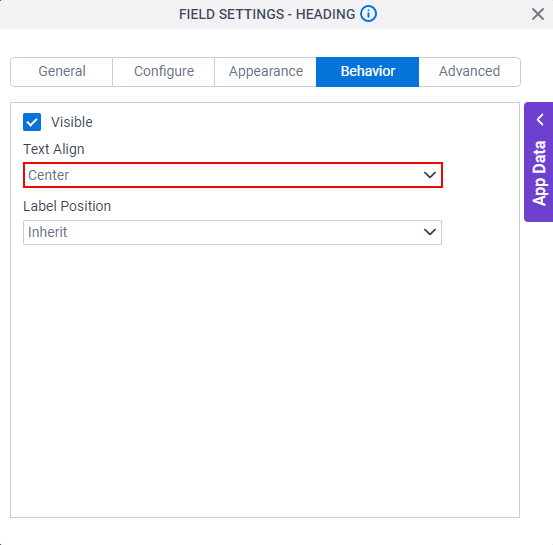
- On the Behavior tab, in the Text Align field, select Center.
- To save the changes, click Close Screen .
- On the Create Absence Request form, expand the Create Absence Request form control to the width to show on the eForm.
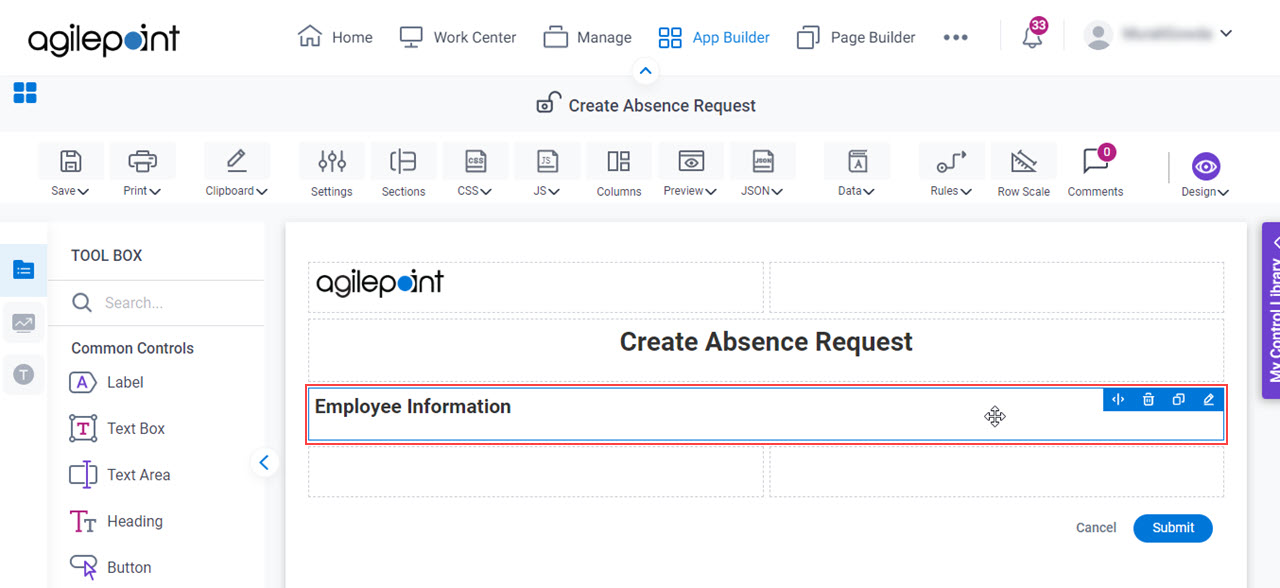
Step 5: Create a Heading (Employee Information)
Next, create the Employee Information heading in the Create Absence Request form using the Heading form control.
Procedure
- On the
Common Controls tab, drag a Heading form control onto your eForm.
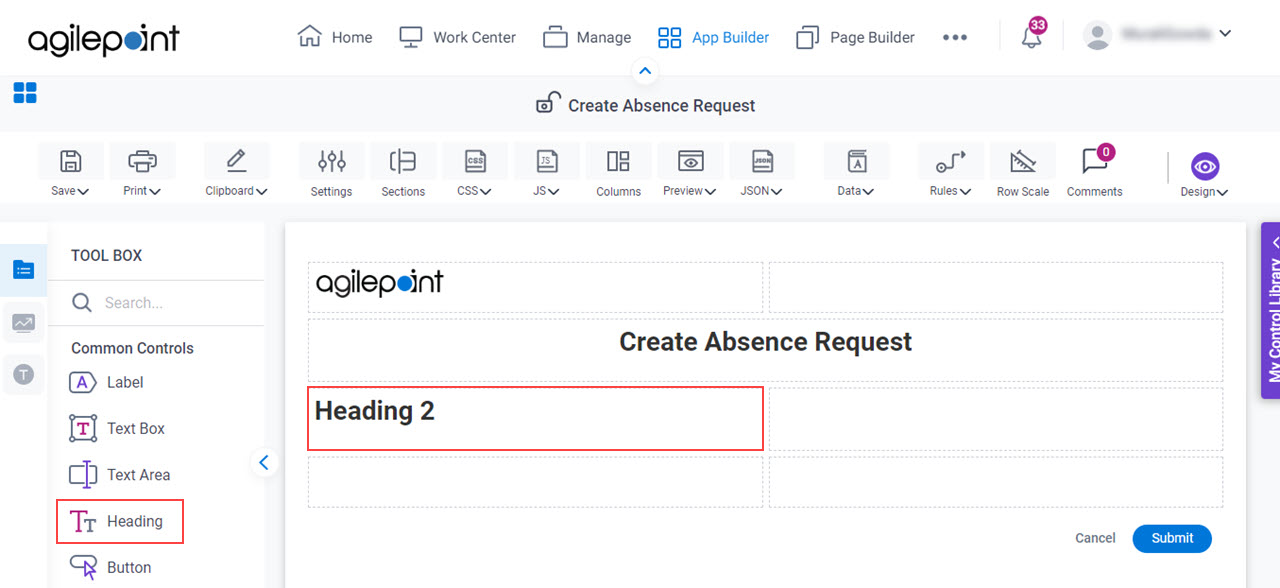
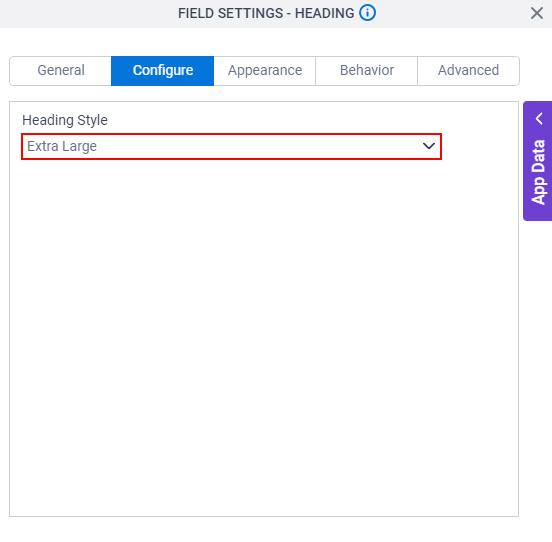
- On the Field Settings - Heading screen, in the Label field, enter Employee Information.

When you click the Internal Name field, the Internal Name field shows the value you entered in the Label field with no spaces.

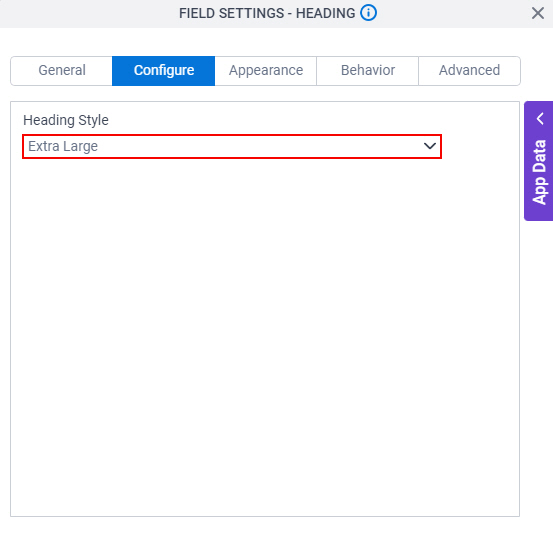
- Click the Configure tab.

- On the Configure tab, in the Heading Style field, select Extra Large.
- To save the changes, click Close Screen .
- On the Create Absence Request form, expand the Employee Information form control to the width to show on the eForm.
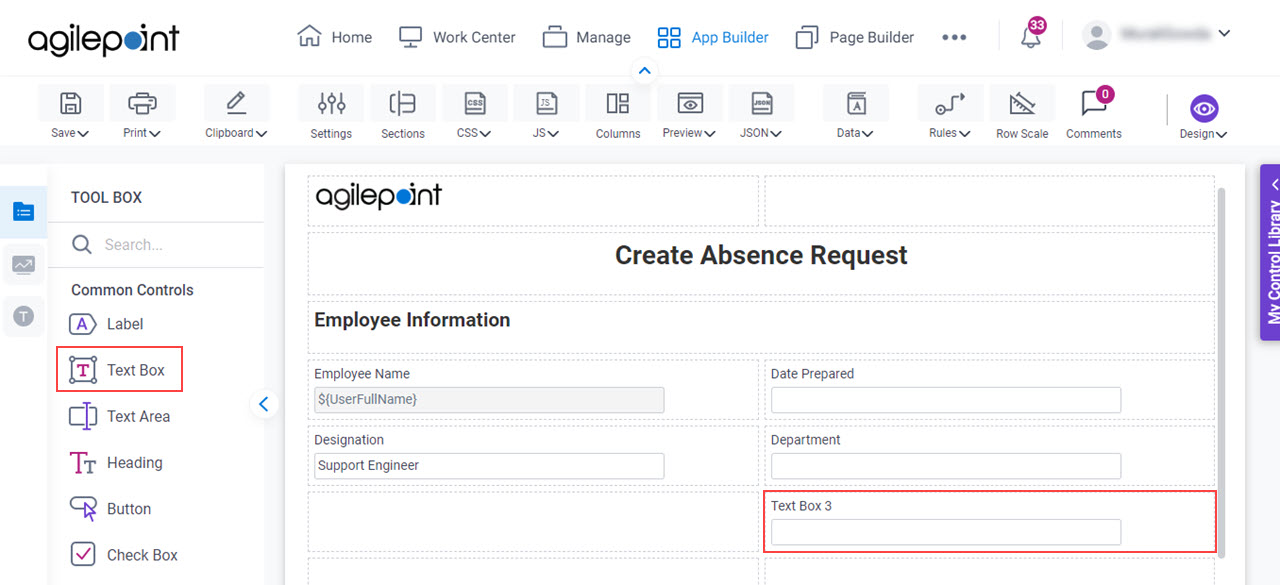
Step 6: Configure a Text Box Form Control (Employee Name)
Next, configure a Text Box form control to show the full name of the employee — usually the runtime app user — on the eForm.
Procedure
- On the
Common Controls tab, drag a Text Box
 form control onto your eForm.
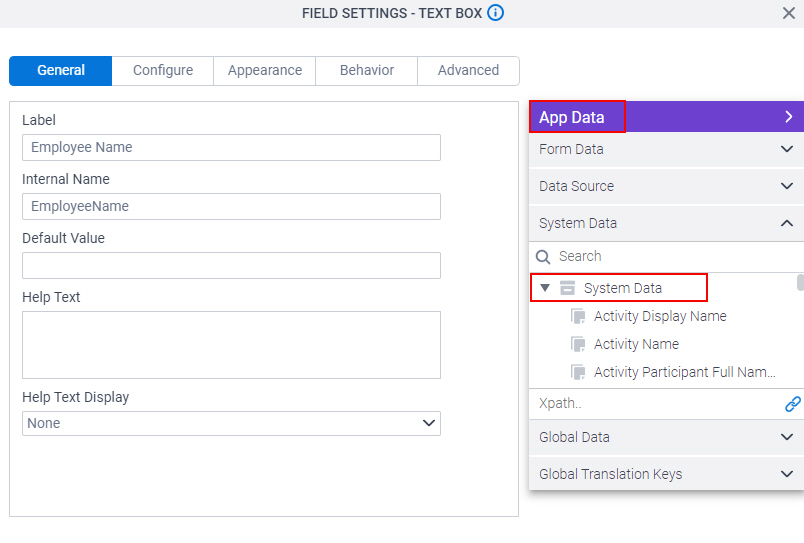
- On the Field Settings - Text Box screen, in the Label field, enter Employee Name.

When you click the Internal Name field, the Internal Name field shows the value you entered in the Label field with no spaces.

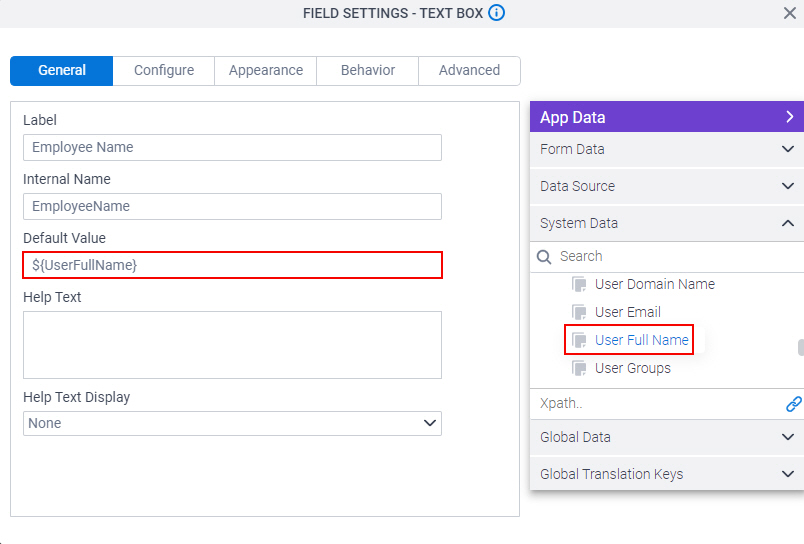
- Click App Data > System Data.
- In the Default Value field, drag the User Full Name system data variable.
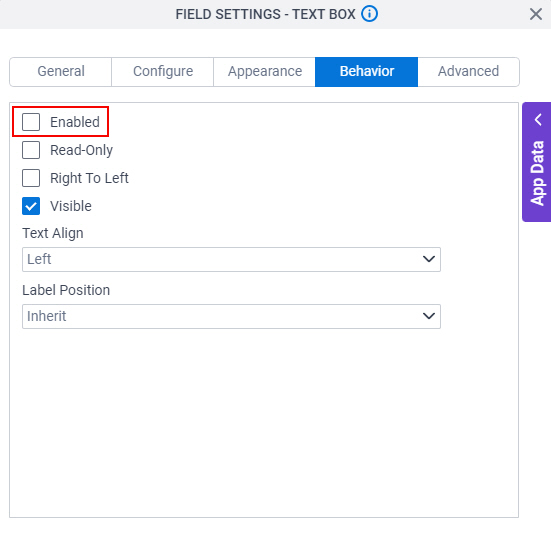
- Click the Behavior tab.
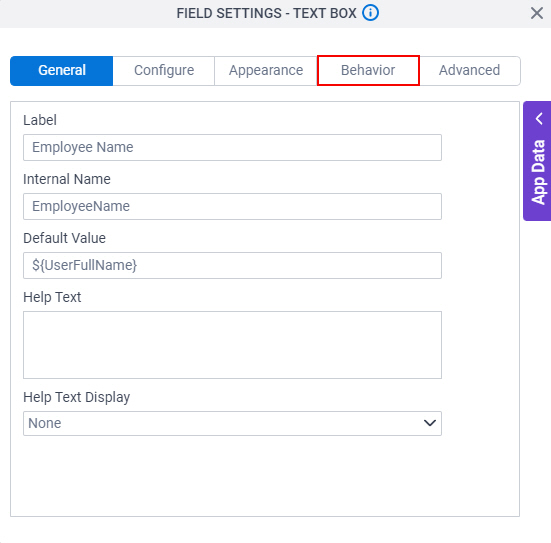
- On the Behavior tab, deselect Enabled.
- To save the changes, click Close Screen .
Step 7: Configure a Date Form Control (Date Prepared)
Next, configure a Date form control to enter the date for the absence request on the eForm.
Procedure
- On the
Common Controls tab, drag a Date
 form control onto your eForm.
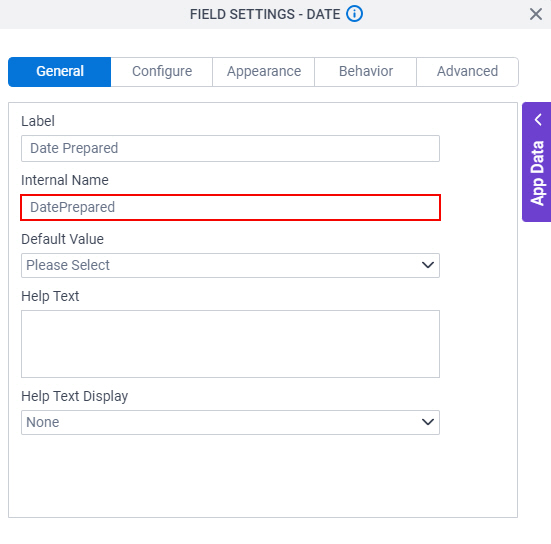
- On the Field Settings - Date screen, in the Label field, enter Date Prepared.

When you click the Internal Name field, the Internal Name field shows the value you entered in the Label field with no spaces.
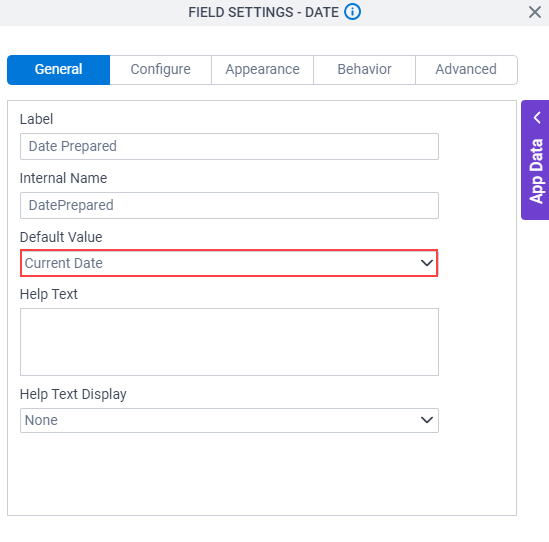
- In the Default Value field, select Current Date.
- To save the changes, click Close Screen .
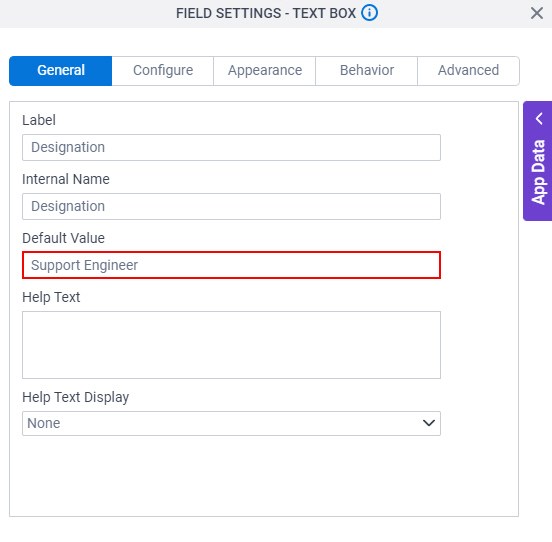
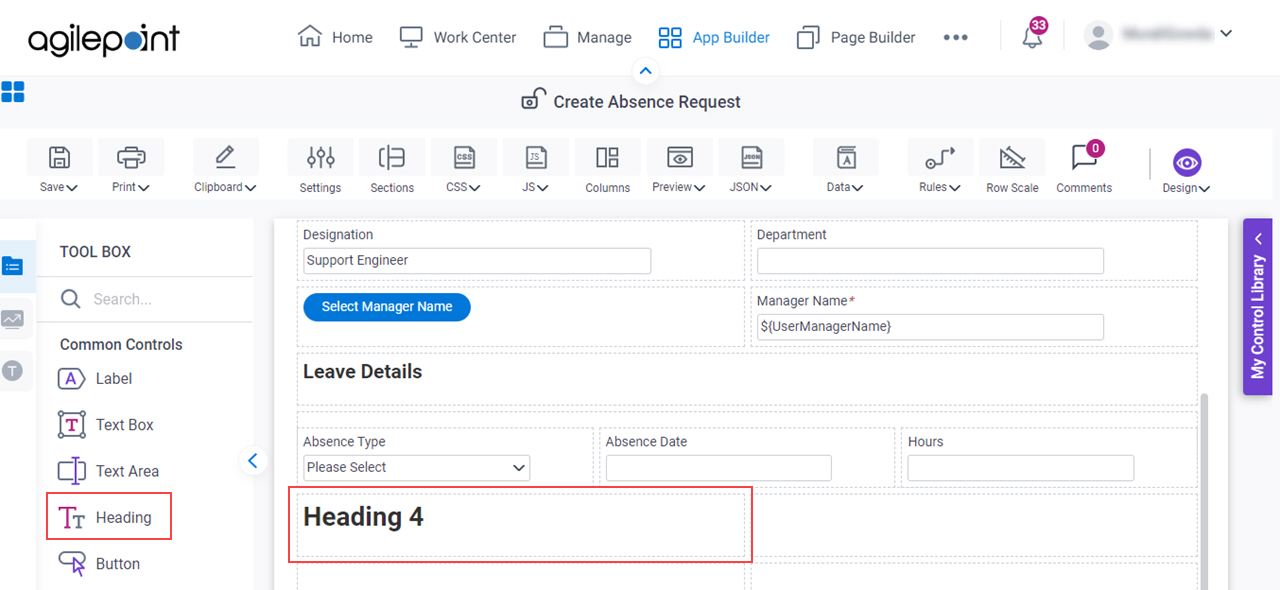
Step 8: Configure a Text Box Form Control (Designation)
Next, configure a Text Box form control to enter the job title on the eForm.
Procedure
- On the
Common Controls tab, drag a Text Box form control onto your eForm.
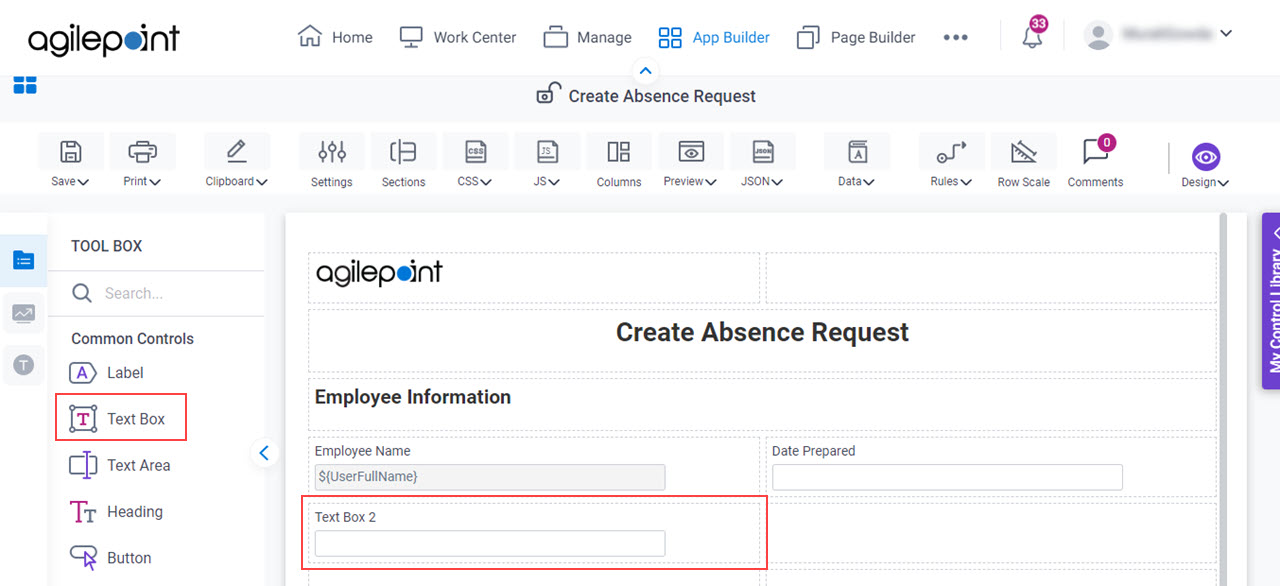
- On the Field Settings - Text Box screen, in the Label field, enter Designation.

When you click the Internal Name field, the Internal Name field shows the value you entered in the Label field with no spaces.

- In the Default Value field, enter Support Engineer.
- To save the changes, click Close Screen .
Step 9: Configure an Auto-Suggest Form Control (Department)
Next, configure an Auto-Suggest form control to select the department on the eForm.
Procedure
- On the
Common Controls tab, drag a Auto-Suggest
 form control onto your eForm.
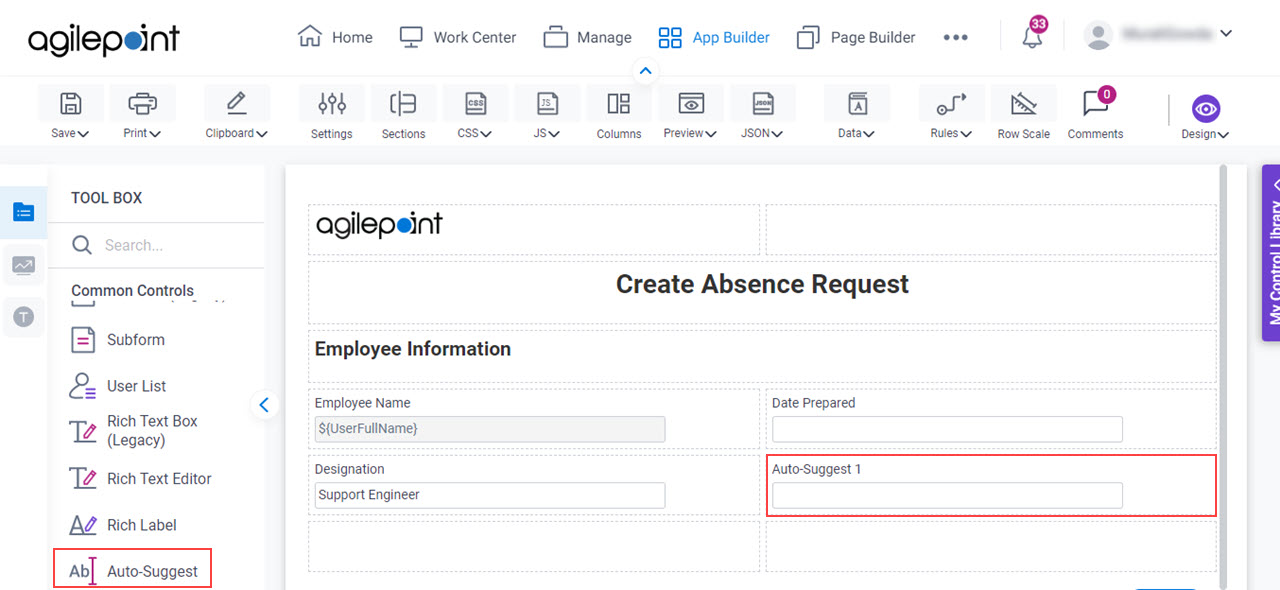
- On the Field Settings - Auto-Suggest screen, in the Label field, enter Department.

When you click the Internal Name field, the Internal Name field shows the value you entered in the Label field with no spaces.

- Click the Configure tab.

- On the Configure tab, in the List Options section, click Add Option 6 times to add a total of 7 rows.
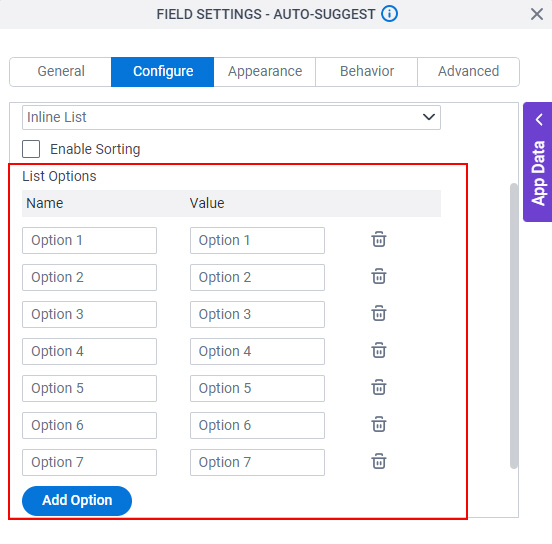
- In the Name and Value fields, enter these values.
- Engineering
- HR
- Professional Service
- Accounts
- Sales
- Support
- Marketing
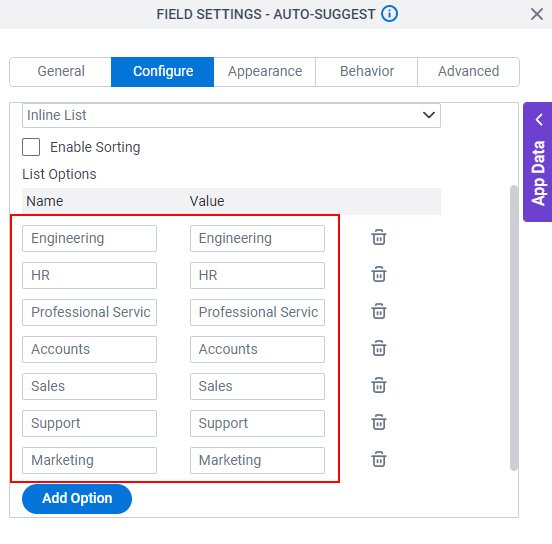
- To save the changes, click Close Screen .
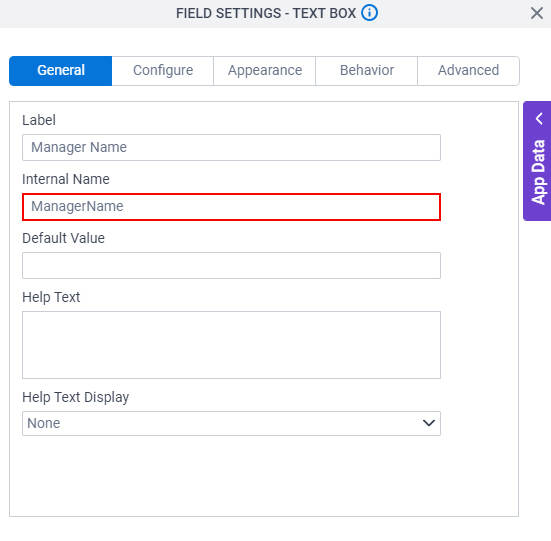
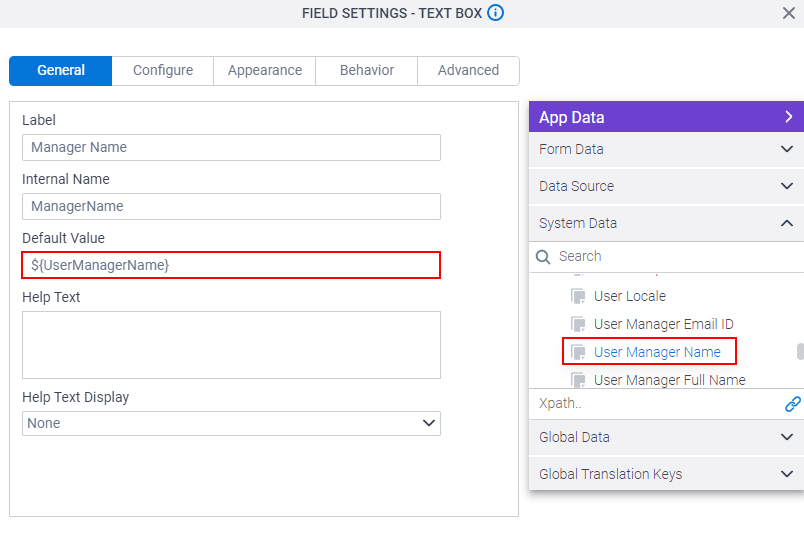
Step 10: Configure a Text Box Form Control (Manager Name)
Next, configure a Text Box form control to show the name of the manager on the eForm.
Procedure
- On the
Common Controls tab, drag a Text Box form control onto your eForm.
- On the Field Settings - Text Box screen, in the Label field, enter Manager Name.

When you click the Internal Name field, the Internal Name field shows the value you entered in the Label field with no spaces.
- Click App Data > System Data.
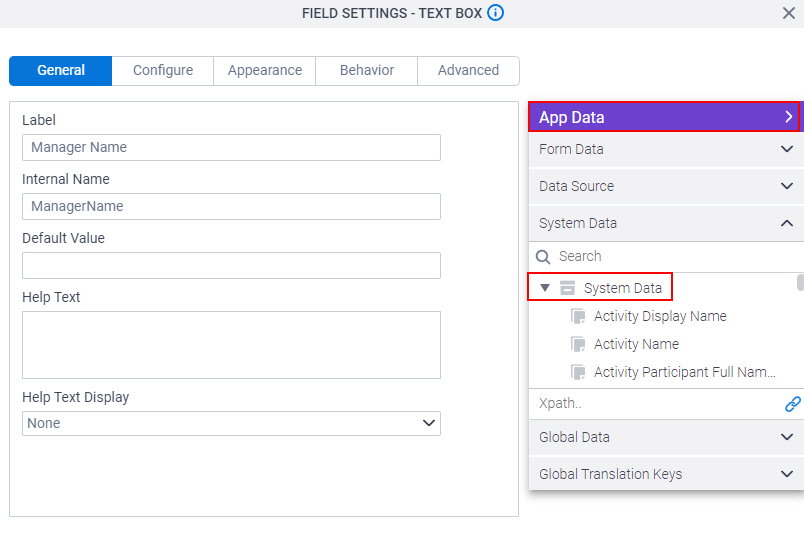
- In the Default Value field, drag the User Manager Name system data variable.
- Click the Configure tab.
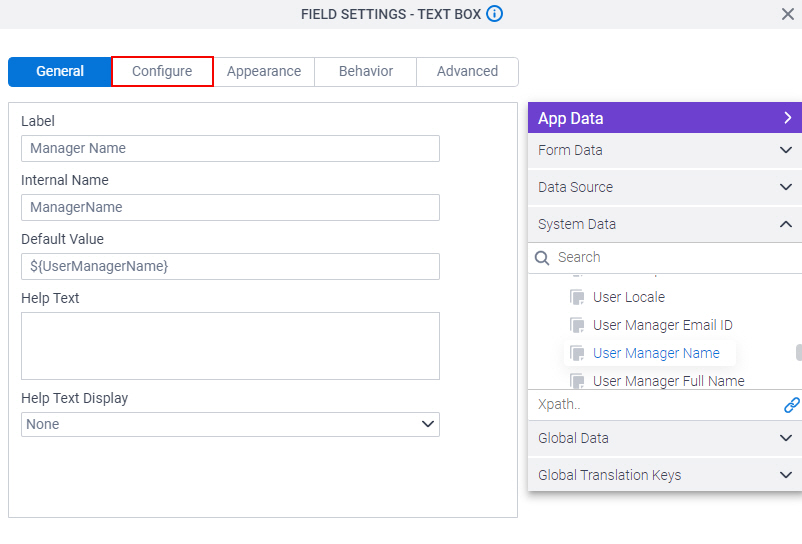
- On the Configure tab, select Required.
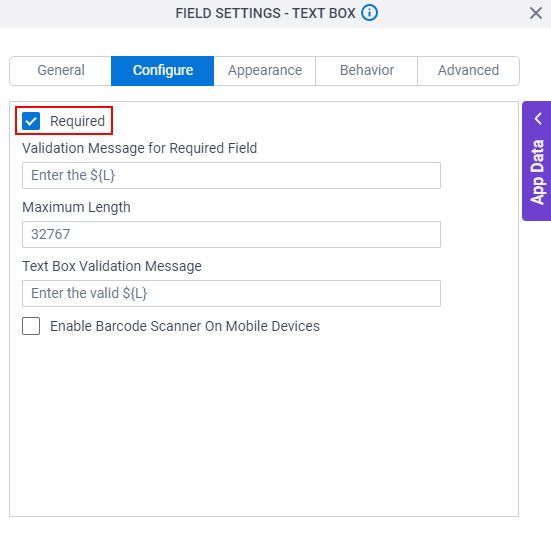
- To save the changes, click Close Screen .
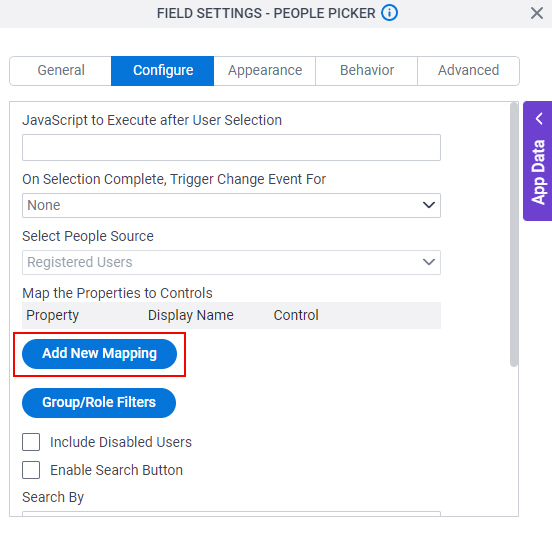
Step 11: Configure a People Picker Form Control (Select Manager Name)
Next, configure a People Picker form control to select the manager name on the eForm.
Procedure
- On the Advanced Controls tab,
drag a People Picker
 form control onto your eForm..
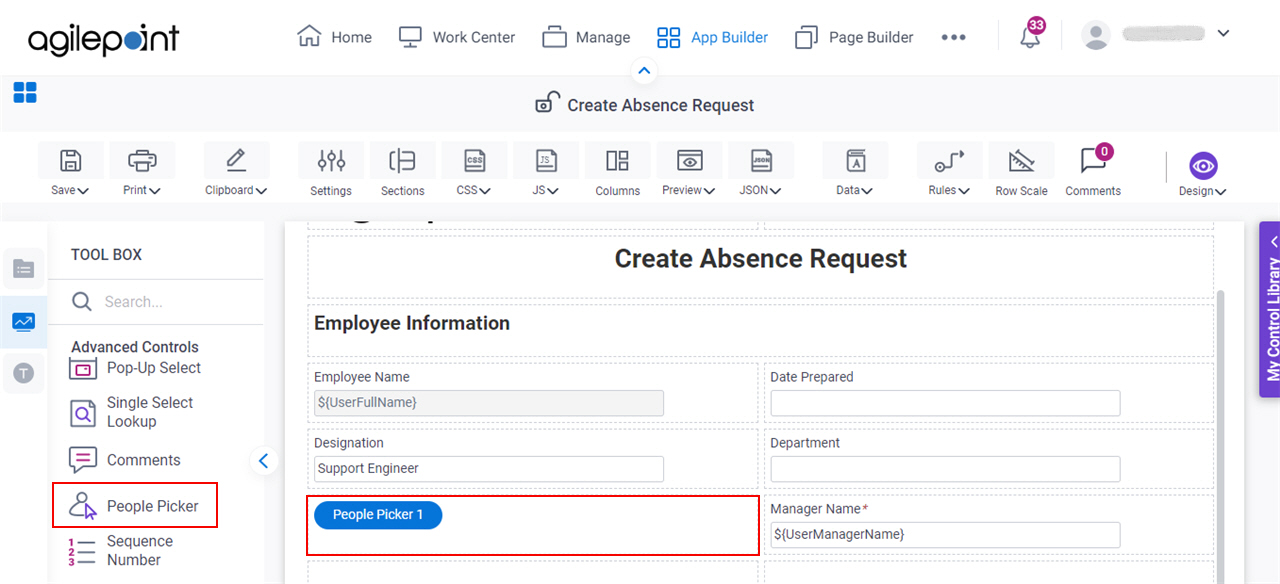
- On the Field Settings - People Picker screen, in the Label field, enter Select Manager Name.

When you click the Internal Name field, the Internal Name field shows the value you entered in the Label field with no spaces.

- Click the Configure tab.

- On the Configure tab, click Add New Mapping.
- In the Property field, select UserName.
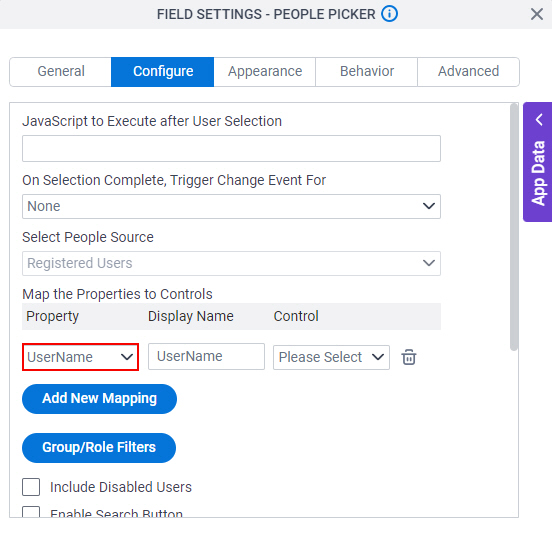
- In the Control field, select ManagerName.

- To save the changes, click Close Screen .
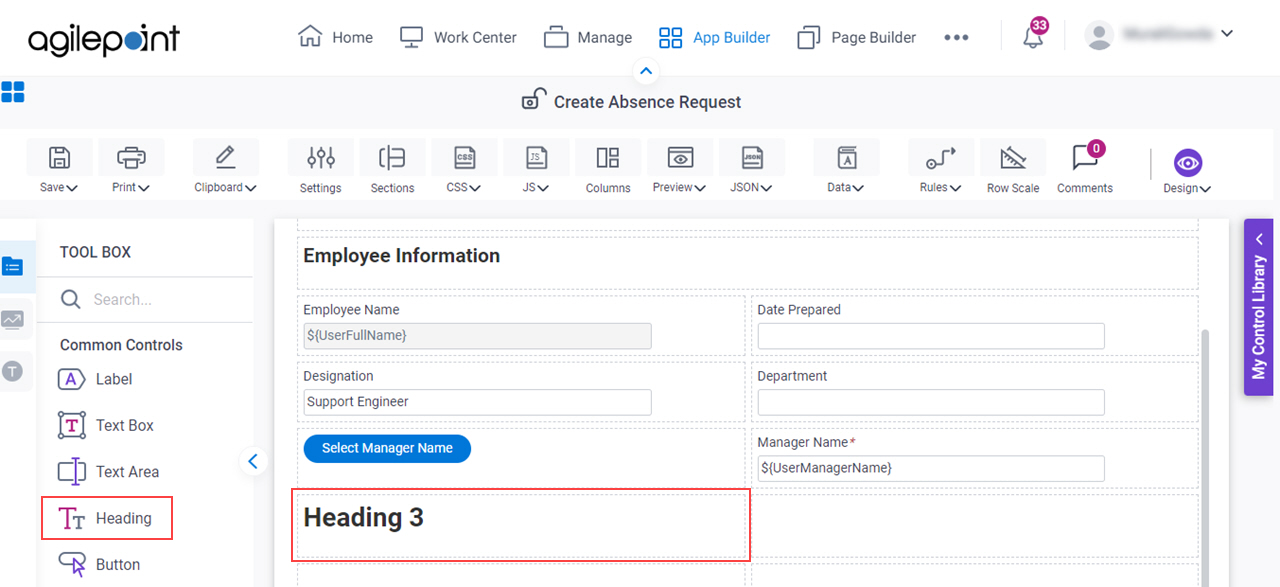
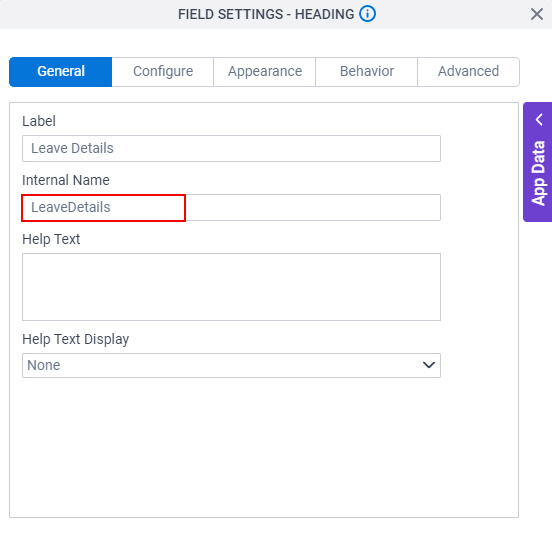
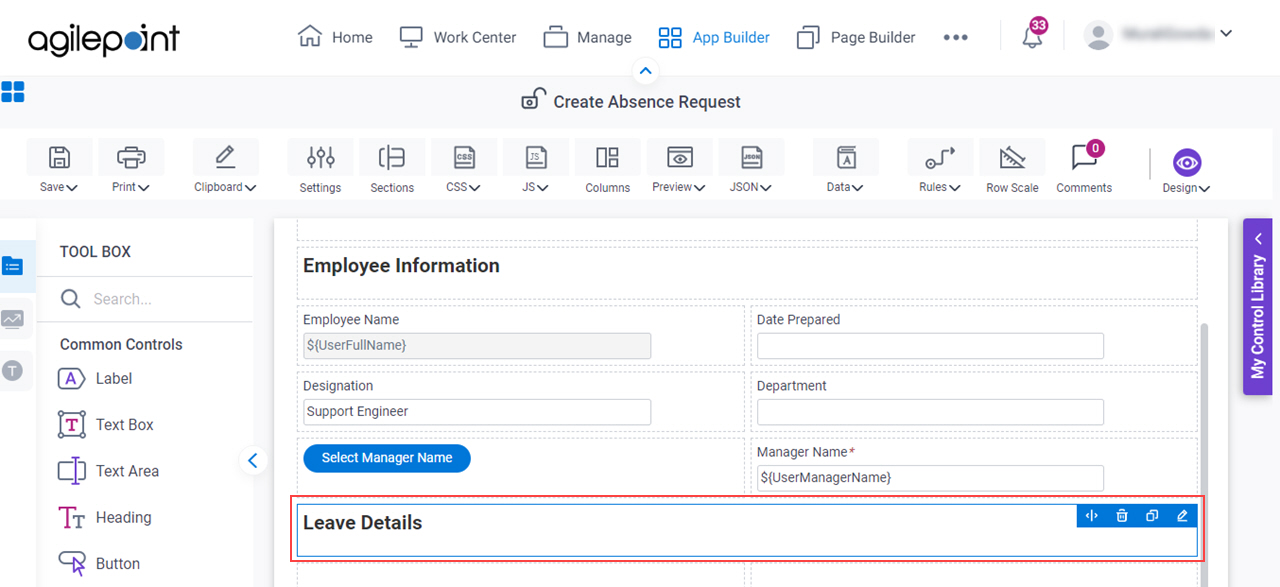
Step 12: Create a Heading (Leave Details)
Next, create the Leave Details heading in the Create Absence Request form using the Heading form control.
Procedure
- On the
Common Controls tab, drag a Heading form control onto your eForm.
- On the Field Settings - Heading screen, in the Label field, enter Leave Details.

When you click the Internal Name field, the Internal Name field shows the value you entered in the Label field with no spaces.
- Click the Configure tab.

- On the Configure tab, in the Heading Style field, select Extra Large.
- To save the changes, click Close Screen .
- On the Create Absence Request form, expand the Leave Details form control to the width to show on the eForm.
Step 13: Configure a Subform Form Control
Next, configure a Subform form control to specify the dates, total hours, and type of absence on the eForm.
Procedure
- On the
Common Controls tab, drag a Subform
 form control onto your eForm.
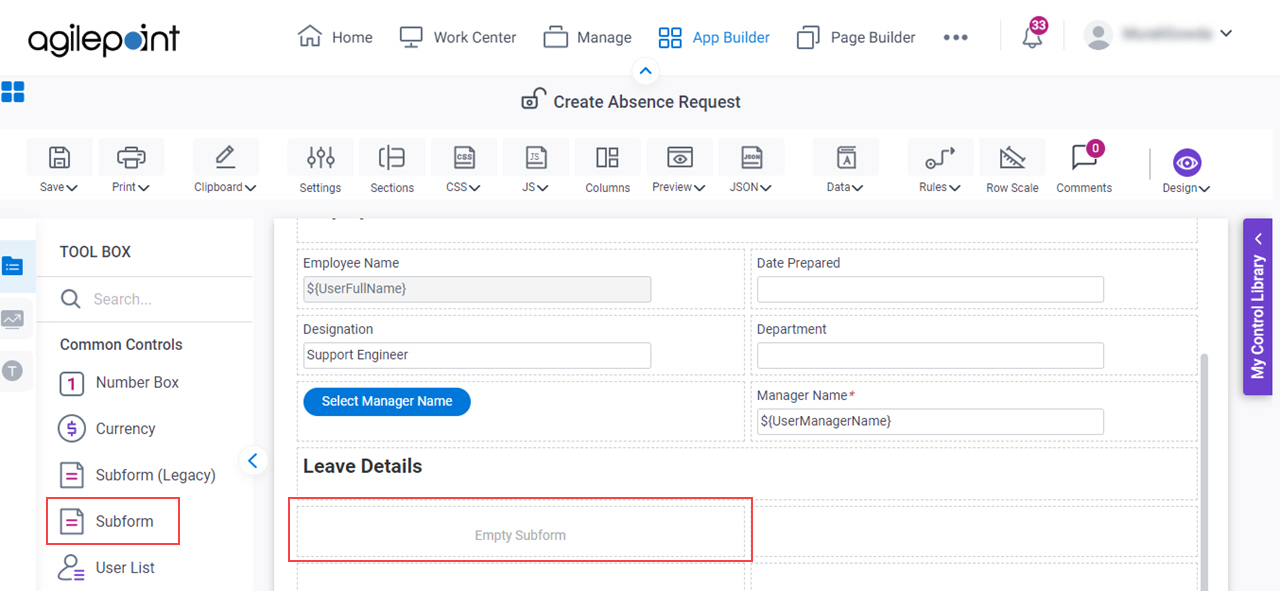
- On the Field Settings - Subform screen, in the Label field, enter Leave Details.

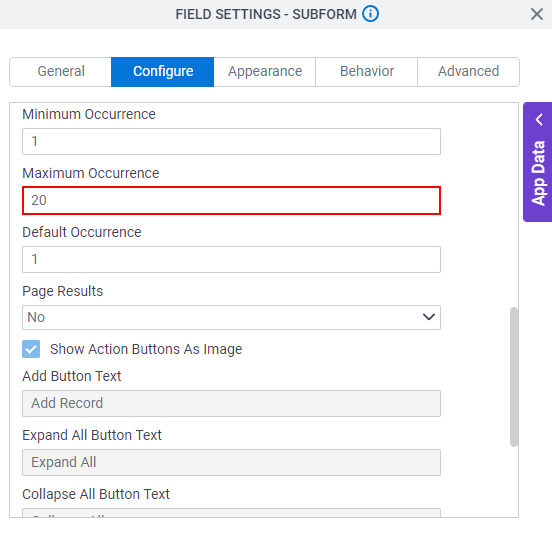
- Click the Configure tab.

- On the Configure tab, in the Display Style field, select Columns.
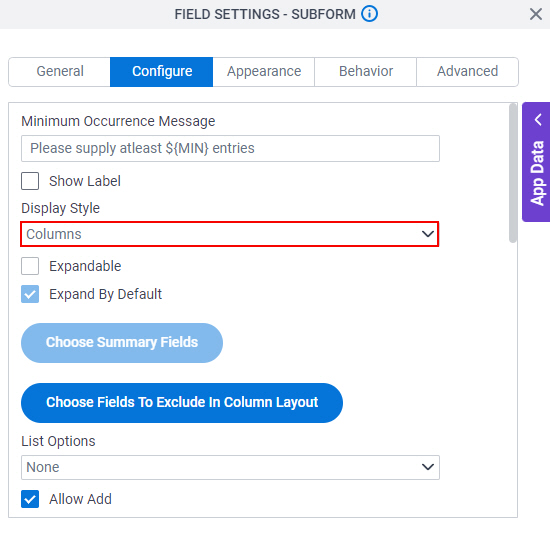
- In the Maximum Occurrence field, enter 20.
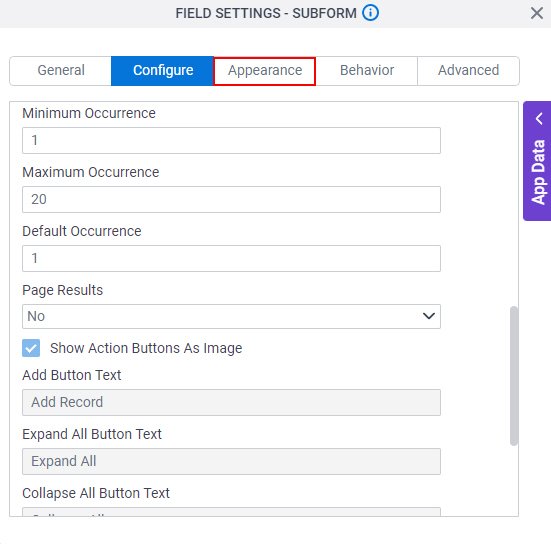
- Click the Appearance tab.
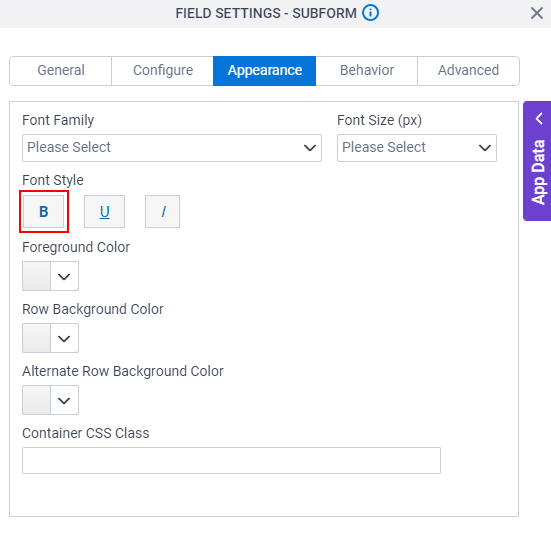
- On the Appearance tab, in the Font Style field, click Bold.
- To save the changes, click Close Screen .
- On the Create Absence Request form, expand the Subform form control to the width to show on the eForm.

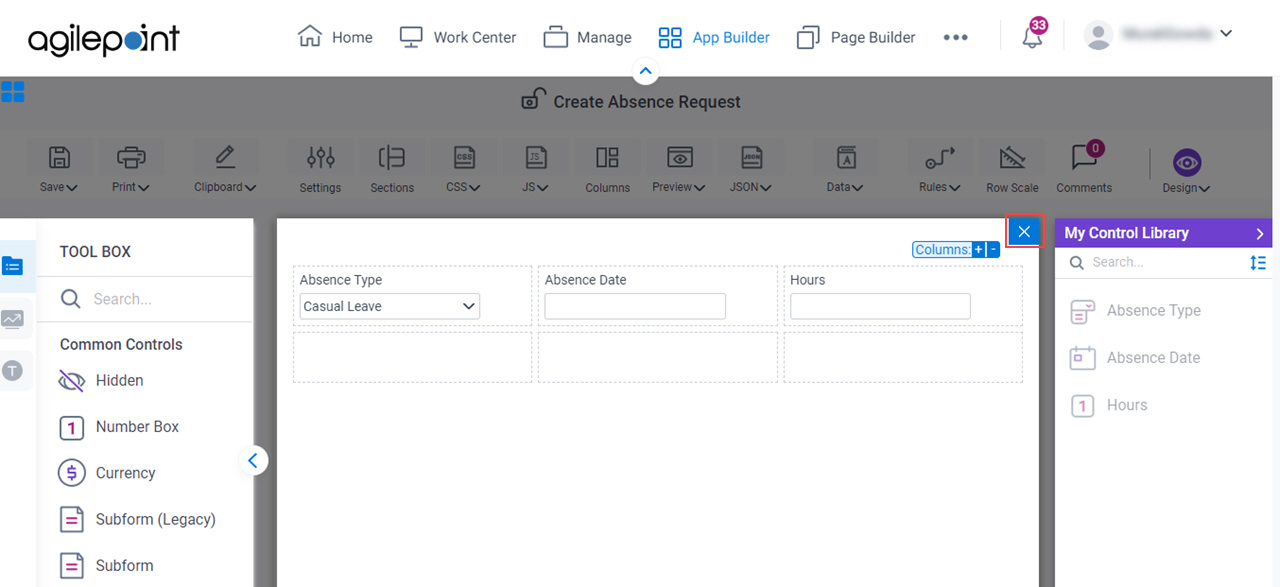
Step 14: Design the Subform
Next, design the subform with the columns.
Procedure
- On the Create Absence Request form, put your cursor over the Subform form control, and the form control toolbar shows.
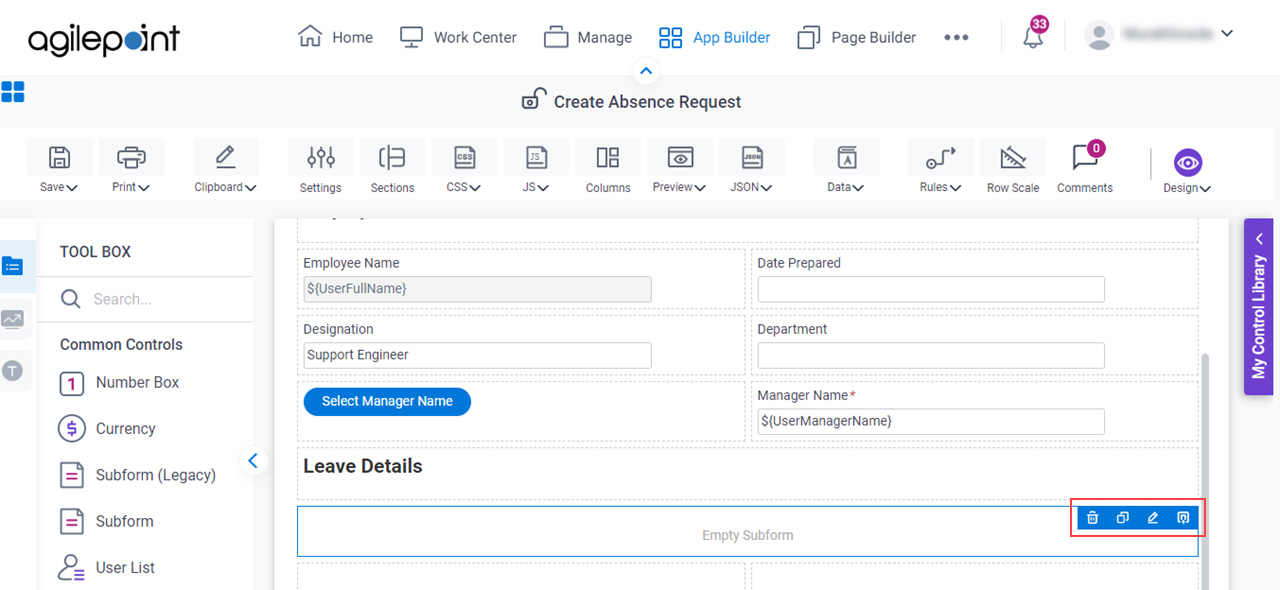
- Click Design Subform
 .
.
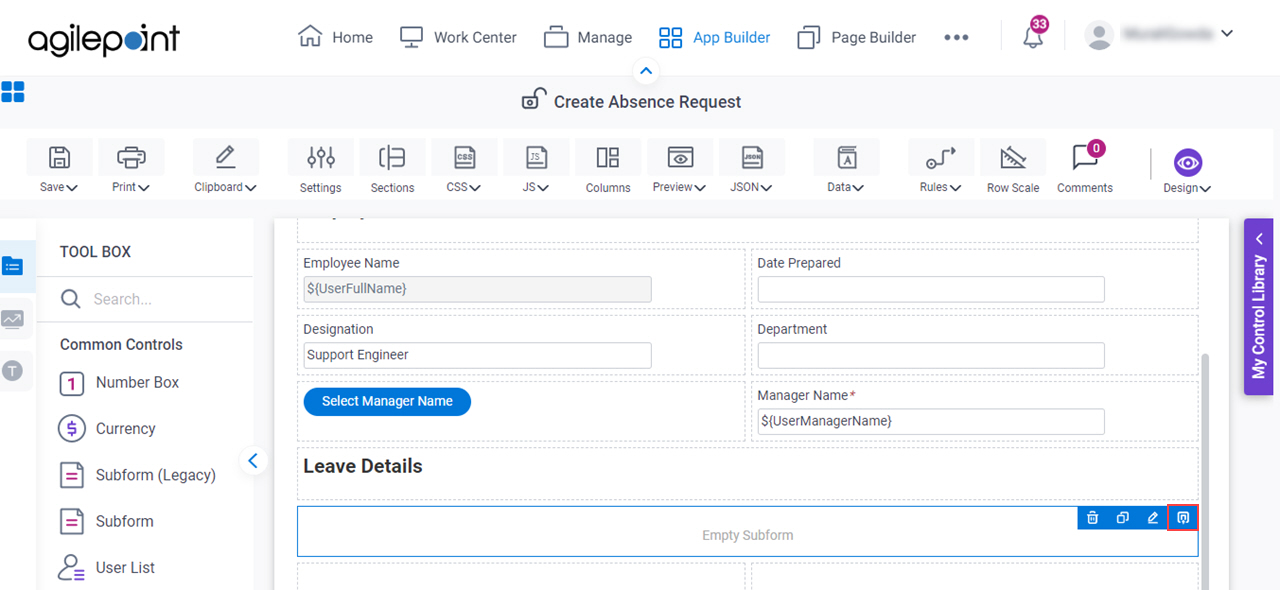
- Click Add Column
 to show the Leave Details subform with 3 columns.
Step 15: Configure a Drop-Down List Form Control (Absence Type)
Next, configure a Drop-Down List form control to select the type of absence on the subform.
Procedure
- On the
Common Controls tab, drag a Drop-Down List
 form control onto your eForm.
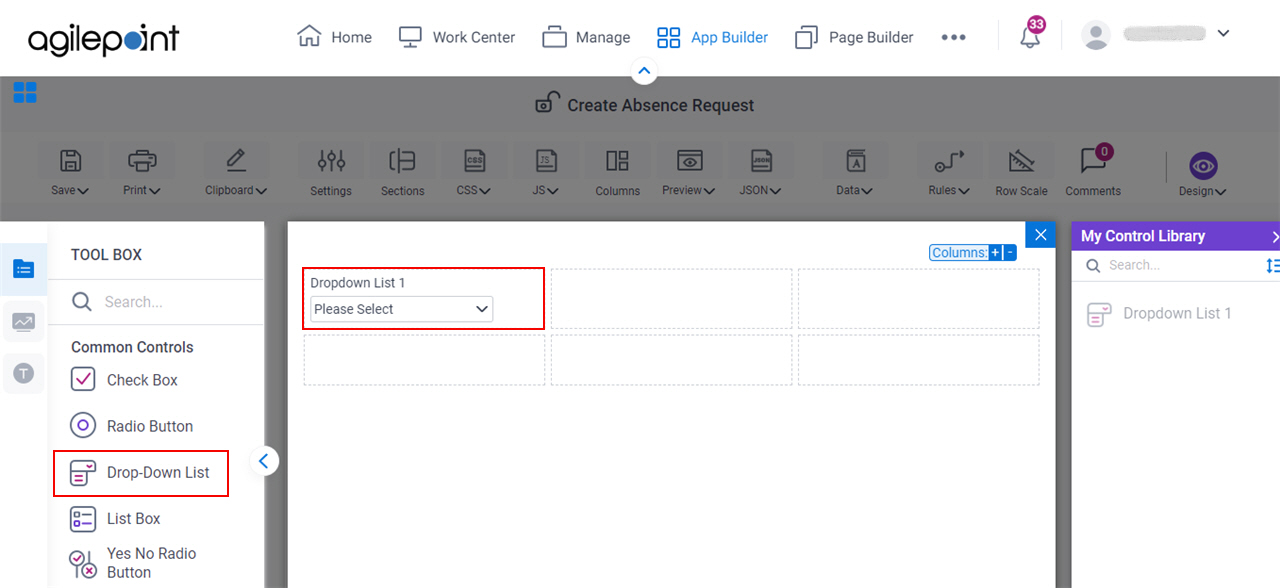
- On the Field Setting - Drop-Down List screen, in the Label field, enter Absence Type.

When you click the Internal Name field, the Internal Name field shows the value you entered in the Label field with no spaces.

- Click the Configure tab.
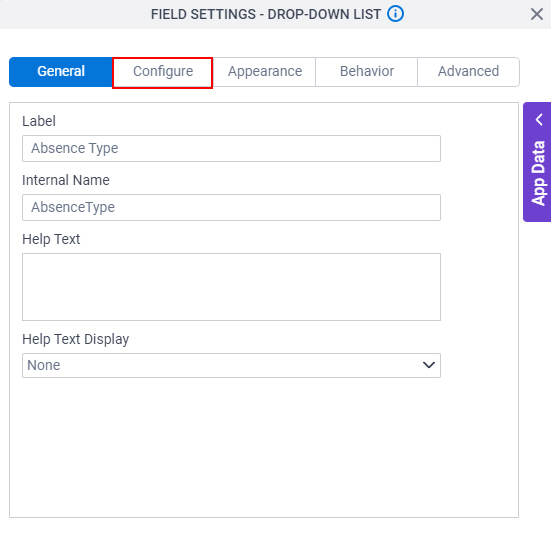
- On the Configure tab, select Required.
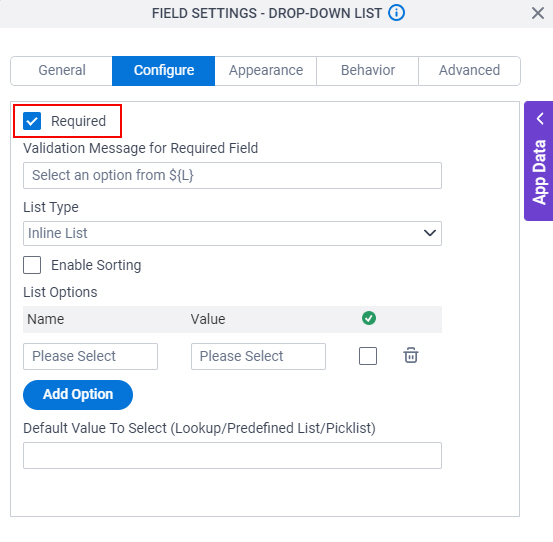
- In the List Options section, click Add Option 3 times to add a total of 4 rows.
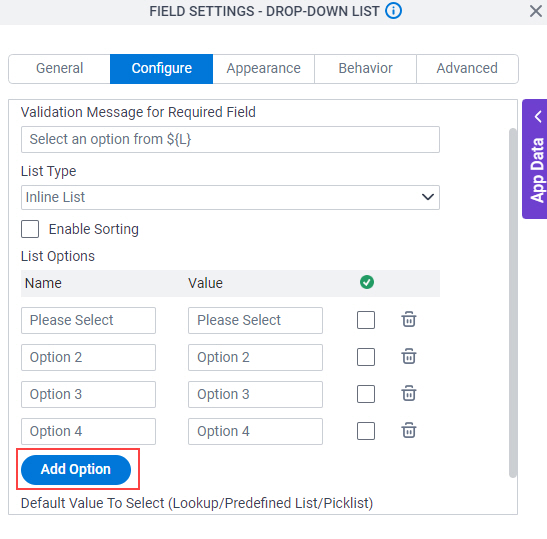
- In the Name and Value fields, enter these values.
- Casual Leave
- Sick Leave
- Comp Off
- Vacation
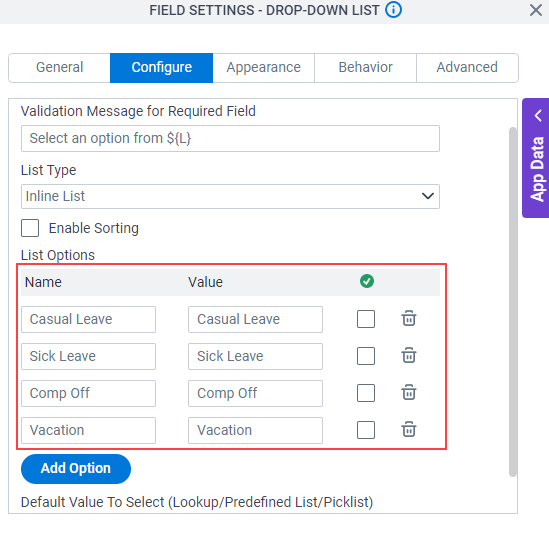
- To save the changes, click Close Screen .
Step 16: Configure a Date Form Control (Absence Date)
Next, configure a Date form control to select the date of the absence on the subform.
Procedure
- On the
Common Controls tab, drag a Date form control onto your eForm.
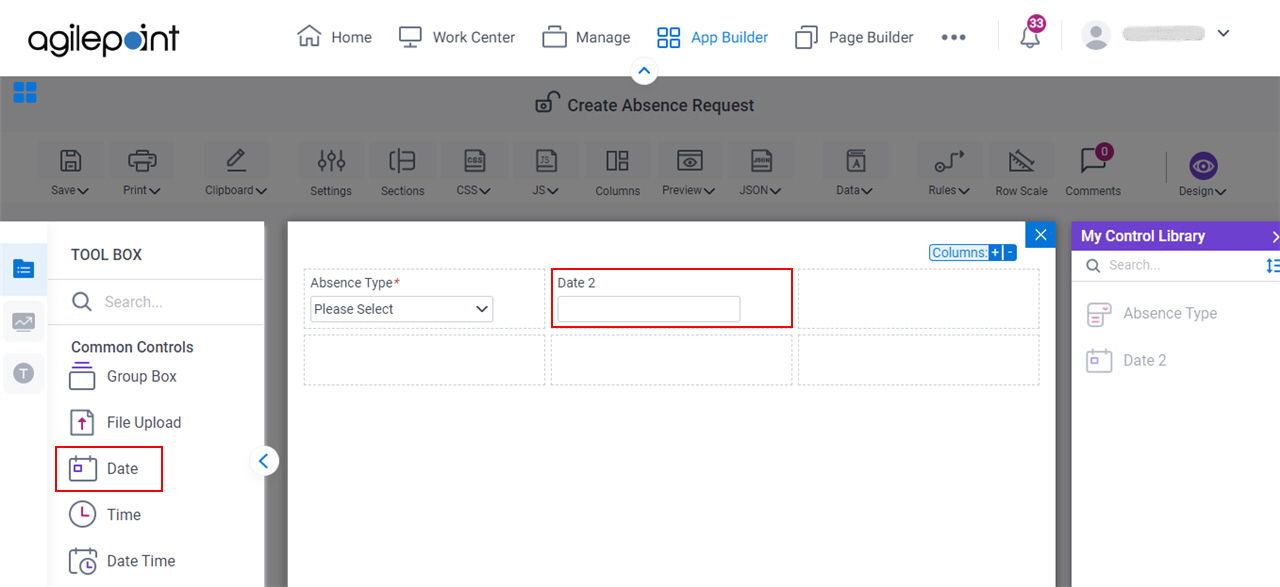
- On the Field Setting - Date screen, in the Label field, enter Absence Date.

When you click the Internal Name field, the Internal Name field shows the value you entered in the Label field with no spaces.

- Click the Configure tab.
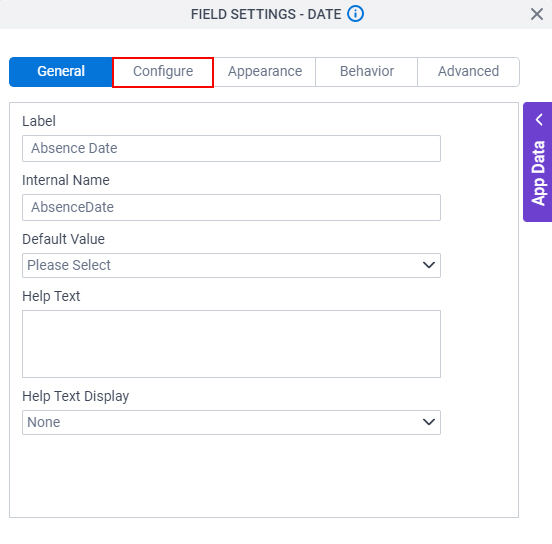
- On the Configure tab, select Required.
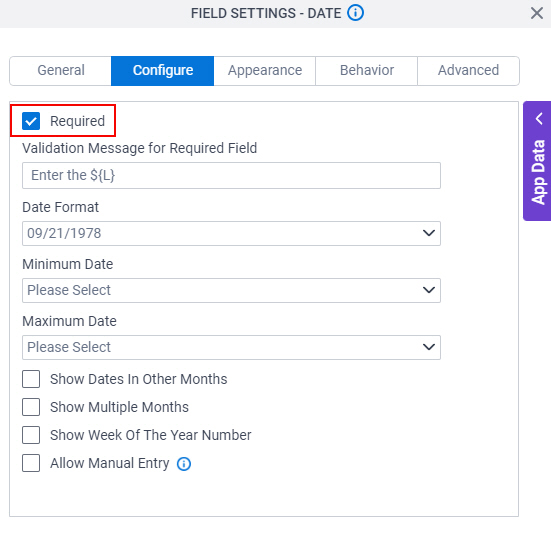
- To save the changes, click Close Screen .
Step 17: Configure a Number Box Form Control (Hours)
Next, configure a Number Box form control to enter the total number of hours of absence on the subform.
Procedure
- On the
Common Controls tab, drag a Number Box
 form control onto your eForm.
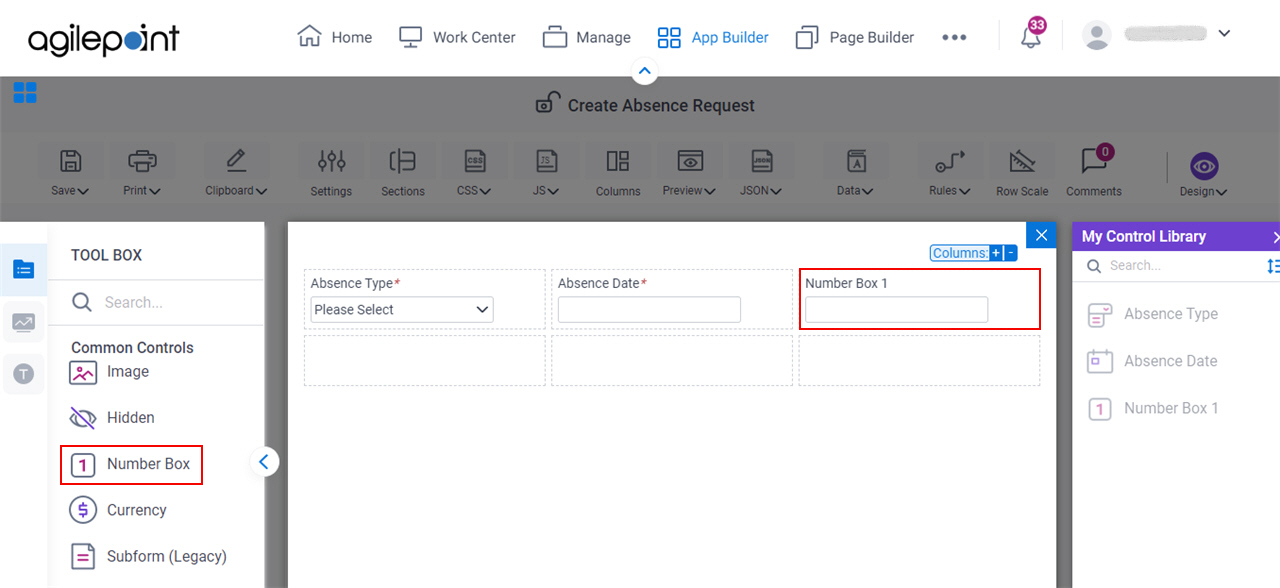
- On the Field Setting - Number Box screen, in the Label field, enter Hours.
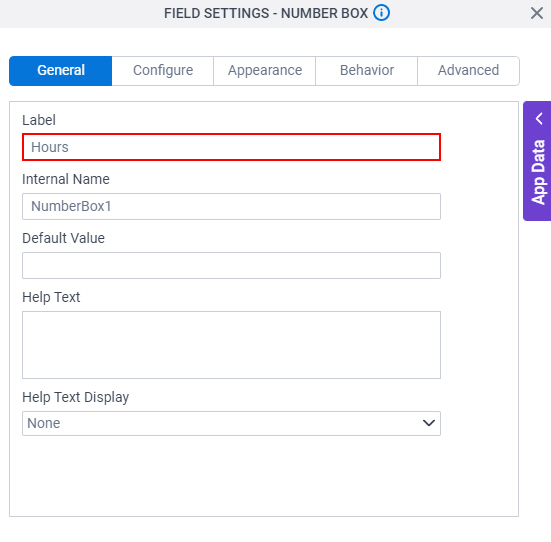
When you click the Internal Name field, the Internal Name field shows the value you entered in the Label field with no spaces.

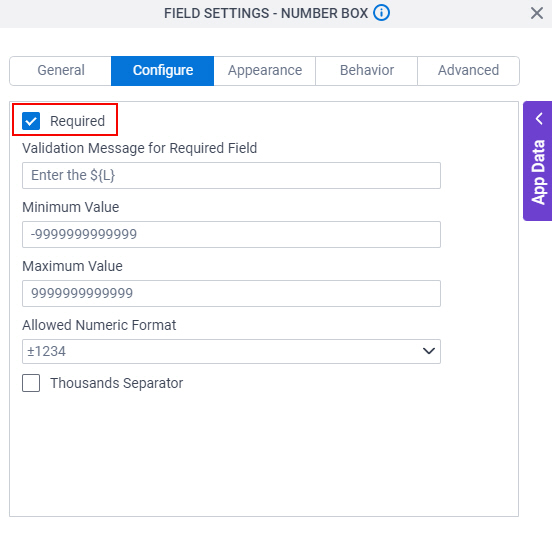
- Click the Configure tab.
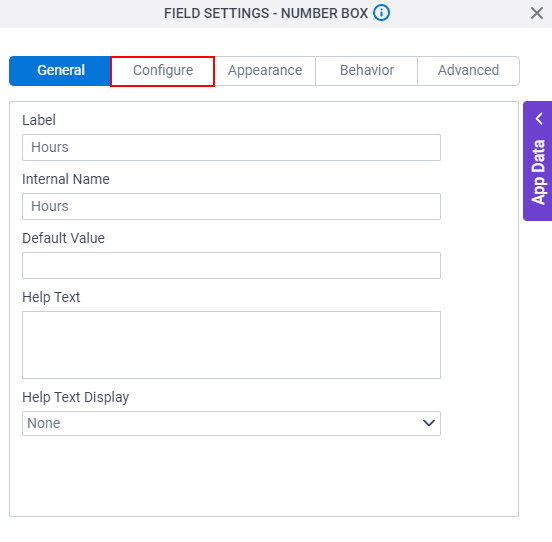
- On the Configure tab, select Required.
- To save the changes, click Close Screen .
- On the subform, to save the changes, click Close Screen .
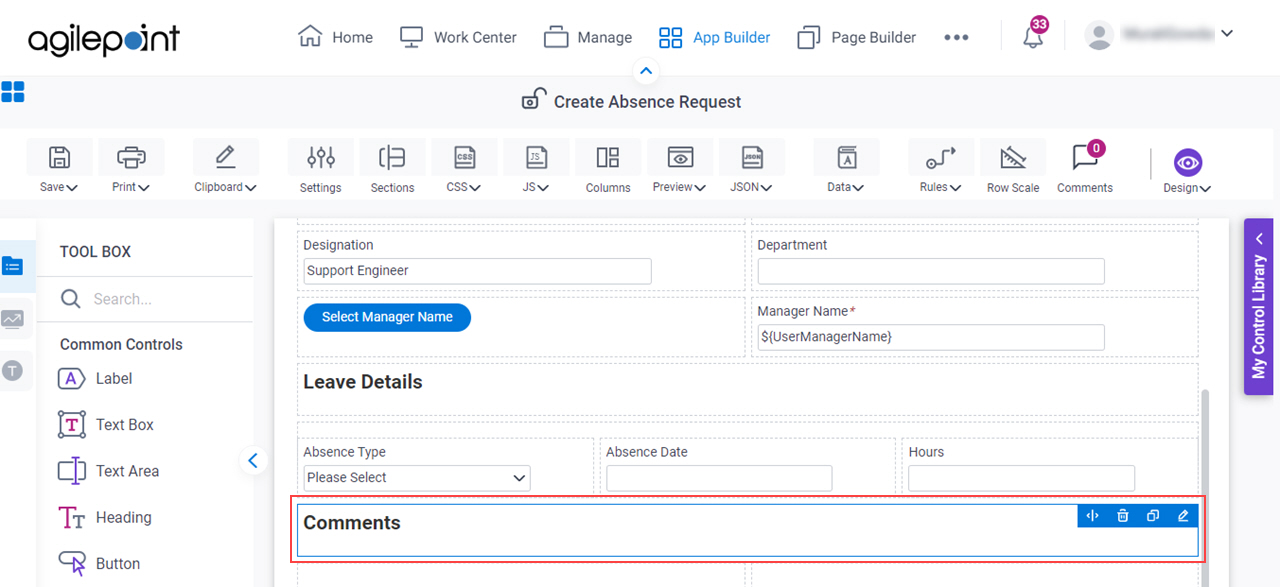
Step 18: Create a Heading (Comments)
Next, create the Comments heading in the Create Absence Request form using the Heading form control.
Procedure
- On the
Common Controls tab, drag a Heading form control onto your eForm.
- On the Field Settings - Heading screen, in the Label field, enter Comments.

When you click the Internal Name field, the Internal Name field shows the value you entered in the Label field with no spaces.

- Click the Configure tab.

- On the Configure tab, in the Heading Style field, select Extra Large.

- To save the changes, click Close Screen .
- On the Create Absence Request form, expand the Comments form control to the width to show on the eForm.
Step 19: Configure a Text Area Form Control (Employee Comments)
Next, configure a Text Area form control to enter comments on the eForm.
Procedure
- On the
Common Controls tab, drag a Text Area
 form control onto your eForm.
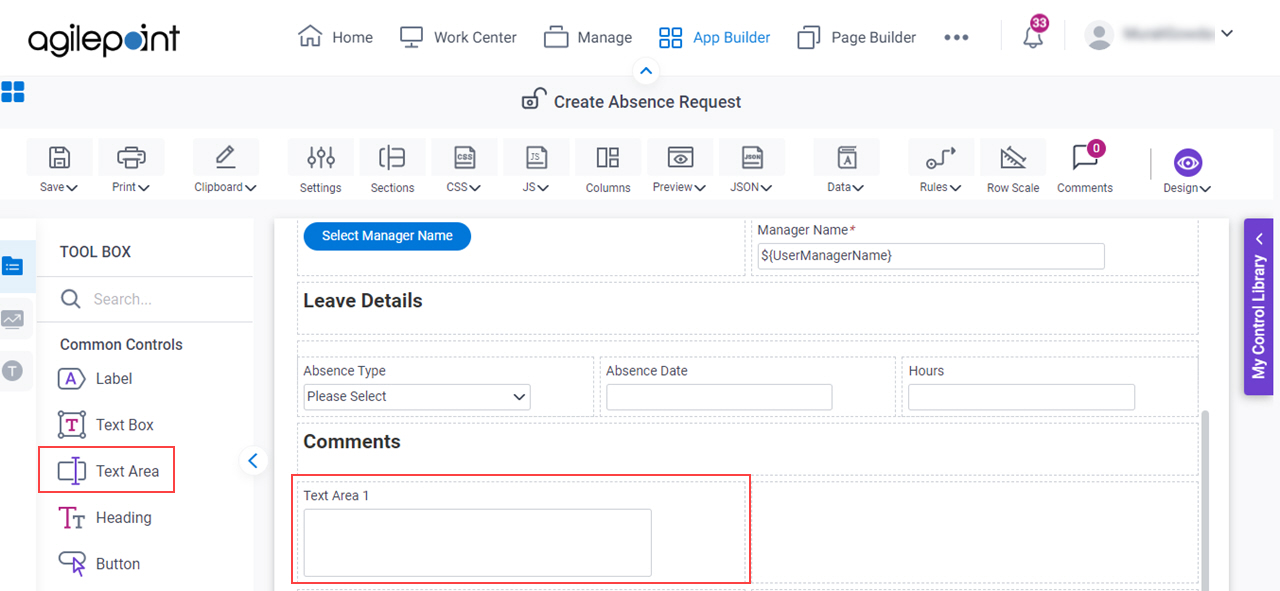
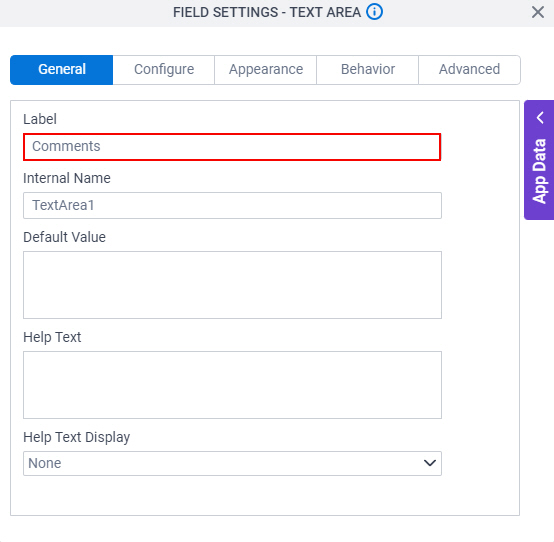
- On the Field Settings - Text Area screen, in the Label field, enter Comments.
- Click the Configure tab.
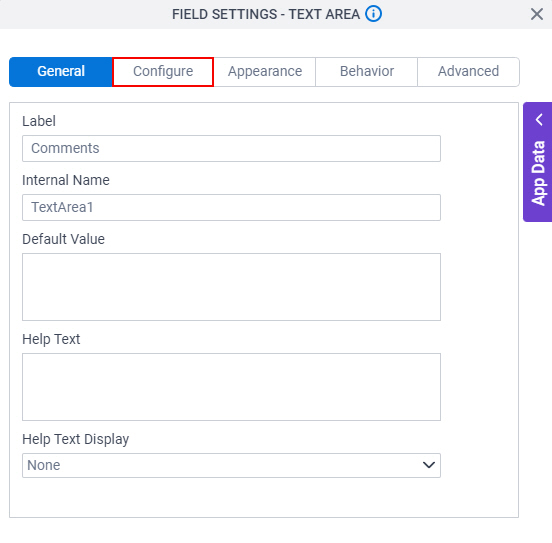
- On the Configure tab, in the Display Rows field, enter 6.
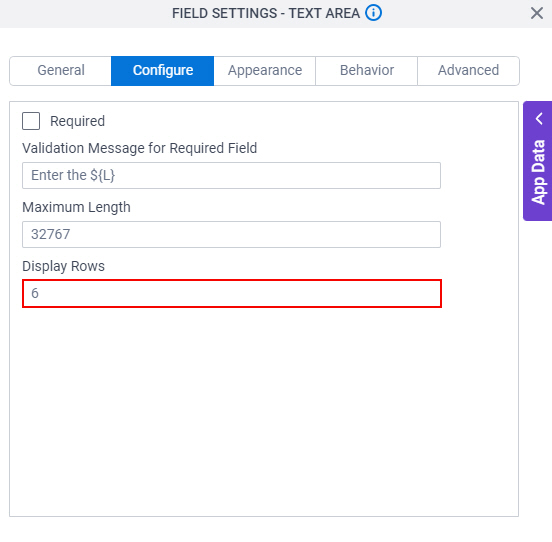
- To save the changes, click Close Screen .
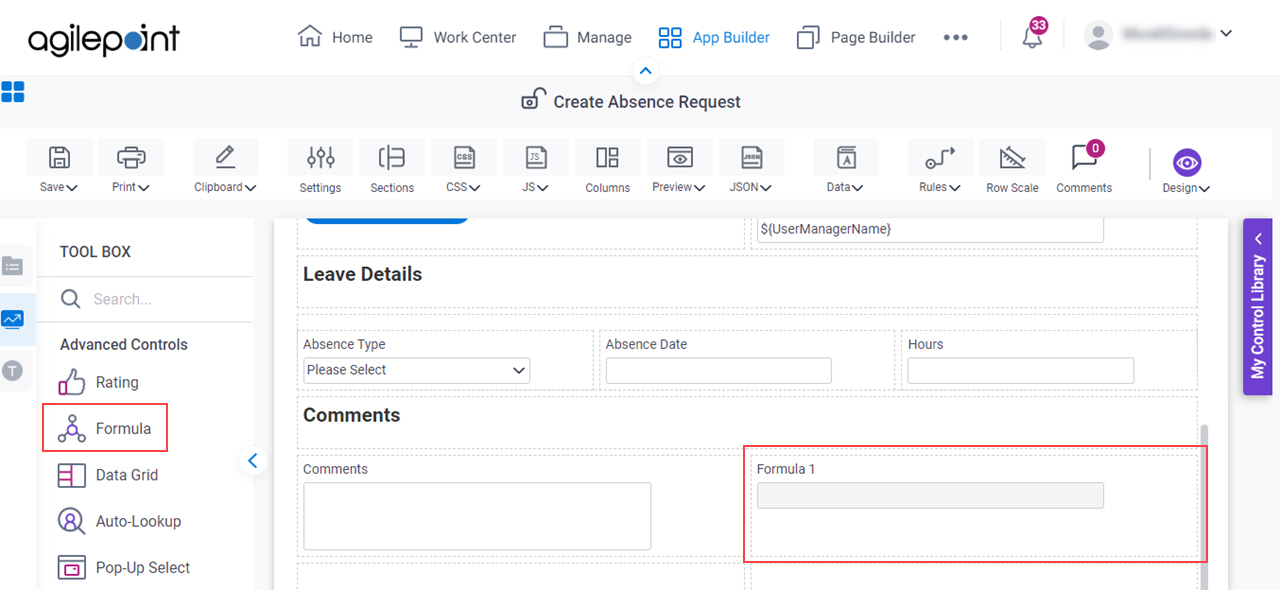
Step 20: Configure a Formula Form Control (Total Hours Requested)
Next, configure a Formula form control to calculate the total number of hours of absence requested by the runtime app user.
Procedure
- On the Advanced Controls tab, drag a Formula
 form control onto your eForm.
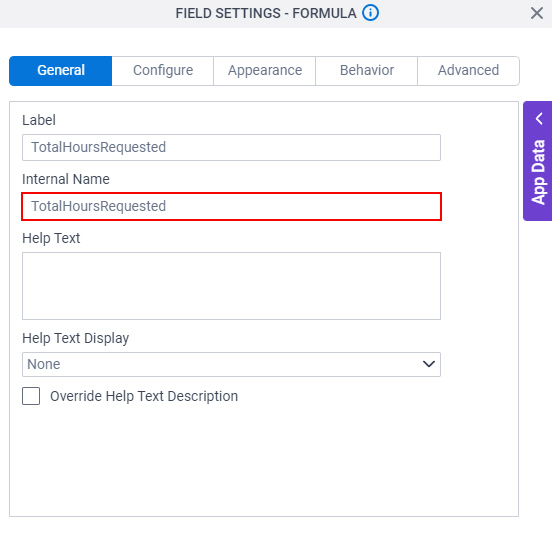
- On the Field Settings - Formula screen, in the Label field, enter TotalHoursRequested.
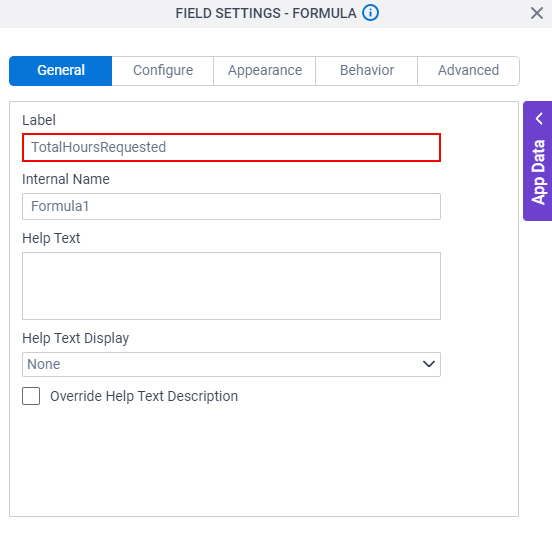
When you click the Internal Name field, the Internal Name field shows the value you entered in the Label field with no spaces.
- Click the Behavior tab.

- On the Behavior tab, deselect Visible.

- To save the changes, click Close Screen .
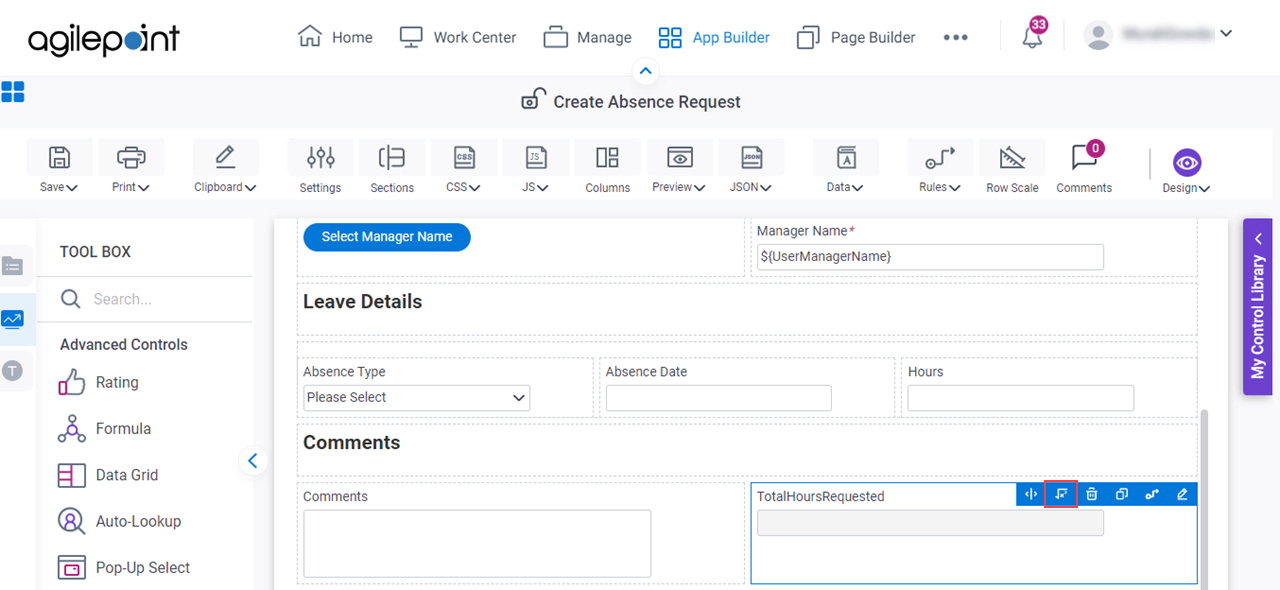
- On the Create Absence Request form, put your cursor over the Formula form control, and the Form Control Quick Menu shows.
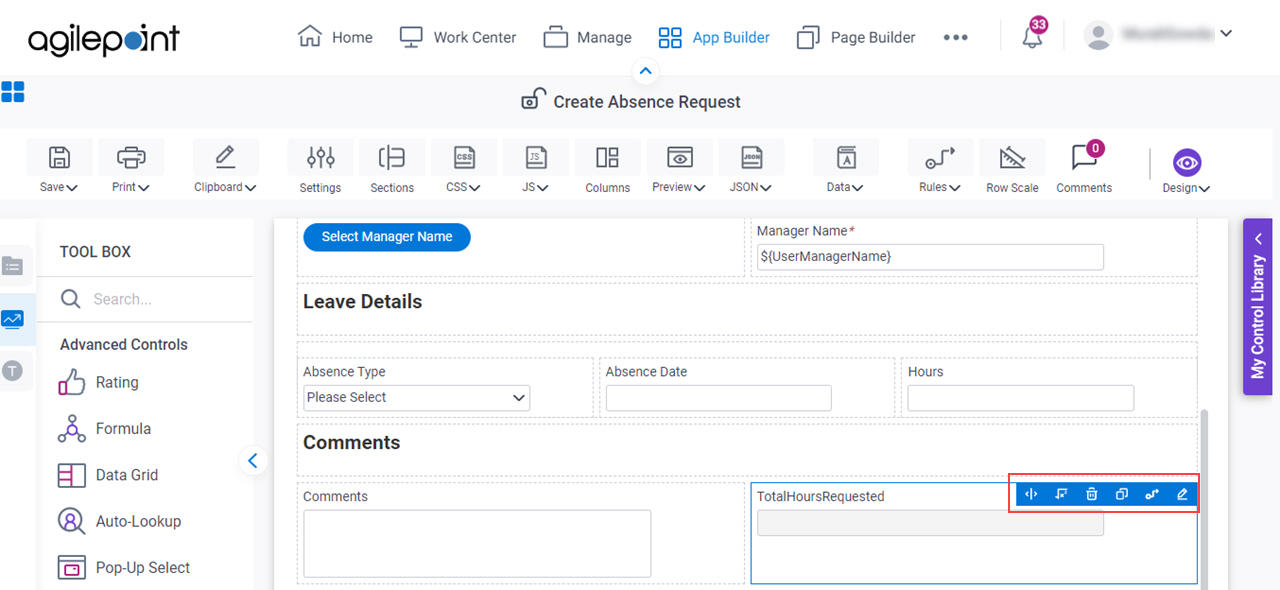
- On the Form Control Quick Menu, click Formula
 .
.
- On the Formula Builder screen, in the Formula field, enter this formula.
sum( ${LeaveDetails/Hours:[*]})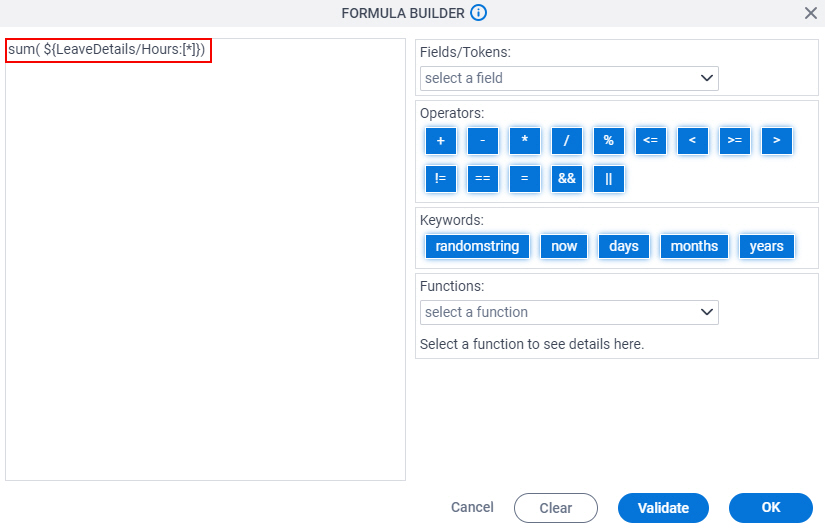
- To make sure the formula is correct, click Validate.
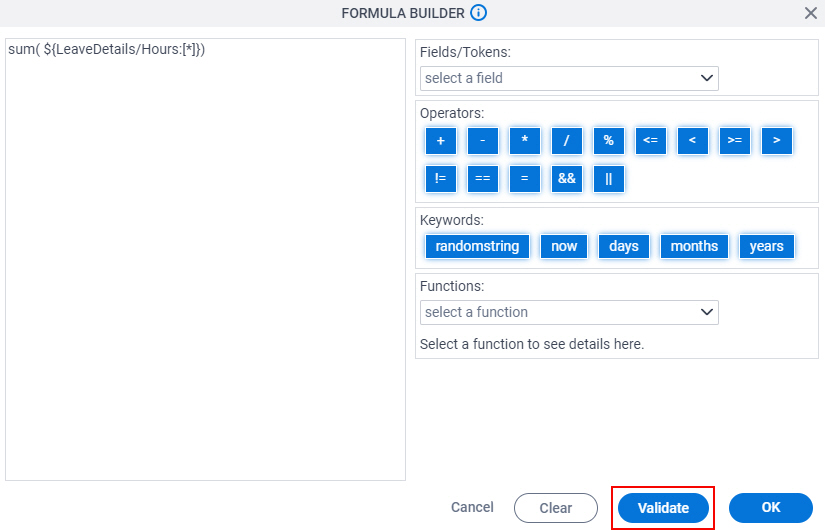
- Click OK.
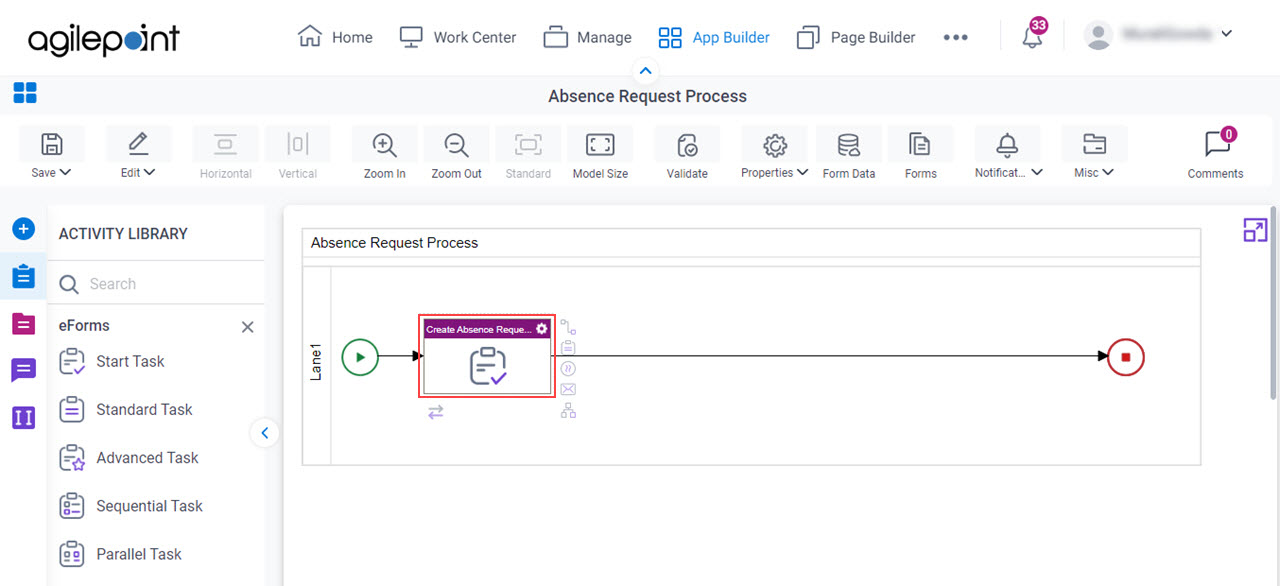
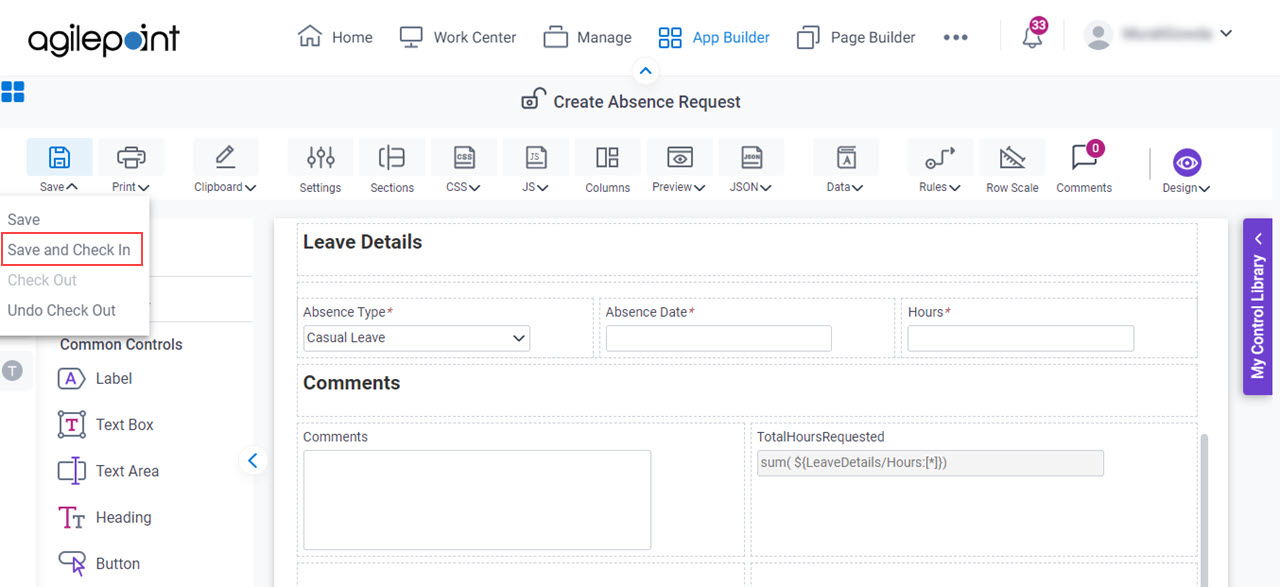
Step 22: Complete the eForm (Create Absence Request)
Next, complete the Create Absence Request eForm and return to the Absence Request process.
Target Result
When you complete this step, the finished eForm will look like this.
Procedure
- On the eForm Builder screen, click Save > Save and Check In.
The eForm Builder screen closes and the eForm Configuration screen shows in the Process Builder.
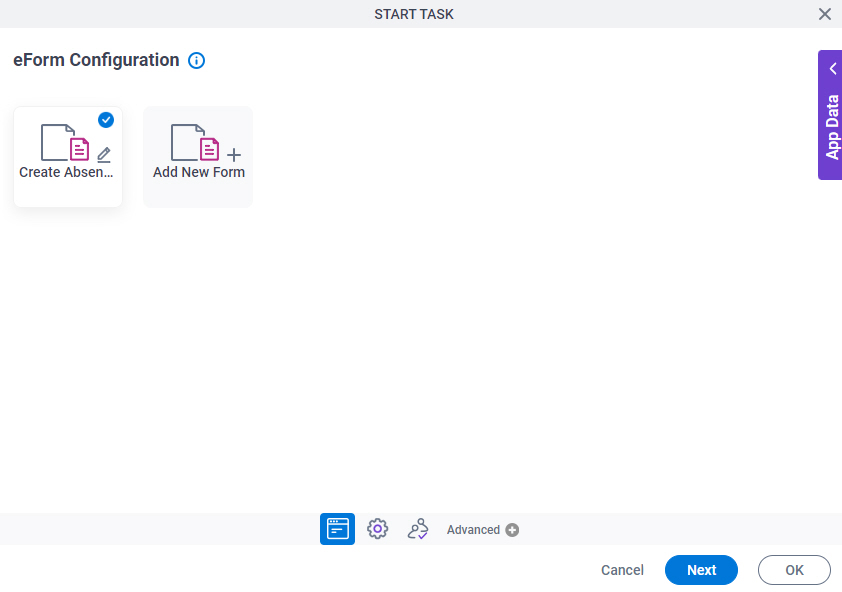
- On the eForm Configuration screen, select the Create Absence Request eForm.
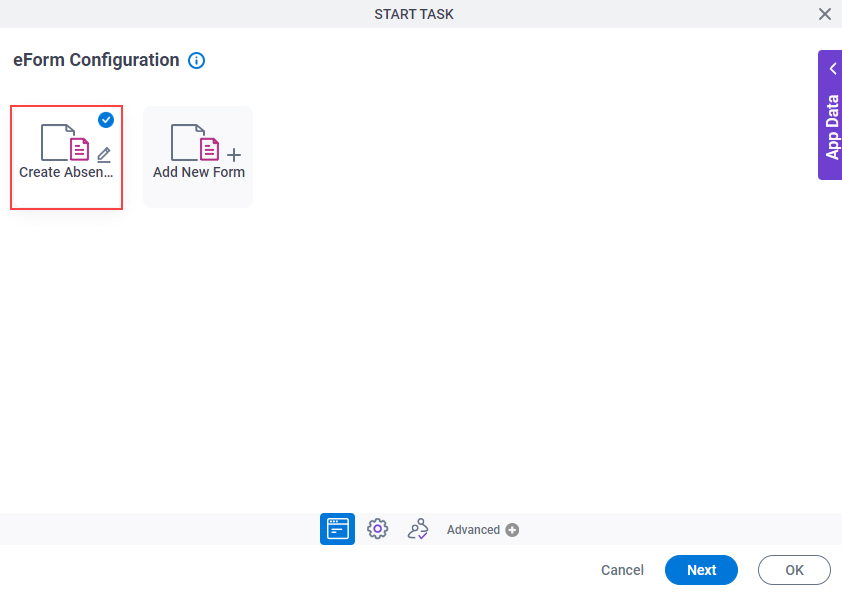
- Click Next.
- On the General Configuration screen, in the Display Name field, enter Create Absence Request.
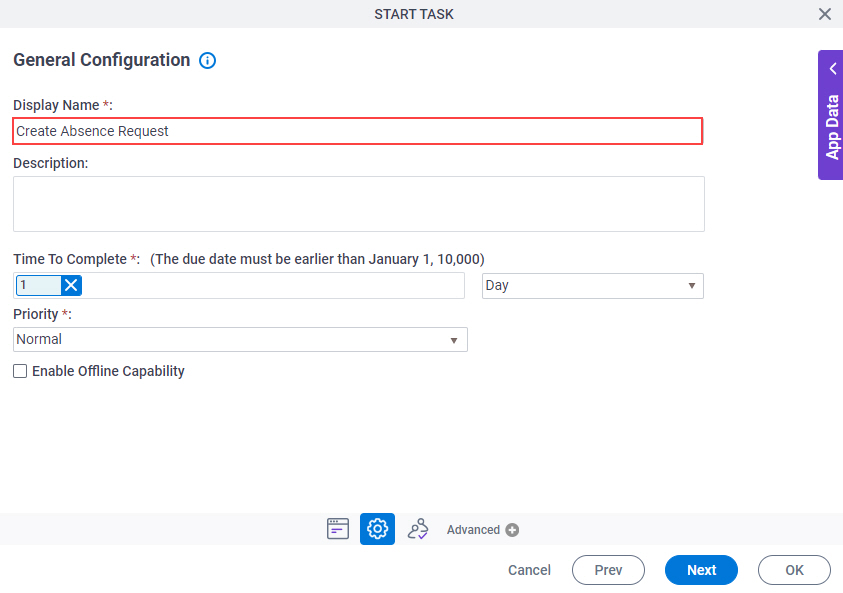
- Click OK.
- The Process Builder shows the process model with the Create Absence Request start task.