
(Example) Configure a Document Transfer activity
This example shows how to configure a Document Transfer activity in a process-based app.
Background and Setup
Result
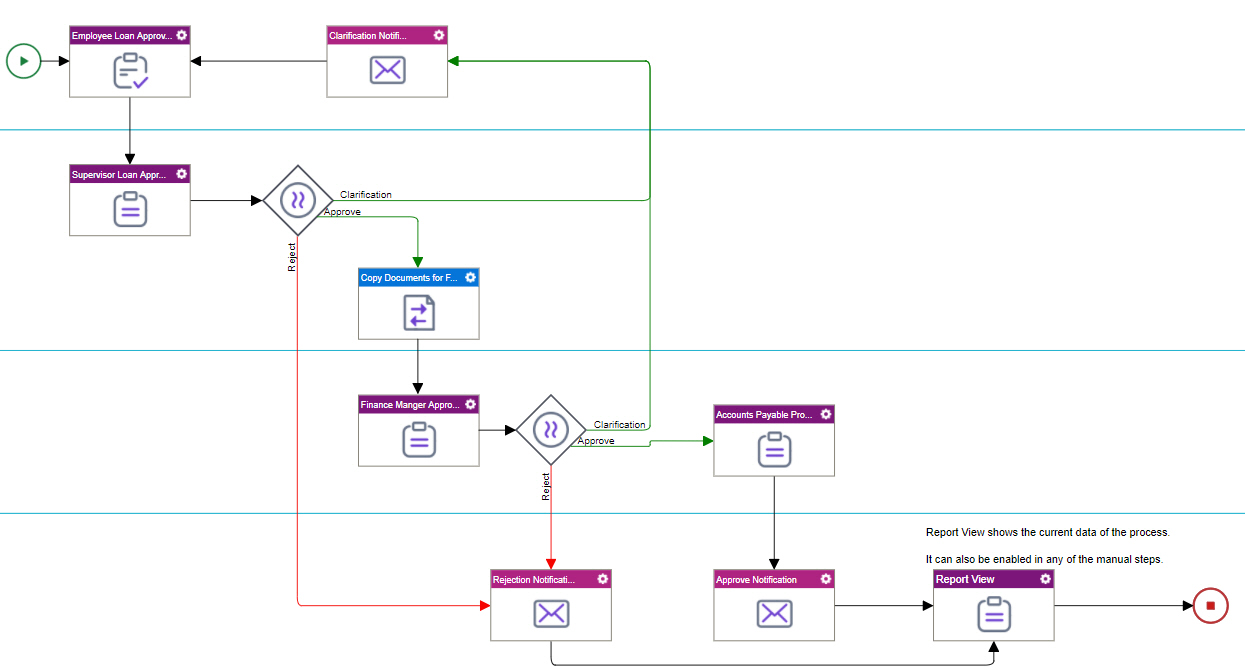
This example shows how to add and configure a Document Transfer activity in the Employee Loan Approval app to store a copy of the supporting loan documents, such as proof of identity and proof of income.
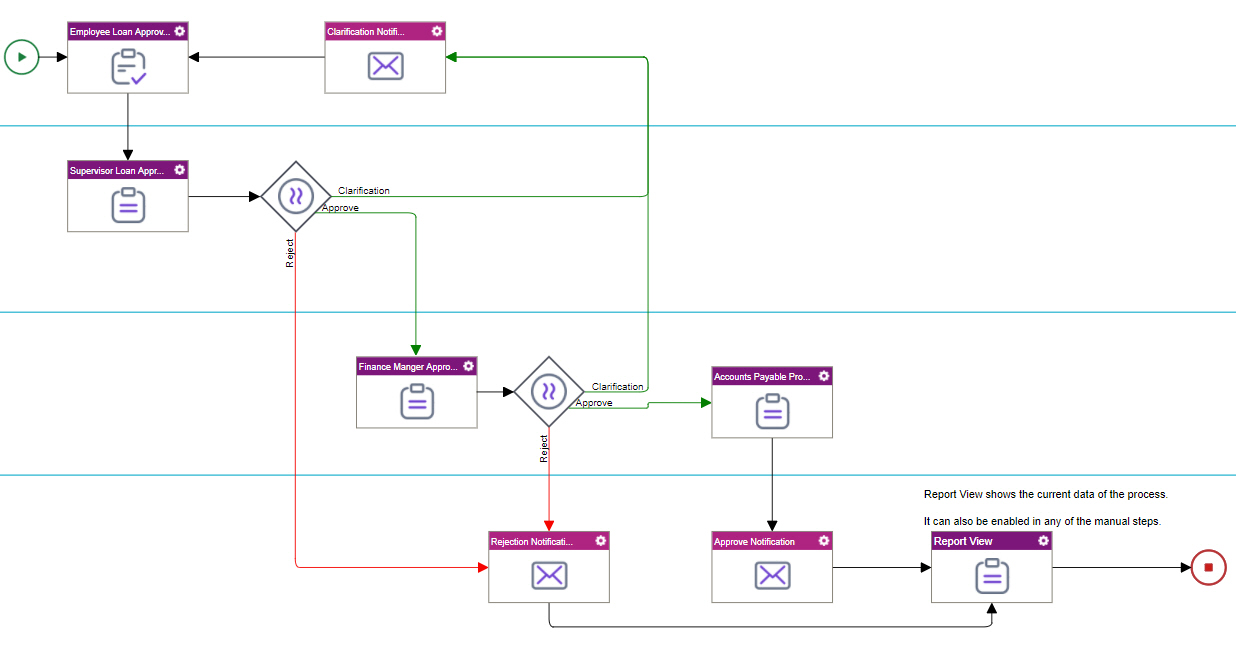
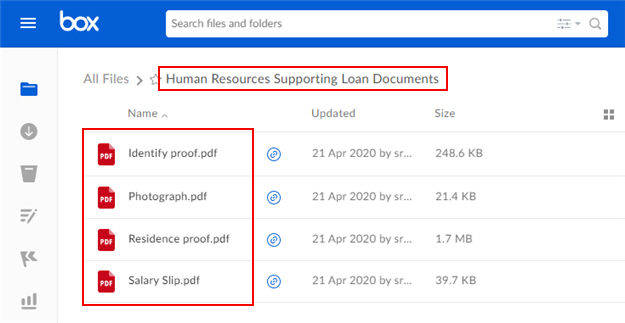
When the process starts, a Box repository stores the supporting loan documents.
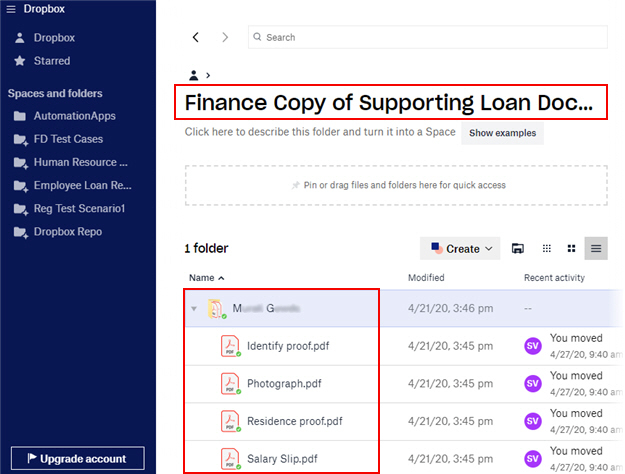
After the Document Transfer activity runs, a Dropbox repository stores the copy of the supporting loan documents.
Prerequisites
- This example uses the Employee Loan Approval app from
the AgilePoint NX App Store.
For more information, refer to How to Get the App
- One of these account types:
- Box Business account
- Box Enterprise account
- Box Personal account
- One of these account types:
- Dropbox Basic account
- Dropbox Business account
- Create an access token for Box. In this example, the access token name is Human Resources Box Account.
For more information, refer to Access Token for Box.
- Create an access token for Dropbox. In this example, the access token name is Finance Department Dropbox Account.
For more information, refer to Access Token for Dropbox.
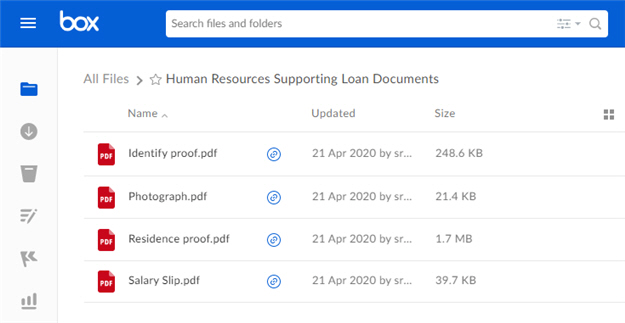
- Create a folder in Box to store the supporting loan documents. In this example, the folder name is Human Resources Supporting Loan Documents.
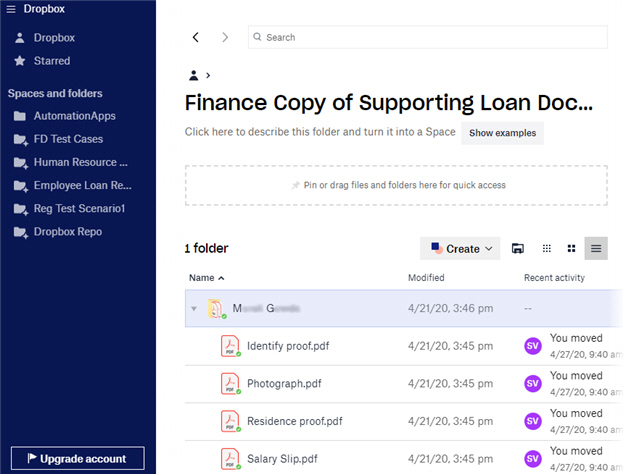
- Create a folder in Dropbox to store a copy for the supporting loan documents. In this example, the folder name is Finance Copy of Supporting Loan Documents.
Good to Know
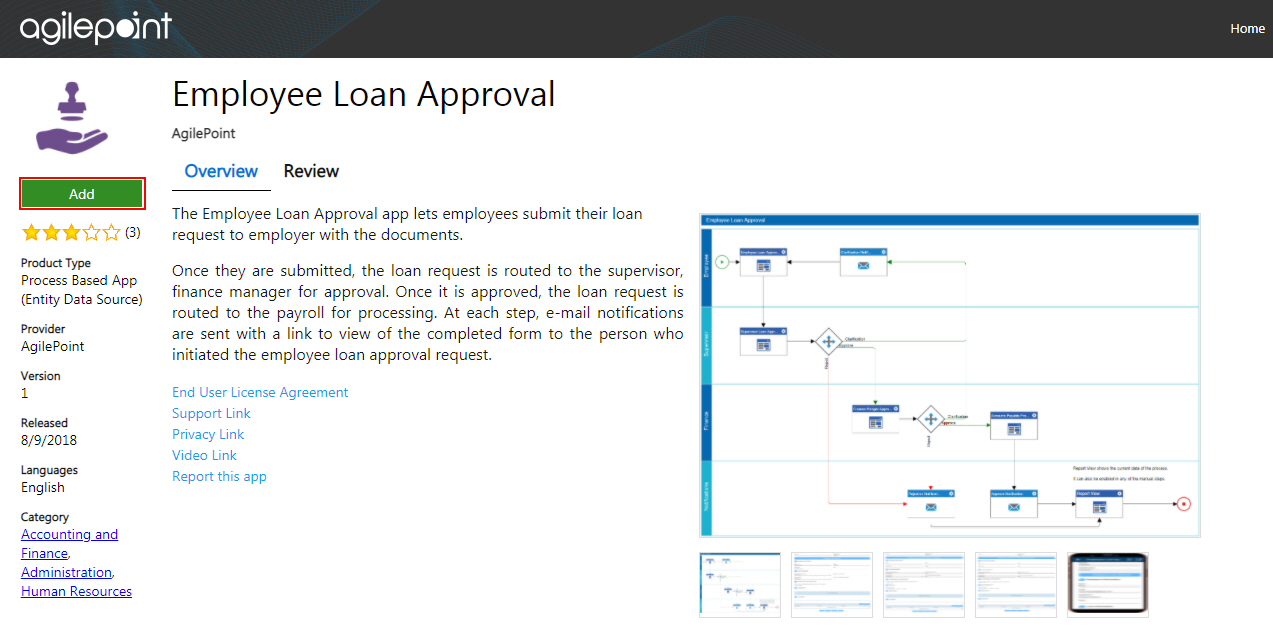
- Employee Loan Approval is an app where an employee can submit a loan request to an employer with supporting documents, such as proof of identity and proof of income.
For the use case in this example, the Document Transfer activity is used to create and store a copy of the supporting loan documents for the company's Finance department in a different file repository. This use case shows the documents being transferred from Box to Dropbox.
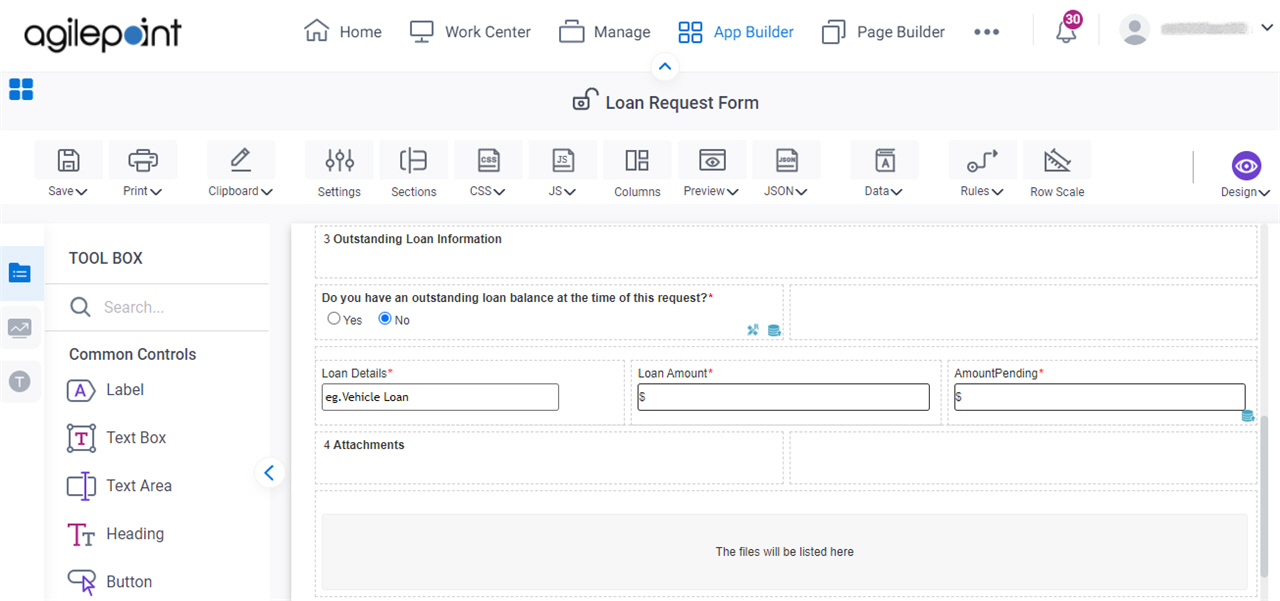
Step 1: Configure the File Upload Form Control to Use Box
First, configure a File Upload form control in the Loan Request Form to use Box as the data source.
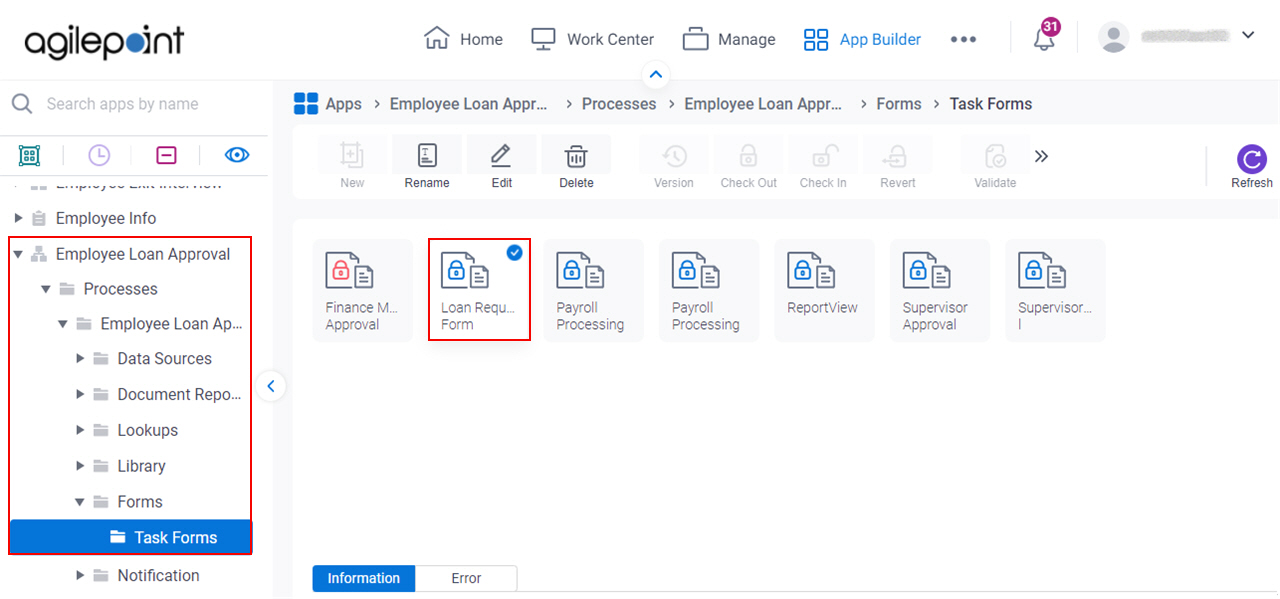
How to Start
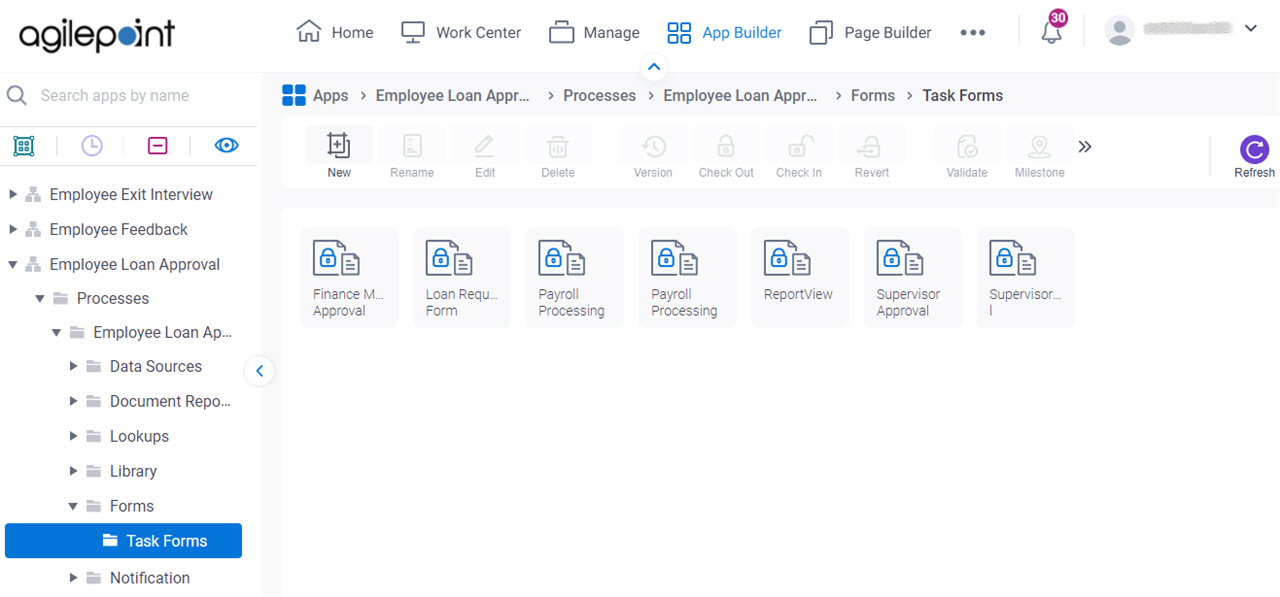
- Click App Builder.

- On the Application Explorer screen,
click Employee Loan Approval > Processes > Employee Loan Approval > Forms > Task Forms > Loan Request Form.
Procedure
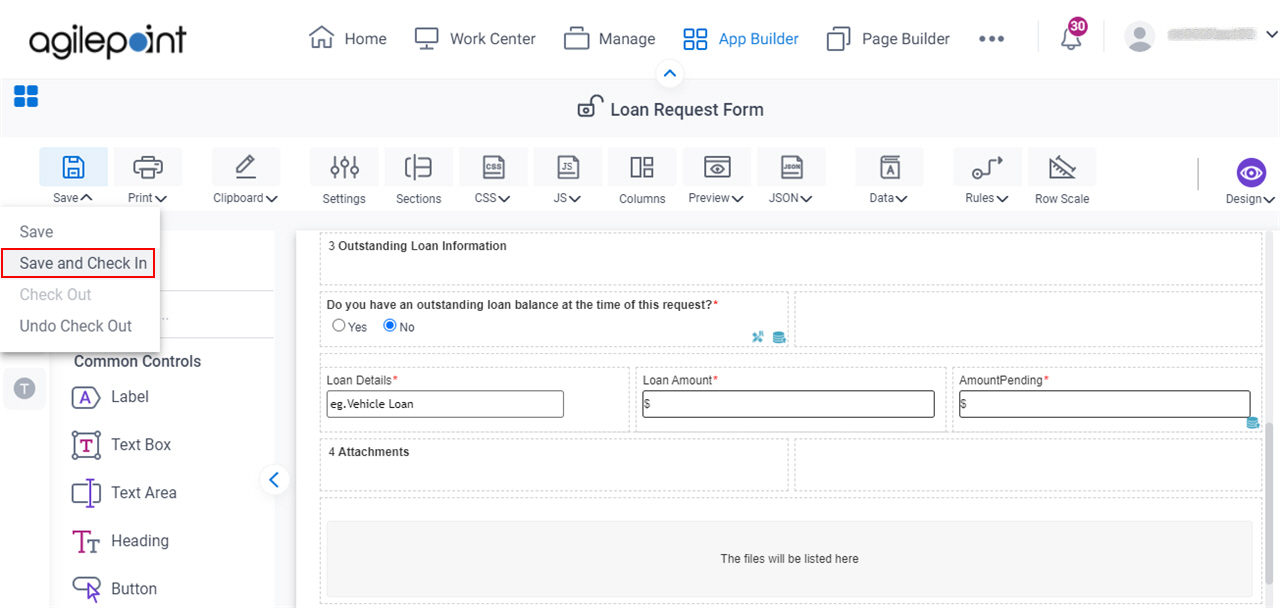
- On the Loan Request Form, put your cursor over the File Upload form control (The files will be listed here) to show the Form Control quick menu.
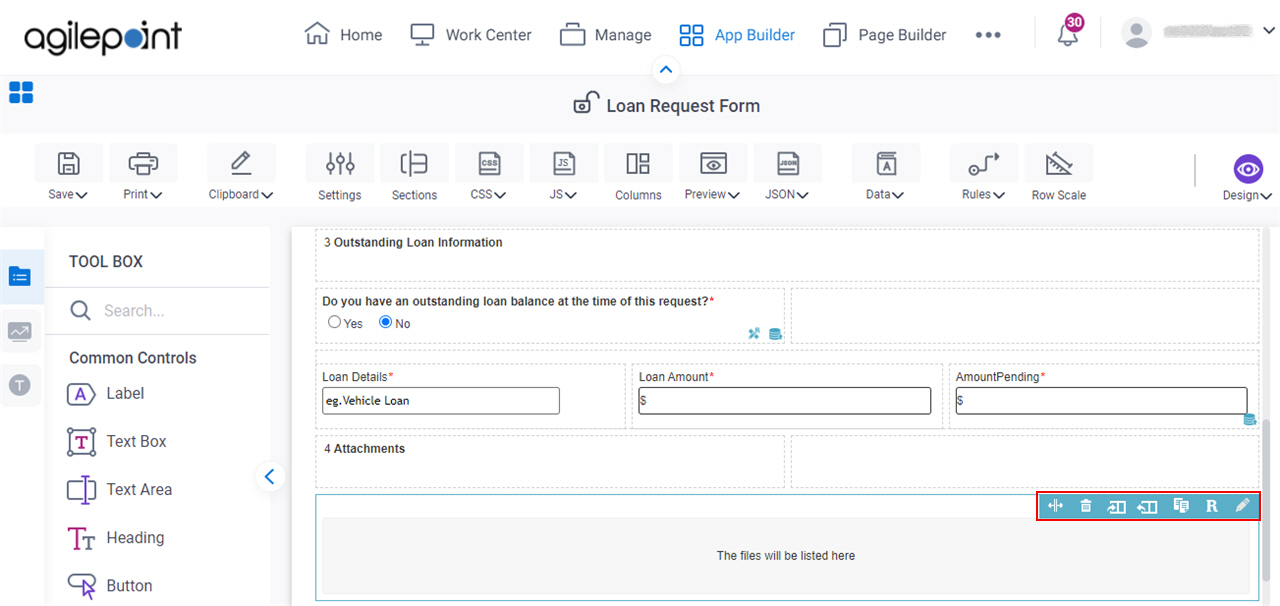
- Click Edit Properties
 .
.

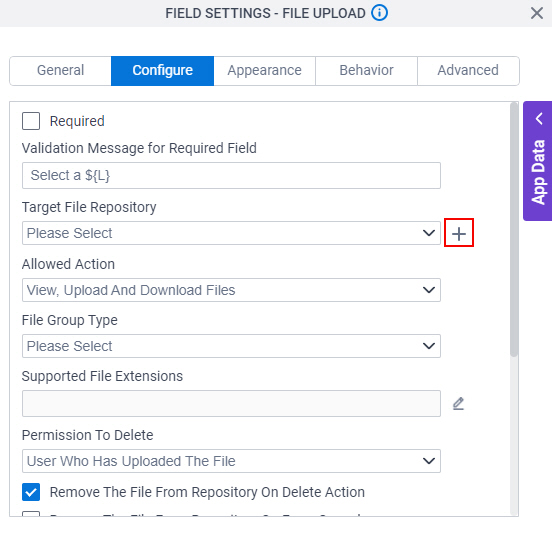
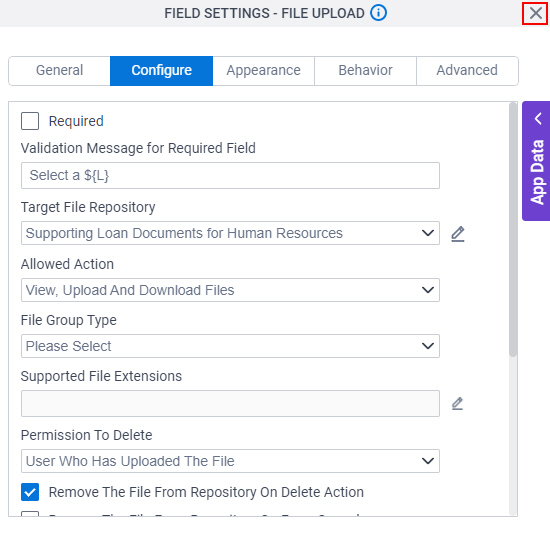
- On the Field Settings - File Upload screen, click the Configure tab.
When you download the Employee Loan Approval app from the App Store, the Loan Request Form is configured with the file repository called Internal File Upload that uses Amazon S3 as the data source. This step shows how to configure Box as the data source. You can use a similar procedure to configure other data sources according to your business requirements.
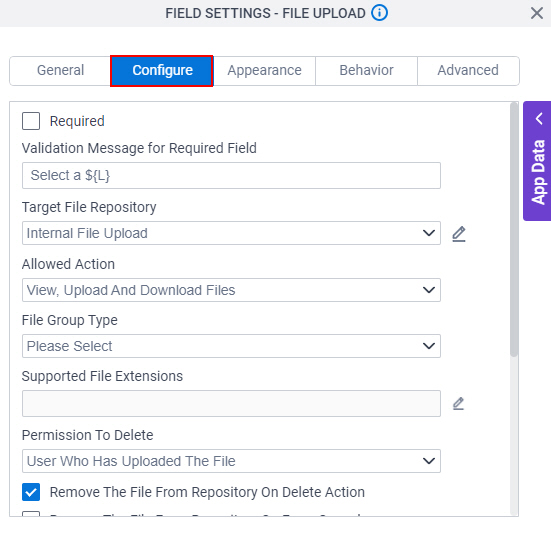
- On the Configure tab, in the Target File Repository list, select Please Select.
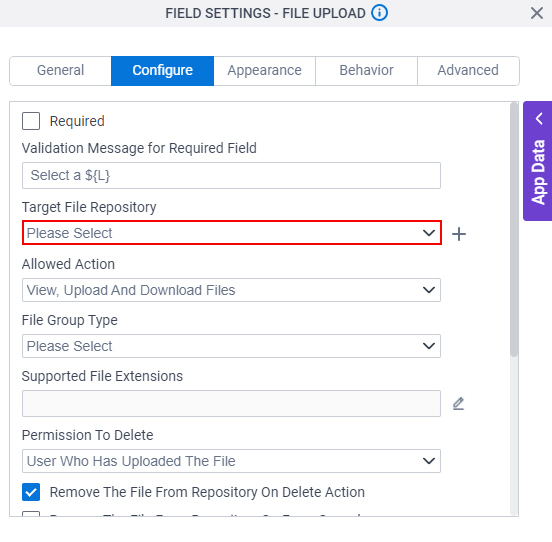
- Click Add Repository
 .
.
- On the Choose Document Repository screen, click Box.
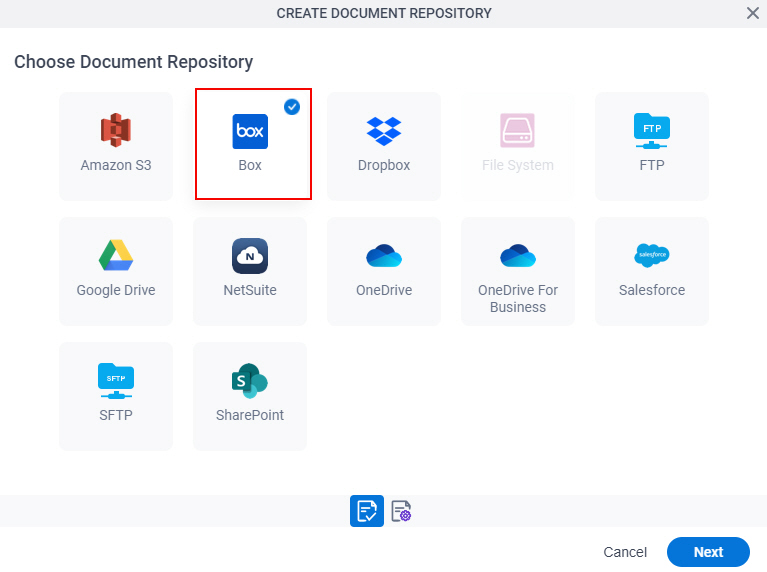
- Click Next.
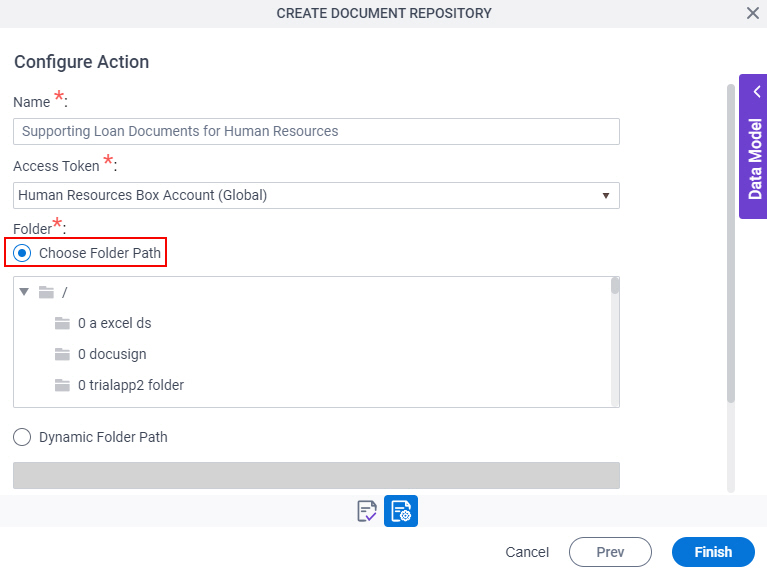
- On the Configure Action screen, in the Name field, enter Supporting Loan Documents for Human Resources.
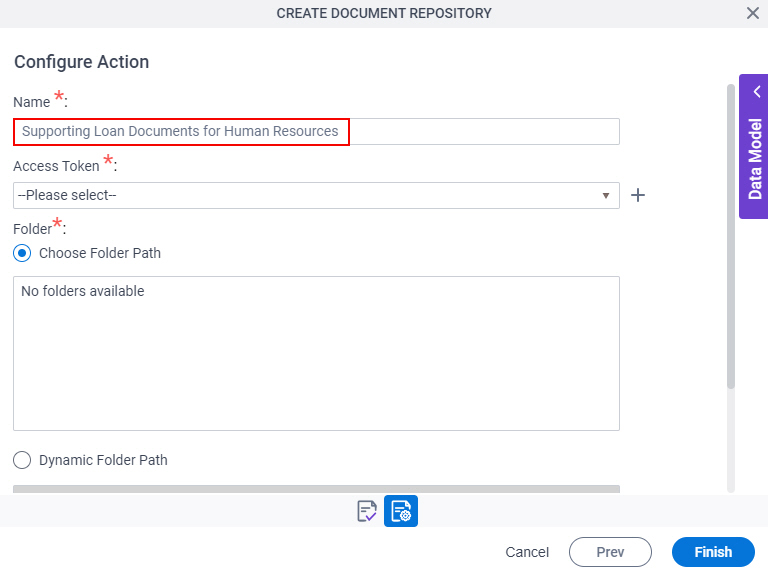
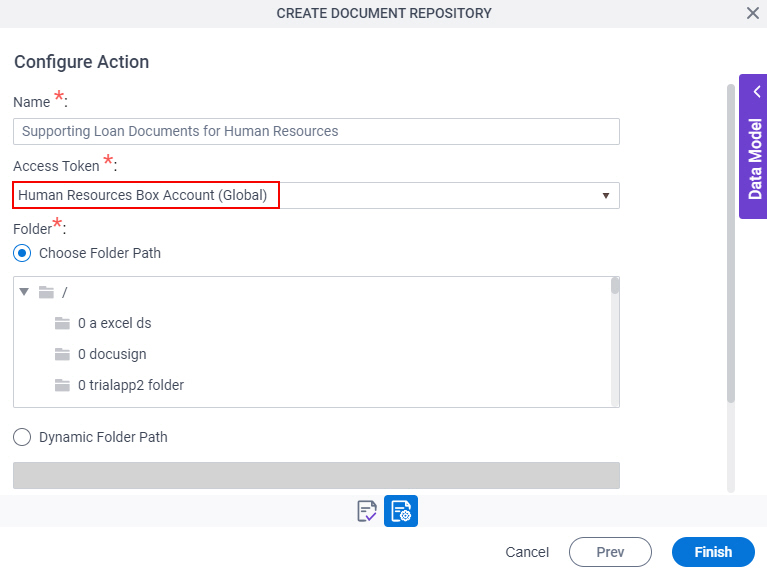
- In the Access Token field, select Human Resources Box Account (Global).
- In the Folder field, select Choose Folder Path.
Optional: If you know the ID for your Box folder, select Dynamic Folder Path.
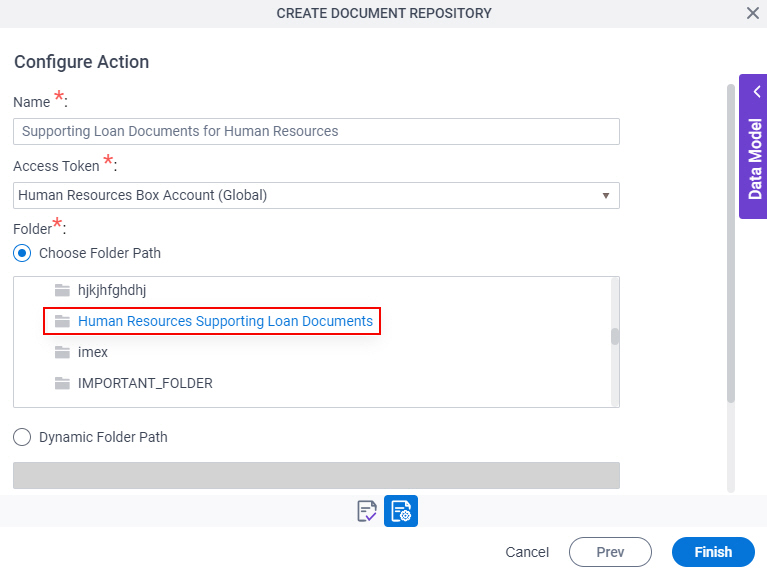
- In the Choose Folder Path field, select Human Resources Supporting Loan Documents.
As a prerequisite, the Human Resources Supporting Loan Documents folder must exist in Box.
- Click Finish.
- To save the changes, click Close Screen
 .
.
The eForm Builder screen shows.
- On the Save quick menu, click Save and Check In
 .
.
The Application Explorer screen shows.
Step 2: Configure a Document Transfer Activity
Next, add and configure a Document Transfer activity.
How to Start
- On the Application Explorer screen,
click Employee Loan Approval > Processes > Employee Loan Approval > Process Model > Employee Loan Approval.

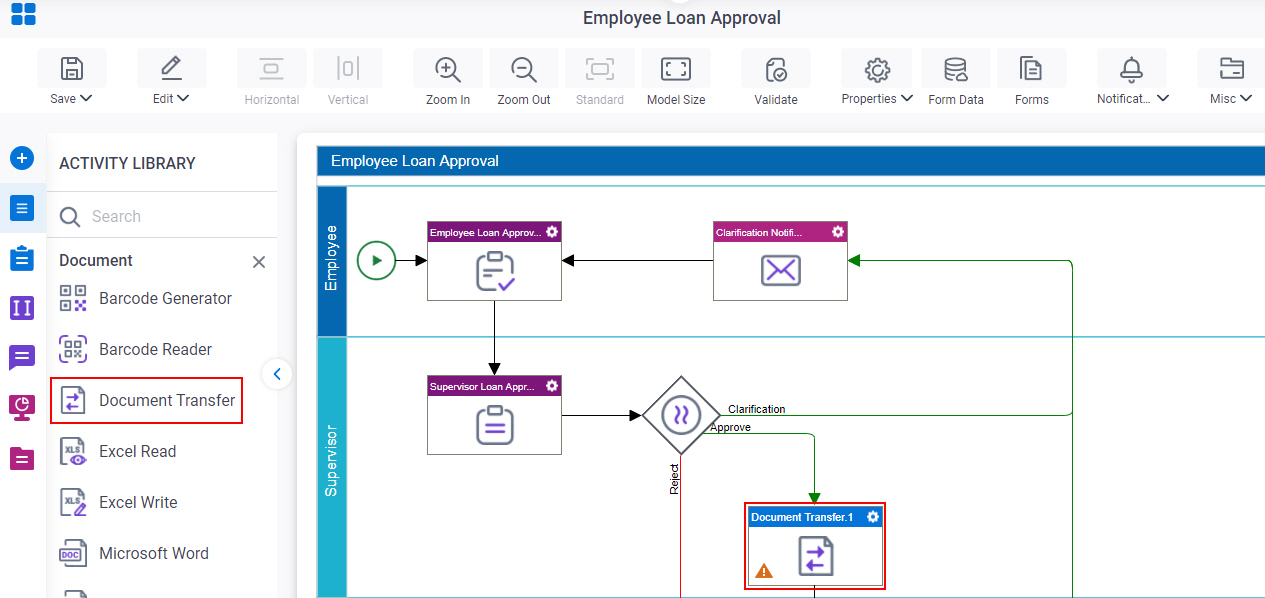
- In Process Builder, in the Activity Library, open the Document
 tab.
tab.
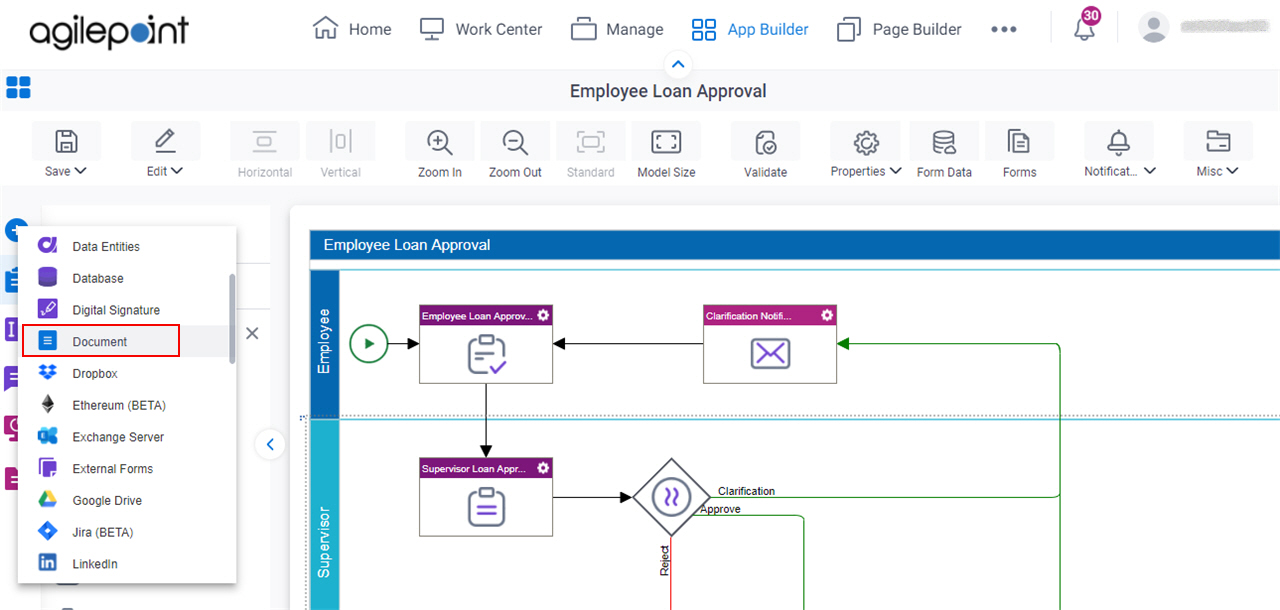
- On the Document tab, drag the Document Transfer
 activity onto your process.
Procedure
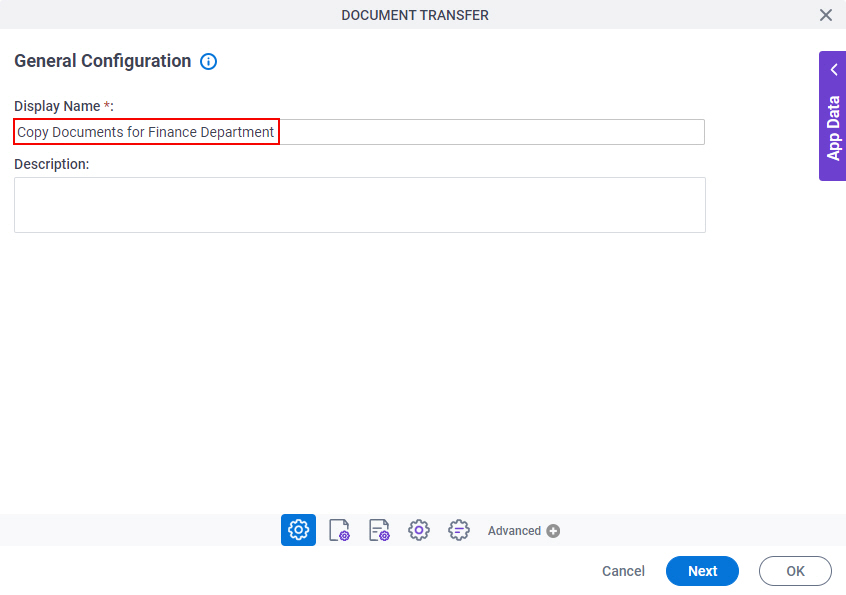
- On the General Configuration screen, in the Display Name field, enter Copy Documents for Finance Department.
- Click Next.
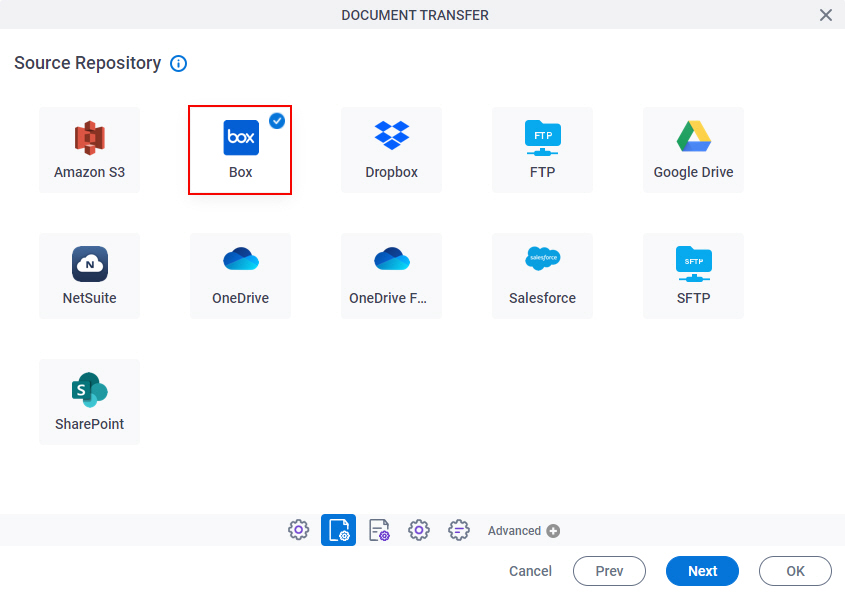
- On the Source Repository screen, select Box.
- Click Next.
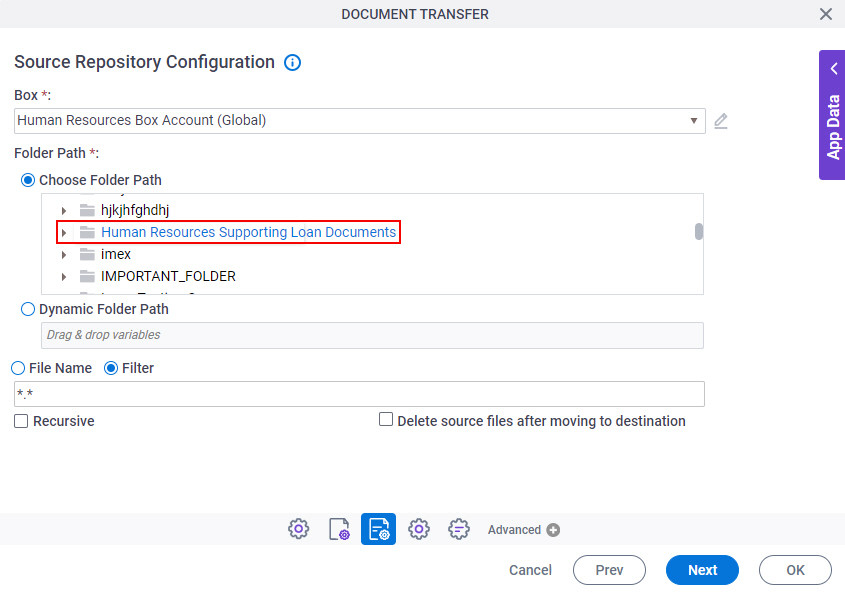
- On the Source Repository Configuration screen, in the Box field, select Human Resources Box Account (Global).
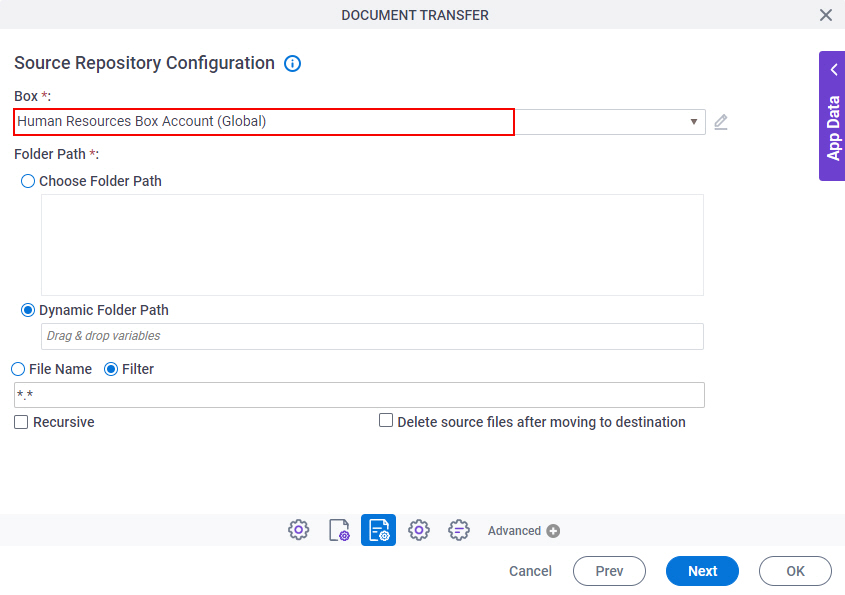
- In the Folder Path field, select Choose Folder Path.
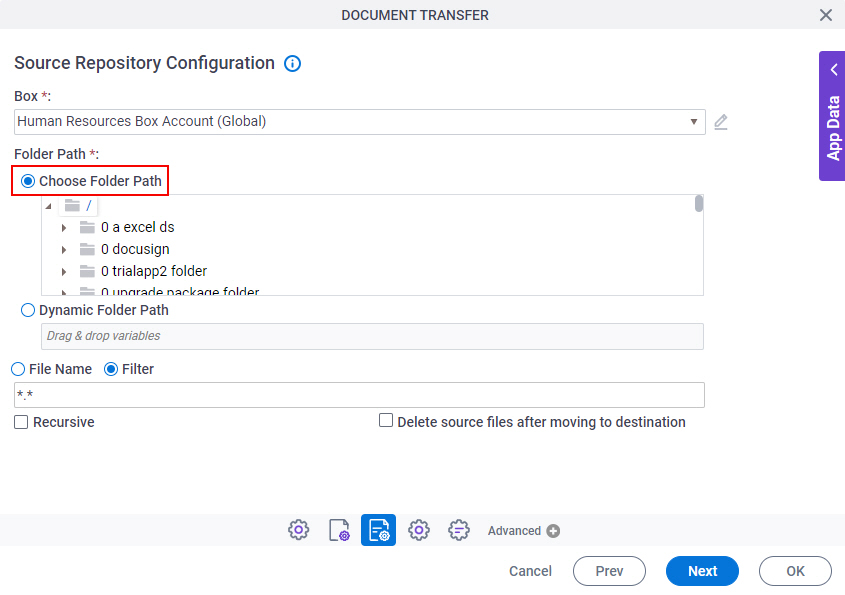
- In the Choose Folder Path field, select Human Resources Supporting Loan Documents.
- Click Next.
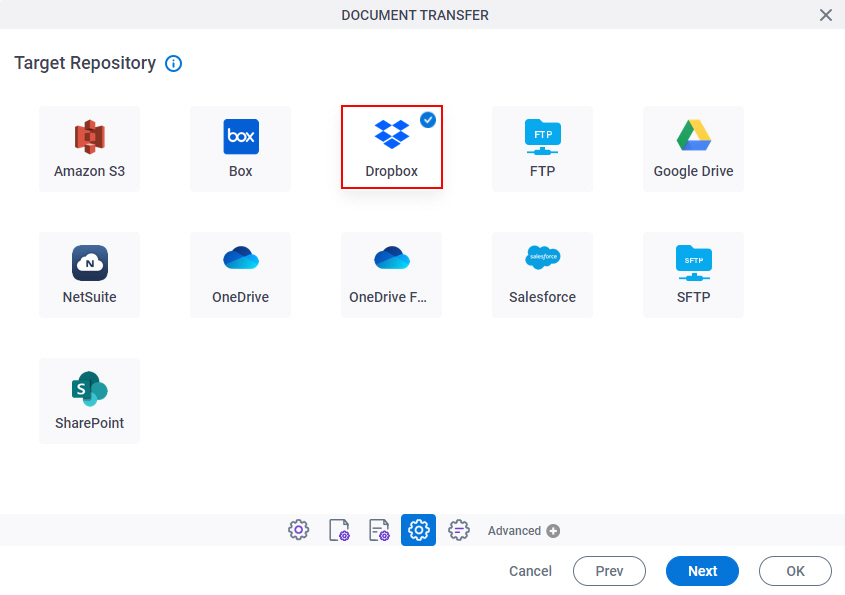
- On the Target Repository screen, select Dropbox.
- Click Next.
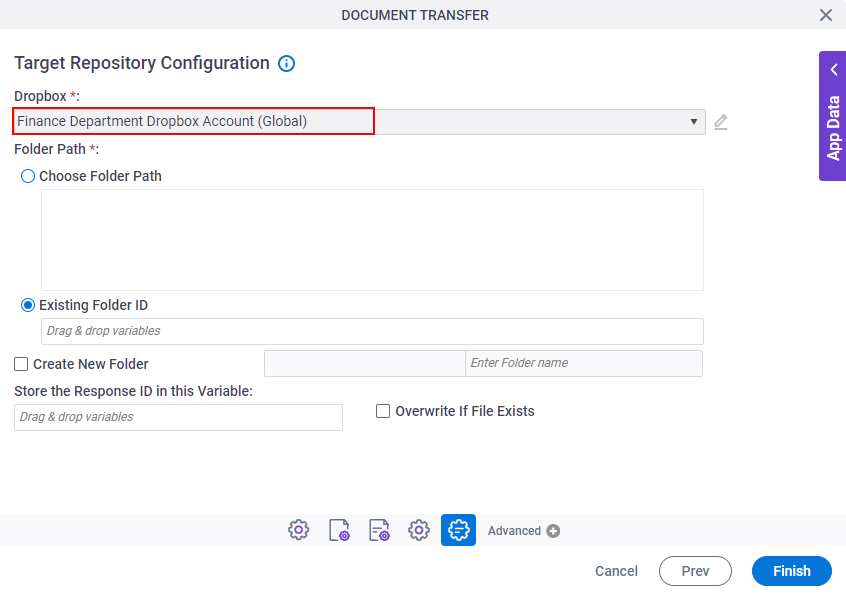
- On the Target Repository Configuration screen, in the Dropbox field, select Finance Department Dropbox Account (Global).
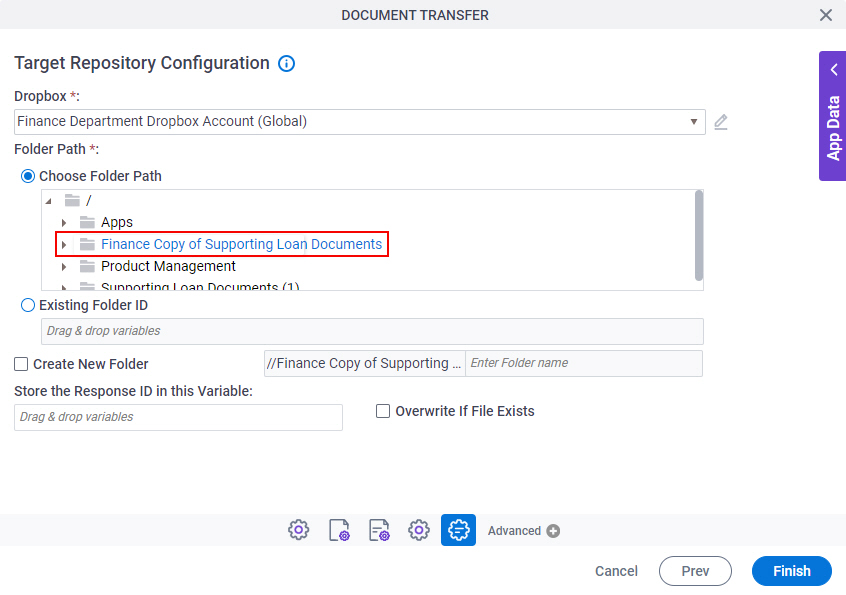
- In the Folder Path field, select Choose Folder Path.
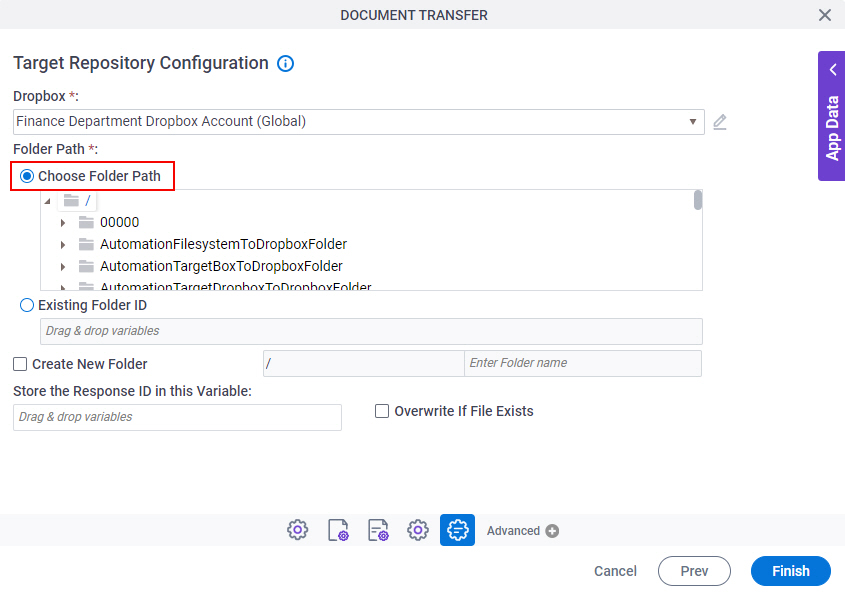
- In the Choose Folder Path field, select finance copy of supporting loan documents.
As a prerequisite, the Finance Copy of Supporting Loan Documents folder must exist in Dropbox.
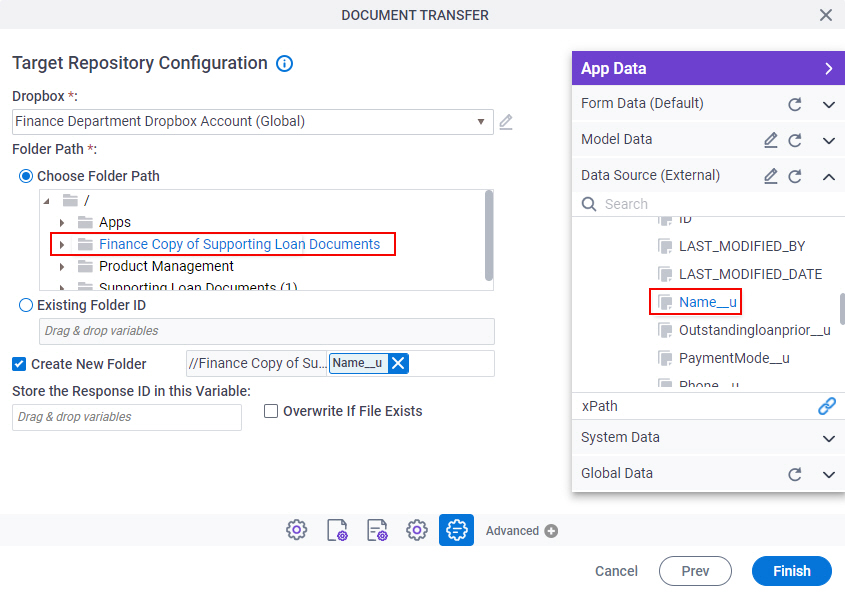
- Select Create New Folder.
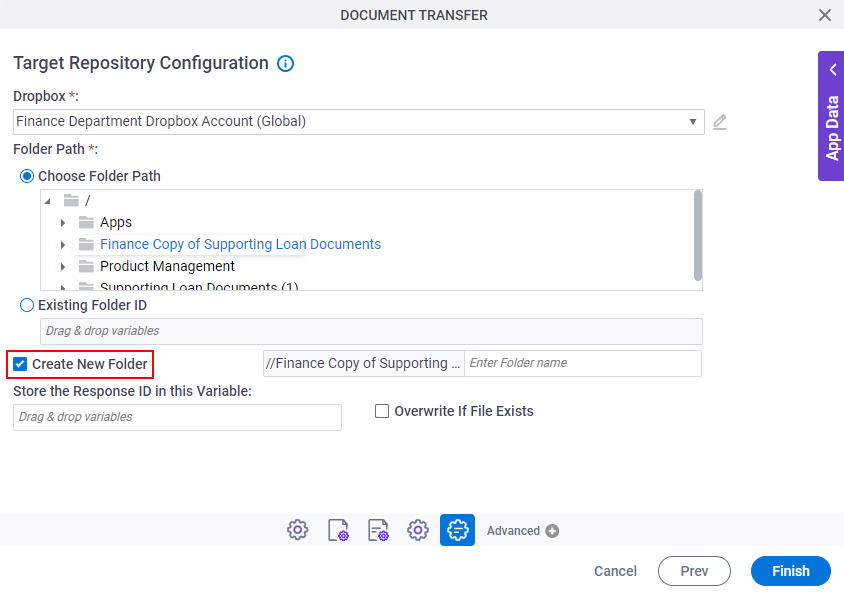
- In the Create New Folder field, drag the Name_u entity field from the Data Source (External) tab.
This entity field represents the user's full name. This field is associated with the Name field on the Loan Request form.
This setting stores the documents in a subfolder under Finance Copy of Supporting Loan Documents where the folder name is the the loan requester's full name.
- Click Finish.
The Process Builder screen shows with the Document Tranfer activity.

Step 3: (Optional) Save, Check In, and Publish the Process-Based App
Next, save, check in, and publish the process-based app.
For more information, refer to (Example) Save, Check In, and Publish a Process-Based App.
Step 4: (Optional) Run the App
Next, run the app.
Procedure
- To run the app, refer to My Apps screen (Modern).
- Complete and submit the Employee Loan Request form.
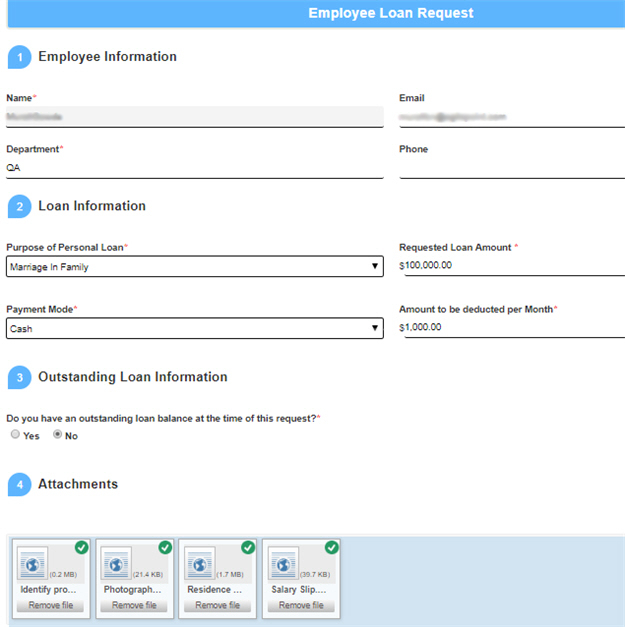
A box repository stores the loan supporting documents in Human Resources Supporting Loan Documents folder.
- On the My Tasks tab, open the Supervisor Approval
task, complete the
eForm, and submit.
For more information, refer to Open a Task.
A Dropbox repository stores the copy of the supporting loan documents in a separate folder in the name of the user's full name on the Finance Copy of Supporting Loan Documents folder.
How to Get the App
This example is based on the Employee Loan Approval app from the AgilePoint NX App Store. Use this procedure to get the app.
Prerequisites
- AgilePoint NX OnDemand (public cloud), or AgilePoint NX Private Cloud or AgilePoint NX OnPremises v7.0 or higher.
Good to Know
- This procedure is optional. It is provided so you can test the example with an out-of-the-box app.
- This is part of the Background and Setup procedures, but many users preferred this step to appear after the example, not before it.
Procedure
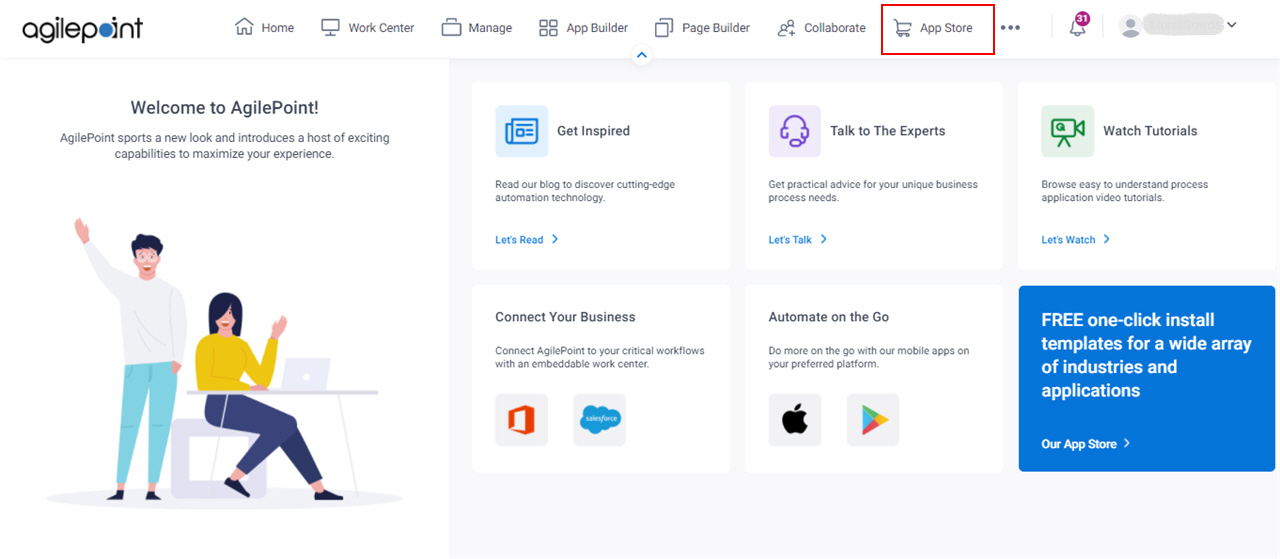
- Click App Store
 .
.
- In the CATEGORY section, click Accounting and Finance.
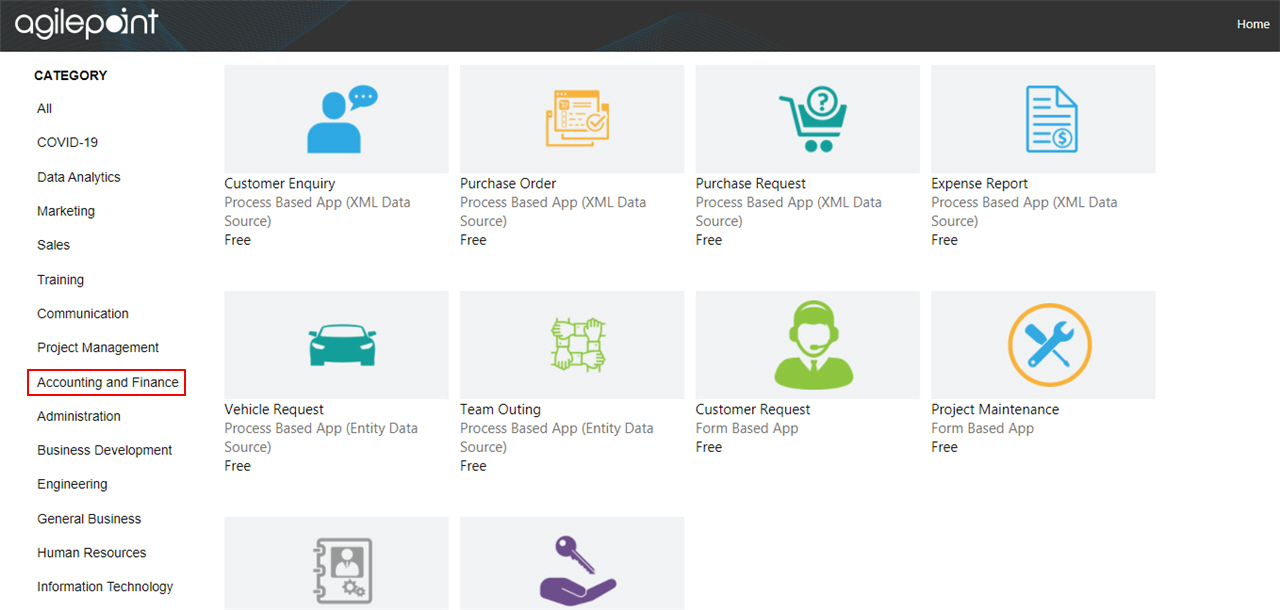
- Click the Employee Loan Approval app.
- On the Employee Loan Approval screen, click Add.
- On the Trust App screen, click Trust it.
- Click Return to site.