
(Example) Schema Mapper
This example shows how to map variables in the Schema Mapper.
Background and Setup
Other Examples
- (Example) Configure an Excel Read Activity
- (Example) Configure an Excel Write Activity
- (Example) Create Zoom Meeting
- (Example) Store Data from an eForm in Data Entities with a Data Entities Activity
- Advanced Examples
For more advanced or complex examples or specific information about how to solve a specific business problem or use case, AgilePoint recommends the following resources:
- AgilePoint Community Forums - A free, AgilePoint-moderated, crowd-sourcing user forum where you can ask questions about specific techniques, the solutions to use cases, workarounds, or other topics that may not be covered in the Product Documentation.
- Video Portal - Video walkthroughs for a range of simple and advanced tasks in AgilePoint NX.
- Professional Services - If you can not find the information you need for your specific business problem, mentoring is available through AgilePoint Professional Services.
- Personalized Training - AgilePoint can provide personalized training for your organization. To request personalized training, contact AgilePoint Sales.
Good to Know
- The Schema Mapper is used to connect, or map, variables in one data source to variables in a different data source. When you map the variables, it synchronizes their values in the two data sources. The examples in this topic show various ways to map variables with the Schema Mapper.
- In the Schema Mapper, the source and the target variables show in a tree view in the left and right panes. You can drag and drop from one pane to the other. If you map the variables:
- A green line indicates that the data type of the source and target variables are the same and no data conversion is required.
- A blue line indicates that the data type of source and target variables are different. The data conversion is required to map the variables. To change the data types of the variables, refer to:
How to Start
- You can open the Schema Mapper from many places in AgilePoint NX where a group of variables in one data source must exchange data with another data source. Usually the Schema Mapper opens with a button called Map Schema.
Example 1: Map One Variable
This example shows how to map one variable in the Schema Mapper.
Good to Know
- This example shows how to map variables that have the same data type. To map variables that have the different data types, refer to:
- This example shows how to map a variable in the Create Meeting activity in the Zoom tab.
A similar procedure can be used in the Schema Mapper anywhere it is accessed in AgilePoint NX.
Procedure
- On the Schema Mapper screen, map the join_url response to MeetingURL form control.

Example 2: Map More Than One Variable
This example shows how to map more than one variable in the Schema Mapper.
Good to Know
- If you map two variables that have different data types, by default, the Schema Mapper uses the Default Conversion method to change the data types. For more information, refer to
Default Data Conversion.
You can change the Default Conversion method to the Custom Data Conversion method to change the data types. For more information, refer to Custom Data Conversion.
- This example shows how to map variables in the Read Excel activity in the Document tab to the form controls in an eForm.
A similar procedure can be used in the Schema Mapper anywhere it is accessed in AgilePoint NX.
Procedure
- On the Schema Mapper screen, map the cells in the Excel file to the form controls as shown in this table.
Excel Template Cell Name Form Fields AccountName AccountName__u EmailId EmailId__u PaymentTerms PaymentTerms__u Phone Phone__u PoAmount POAmount__u PoNumber CutomerPONumber__u 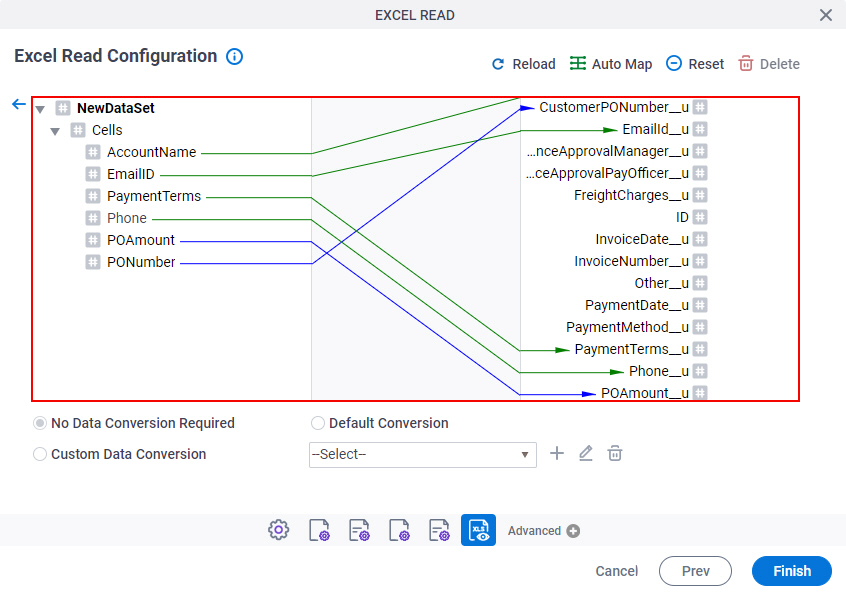
Example 3: Map Variables with Auto Map
This example shows how to use the Auto Map method to map the variables in the Schema Mapper.
Good to Know
- Auto Map connects all variables in the source and the target that have the same name, regardless of data type. Auto Map does not map variables with different names.
- To map variables with different names, click the variables to map them. For more information, refer to Map More Than One Variable.
- If you map two variables that have different data types, by default, the Schema Mapper uses the Default Conversion method to change the data types. For more information, refer to
Default Data Conversion.
You can change the Default Conversion method to the Custom Data Conversion method to change the data types. For more information, refer to Custom Data Conversion.
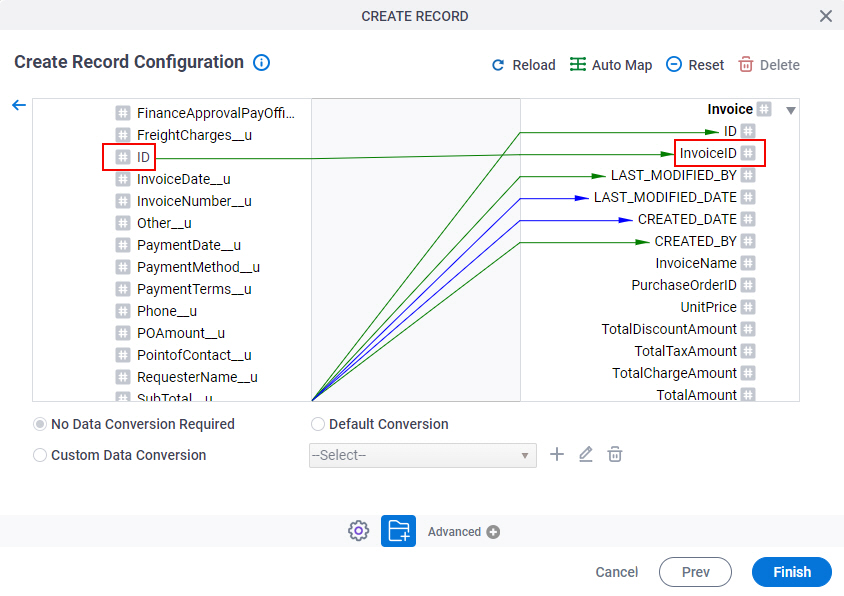
- When more than one variable has the same name in the source, the target, or both data sources, the Auto Map feature may not map the variables as you expect. In this case, change the mapping as necessary after you click Auto Map.
- This example shows how to map variables in the Create Record activity in the Data Entities tab.
A similar procedure can be used in the Schema Mapper anywhere it is accessed in AgilePoint NX.
Procedure
- On the Schema Mapper screen, click Auto Map.
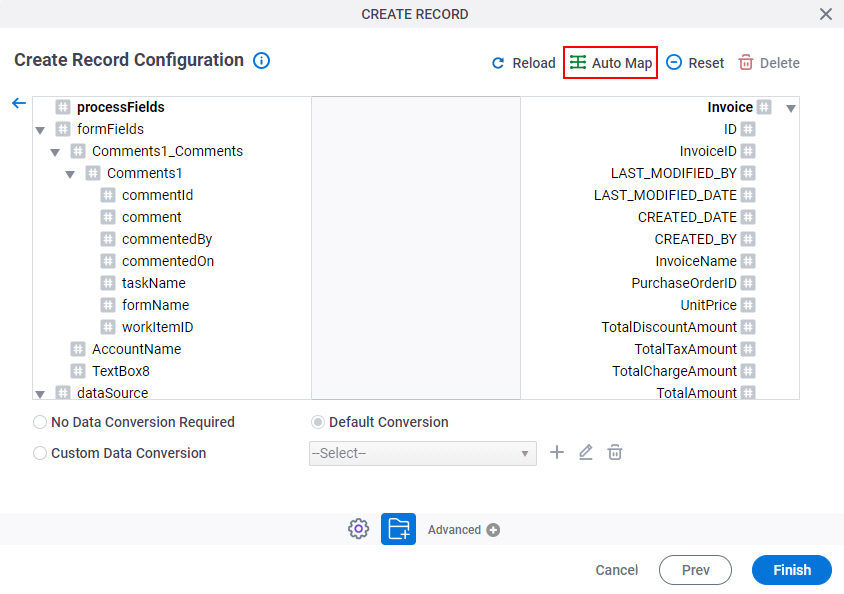
The Schema Mapper maps the variables that have the same name.
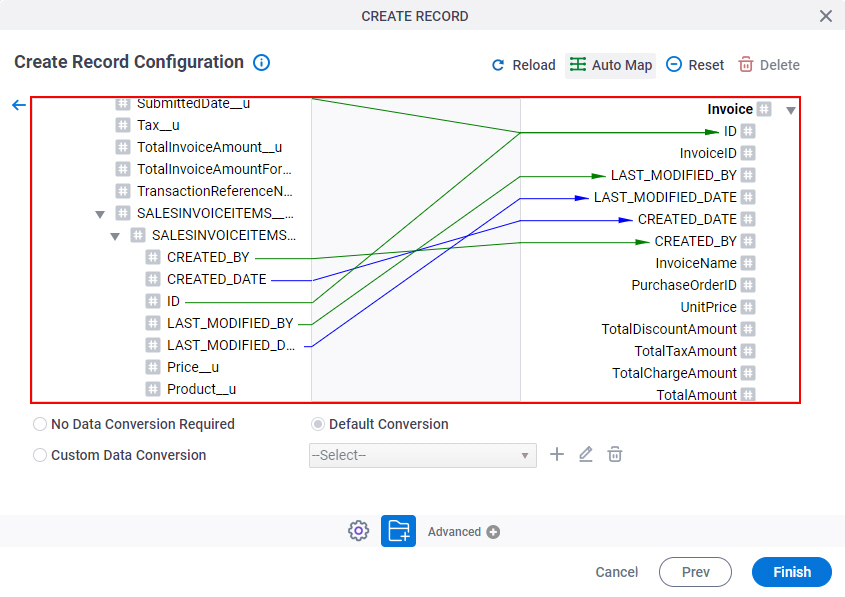
- (Optional) Change the connections created by the Auto Map feature that are not correct or do not match your requirements.
Example 4: Default Data Conversion
This example shows how to use the Default Conversion method to map the variables in the Schema Mapper.
Good to Know
- If you map two variables that have different data types, by default, the Schema Mapper uses the Default Conversion method to change the data types. You can change the Default Conversion method to the Custom Data Conversion method to change the data types.
For more information, refer to Custom Data Conversion.
- This example shows how to map a variable in the Auto-Lookup form control with OData service as the data source.
A similar procedure can be used in the Schema Mapper anywhere it is accessed in AgilePoint NX.
Procedure
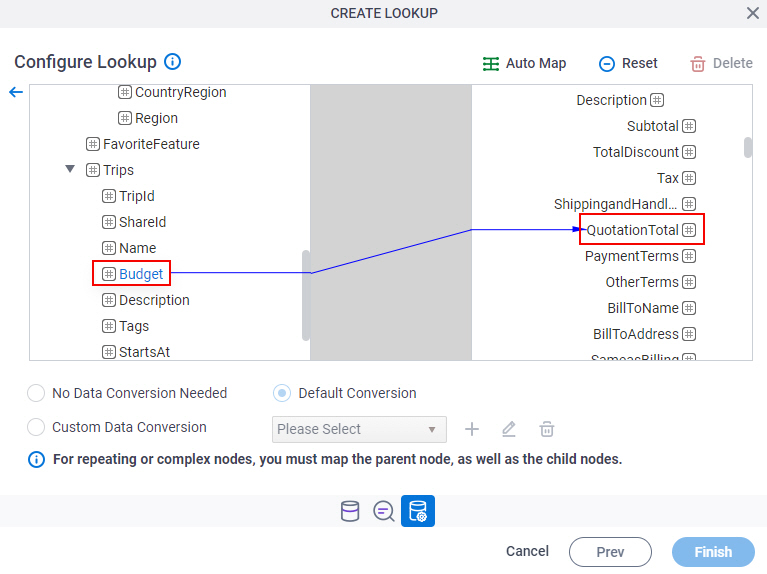
- On the Schema Mapper screen, map the Budget response to the QuotationTotal form control.
- The Budget variable has an integer data type.
- The QuotationTotal variable has a string data type.
- The Default Conversion method changes the integer value to a string value.
Example 5: Custom Data Conversion
This example shows how to use the Custom Data Conversion method to map the variables in the Schema Mapper.
Good to Know
- In this example, the Custom Data Conversion method changes the string value
from the InvoiceDate variable to a date-time value and stores it
in the InvoiceDate form control in this format:
- dd/MM/yyyy HH:mm:ss tt
- Use the Custom Data Conversion method to change the data type to a specific format.
- You can configure the Custom Data Conversion method for one variable at a time. In other words, Custom Data Conversion is specific to one mapped variable.
- For a Custom Data Conversion method, the value for the Custom Mapping Method Code must be a C# code snippet.
- If you map two variables that have different data types, by default, the Schema Mapper uses the Default Conversion method to change the data types.
For more information, refer to Default Data Conversion.
- This example shows how to map a variable in the Retrieve Records activity in the Data Entities tab.
A similar procedure can be used in the Schema Mapper anywhere it is accessed in AgilePoint NX.
Procedure
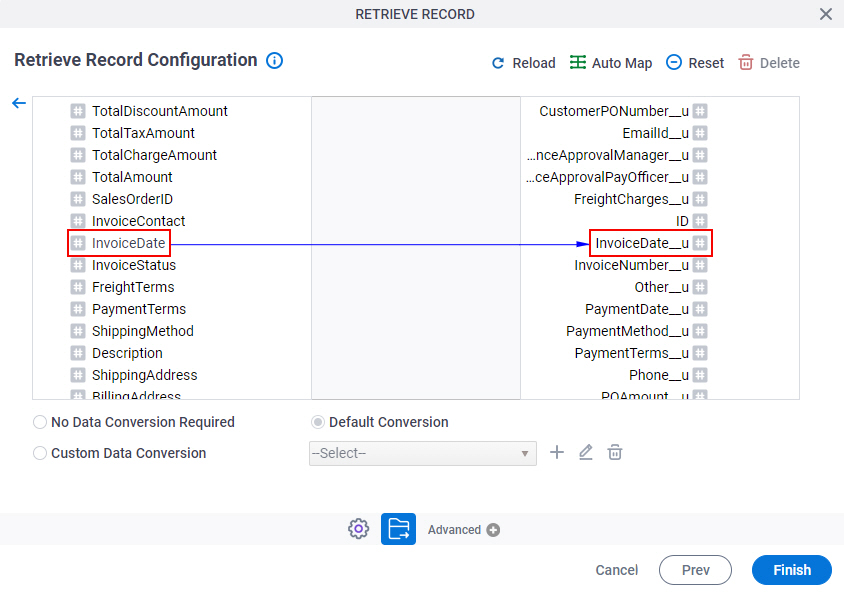
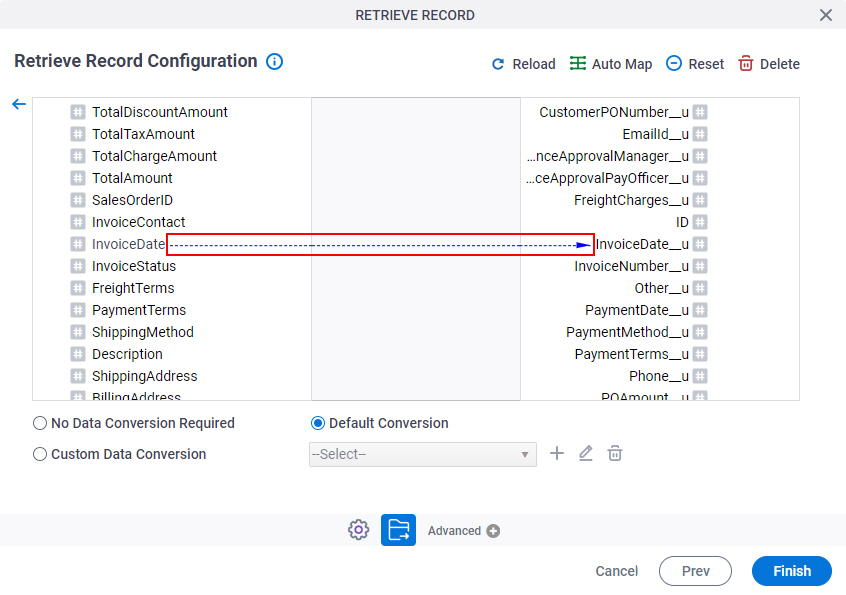
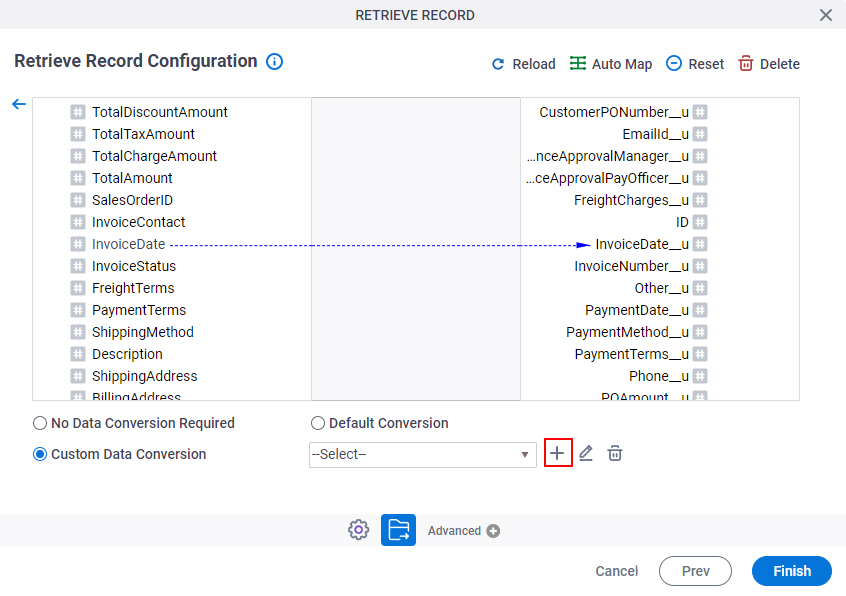
- On the Schema Mapper screen, map the InvoiceDate response to the InvoiceDate_u form control.
- Click the blue line.
- Select Custom Data Conversion.
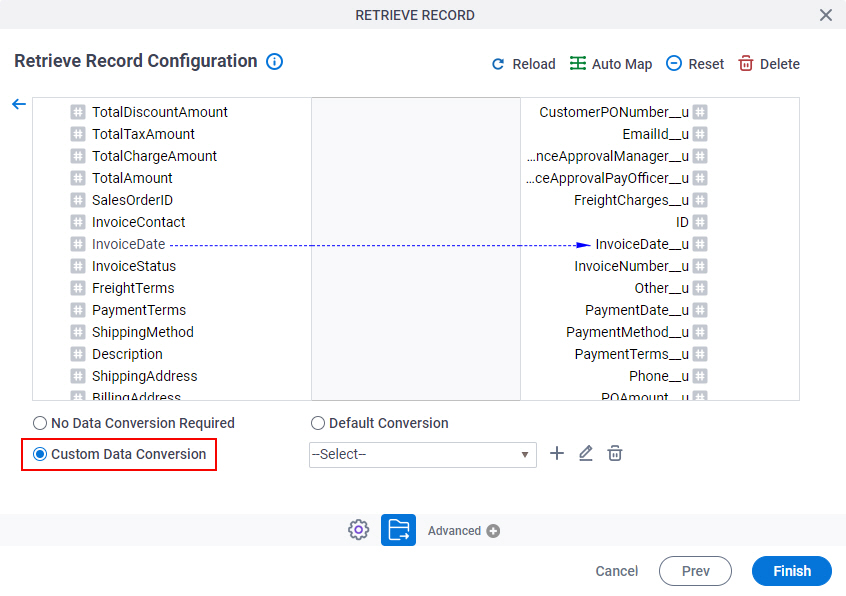
- Click Add.
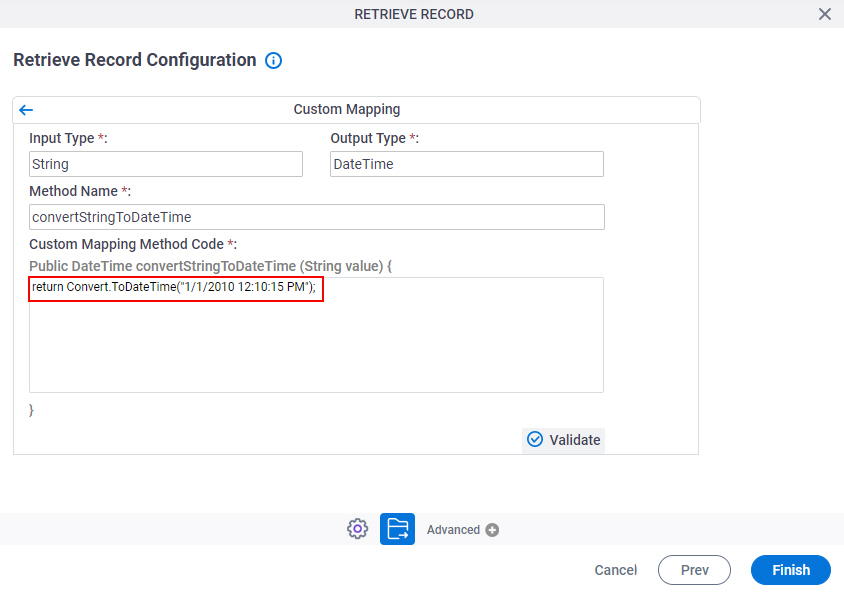
- On the Custom Mapping screen, in the Custom Mapping Method Code field, enter return Convert.ToDateTime("1/1/2010 12:10:15 PM");.
- Click Validate.
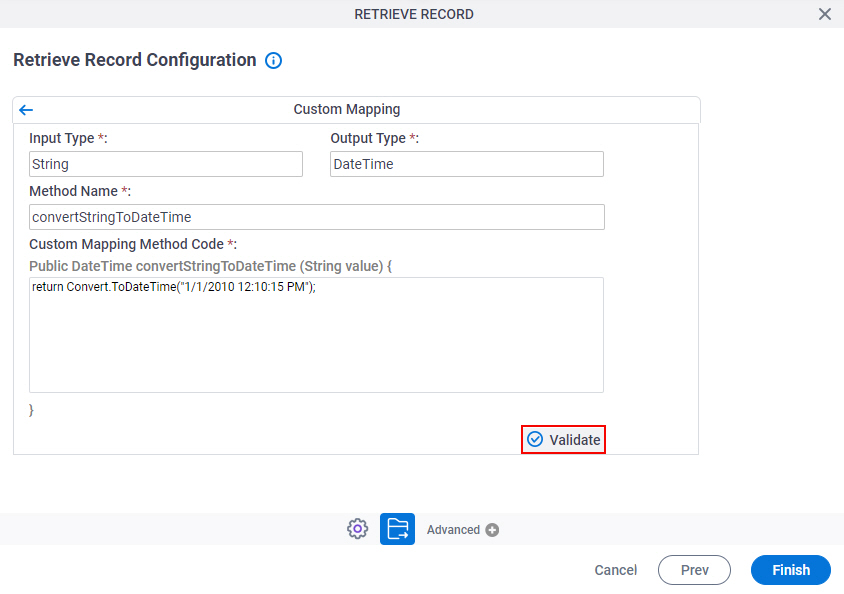
If the code for the custom data conversion is correct, a confirmation message shows.

- Click Finish.