
(Example) Configure an Excel Read Activity
This example shows how to configure the Excel Read activity to read the data from a Microsoft Excel file from a process-based app.
Background and Setup
Result
This example shows how to add and configure the Excel Read activity in Sales Invoice app and read the data from a Microsoft Excel file.
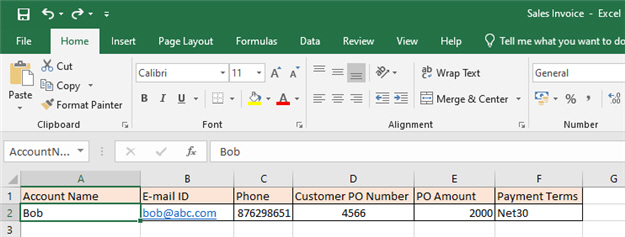
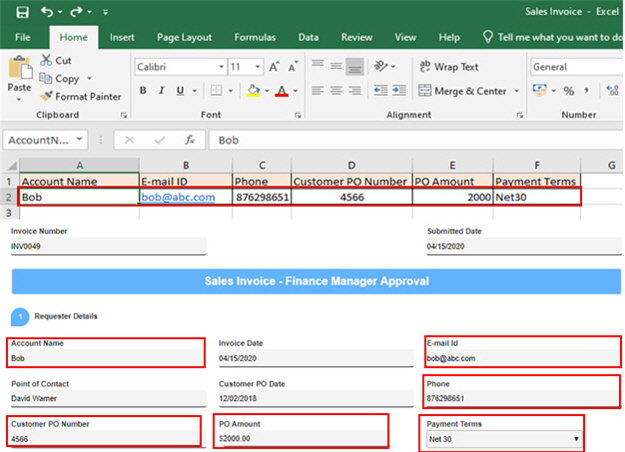
When you create the Microsoft Excel file, it looks like this:
Prerequisites
- This example uses the Sales Invoice app from
the AgilePoint NX App Store.
For more information, refer to How to Get the App
- Create an access token for
Google Drive. In this example, the access token name is Read Excel Data.
For more information, refer to Access Token for Google Workspace.
- You must have Google account.
- Upload your Microsoft Excel file — Sales Invoice.xlsx in this example — to the Google Drive folder you want to use for your app.
Good to Know
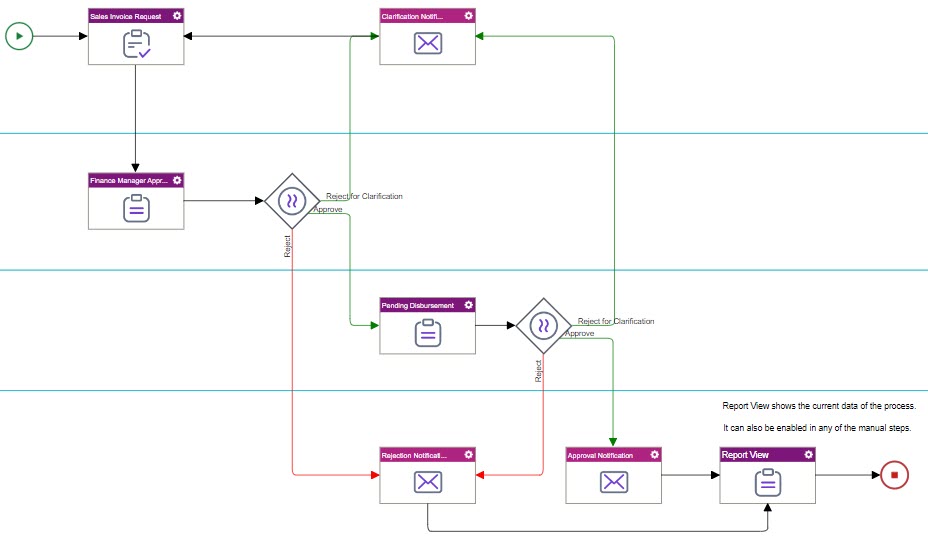
- The Sales Invoice app is a process-based app that creates an invoice for a sale.
For the use case in this example, this app provides a form to enter information for the invoice. The invoice request is then routed to the Excel Read activity, which retrieves customer information from a Microsoft Excel file to use in the app.
- This example uses the Excel Read activity in the Document tab. There are also versions of the Excel Read and Excel Write activities in the SharePoint tab. In general, examples are not provided for most third-party intergrations, including SharePoint. For information that is specific to the SharePoint versions of these activities, refer to Where Can I Find Information and Examples for Third-Party Integrations?
Step 1: Create a Microsoft Excel Template File
First, create and configure a Microsoft Excel file to read the data to show an eForm.
Good to Know
- This app uses the same Microsoft Excel file at design time and runtime.
How to Start
- Open Microsoft Excel.
- Click Blank workbook.
- Save an Excel file with the file name Sales Invoice.xlsx.
Procedure
- In the Sales Invoice.xlsx file, enter the column names in this table:
Column Names Account Name E-mail ID Phone Cutomer PO Number PO Amount Payment Terms 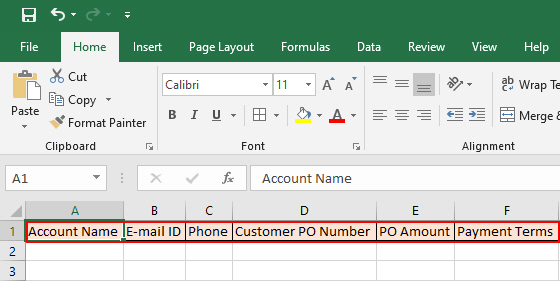
- Enter the values for each column as shown in this table:
Column Names Column Values Account Name Bob E-mail ID bob@abc.com Phone 876298651 Cutomer PO Number 4566 PO Amount 2000 Payment Terms Net30 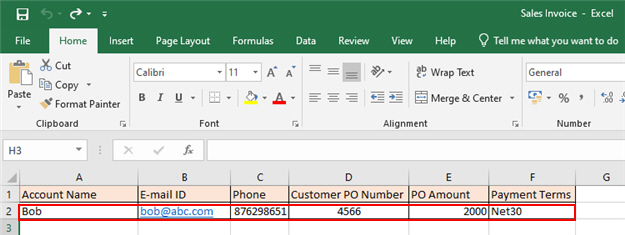
- Name the cells that contain the data you want to retrieve
to show on the form.
Each cell from which you want to read data must have a name. For this example, use the names shown in this table.
Cell Values Name bob@abc.com EmailId 876298651 Phone 4566 CustomerPoNumber 2000 PoAmount Net30 PaymentTerms - Select the Bob cell.
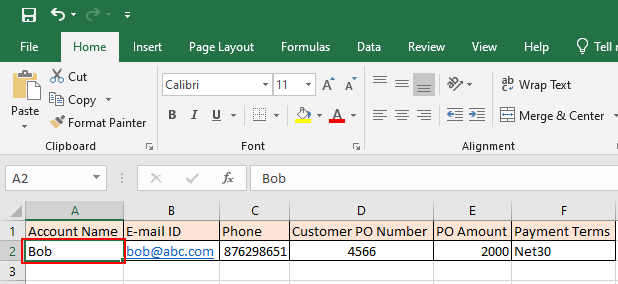
- In the Name Box, enter AccountName in name the cell.

- Repeat these steps for each cell.
- Select the Bob cell.
Step 2: Configure an Excel Read Activity
Next, add and configure an Excel Read activity.
How to Start
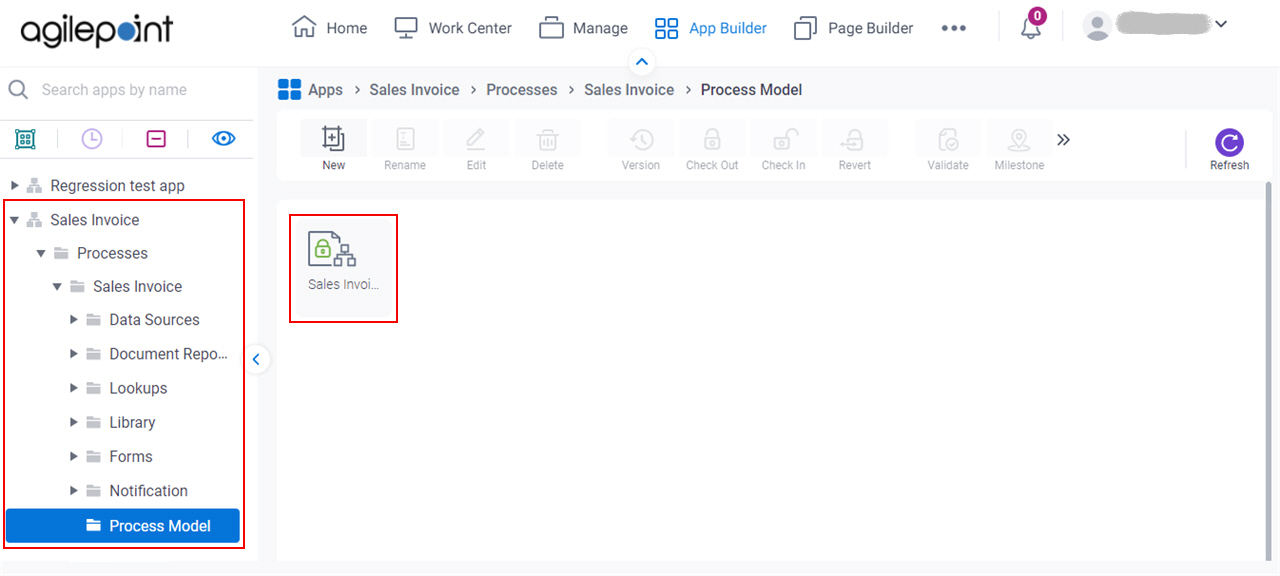
- Click App Builder.

- On the App Explorer screen,
click Sales Invoice > Processes > Sales Invoice > Process Model > Sales Invoice.
Procedure
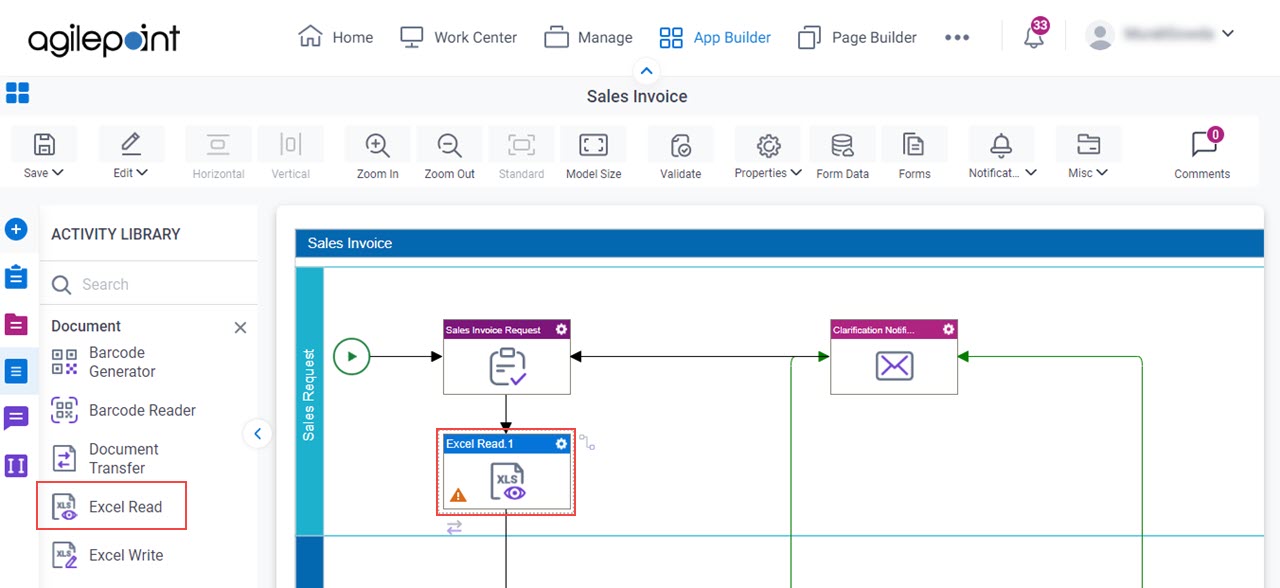
- On the Document
tab,
drag the Excel Read
 activity onto your process.
- On the General Configuration screen, in the Display Name field,
enter Read Sales Invoice Excel.
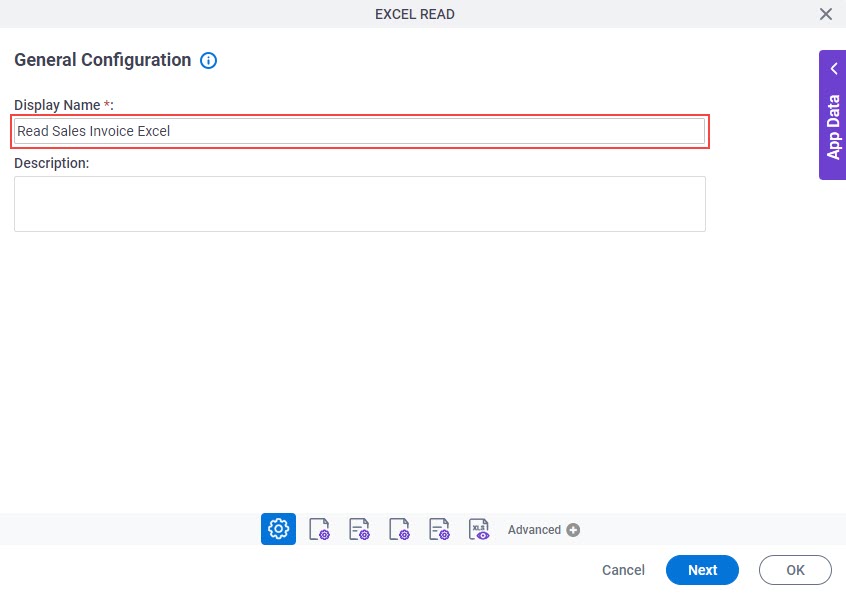
- Click Next.
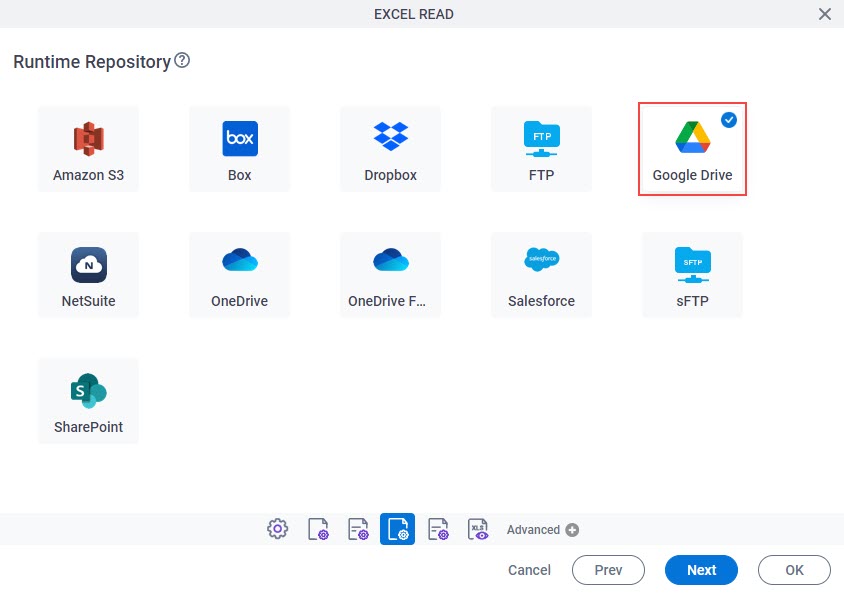
- On the Source Repository screen, select Google Drive.
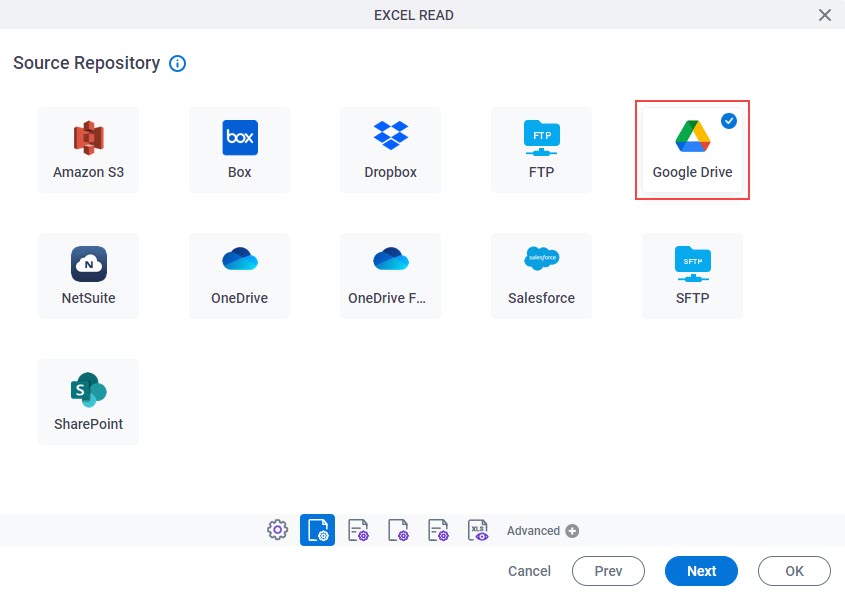
- Click Next.
- On the Design Time Template Configuration screen, in the Google Workspace list,
select the access token Read Excel Data.
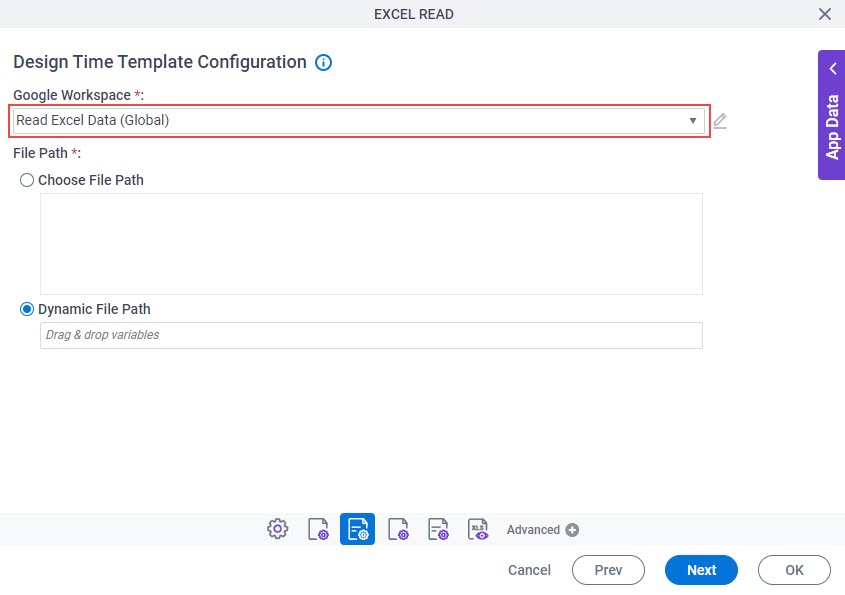
- In the File Path section, select Choose File Path > Sales Invoice.xlsx.
As a prerequisite, Sales Invoice.xlsx must exist in Google Drive.
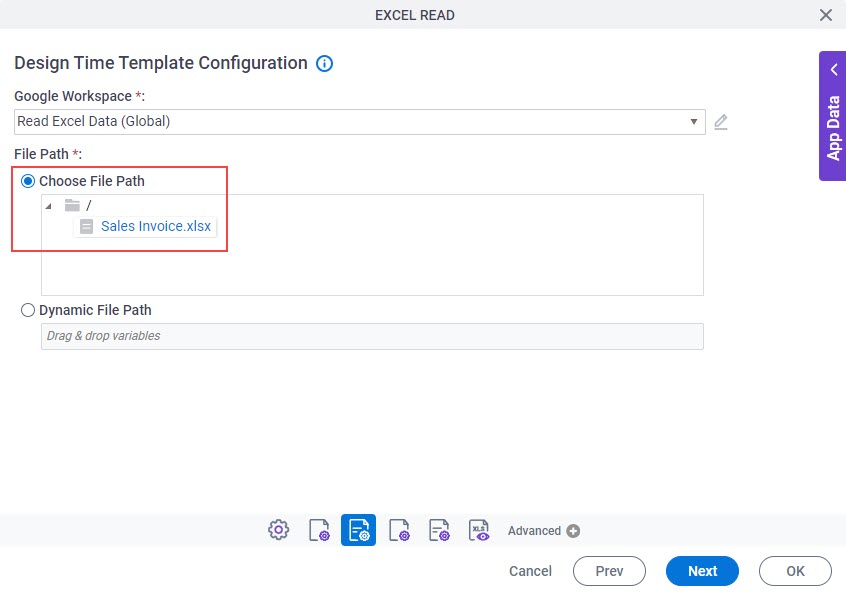
- Click Next.
- On the Runtime Repository screen, select Google Drive.
- On the Runtime Template Configuration screen, in the
Google Workspace list, select Read Excel Data.
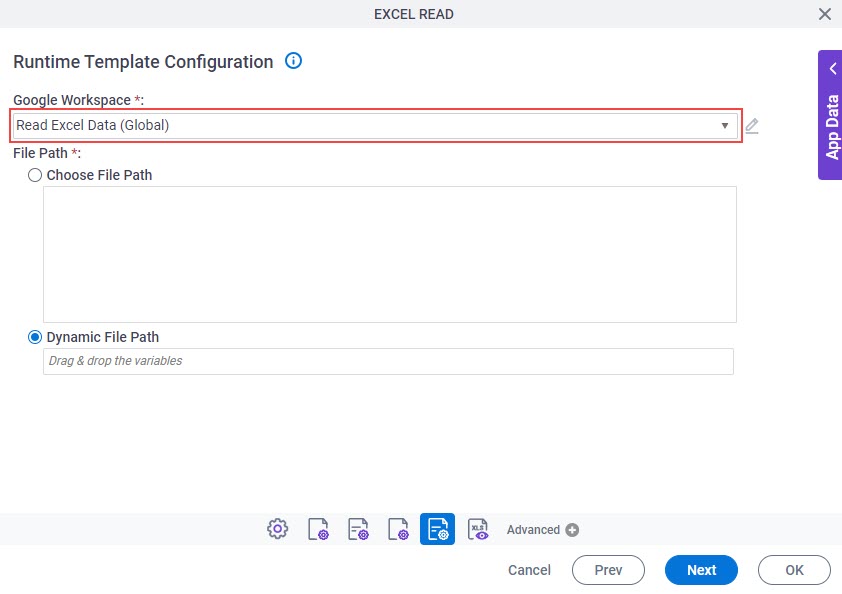
- In the File Path section, select Choose File Path > Sales Invoice.xlsx.
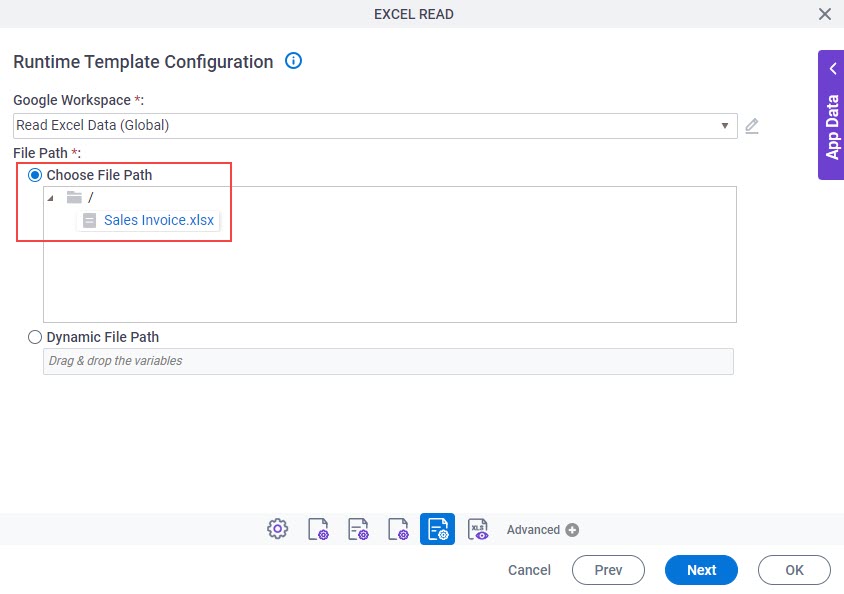
- Click Next.
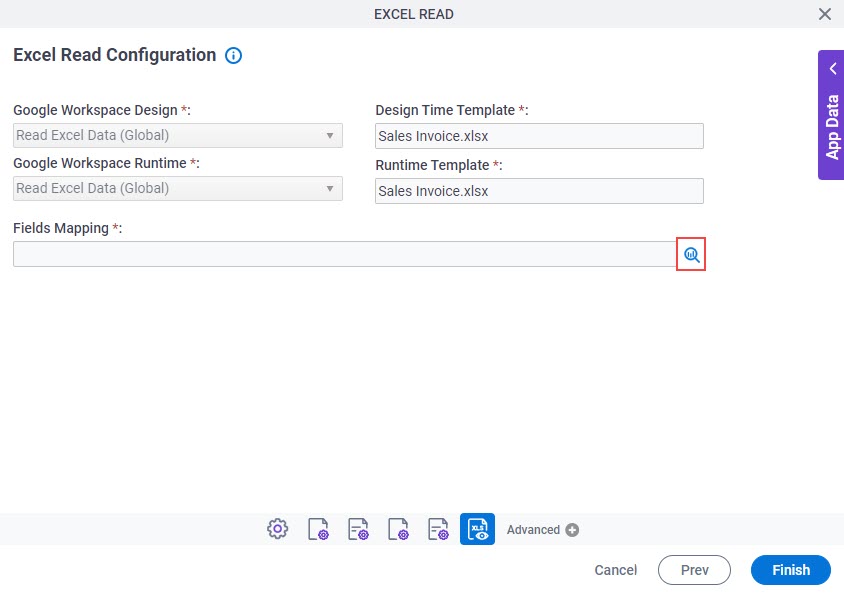
- On the Excel Read Configuration screen, in the Fields Mapping field,
click Schema Mapping
 .
.
- On the Schema Mapper screen, map the cells in the Excel file to the
entity fields as shown in this table.
These entity fields are associated with form controls in the Sales Invoice app.
Excel Template Cell Name Form Fields AccountName AccountName__u CutomerPoNumber CutomerPONumber__u EmailId EmailId__u PaymentTerms PaymentTerms__u Phone Phone__u PoAmount POAmount__u 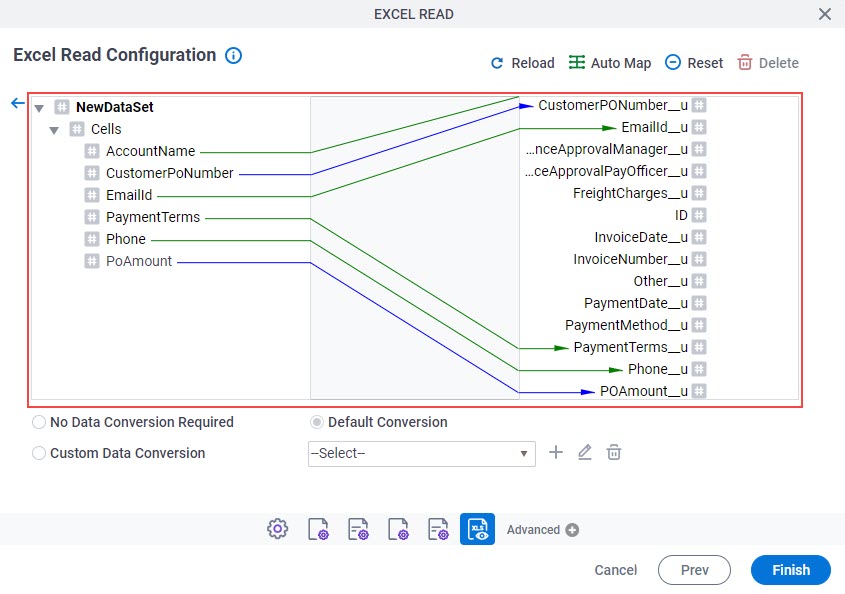
- Click Finish.
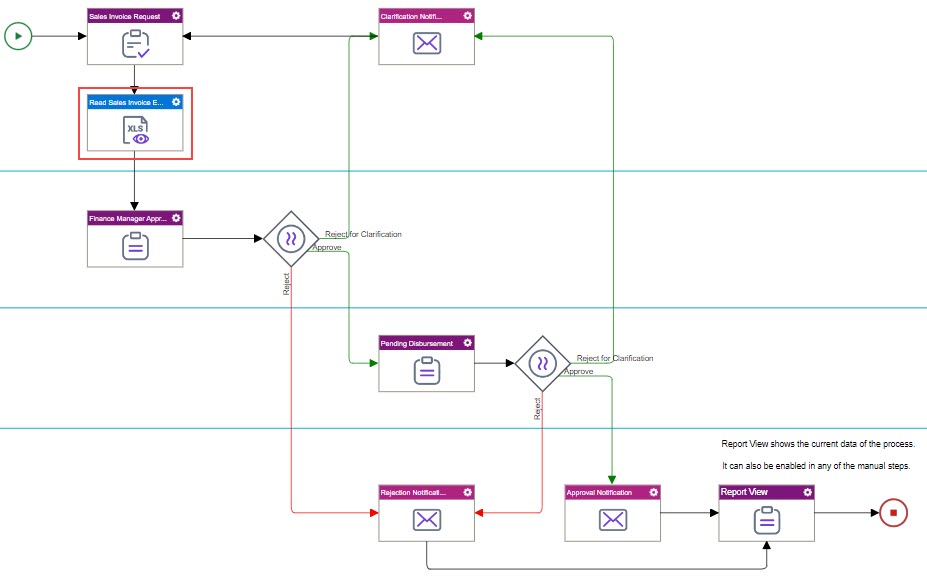
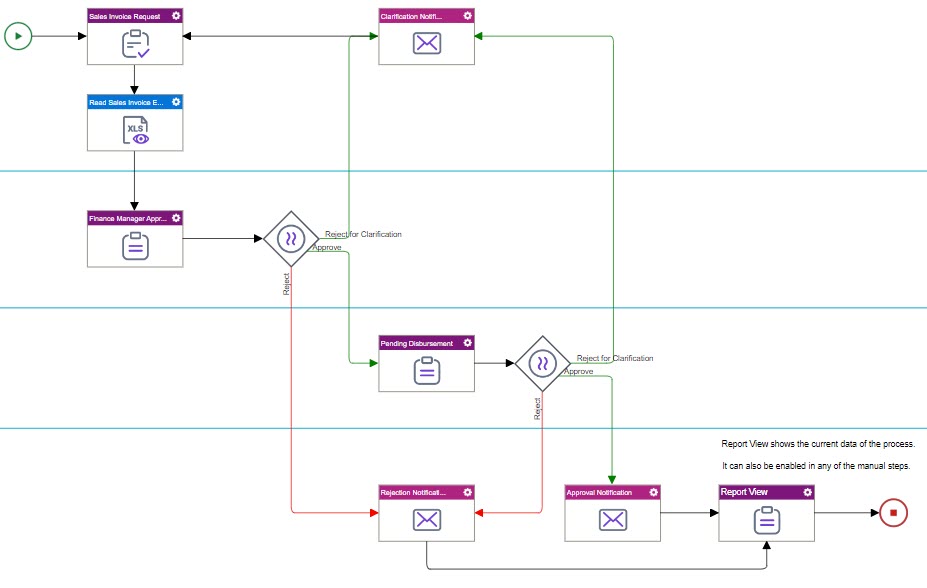
The Process Builder shows with Excel Read activity.
Step 3: (Optional) Save, Check In, and Publish the Process-Based App
Next, save, check in, and publish the process-based app.
For more information, refer to (Example) Save, Check In, and Publish a Process-Based App.
Step 4: (Optional) Run the App
Next, run the app.
Procedure
- To run the app, refer to My Apps screen (Modern).
- Complete your Sales Invoice Request form and submit the form.
- On the My Tasks tab, open the Finance Manager Approval
task and complete the
eForm as necessary.
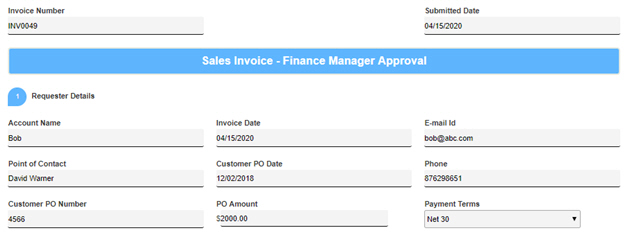
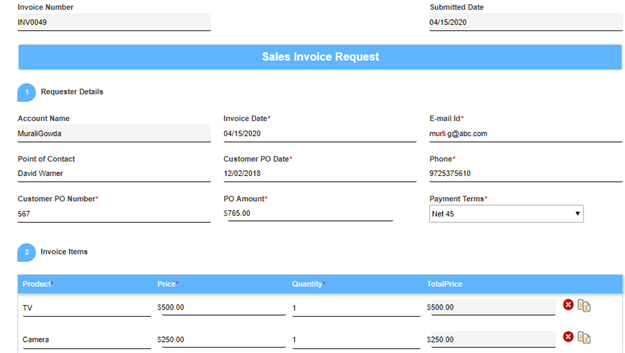
When you open the task, the Requester Details section on the Finance Manager Approval form shows the data from these columns specified in the Sales Invoice.xlsx Microsoft Excel file.
- Account Name
- E-mail Id
- Phone
- Customer PO Number
- PO Amount
- Payment Terms
For more information, refer to Open a Task.
How to Get the App
This example is based on the Sales Invoice app from the AgilePoint NX App Store. Use this procedure to get the app.
Prerequisites
- AgilePoint NX OnDemand (public cloud), or AgilePoint NX Private Cloud or AgilePoint NX OnPremises v7.0 or higher.
Good to Know
- This procedure is optional. It is provided so you can test the example with an out-of-the-box app.
- This is part of the Background and Setup procedures, but many users preferred this step to appear after the example, not before it.
Procedure
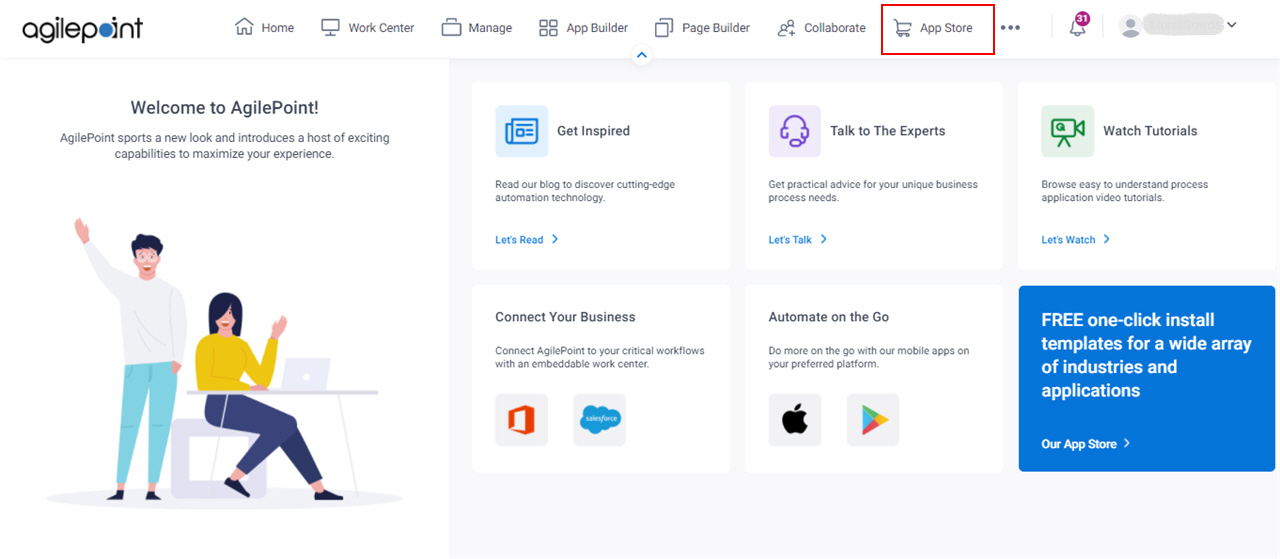
- Click App Store
 .
.
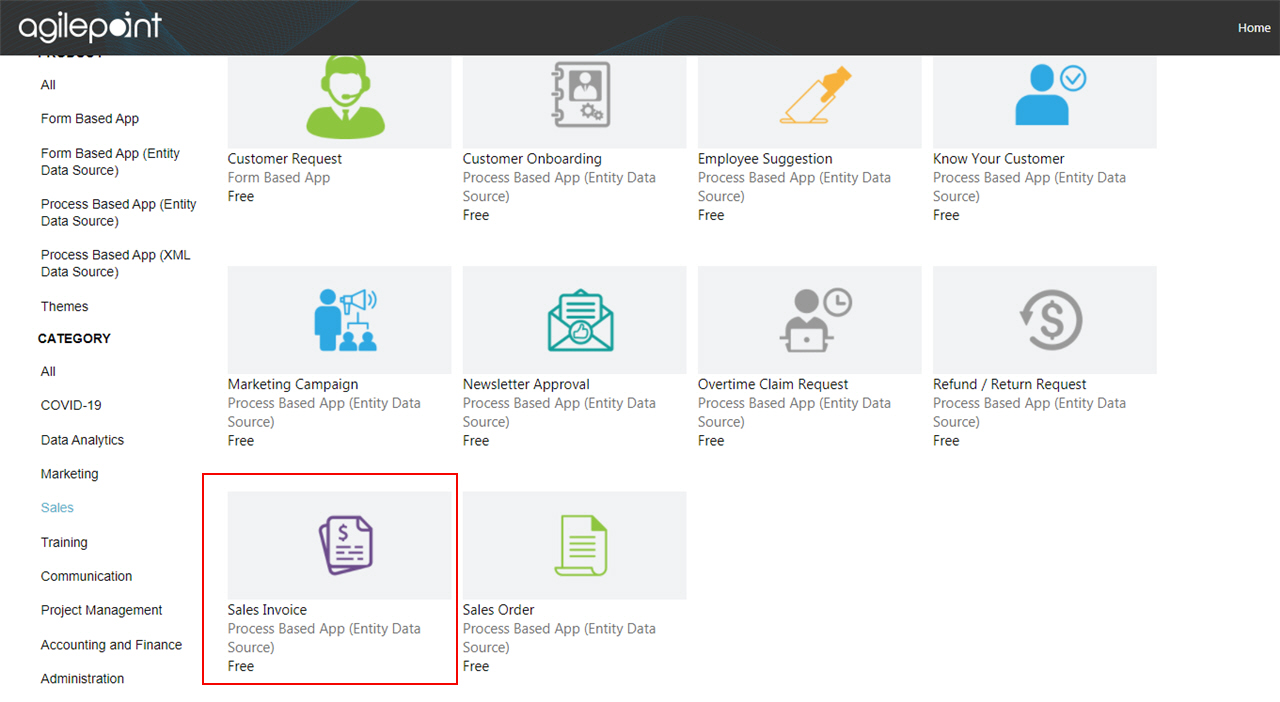
- In the CATEGORY section, click Sales.
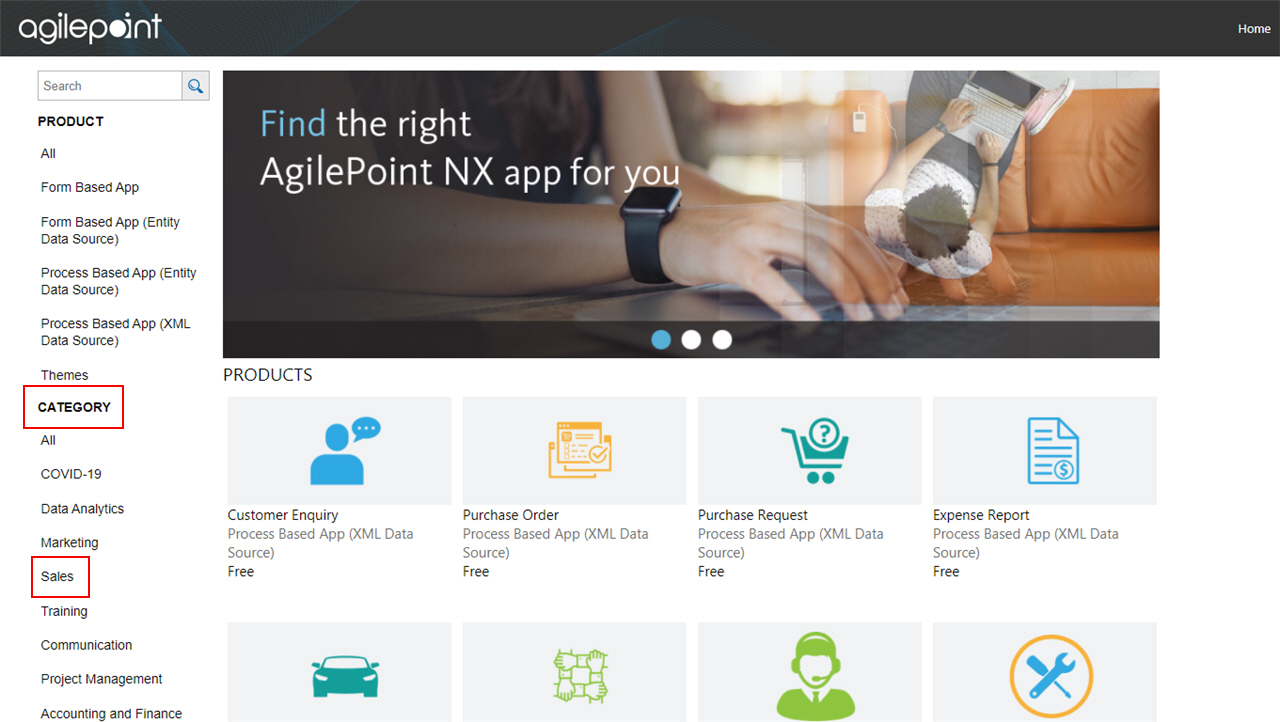
- Click the Sales Invoice app.
- On the Sales Invoice screen, click Add.
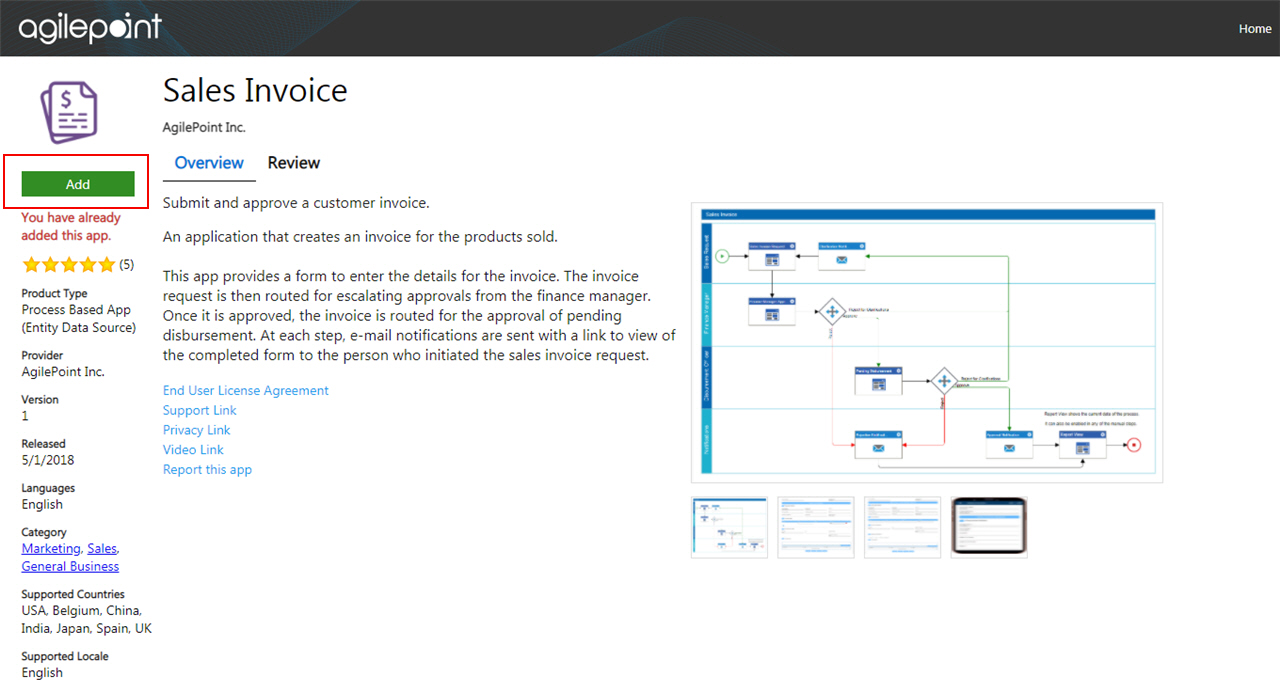
- On the Trust App screen, click Trust it.
- Click Return to site.