
(Example) Import Data to a Subform from Microsoft Excel
This example shows how to import data to a subform from a Microsoft Excel file at runtime.
Background and Setup
Prerequisites
- An external software system with the following requirements:
- Can export data to a Microsoft Excel or CSV file.
- Has data fields or columns that provide data that is similar enough to the fields in the Subform control that the data can be mapped from one system to the other.
This is the most common usage for Excel import, and it is the use case shown in this example. There are other ways to create an Excel file to import.
For more information, refer to Rules for Using Microsoft Excel Files with AgilePoint NX.
- This example uses the Sales Invoice app from the AgilePoint NX App Store.
For more information, refer to How to Get the App
Good to Know
- The Subform form control must be a repeating subform.
- The Sales Invoice app creates an invoice for a product sale.
For the use case in this example, this app provides a form to enter information for the invoice. A runtime app user can use a Microsoft Excel file to import the information to the Invoice Items field, which uses a Subform control.
- In the version of the Sales Invoice app released on May 1, 2018, the eForms use the Subform (Legacy) form control for the Invoice Items field. In this example, the Subform (Legacy) form control is migrated to the Subform (v8) form control.
To migrate the Subform (Legacy) form control to the Subform (v8) form control, refer to the Migrate Subform field in the Subform (Legacy) form control.
Step 1: Enable the Import Excel or CSV Option in a Subform
First, configure the Subform form control to show the Import Excel or CSV option on the Sales Invoice Request form.
Good to Know
- The app designer completes this step.
How to Start
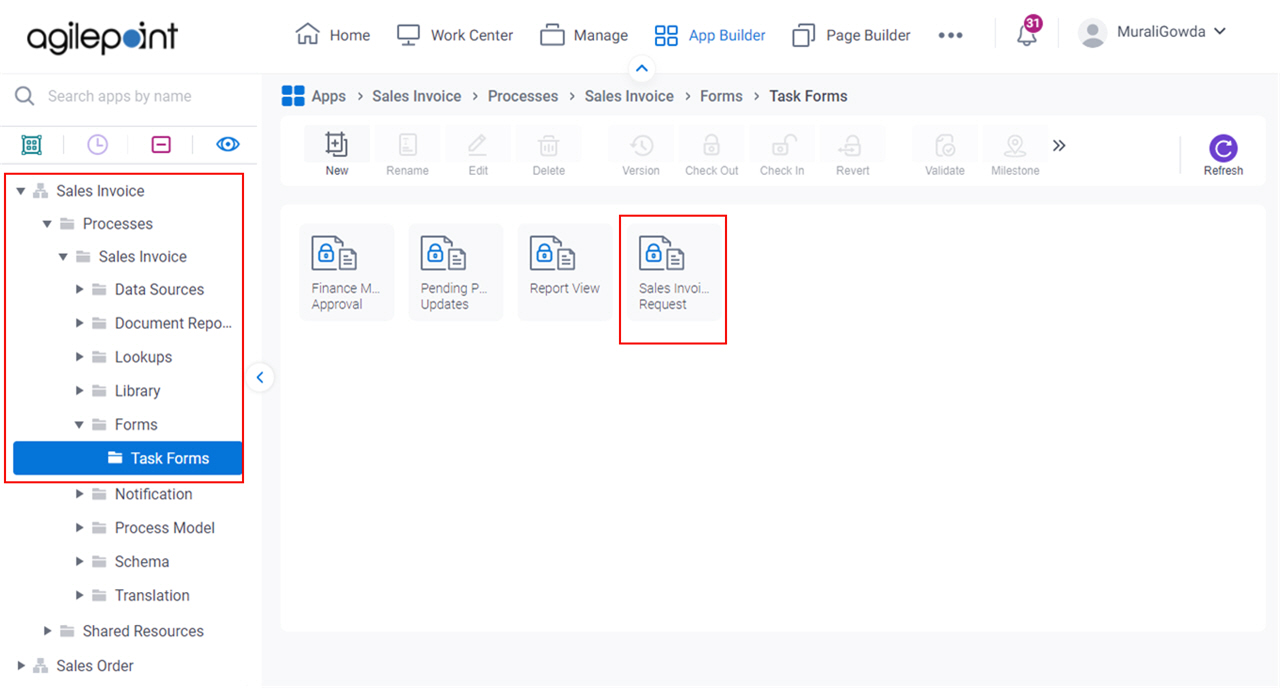
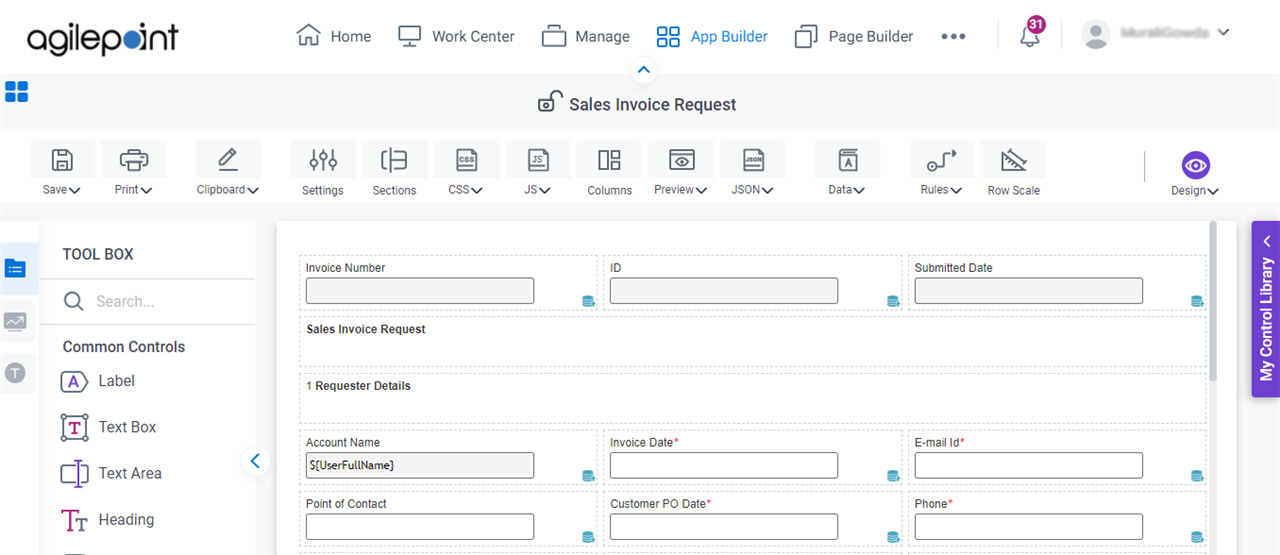
- Click App Builder.

- On the Application Explorer screen,
click Sales Invoice > Processes > Sales Invoice > Forms > Task Forms > Sales Invoice Request.
Procedure
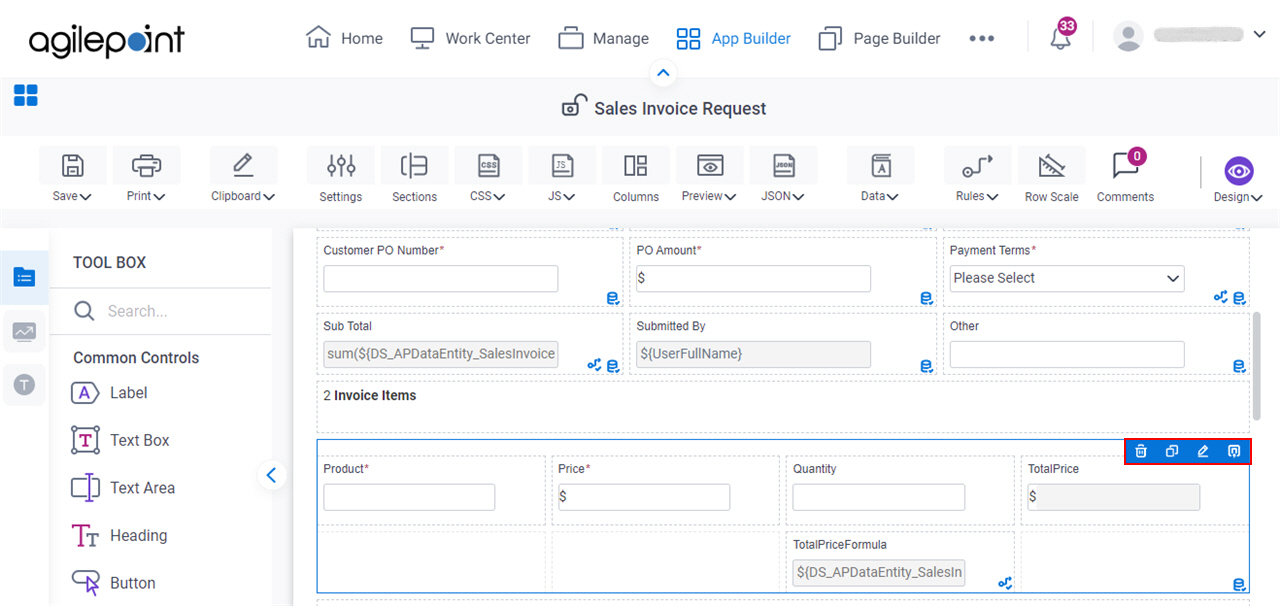
- On the Sales Invoice Request form, put your cursor over the Subform form control, and the form control toolbar shows.
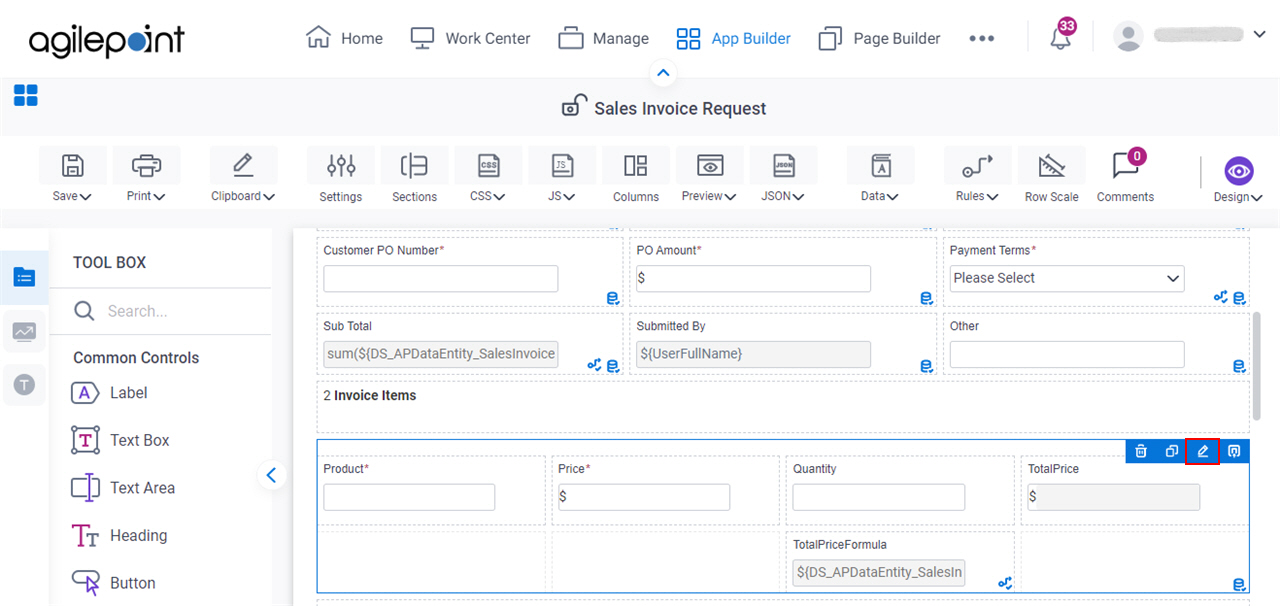
- Click Edit Properties
 .
.
- On the Field Settings - Subform screen, click the Advanced tab.
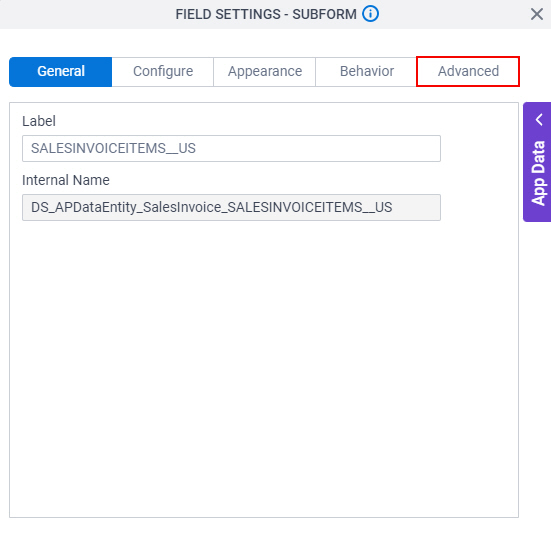
- On the Advanced tab, select the Allow Import From Excel or CSV field.
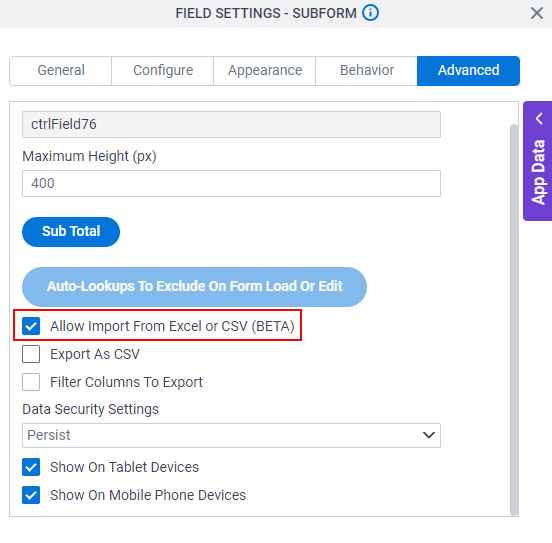
- To save the changes, click Close Screen
 .
.
The Sales Invoice Request form shows.
Step 2: Save, Check In, and Publish the Process-Based App
Next, save, check in, and publish the process-based app.
For more information, refer to (Example) Save, Check In, and Publish a Process-Based App
Good to Know
- The app designer completes this step.
Step 3: Export the Microsoft Excel File From an External System
Next, download the Microsoft Excel file from an external system to use to import to the subform.
Good to Know
- Exporting data in an Excel file from an external system may be completed on demand by the runtime app user, or the external system may create the Excel file programmatically, such as on a configured schedule. This is determined by your business requirements.
- To import the data to a Subform control, the Excel file must be saved on the local machine for the runtime app user. If the exported Excel file is saved to any other storage system, such as Microsoft SharePoint, it must be downloaded to your local machine before you can complete the import.
- In this example, the Excel file name is Sales Invoice Items.xlsx.
The example Sales Invoice Items.xlsx file is in this format.
Product Price Quantity Laptop Computer 1200 2 Desktop Computer 750 5 Printer 500 20 Portable Hard Drive 100 50 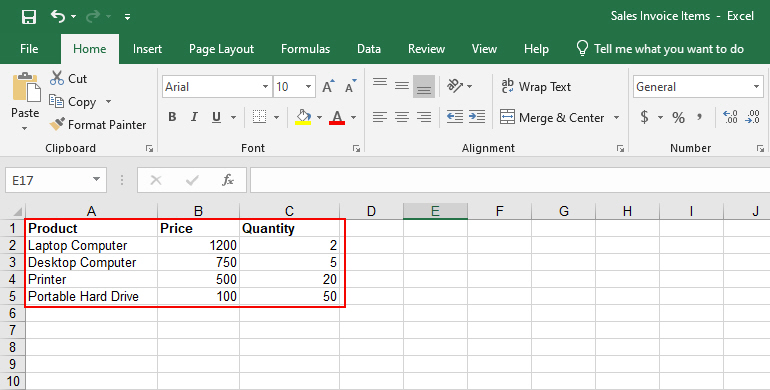
Step 4: Import Data to a Subform from Microsoft Excel at Runtime
Next, import the data to a subform form control from the Microsoft Excel file at runtime.
Prerequisites
- A Microsoft Excel or CSV file with data exported from an external system.
For more information, refer to Step 4: Export the Microsoft Excel File From an External System.
Good to Know
- The runtime app user completes this step.
- The Verify Column Mapping screen shows by default when you import data to the subform using an Excel or CSV file that is in any format other than the exact format provided in the downloadable Excel template. Usually this mapping step is required, but it is possible to configure the imported Excel file to skip the mapping step.
For more information, refer to Rules for Using Microsoft Excel Files with AgilePoint NX.
- There are mapping rules related to field data types.
For more information, refer to Rules for Using Microsoft Excel Files with AgilePoint NX.
How to Start
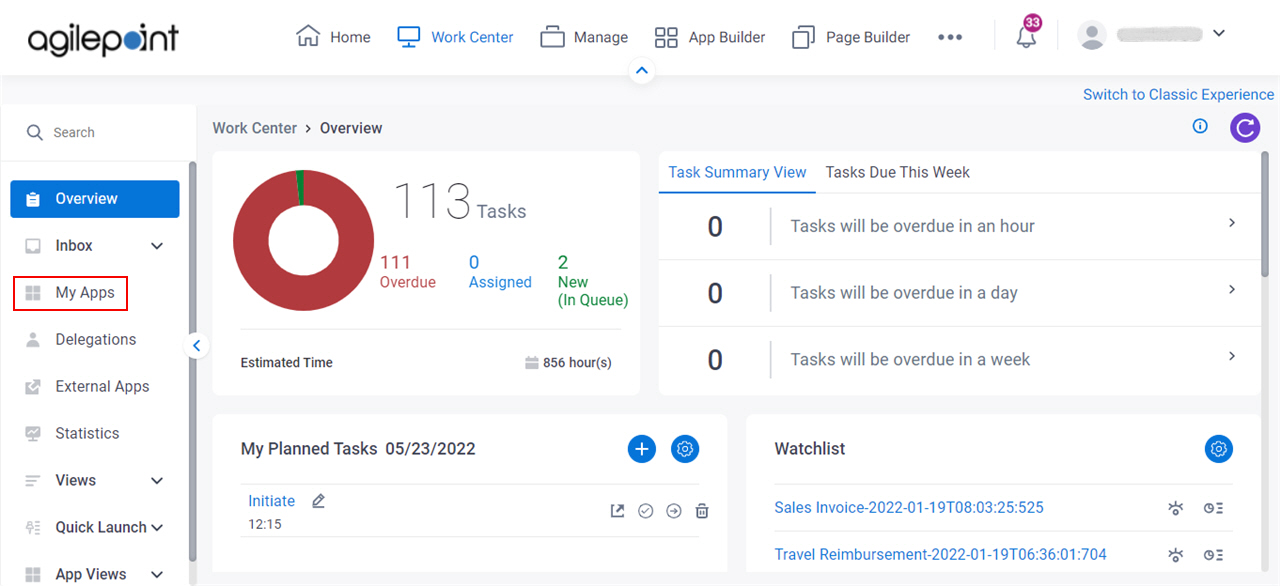
- Click Work Center.
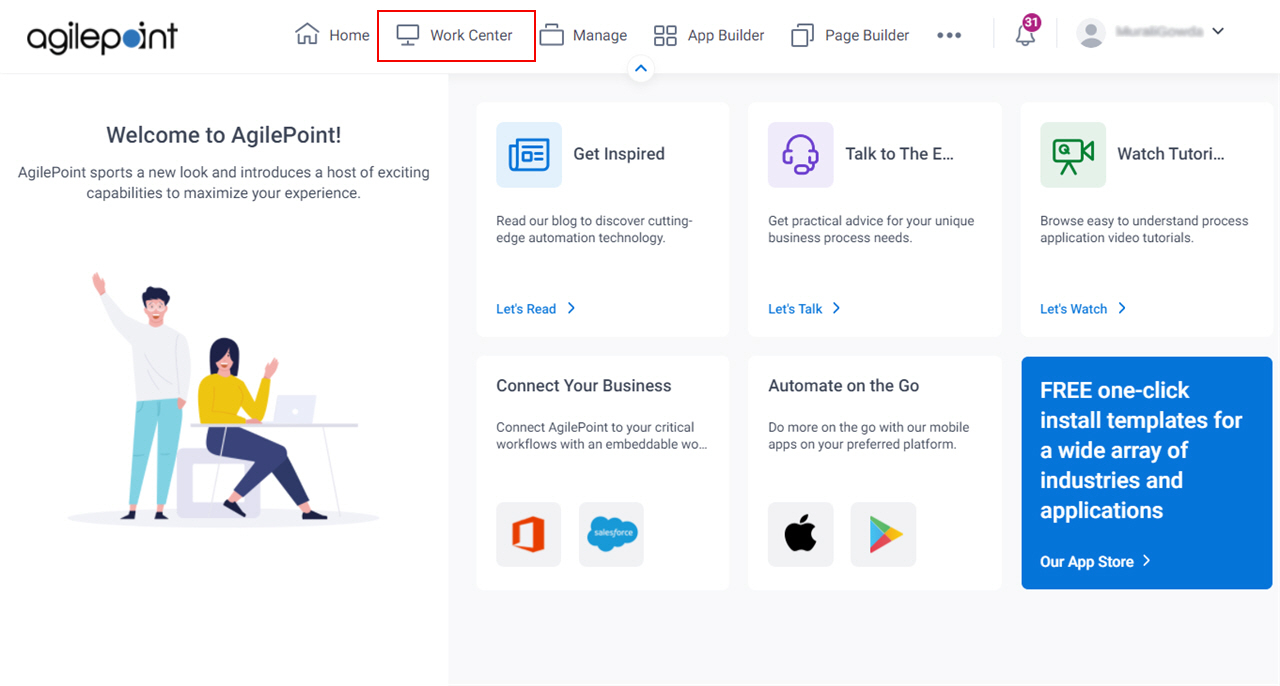
- In the left pane, click My Apps.
Procedure
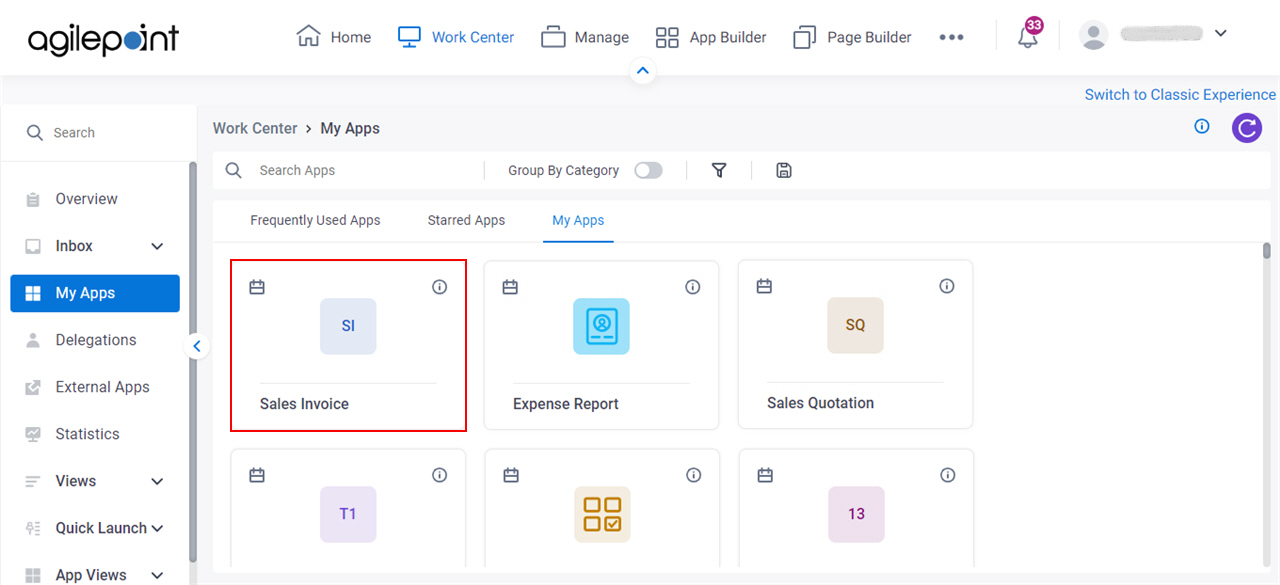
- On the My Apps screen, click Sales Invoice.
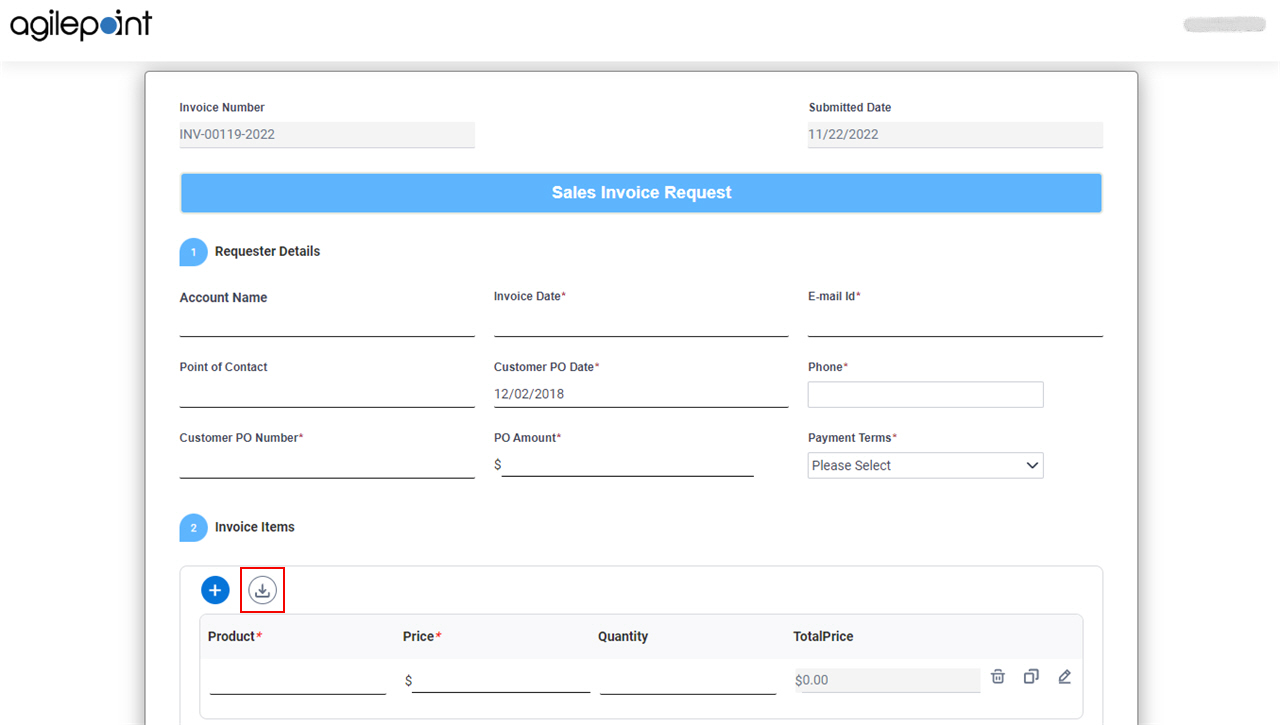
- On the Sales Invoice Request form, in the Invoice Items section,
click Import Excel or CSV
 .
.
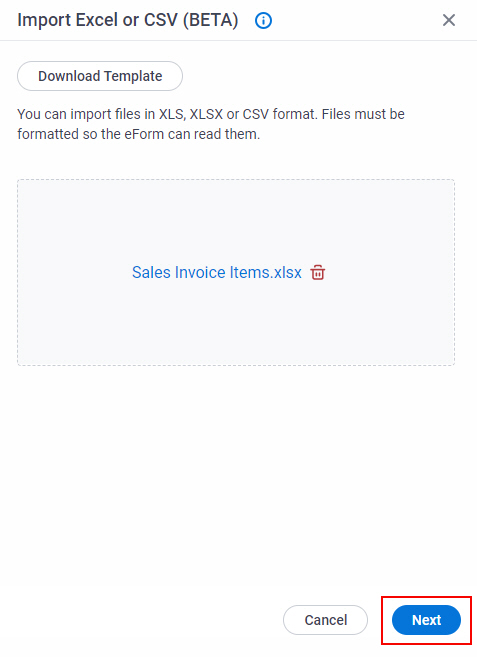
- On the Import Excel or CSV screen, click Select File.
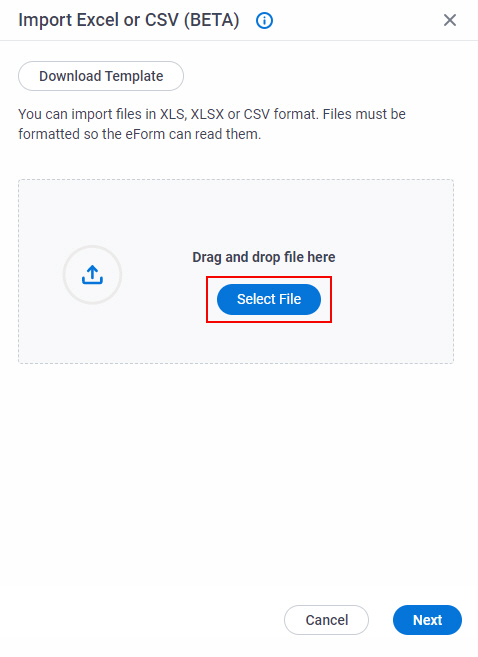
- Select the Sales Invoice Items.xlsx file from the local machine that contains the invoice items.
- Click Next.
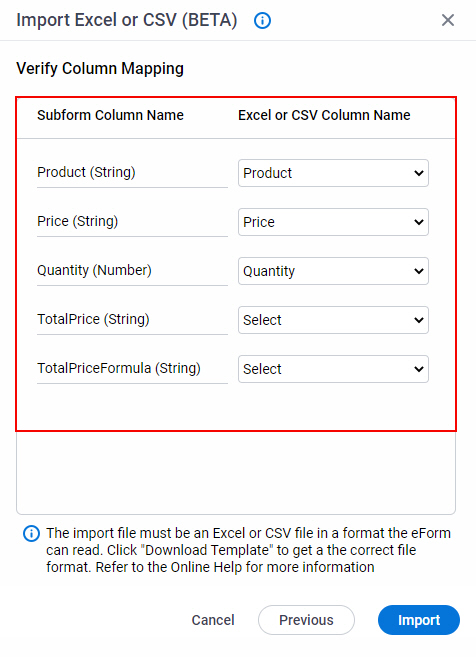
The Verify Column Mapping screen shows.
This screen maps the column names in the Excel file with the subform fields. If required, you can change the default mapping.
In this example, the TotalPrice field populates the value based on the TotalPriceFormula field. The TotalPriceFormula field is a hidden field and calculates the total price based on the values from the Price and Quantity fields. Because the eForm does these calculations, these fields are not mapped.
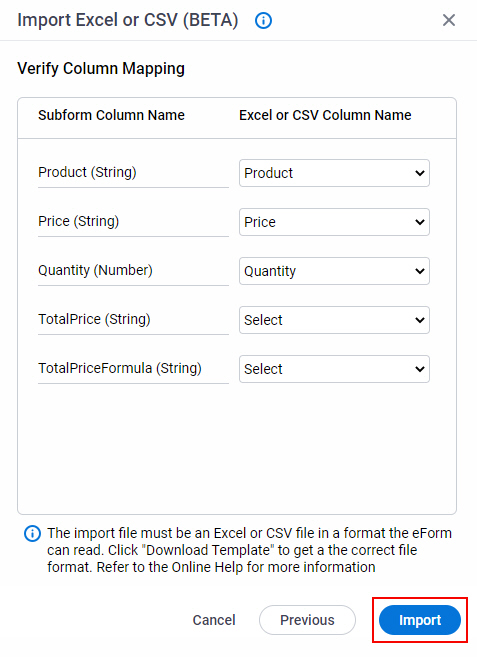
- On the Verify Column Mapping screen, click Import.
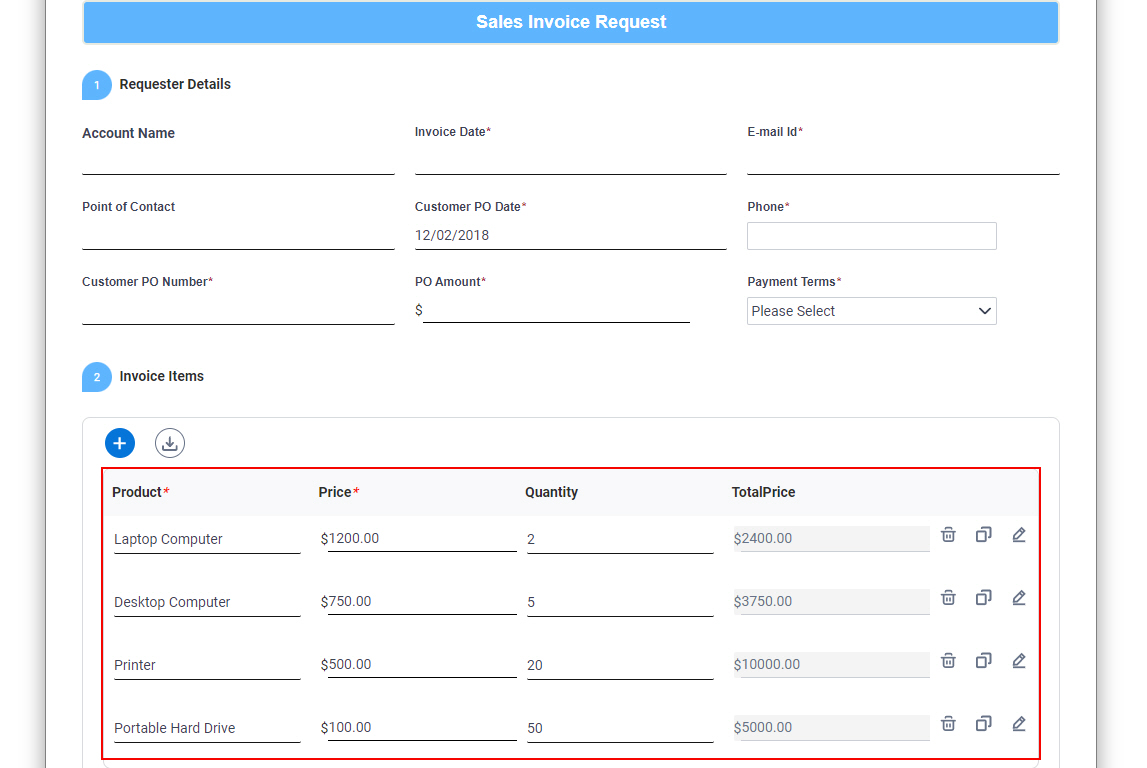
The Sales Invoice Request form shows the invoice items from the imported Microsoft Excel file.
How to Get the App
This example is based on the Sales Invoice app from the AgilePoint NX App Store. Use this procedure to get the app.
Prerequisites
- AgilePoint NX OnDemand (public cloud), or AgilePoint NX Private Cloud or AgilePoint NX OnPremises v7.0 or higher.
Good to Know
- This procedure is optional. It is provided so you can test the example with an out-of-the-box app.
- This is part of the Background and Setup procedures, but many users preferred this step to appear after the example, not before it.
Procedure
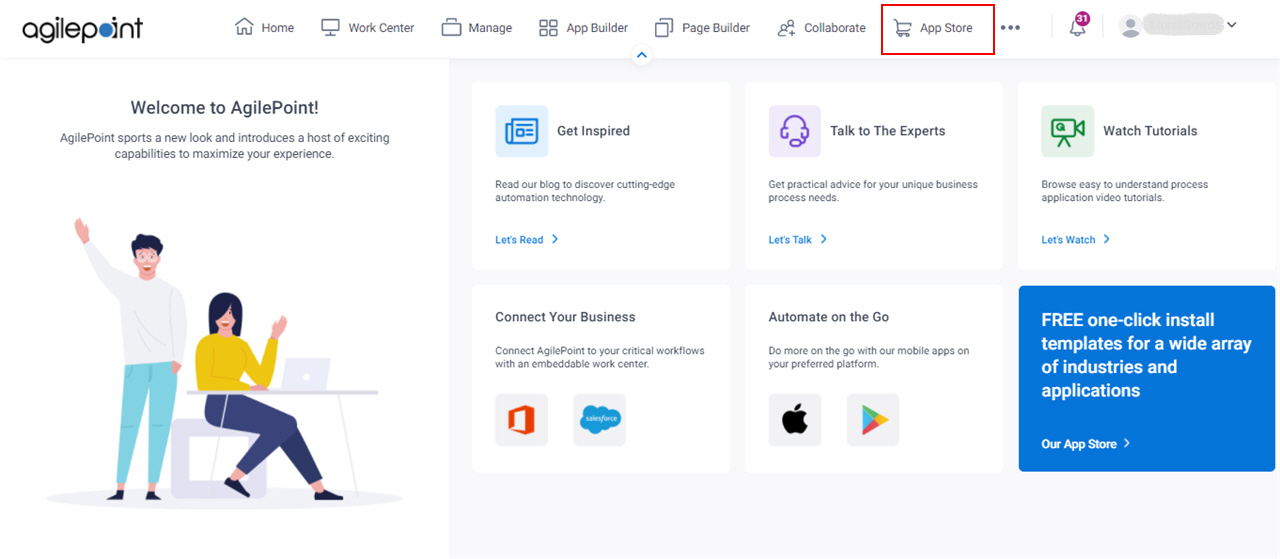
- Click App Store
 .
.
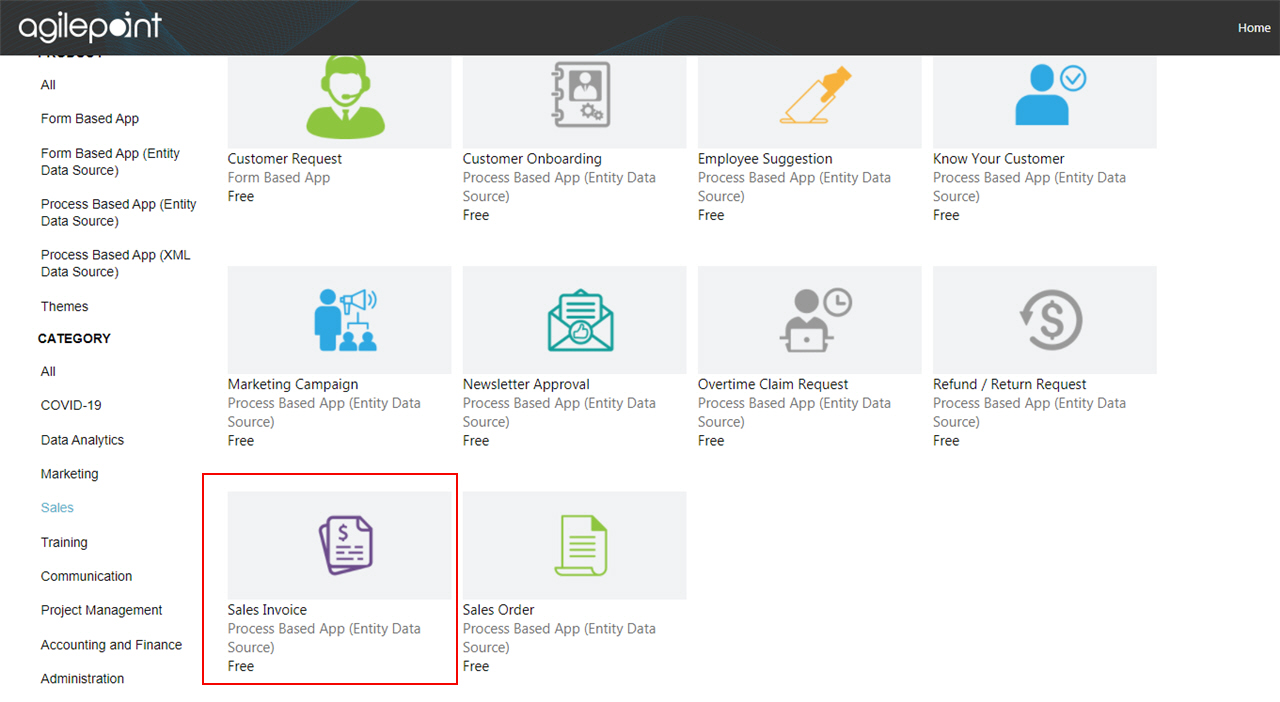
- In the CATEGORY section, click Sales.
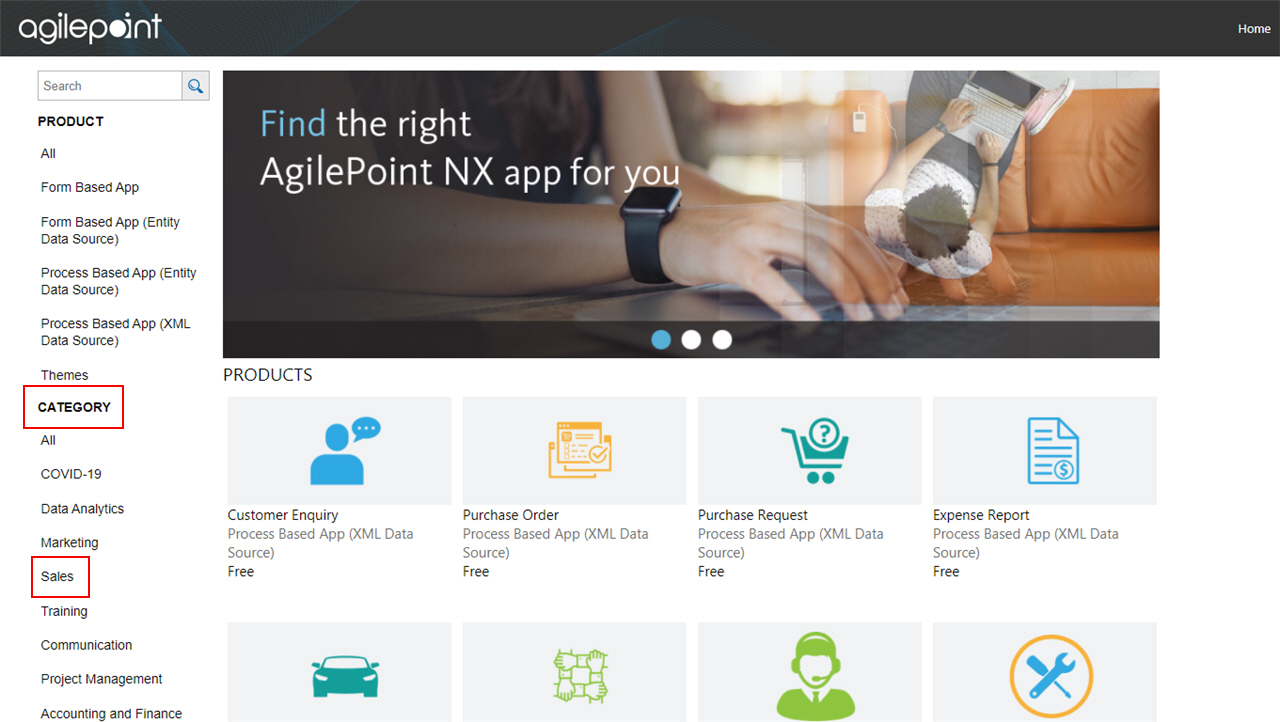
- Click the Sales Invoice app.
- On the Sales Invoice screen, click Add.
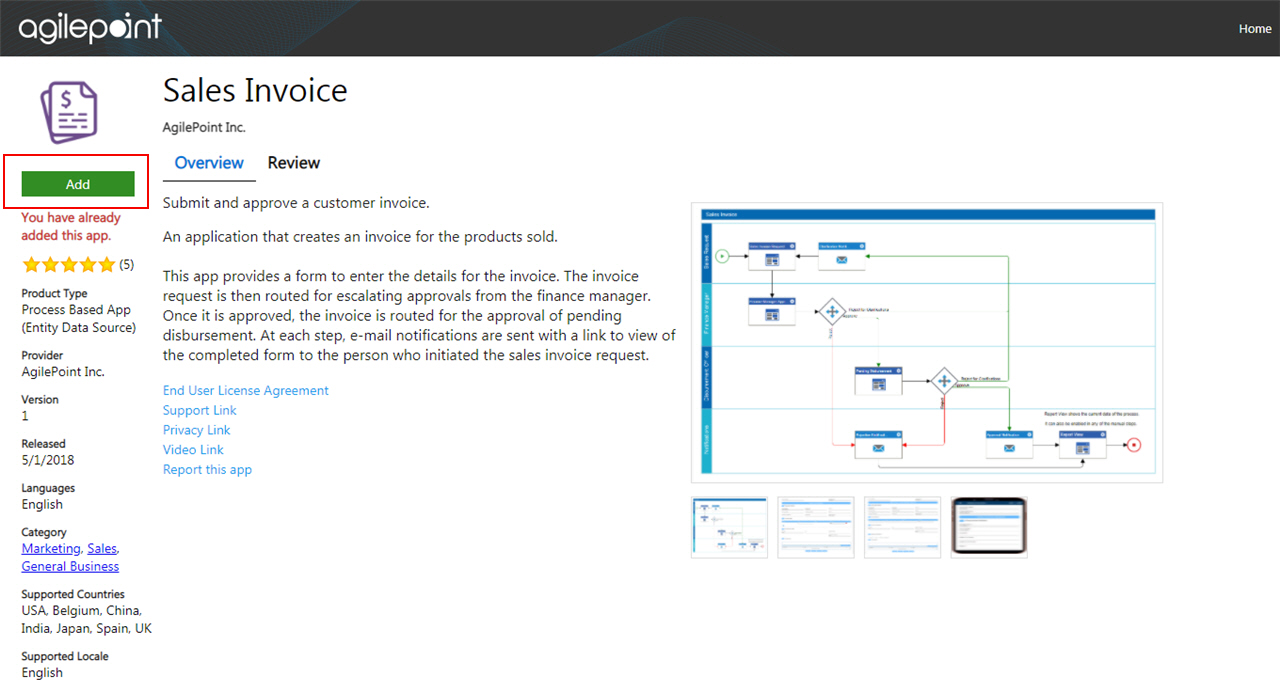
- On the Trust App screen, click Trust it.
- Click Return to site.