
(Example) Show a Subform in an Email Notification
This example shows how to display the data from a subform in an email notification.
Background and Setup
Result
This example shows how to add a SALESINVOICEITEMS subform to Assignment Notification email template in the Sales Invoivce app.
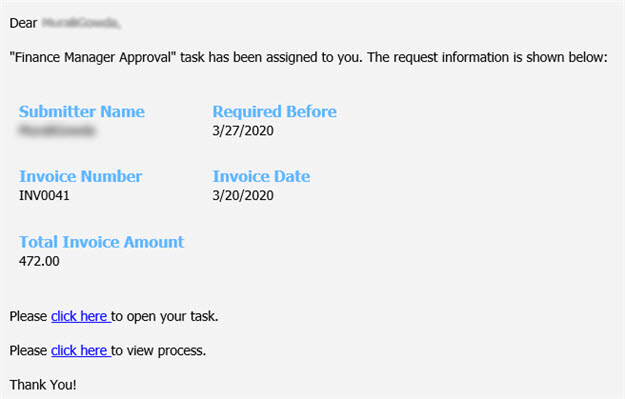
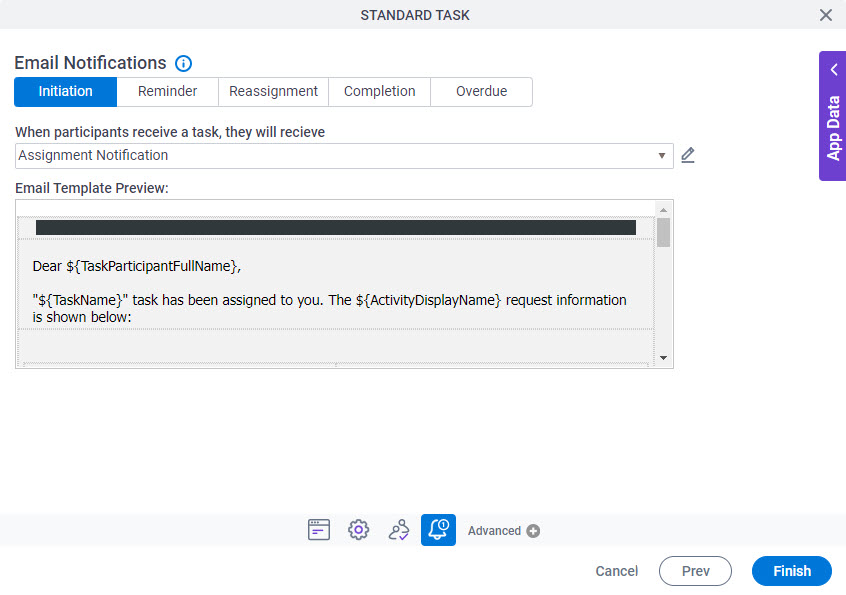
When you add the Sales Invoice app from the App Store to your App Builder, and submit the Sales Invoice Request form, the finance manager receives an email notification for approval that is configured in Finance Manager Approval activity. The email notification looks like this:
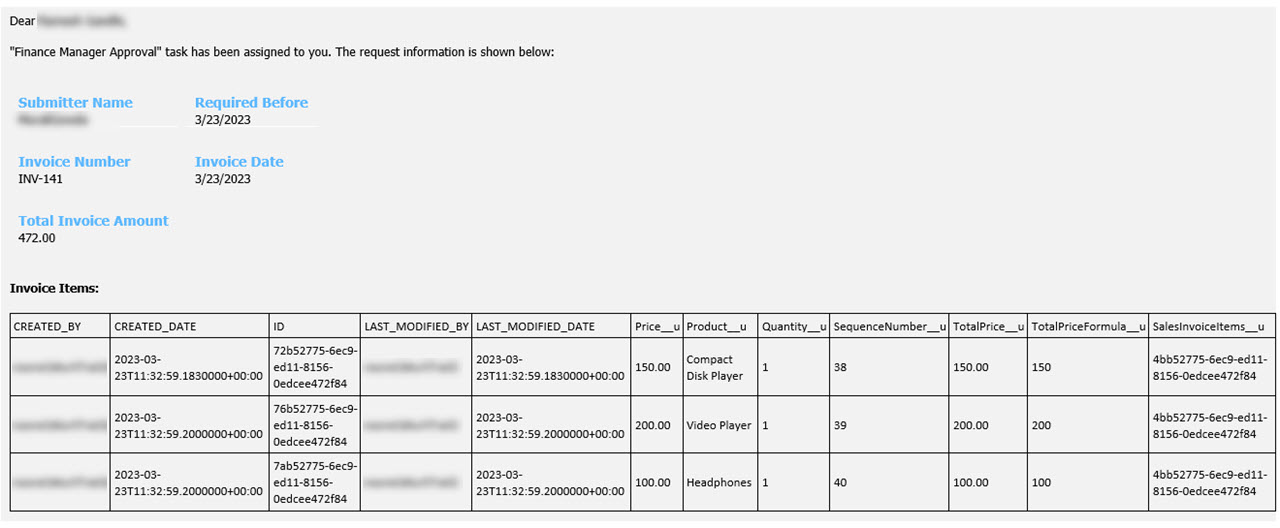
When you complete this example procedure, the finished email notification that shows the data from a subfrom looks like this:
Prerequisites
- This example usesSales Invoice app from the AgilePoint NX App Store.
For more information, refer to How to Get the App.
Good to Know
- The $XMLREPEATING2HTML() email macro shows all fields of the subform, such as hidden fields, internal fields, and the Data Entities default fields, even if these do not show on your eForm. If you want to remove the fields from the email notification that shows the data from a subfrom, use the $XMLREPEATING2HTMLWITHFILTER() email macro.
- The column headings that display in the email notification are the internal names of the fields. It is not possible to show the display names.
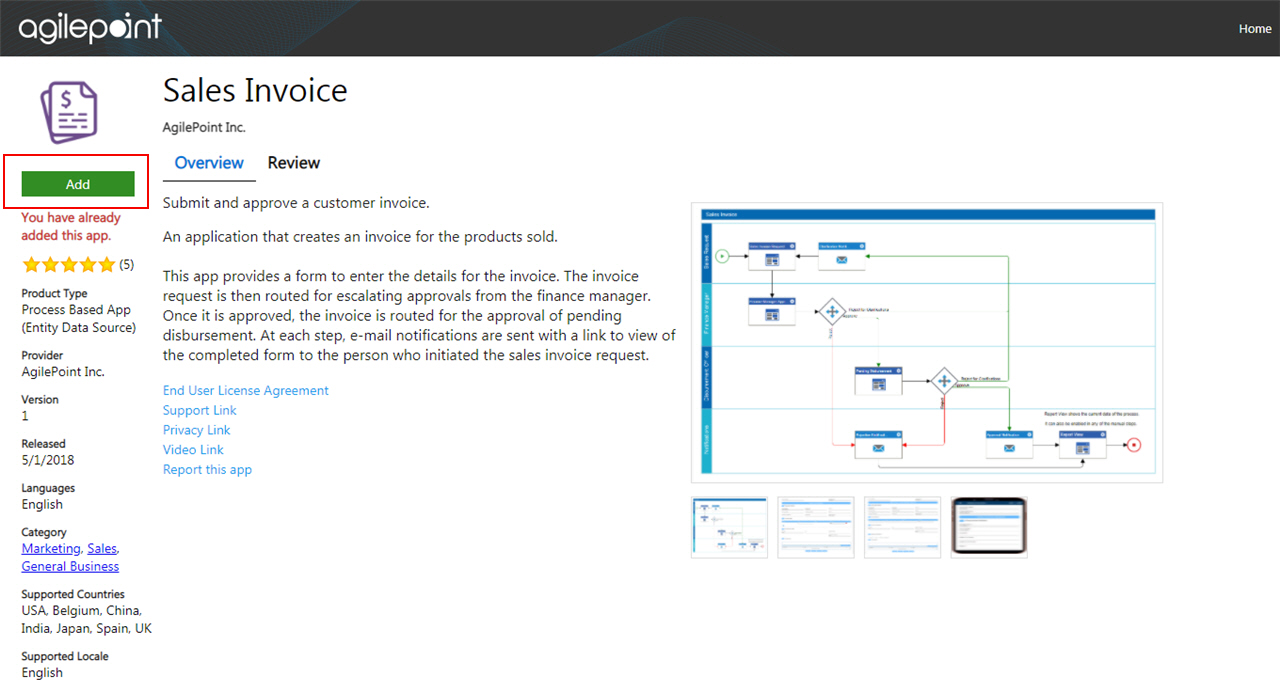
- Sales Invoice is an app that creates an invoice for the products sold.
For the use case in this example, a subform called SALESINVOICEITEMS shows in an Assignment Notification email template so the manager can see the invoice items to approve the sales invoice request based on the information in the email.
Step 1: Configure an Email Template to Add a Subform
First, configure an email template to use a subform in an email notification.
How to Start
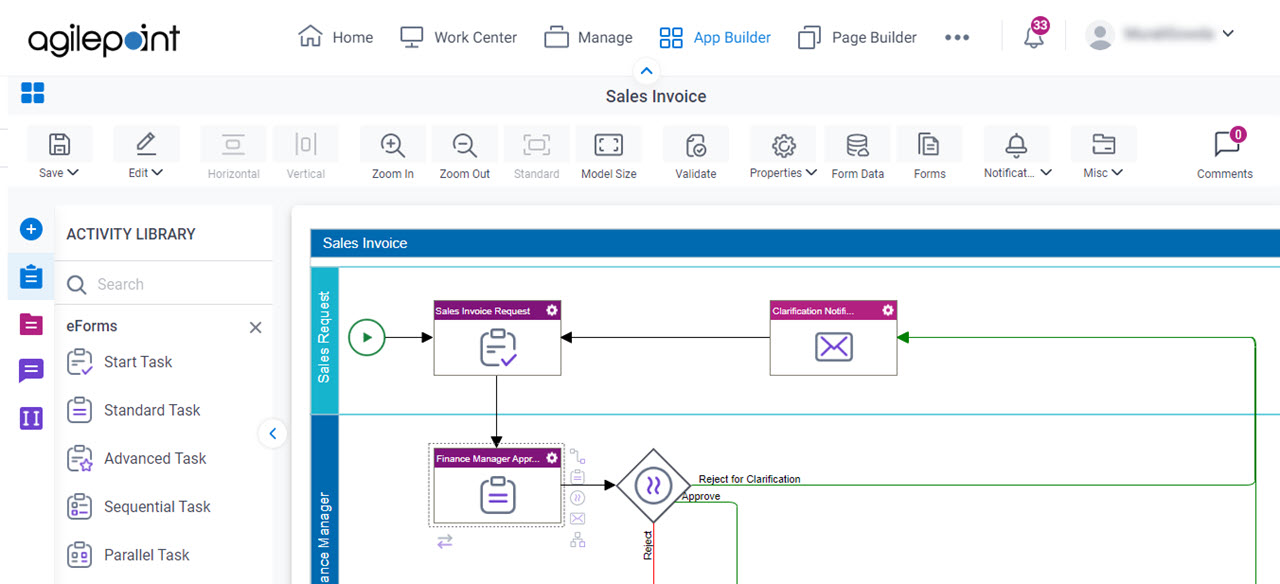
- Click App Builder.

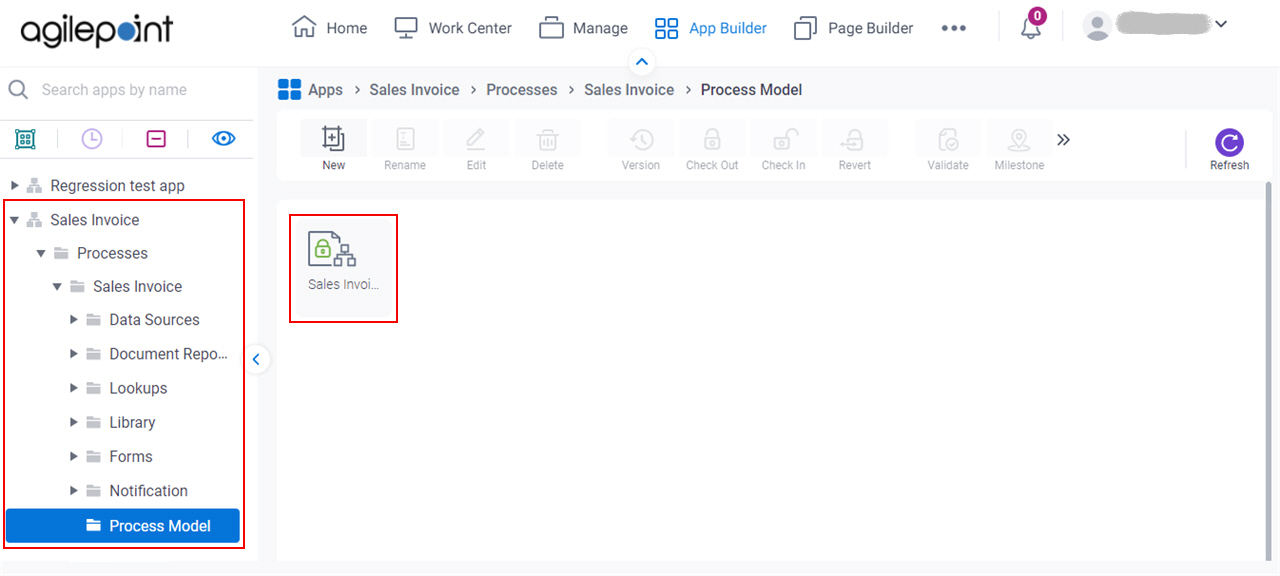
- On the App Explorer screen,
click Sales Invoice > Processes > Sales Invoice > Process Model > Sales Invoice.
Procedure
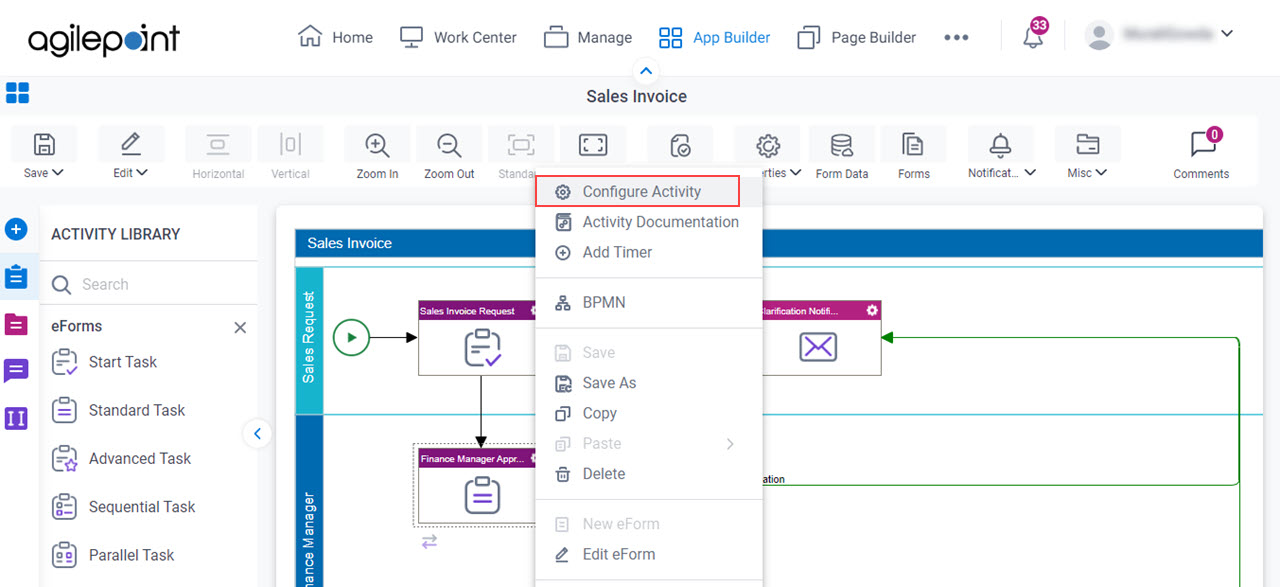
- On the Sales Invoice process, in the Finance Manager Approval activity,
click Activity Settings
 > Configure Activity
  .
.
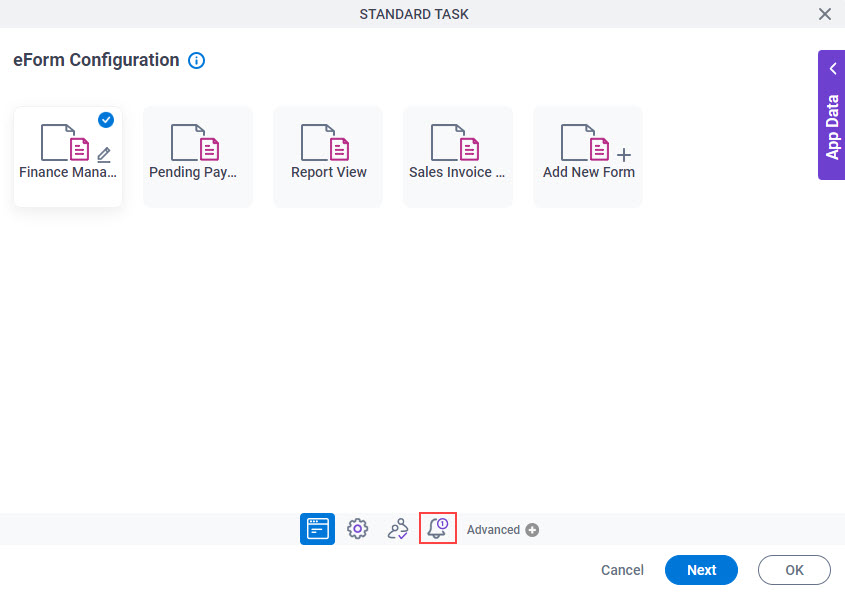
- In the eForm Configuration screen, click Email Notifications
 .
.
- On the Email Notifications screen, in the Initiation tab, click
Edit

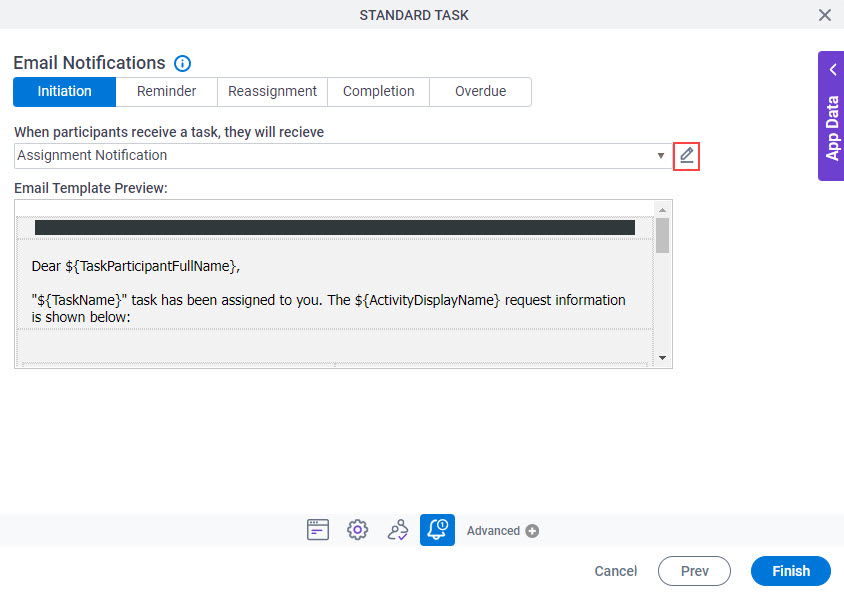
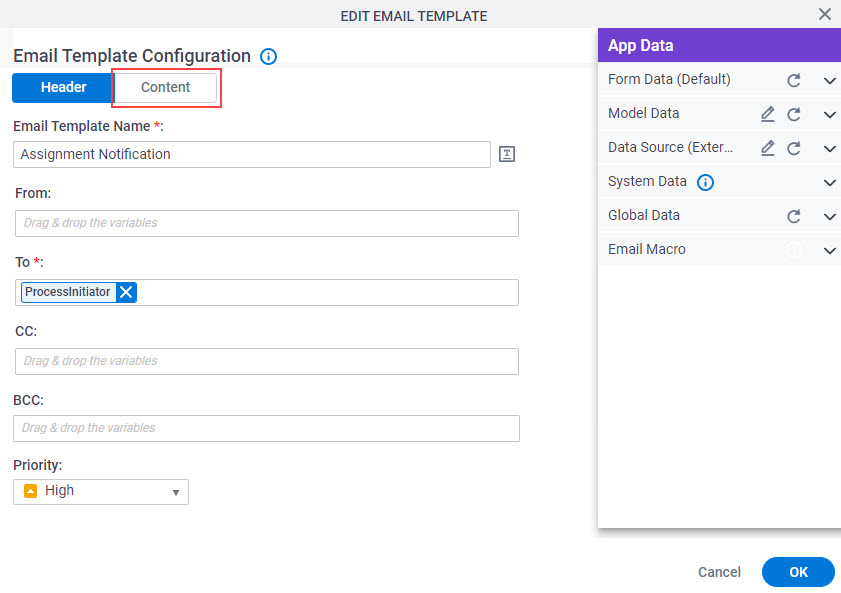
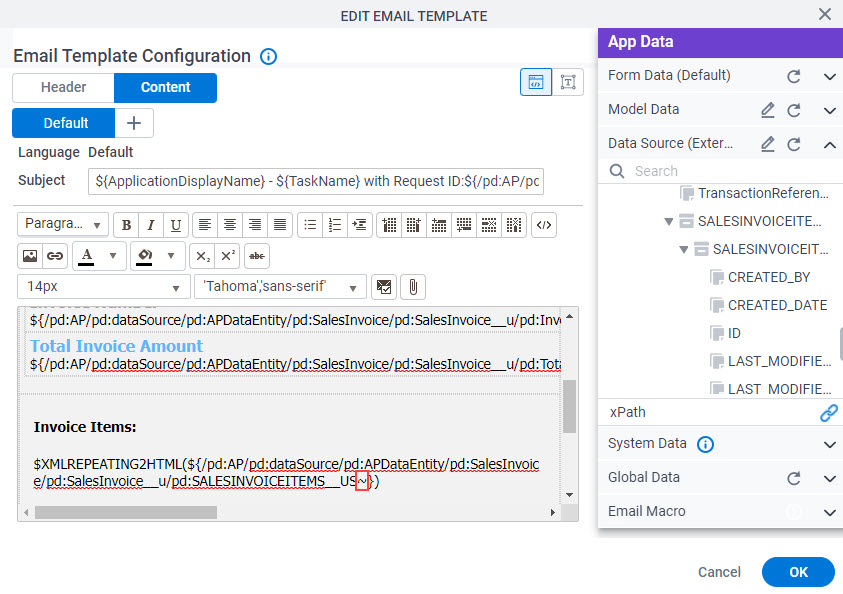
- In the Email Template Configuration screen, click the Content tab.
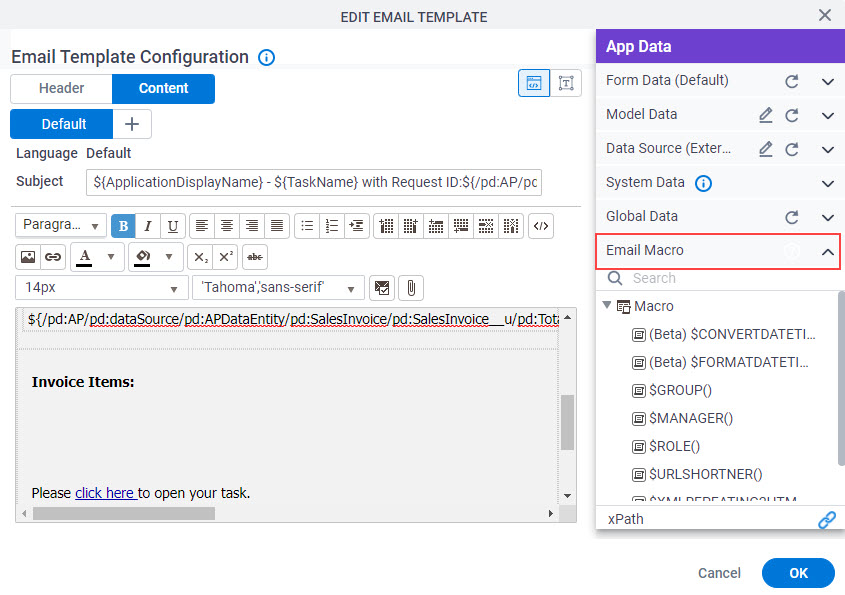
- On the Content tab, in the email body, enter Invoice Items:.
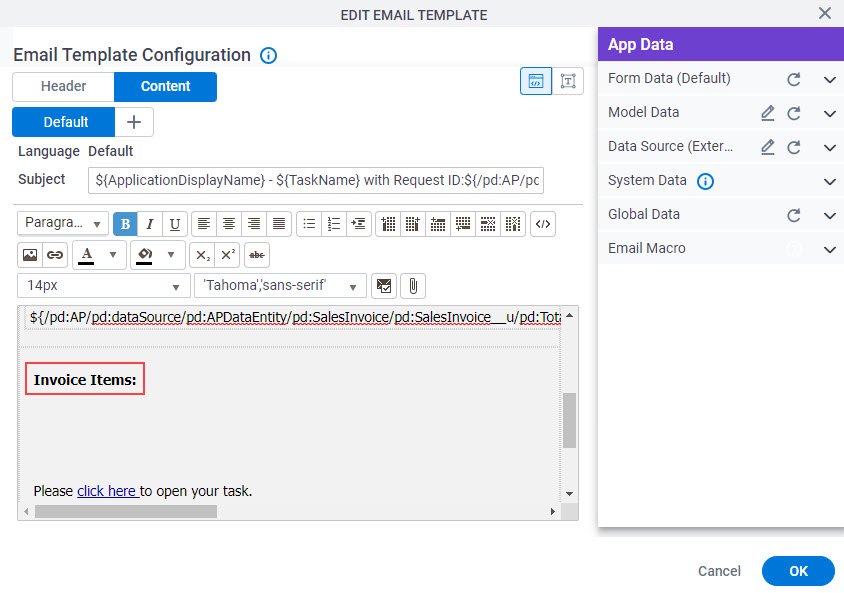
- On the App Data screen, expand the Email Macro tab.
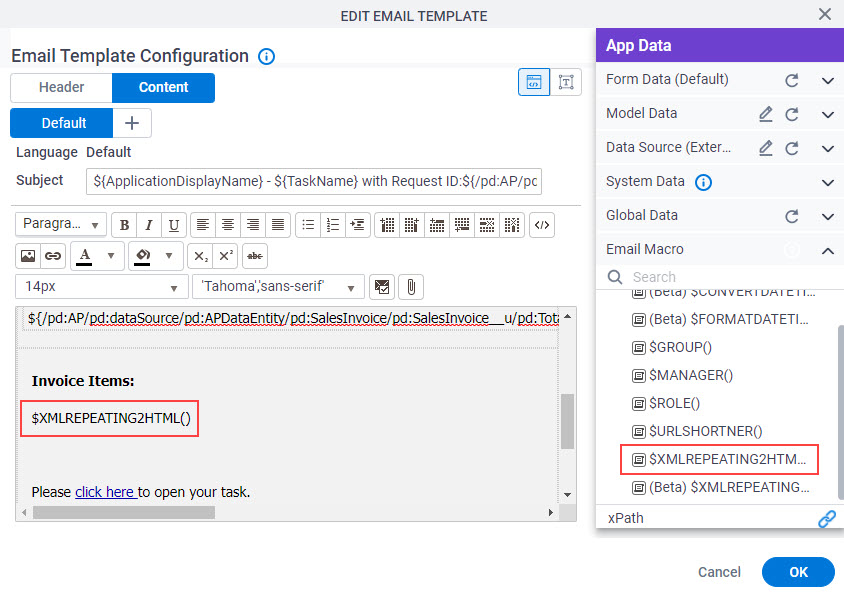
- In the email body, under Invoice Items:, drag $XMLREPEATING2HTML().
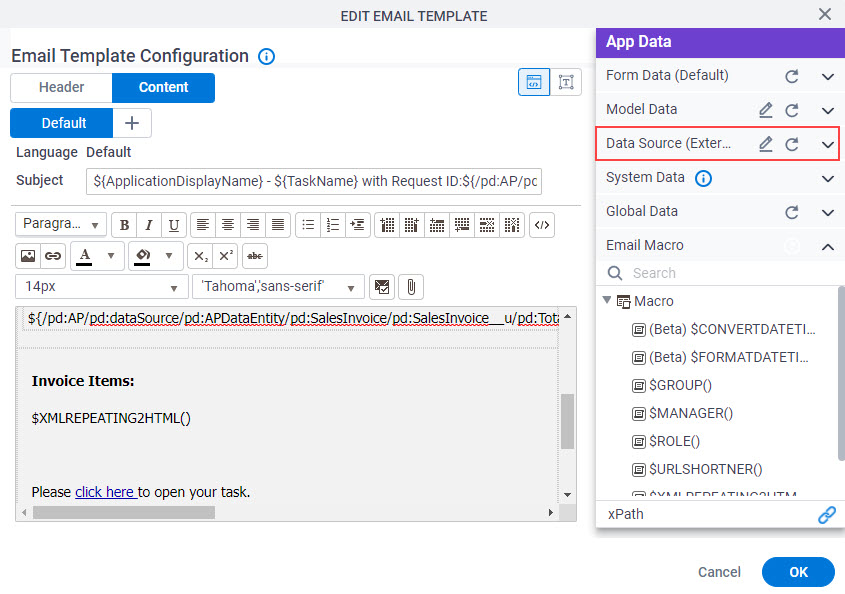
- Click the Data Source tab.
The Sales Invoice app used Data Entities data source and the form controls are mapped to fields in the associated entity so the form fields show in DataSource External tab.
- In the email body, drag SALESINVOICEITEMS_US within parenthesis () of $XMLREPEATING2HTML().
The SALESINVOICEITEMS_US is an internal name of the subform.
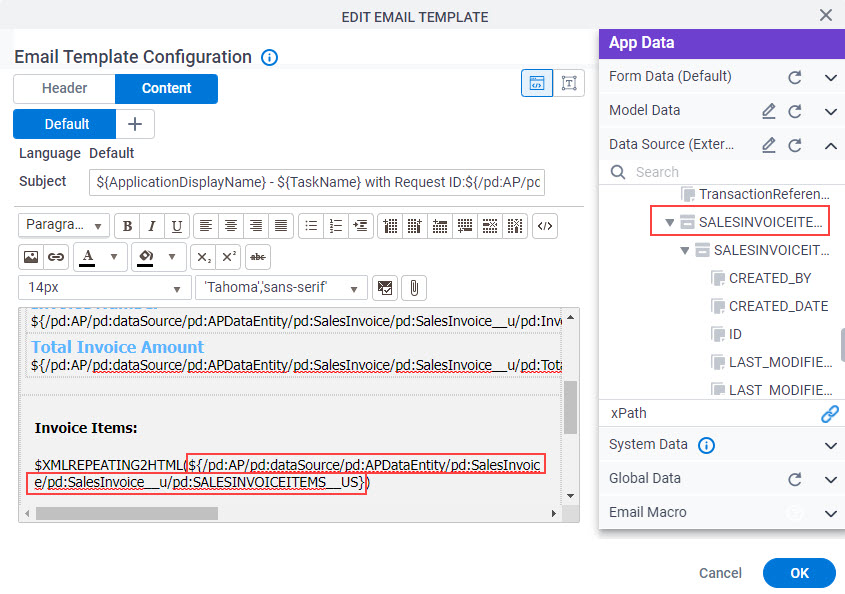
- Add a tilde (~) at the end of Xpath.
$XMLREPEATING2HTML(${/pd:AP/pd:dataSource/pd:APDataEntity/ pd:SalesInvoice/pd:SalesInvoice__u/pd:SALESINVOICEITEMS__US~})
The tilde returns the inner XML for the element to which the Xpath refers.
- Click OK.
The Email Notifications screen shows.
- On the Email Notifications screen, click Finish.
The Sales Invoice process screen shows.
Step 2: (Optional) Save, Check In, and Publish the Process-Based App
Next, save, check in, and publish the process-based app.
For more information, refer to (Example) Save, Check In, and Publish a Process-Based App.
Step 3: (Optional) Run the App
Next, run the app.
For more information, refer to My Apps screen (Modern)
Step 4: (Optional) View the Data from a Subform in Email Notification
Next, view the data from a subform in email notification.
Prerequisites
- Start the app.
For more information, refer to My Apps screen (Modern).
Procedure
- On the Sales Invoice Request form, complete the required (*) fields.

- Click Submit.
The finance manager receives an email with the subform data.
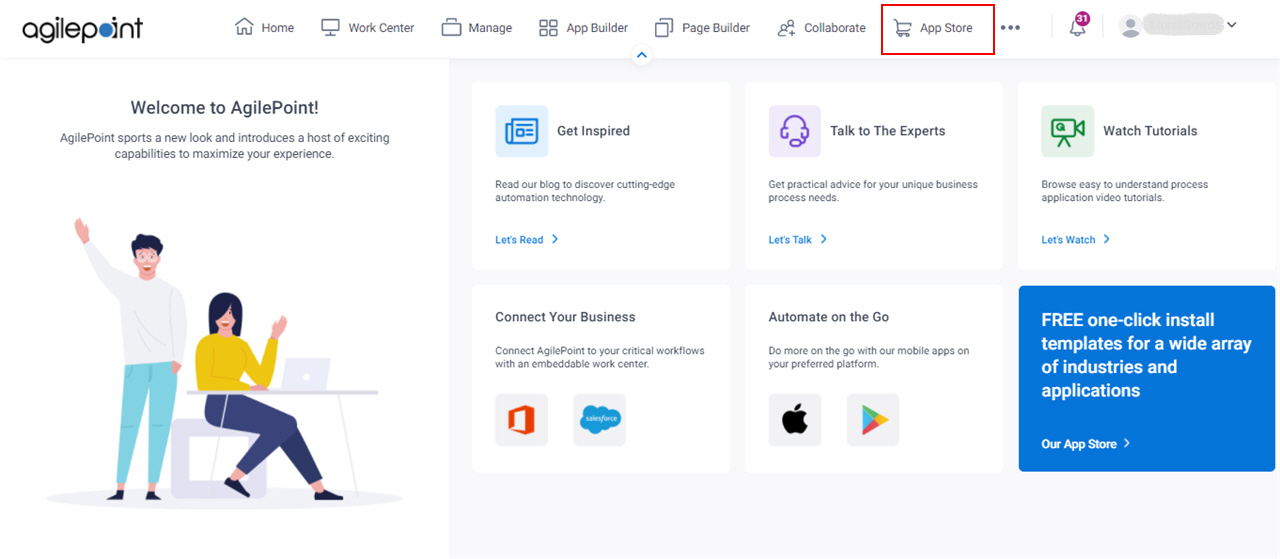
How to Get the App
This example is based on the Sales Invoice app from the AgilePoint NX App Store. Use this procedure to get the app.
Prerequisites
- AgilePoint NX OnDemand (public cloud), or AgilePoint NX Private Cloud or AgilePoint NX OnPremises v7.0 or higher.
Good to Know
- This procedure is optional. It is provided so you can test the example with an out-of-the-box app.
- This is part of the Background and Setup procedures, but many users preferred this step to appear after the example, not before it.
Procedure
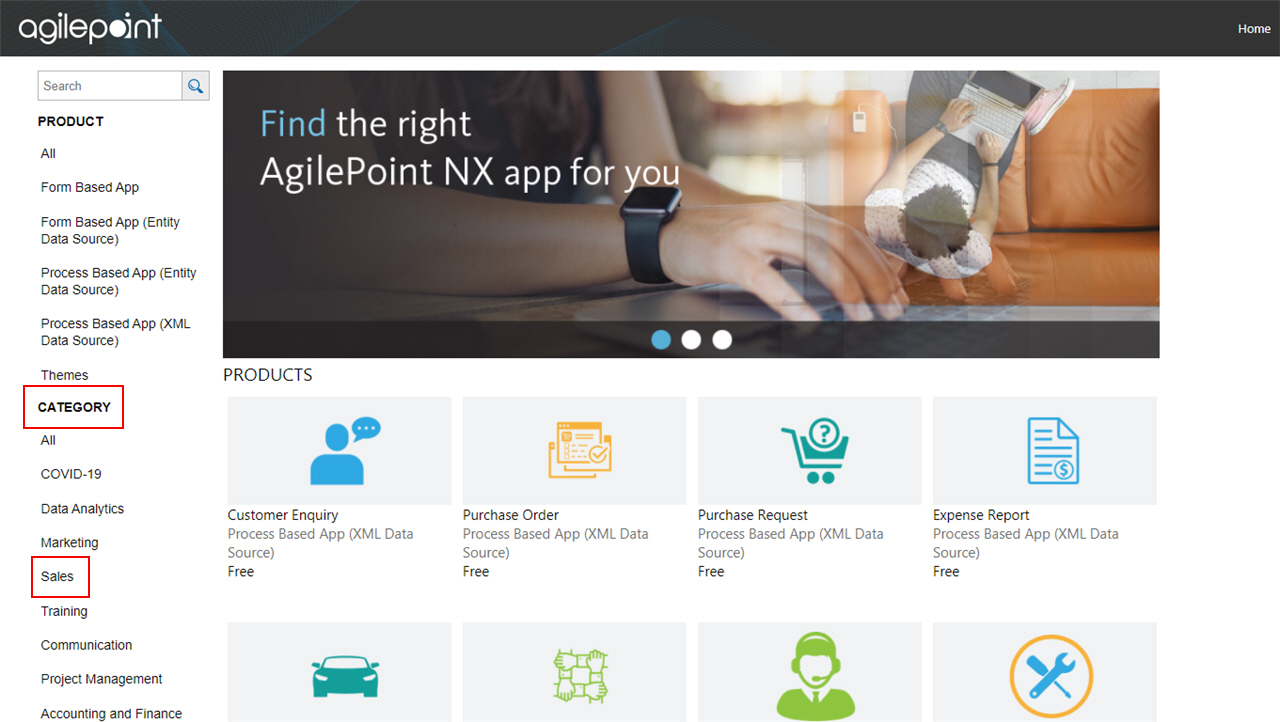
- Click App Store
 .
.
- In the CATEGORY section, click Sales.
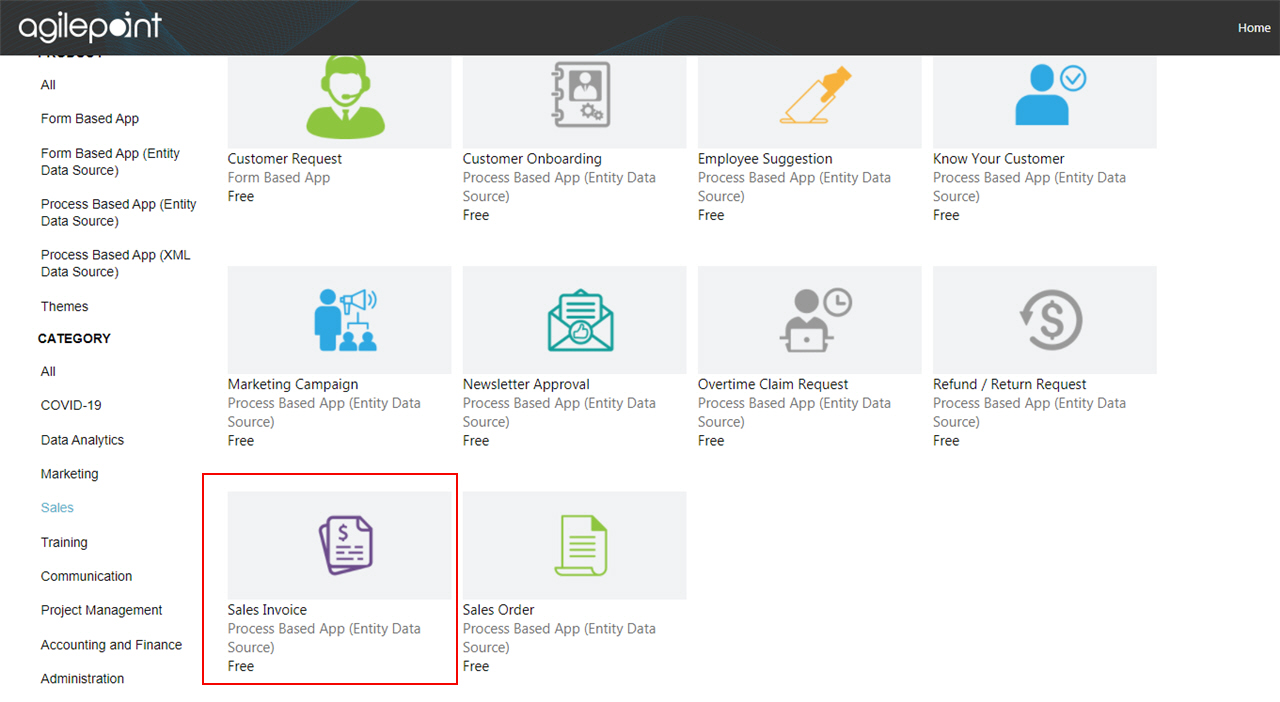
- Click the Sales Invoice app.
- On the Sales Invoice screen, click Add.
- On the Trust App screen, click Trust it.
- Click Return to site.