
(Example) Configure a Timer activity
This example shows how to configure a Timer activity in a process-based app.
Background and Setup
Result
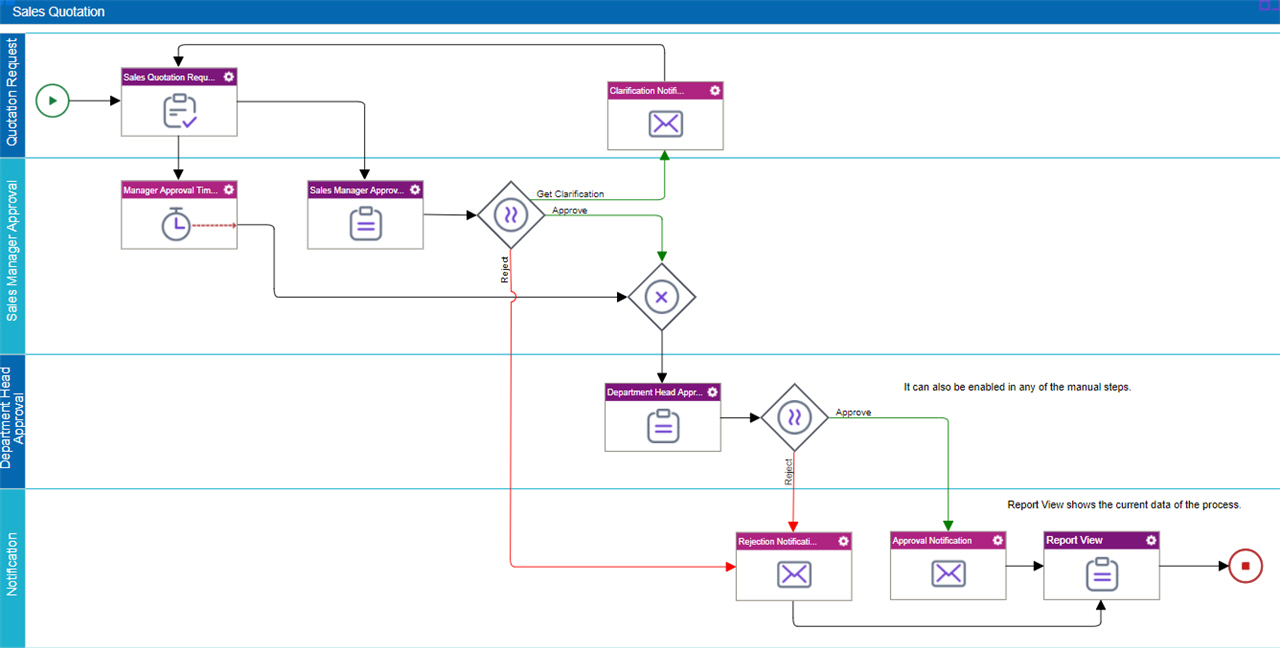
This example shows how to add and configure the Timer activity in the Sales Quotation app to bypasses the Sales Manager approval and goes directly to the Department Head for approval.
Prerequisites
- This example uses the Sales Quotation app from the AgilePoint NX
App Store.
For more information, refer to How to Get the App
Good to Know
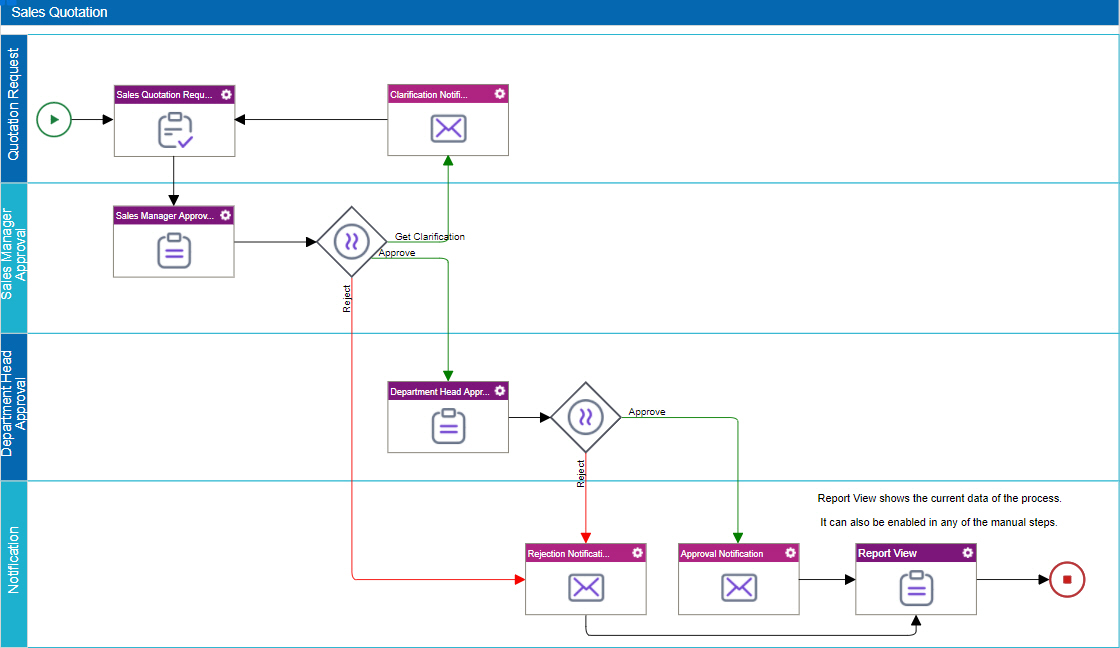
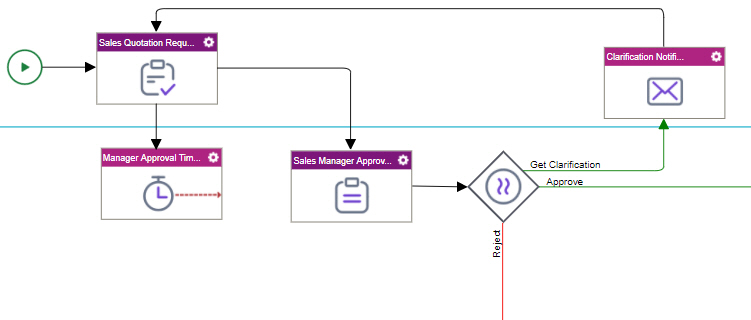
- Sales Quotation is an app that collects information about a sale
to provide a sales quote.
The sales quotation request is routed for escalationg approvals from the Sales Manager,
and then the Department Head.
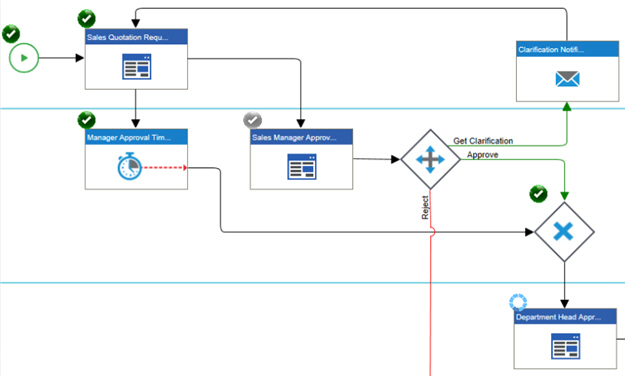
For the use case in this example, if the Sales Manager does not respond to the sales quotation after 1 business day, the sales quotation uses a Timer activity to bypass the Sales Manager approval step and route the request directly to the Department Head. The Timer helps to ensure the efficiency of the process, so that the sales prospect is not waiting for the Sales Manager if they are unavailable.
Step 1: Configure a Timer activity
First, add and configure a Timer activity.
How to Start
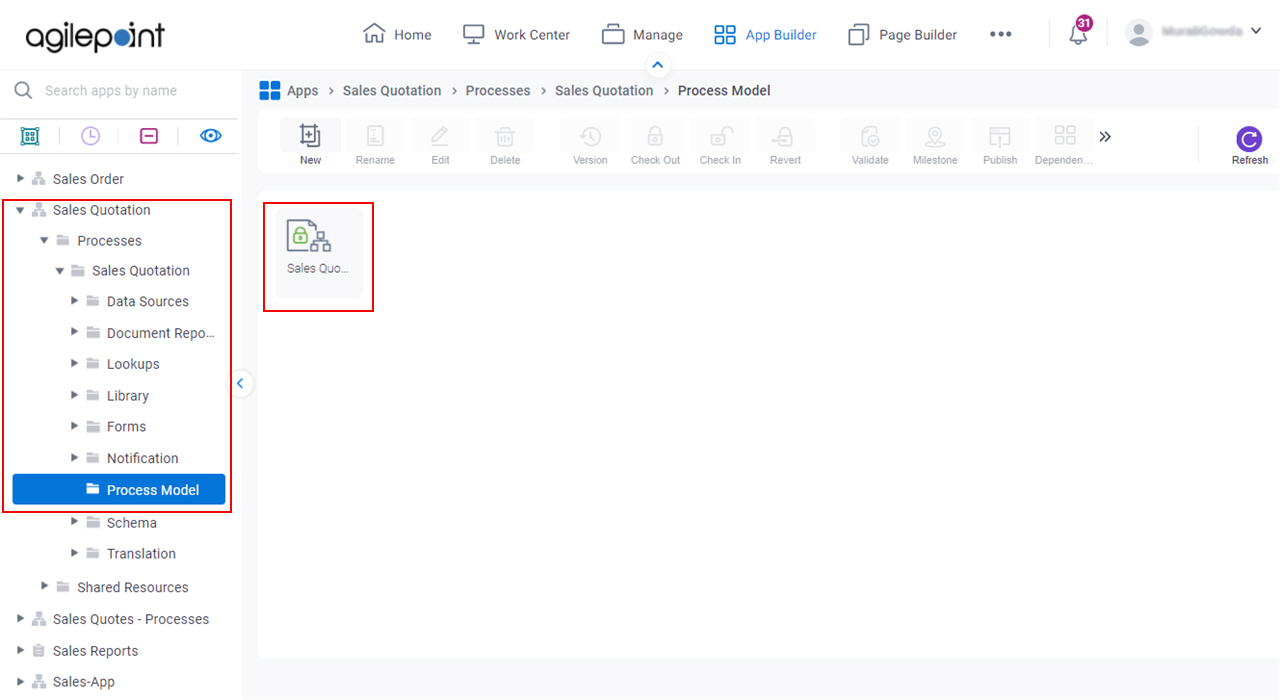
- Click App Builder.

- On the Application Explorer screen,
click Sales Quotation > Processes > Sales Quotation > Process Model > Sales Quotation.
Procedure
- On the Process Builder screen, in the Activity Library, click the Common
 tab.
tab.
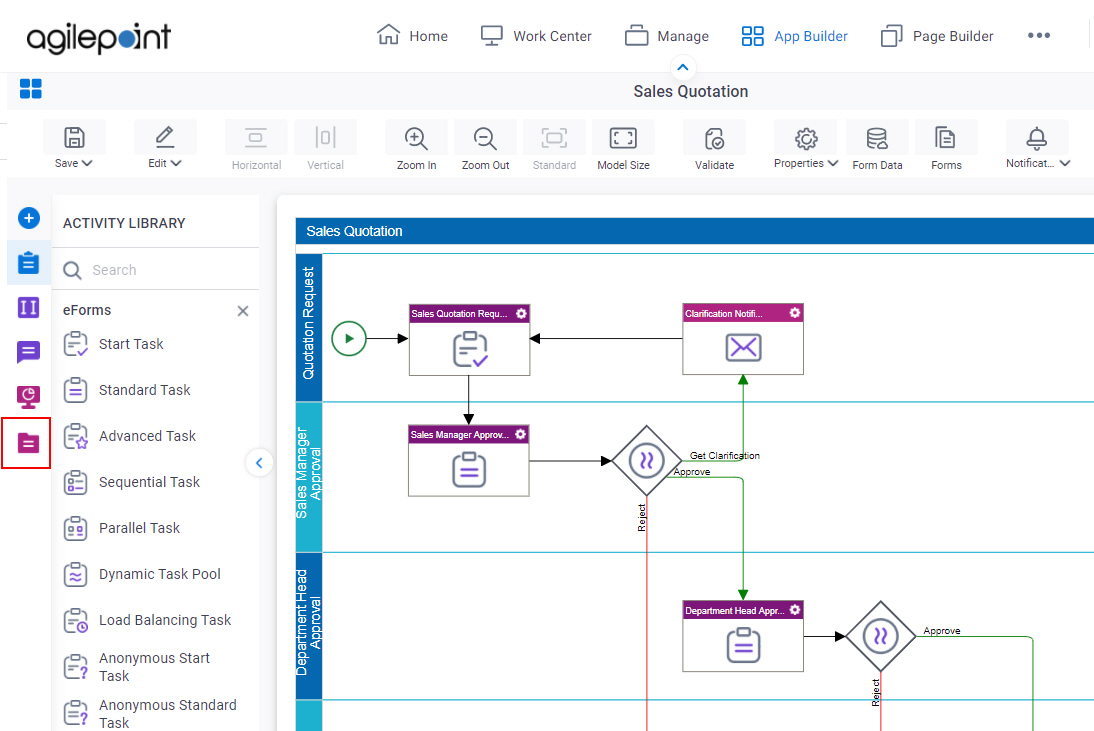
- On the Common tab, drag the Timer
 activity onto your process.
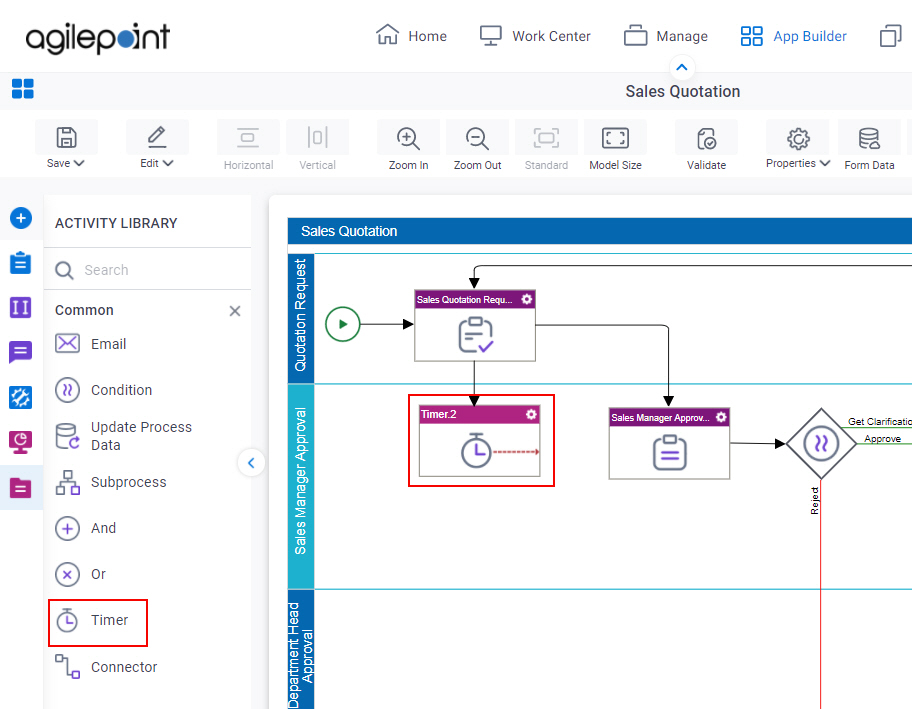
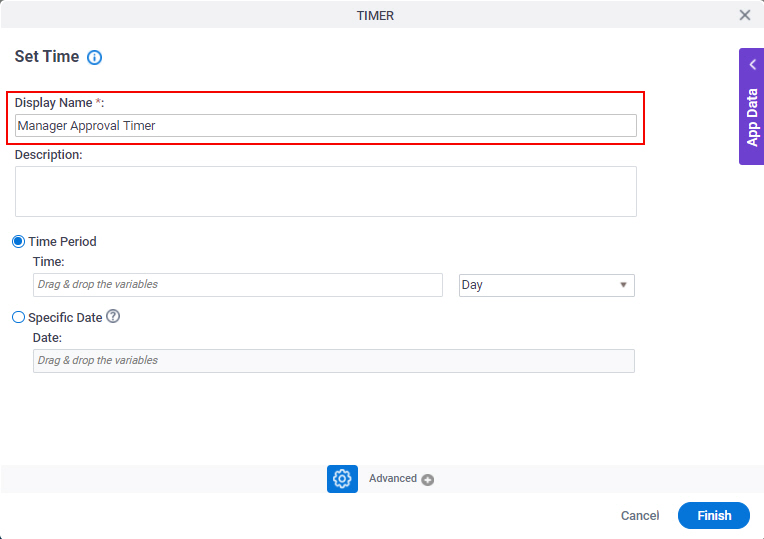
- On the Set Time screen, in the Display Name field, enter Manager Approval Timer.
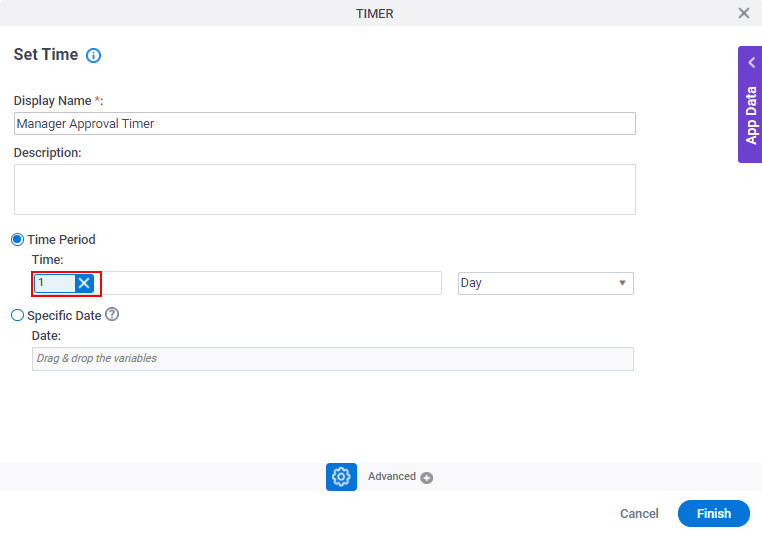
- In the Time field, enter 1.
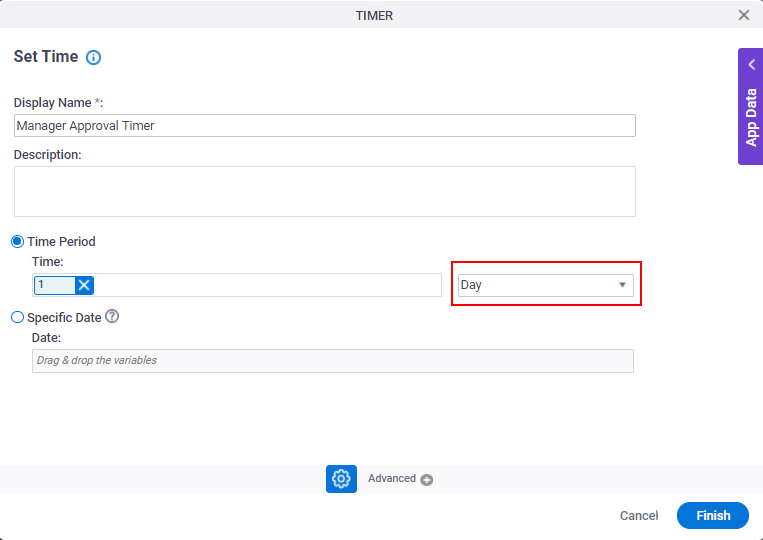
In the Unit list, Day is selected by default.
- Click Finish.
The Process Builder screen shows with the Manager Approval Timer activity.
Step 2: Configure an Or Activity
Next, add and configure an Or activity to your process to cancel other incoming activities.
Procedure
- On the Activity Library screen, in the Common tab, drag
the Or
 activity onto your process.
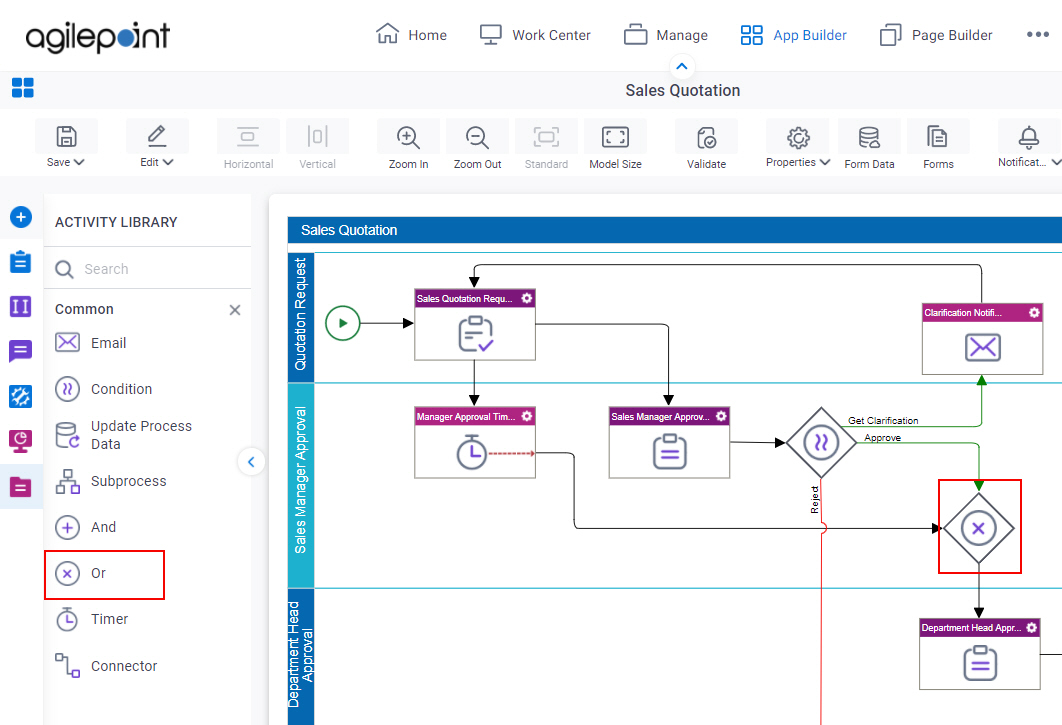
- On the General Configuration screen, in the Display Name field, enter Cancel Timeout Manager Approval.
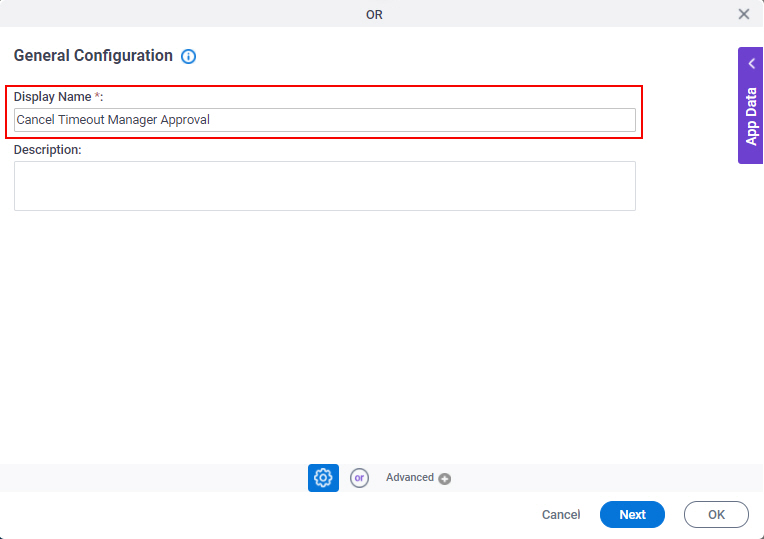
- Click Next.
- On the Configuration screen, select these fields:
- All Human Tasks
- All System Activities
This cancels all activities from the alternate process branch.
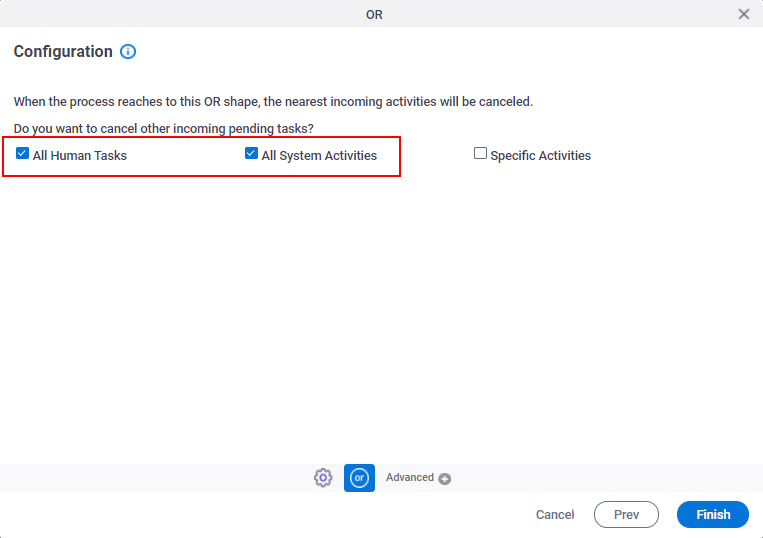
- Click Finish.
The Process Builder screen shows with the Or activity.

Step 3: (Optional) Save, Check In, and Publish the Process-Based App
Next, save, check in, and publish the process-based app.
For more information, refer to (Example) Save, Check In, and Publish a Process-Based App.
Step 4: (Optional) Run the App
Next, run the app.
Procedure
- To run the app, refer to My Apps screen (Modern).
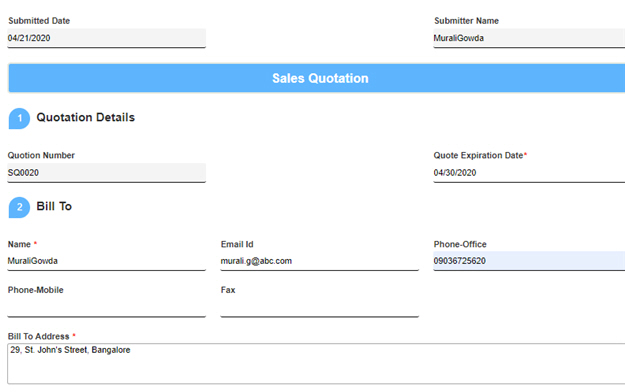
- Complete and submit the Sales Quotation form.
- Click Inbox > Processes.
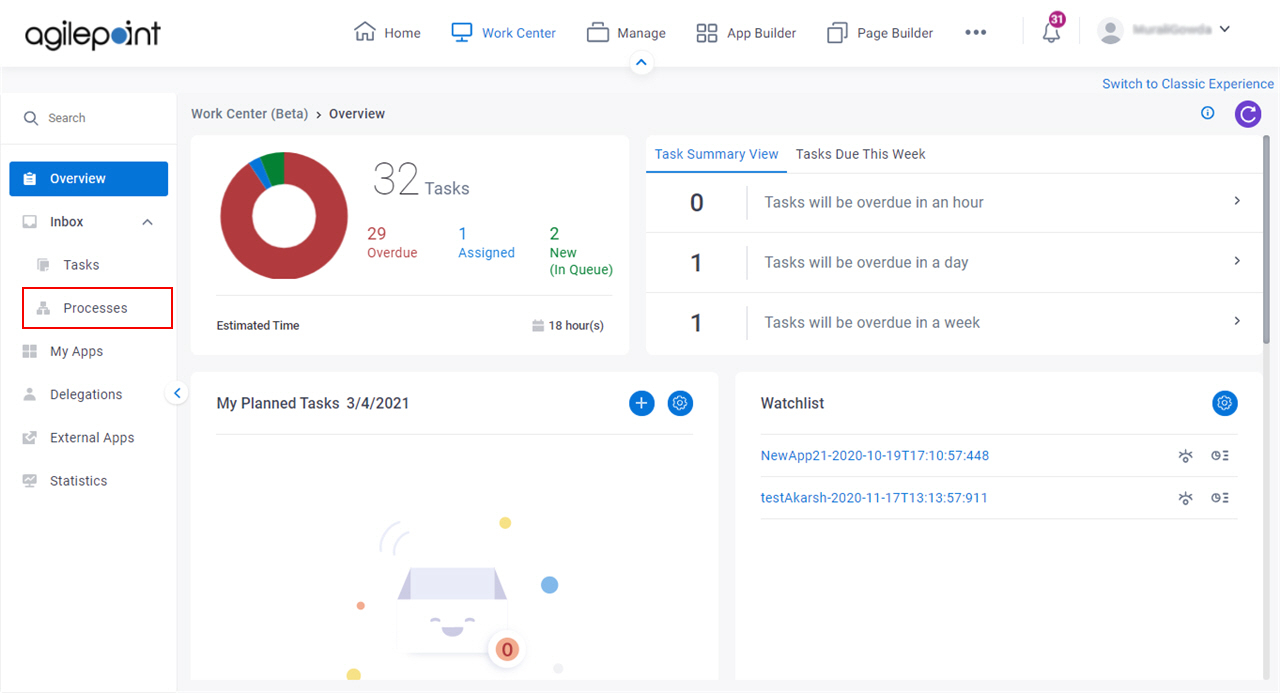
- On the Inbox screen, click Processes > I Started.

- On the Processes I Started tab,
click Sales Quotation > View Process
 .
.
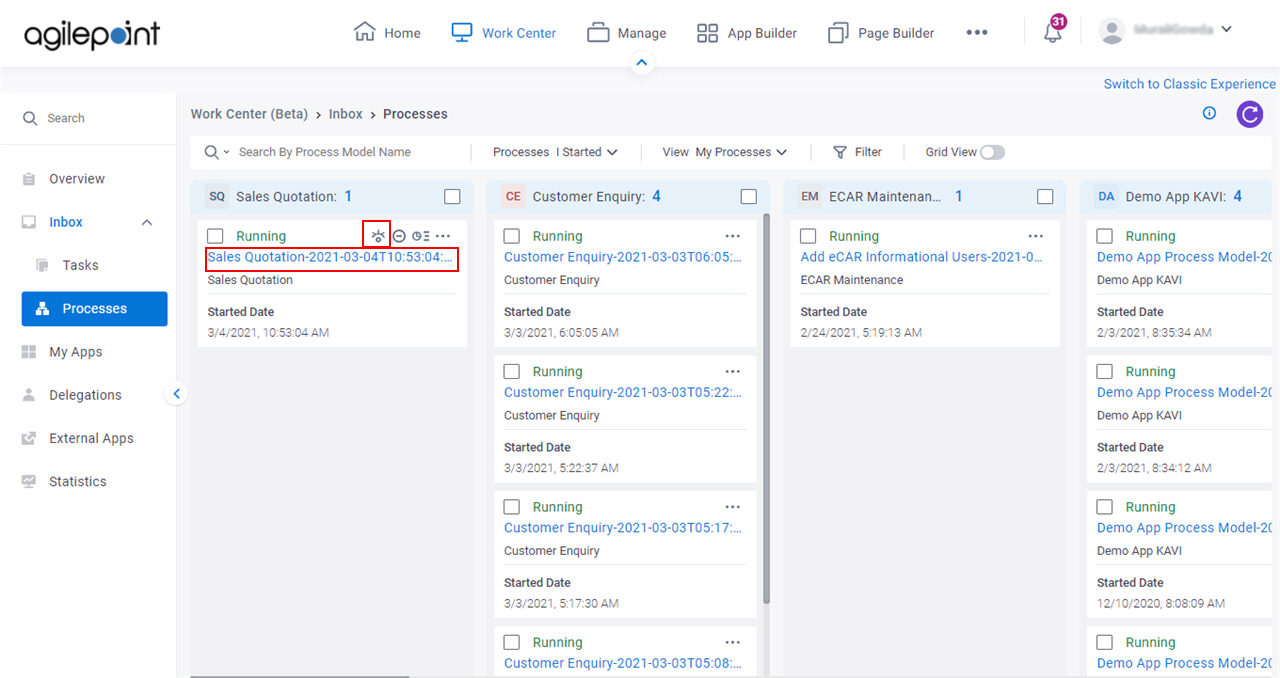
In the Process Monitor screen, you can see if the Sales Manager does not respond to the sales quotation after 1 business day, the Sales Manager Approval task is canceled, and the process goes to the Department Head Approval task.
How to Get the App
This example is based on the Sales Quotation app from the AgilePoint NX App Store. Use this procedure to get the app.
Prerequisites
- AgilePoint NX OnDemand (public cloud), or AgilePoint NX Private Cloud or AgilePoint NX OnPremises v7.0 or higher.
Good to Know
- This procedure is optional. It is provided so you can test the example with an out-of-the-box app.
- This is part of the Background and Setup procedures, but many users preferred this step to appear after the example, not before it.
Get the App
- Click App Store
 .
.

- In the CATEGORY section, click Sales.

- Click the Sales Quotation app.

- On the Sales Quotation screen, click Add.
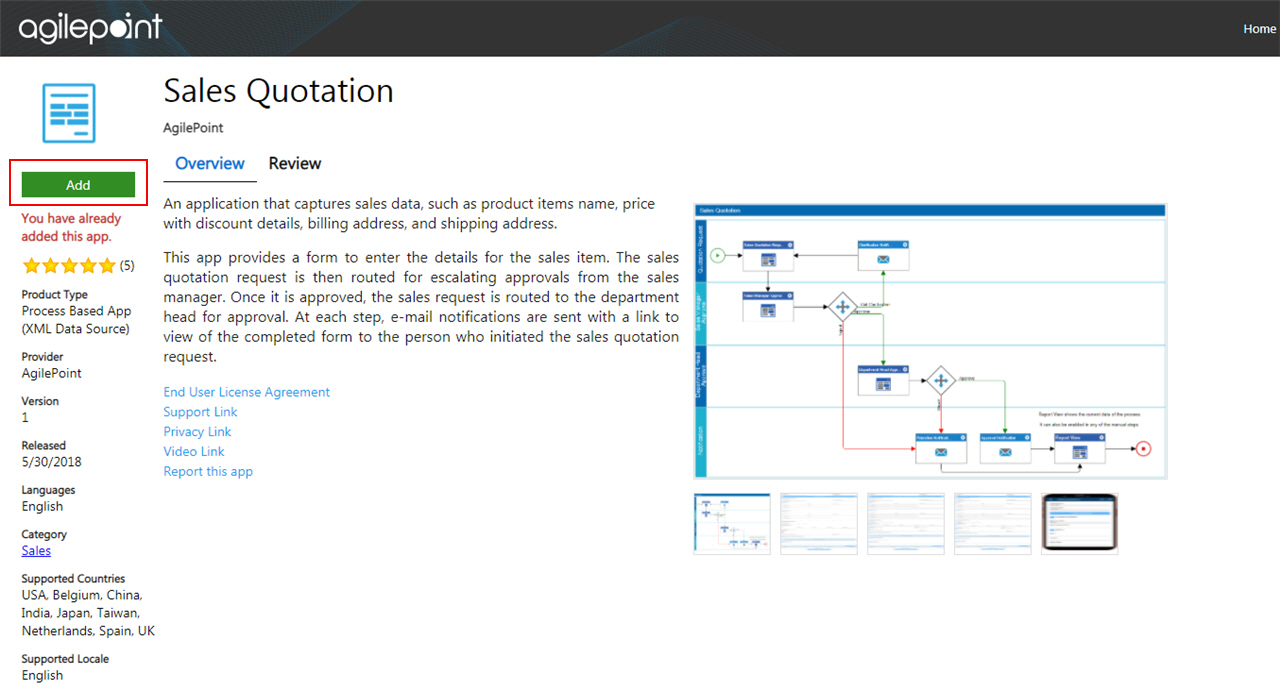
- On the Trust App screen, click Trust it.
- Click Return to site.