
Change the Data Format for a Date and Time
To change the data format for a date and time, do the procedure in this topic.
Examples
- (Example) Configure a Convert Date Format activity
- Examples - Step-by-step use case examples, information about what types of examples are provided in the AgilePoint NX Product Documentation, and other resources where you can find more examples.
Good to Know
- In most text fields, you can use process data variables as an alternative to literal data values.
- You can configure whether this activity waits for other activities before it runs.
For more information, refer to How Do I Configure an Activity to Wait for Other Incoming Activities?
How to Start
- On the Application Explorer screen, do one of these:
- Do one of these:
- Add an activity:
- In the Process Builder, in the Activity Library,
open the Utilities
 tab.
tab. - On the Utilities
tab,
drag the Convert Date Format
 activity onto your process.
- In the Process Builder, in the Activity Library,
open the Utilities
- Change an activity:
- In your process, double-click your activity.
- Add an activity:
- Click Convert Date Format
 .
.
Procedure
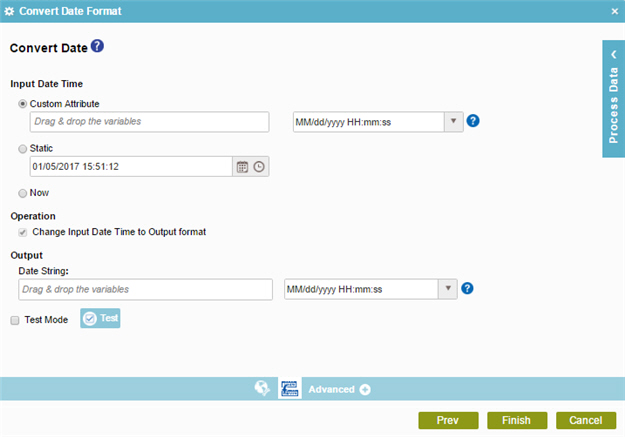
- On the Convert Date screen, complete these fields
as necessary.
Field Name Value Input Date Time
- Function:
- Specifies the reference date for your date calculation.
Two Date Time fields are available: Input Date Time 1 and Input Date Time 2.
- Accepted Values:
-
- Custom Attributes - Specifies a process data variable that stores the date-time value and your date-time format.
You can use Process Data screen to specify a process data variable.
You can also use a custom date-time format. For more information, refer to Customize Your Date-Time Format.
- Static - Specifies a static date and time.
- Now - The date and time the system activity starts at runtime.
- Custom Attributes - Specifies a process data variable that stores the date-time value and your date-time format.
- Default Value:
- Custom Attributes
- Example:
- Refer to:
Date String
- Function:
- Specifies the process data variable that stores the result received from the date calculations if it is in the Date Time format.
The results of the date calculations that changes from the Date Time format to a String. The format of the string is specified in the list.
- Accepted Values:
- A process data variable that stores the result in the selected String format.
- Default Value:
- None
- Accepts Process Data Variables:
- Yes
- Example:
- Refer to: