
(Example) Configure a Convert Date Format activity
This example shows how to configure a Convert Date Format activity in a process-based app.
Background and Setup
Result
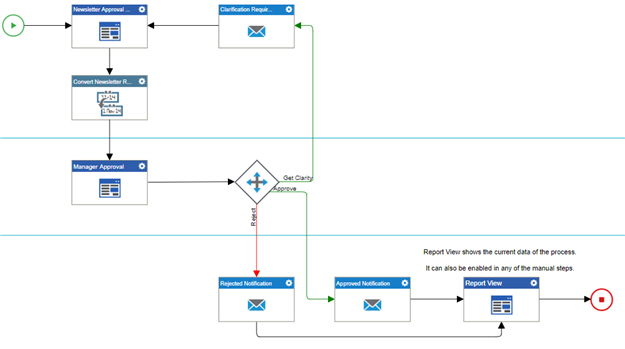
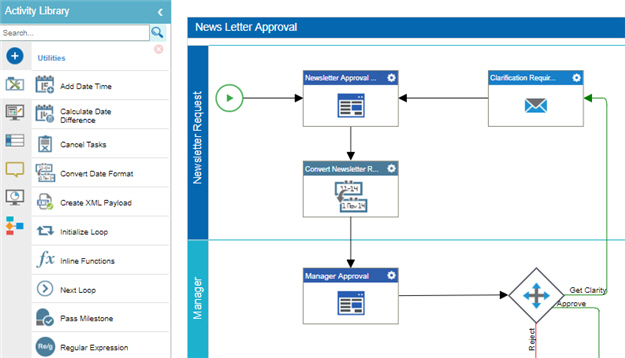
This example shows how to add and configure the Convert Date Format activity in the News Letter Approval app to change the date-time format for a Date Time form control.
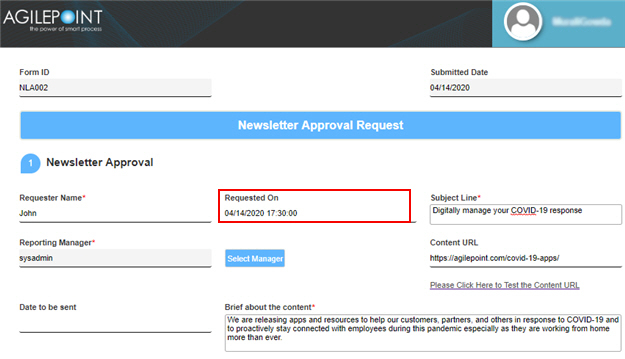
When the process starts, the input format for the Requested On field on the Newsletter Approval Request form looks like this:
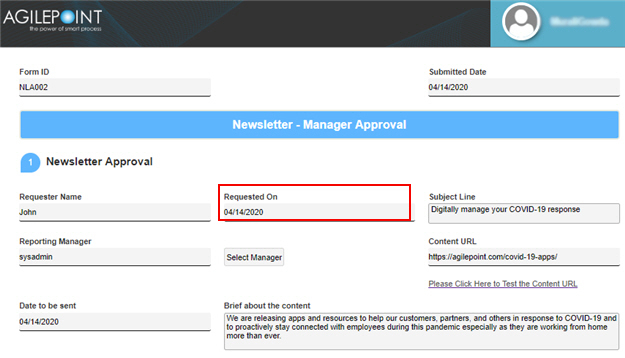
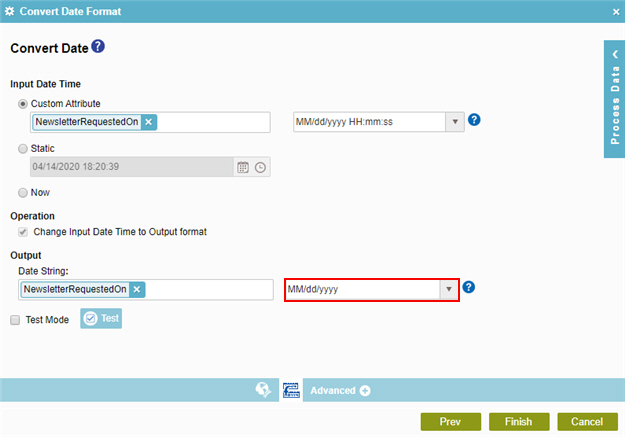
After the Convert Date Format activity runs, the output format for the Requested On field on the Newsletter - Manager Approval form looks like this:
Prerequisites
- This example uses the News Letter Approval app from the AgilePoint NX
App Store.
For more information, refer to How to Get the App
Good to Know
- For more information about the format pattern of the date-time, refer to Customize Your Date-Time Format.
How to Start
- Click Build Apps
 .
.
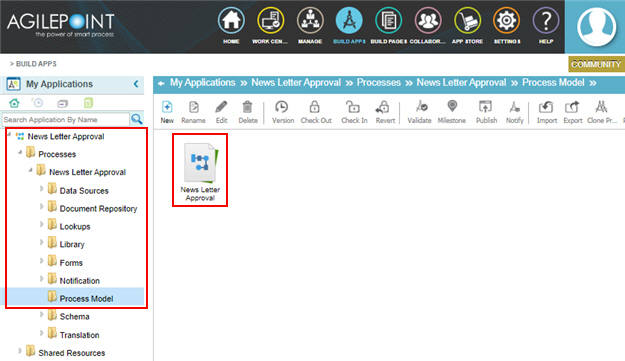
- On the Application Explorer screen, on the My Applications pane,
click News Letter Approval > Processes > News Letter Approval > Process Model > News Letter Approval.
Step 1: Configure a Convert Date Format activity
First, add and configure the Convert Date Format activity.
Procedure
- On the Process Builder screen, in the Activity Library, click Add Stencils > Utilities

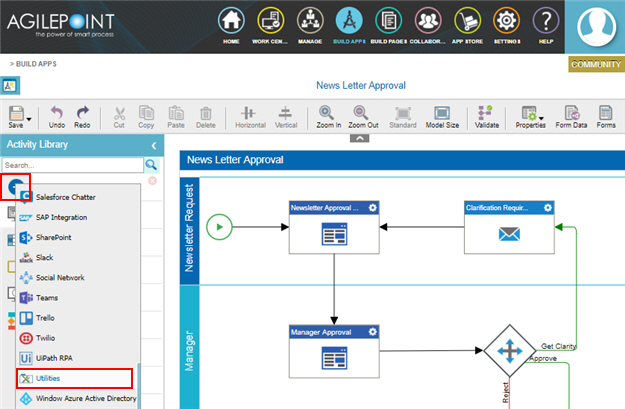
- On the Utilities
tab,
drag the Convert Date Format
 activity onto your process.
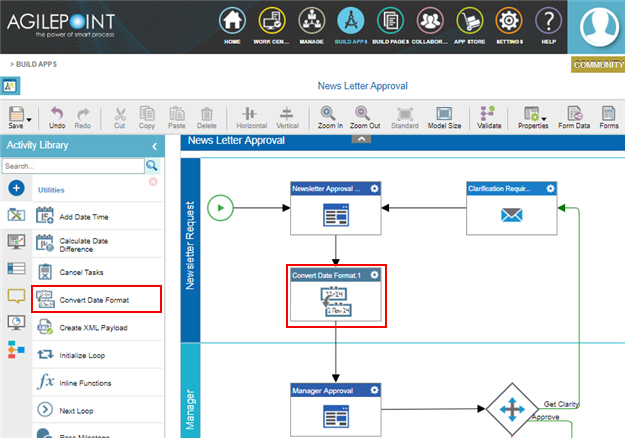
- On the General Configuration screen, in the Display Name field, enter Convert Newsletter Requested Date Format.
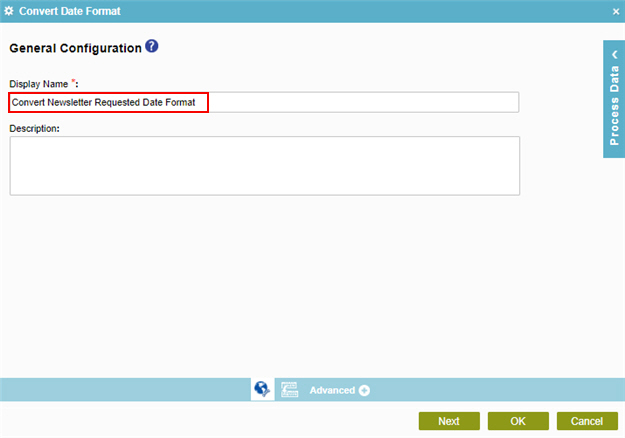
- Click Next.
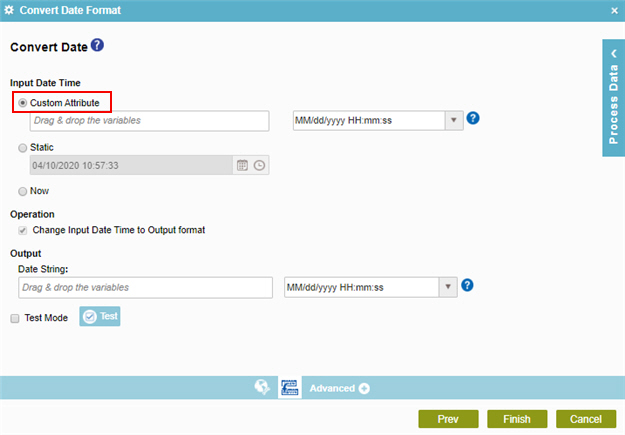
- On the Convert Date screen, in the Input Date Time section, select Custom Attribute. Optional: You can also use the Static or Now option to change the date-time format:
- Static - Specifies a static date and time.
- Now - The date and time the system activity starts at runtime.
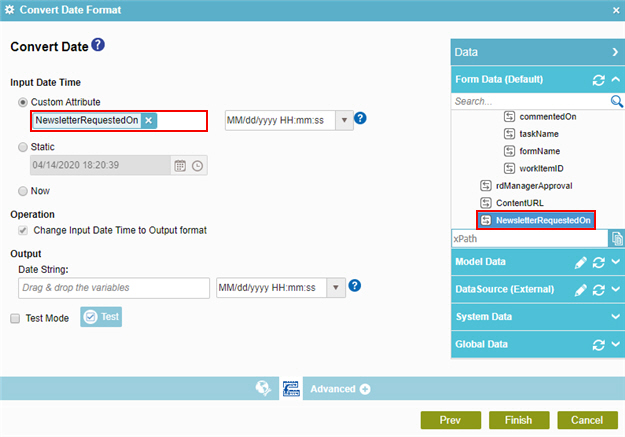
- In the Custom Attribute field, drag the NewsletterRequestedOn variable.
The variable NewsletterRequestedOn is an internal name of the Requested On field.
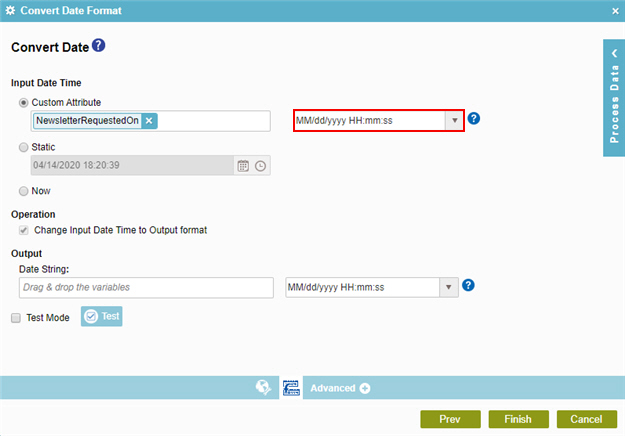
- In the Input Format field, select MM/dd/yyyy HH:mm:ss.
- On the Output section, in the Date String field, drag the NewsletterRequestedOn variable that you entered in the Custom Attribute field.
This example shows how to change the date-time format of the same variable. Optionally, you can enter a different output variable to store the value from the input date-time value, and also convert the value to the specified format.
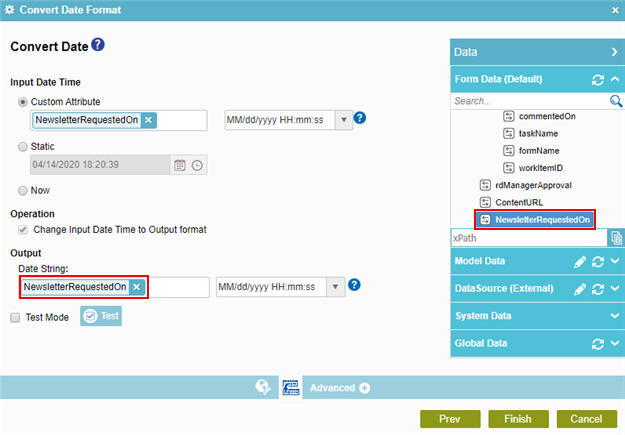
- In the Output Format field, select MM/dd/yyyy.
The output variable shows the date-time value in this format at runtime.
- Click Finish.
The Process Builder screen shows with the Convert Date Format activity
Step 2: (Optional) Complete the Process
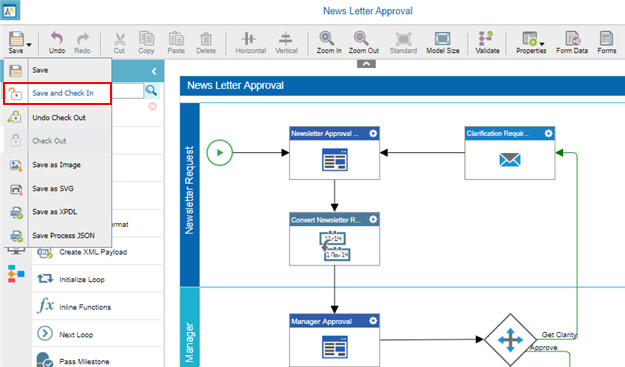
Next, save and validate your process model.
Procedure
- To validate a process, refer to Validate a Process.
- On the Save quick menu, click Save and Check In
 .
.
Step 3: (Optional) Publish and Run the Application
Next, publish the application so people can use it.
Procedure
- To publish the app, refer to Publish a process-based application.
- To run the app, refer to Start your process.
- Complete and submit the Newsletter Approval Request form.
When you open the form, the Requested On field on the Newsletter Approval Request form shows in the input format.
- On the My Tasks tab, open the Manager Approval
task, and complete the
eForm as necessary.
When you open the task, the Requested On field on the Newsletter - Manager Approval form shows in the output format.
For more information, refer to Open a Task.
How to Get the App
This example is based on the Newsletter Approval app from the AgilePoint NX App Store. Use this procedure to get the app.
Prerequisites
- AgilePoint NX OnDemand (public cloud), or AgilePoint NX PrivateCloud or AgilePoint NX OnPremises v7.0 or higher.
Good to Know
- This procedure is optional. It is provided so you can test the example with an out-of-the-box app.
- This is part of the Background and Setup procedures, but many users preferred this step to appear after the example, not before it.
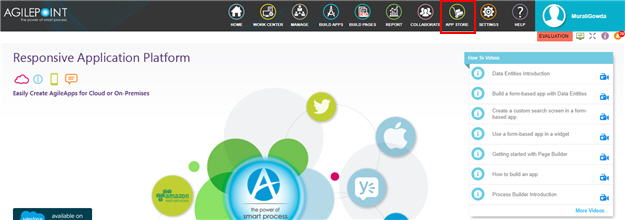
Get the App
- Click App Store
 .
.
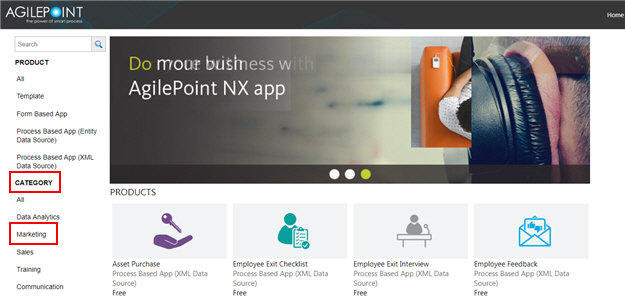
- In the CATEGORY section, click Marketing.
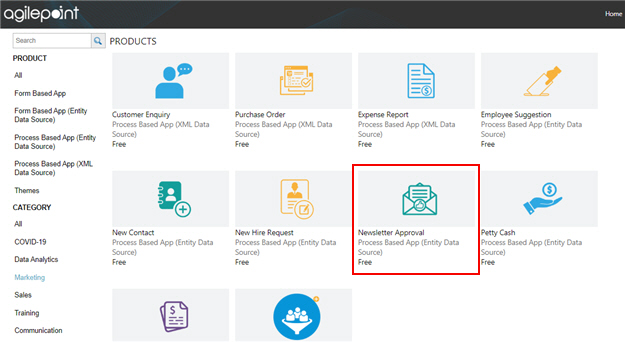
- Click the Newsletter Approval app.
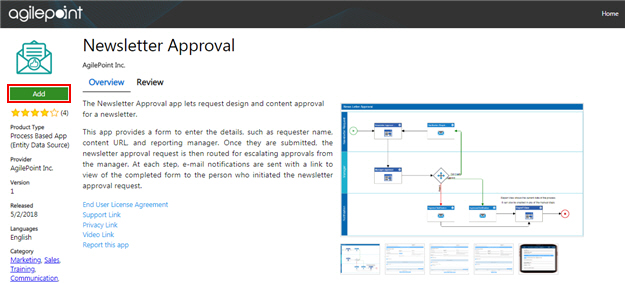
- On the Newsletter Approval screen, click Add.
- On the Trust App screen, click Trust it.
- Click Return to site.