
(Example) Set the Title for the Sequential Approval eForm
To set the title for the Approvers section in the Approvers eForm for sequential approval, do the procedure in this topic.
Good to Know
- For a list of limitations for AgilePoint NX example documentation, refer to (Example) Create a Process-Based Application.
- If you reuse the form control in the same form, the best approach is Copy/Paste. The Copy/Paste creates a copy of the form control with the same configuration. It helps you to reduce the steps to configure the form control.
How to Start
- (Example) Create a Process-Based Application for an Absence Request.
- (Example) Start an Absence Request Process with an eForm.
- (Example) Create an eForm to Set Available Leave Hours.
- (Example) Configure a Condition Activity to Check the Leave Hours Available in the Absence Request Process.
- (Example) Create a Sequential Approval Task.
- (Example) Set Sections for the Sequential Approval eForm.
Procedure
- On the Approvers
eForm,
click the Absence Request section.

- Click the Absence Request title.

- On the eForm Builder screen, click Copy
 .
.

- Click the Approvers section.
- On the eForm Builder screen, click
Paste
 .
.

- On your title form control onto your eForm, click Edit Properties
 .
.
- On the General tab, in the Html field, replace the old HTML code with this HTML code:
<hr class="lineClass"/><br/>
              <div class="headerClass">
              Approvers
              </div>
              <hr class="lineClass"/>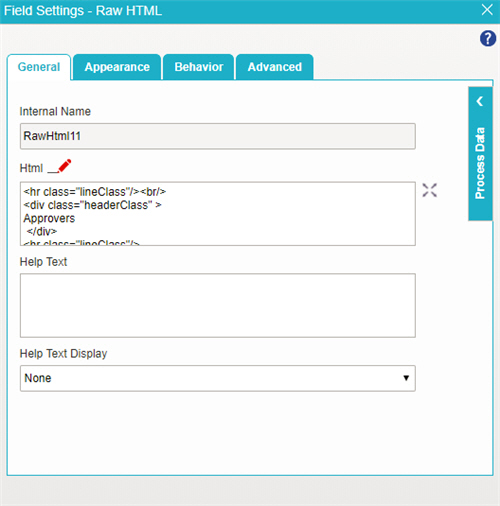
- To save the changes, click Close Screen
 .
. - On the eForm screen, drag the right edge of the form control to the right until the width of the form control is 2 columns.
- The eForm Builder shows the title for the Approvers
eForm with 2 columns.
