(Example) Use Custom CSS in an eForm
This example shows how to create and use a custom CSS snippet that changes the look and feel for the eForms in an application.
Background and Setup
Other Examples
- (Example) Custom CSS in Page Builder
- (Example) Create a Shared CSS Class to Change the Logo Image Size
- Advanced Examples
For more advanced or complex examples or specific information about how to solve a specific business problem or use case, AgilePoint recommends the following resources:
- AgilePoint Community Forums - A free, AgilePoint-moderated, crowd-sourcing user forum where you can ask questions about specific techniques, the solutions to use cases, workarounds, or other topics that may not be covered in the Product Documentation.
- Video Portal - Video walkthroughs for a range of simple and advanced tasks in AgilePoint NX.
- Professional Services - If you can not find the information you need for your specific business problem, mentoring is available through AgilePoint Professional Services.
- Personalized Training - AgilePoint can provide personalized training for your organization. To request personalized training, contact AgilePoint Sales.
Prerequisites
- This example uses the Employee Exit Checklist app from the AgilePoint NX App Store.
For more information, refer to How to Get the App.
- Before you create a custom CSS file in AgilePoint NX, you must get the CSS class names from the eForm as they are rendered at runtime.
For more information, refer to How to Get CSS Class Names for an eForm.
Good to Know
- This example shows how to create and use a custom CSS snippet that changes the look and feel for the Employee Exit Checklist Request form. You can use the same CSS file to chage the look and feel for all other forms in Employee Exit Checklist app.
- This is a simple example. It is not intended as a real-world use case.
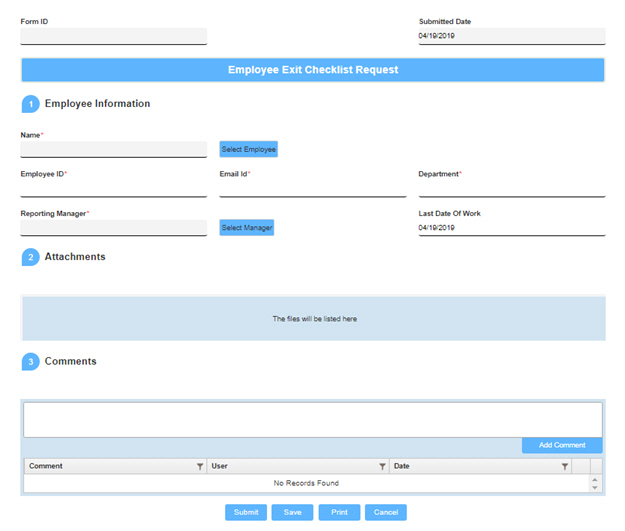
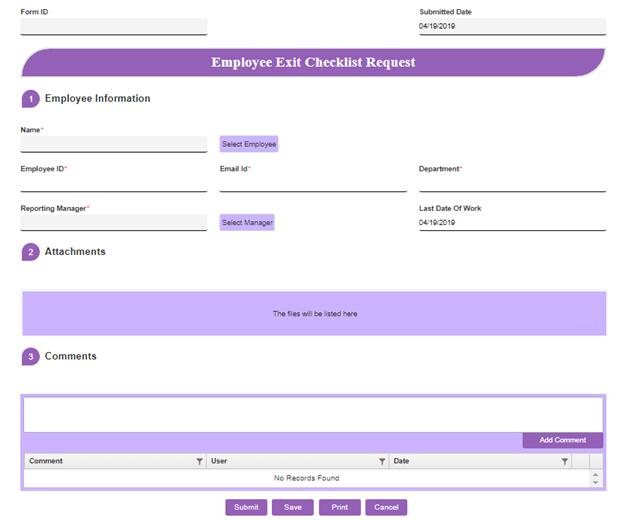
Result
Step 1: Create a CSS File
Create a CSS file in eForm Builder.
How to Start
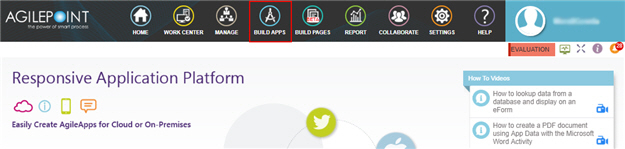
- Click Build Apps
 .
.
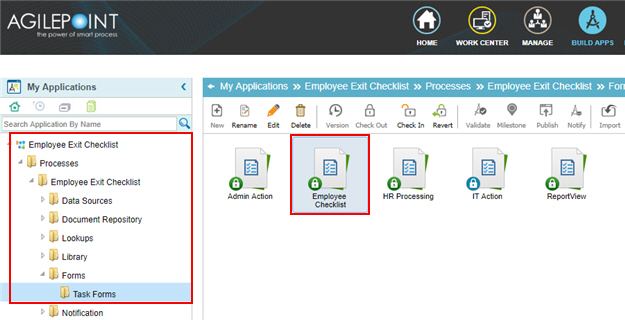
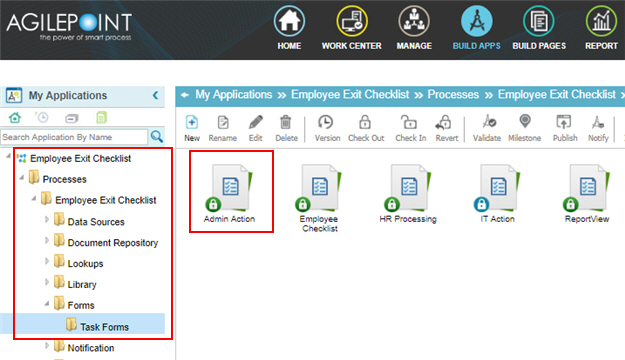
- On the Application Explorer screen,
on the My Application pane, click Employee Exit Checklist > Processes > Employee Exit Checklist > Forms > Task Forms > Employee Checklist.
Procedure
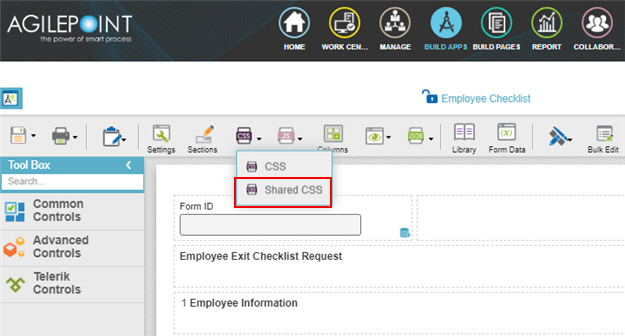
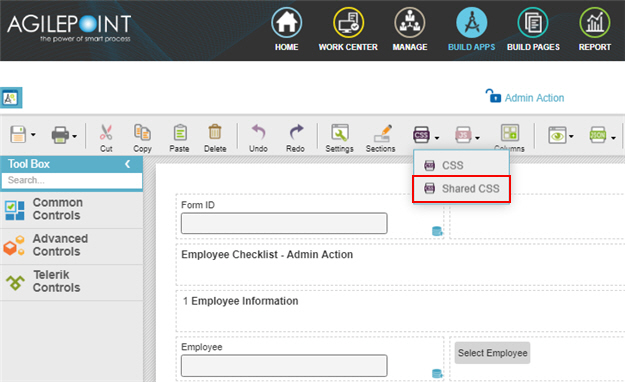
- On the eForm Builder screen,
click CSS
 >
Shared CSS .
>
Shared CSS .
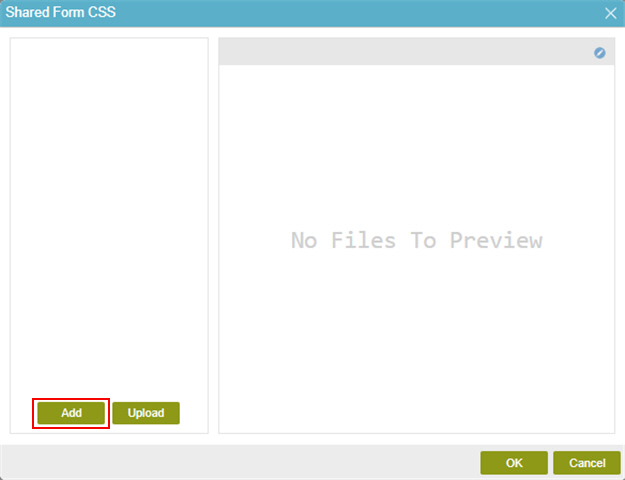
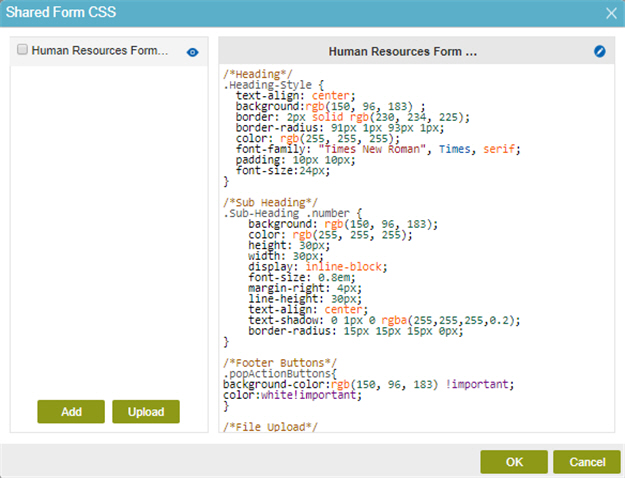
- On the Shared Form CSS screen, click Add.
- On the Create Style Sheet screen, in the File Name field, enter Human Resources Form Style.
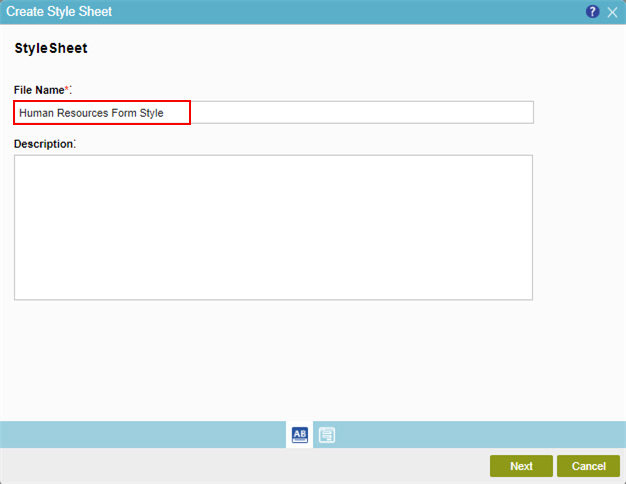
- Click Next.
- For the CSS content body, add this CSS snippet.
To get the CSS class names from the Employee Exit Checklist form, refer to How to Get CSS Class Names for an eForm.
/*Heading*/
.Heading-Style {
  text-align: center;
  background:rgb(150, 96, 183) ;
  border: 2px solid rgb(230, 234, 225);
  border-radius: 91px 1px 93px 1px;
  color: rgb(255, 255, 255);
  font-family: "Times New Roman", Times, serif;
  padding: 10px 10px;
  font-size:24px;
}

/*Sub Heading*/
.Sub-Heading .number {
  background: rgb(150, 96, 183);
  color: rgb(255, 255, 255);
  height: 30px;
  width: 30px;
  display: inline-block;
  font-size: 0.8em;
  margin-right: 4px;
  line-height: 30px;
  text-align: center;
  text-shadow: 0 1px 0 rgba(255,255,255,0.2);
  border-radius: 15px 15px 15px 0px;
}

/*Footer Buttons*/
.popActionButtons{
  background-color:rgb(150, 96, 183) !important;
  color:white!important;
}

/*File Upload*/
.dropzone .dz-default.dz-message {
  background-color: rgb(203, 179, 255) !important;
}

/*Comments*/
.EnterCommentsWrapper, .commentsHistoryWrapper {
  background-color: rgb(203, 179, 255) !important;
}

/*Comments Button*/
.EnterCommentsWrapper .pseudoBtnCommentSubmit, .EnterCommentsWrapper .pseudoBtnShowHistory {
  background-color: rgb(150, 96, 183) !important;
}

/*People Picker Button*/
.PeoplePicker {
  background-color: rgb(203, 179, 255) !important;
}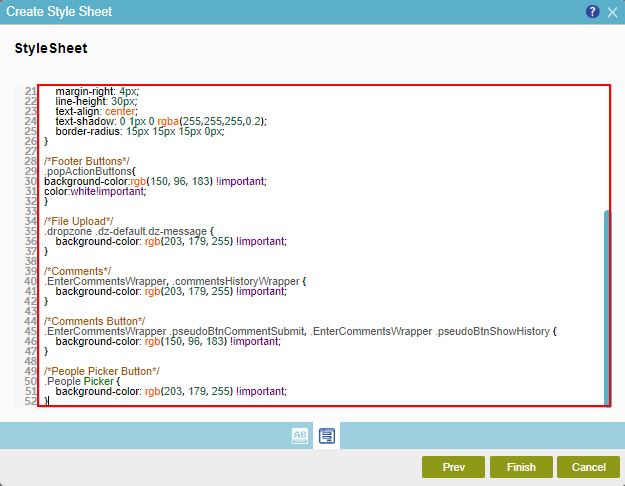
- Click Finish
The Shared Form CSS screen shows.
Step 2: Add Custom CSS to an eForm
Add the CSS file to the Employee Exit Checklist Request form.
- On the Shared Form CSS screen, select Human Resources Form Style.
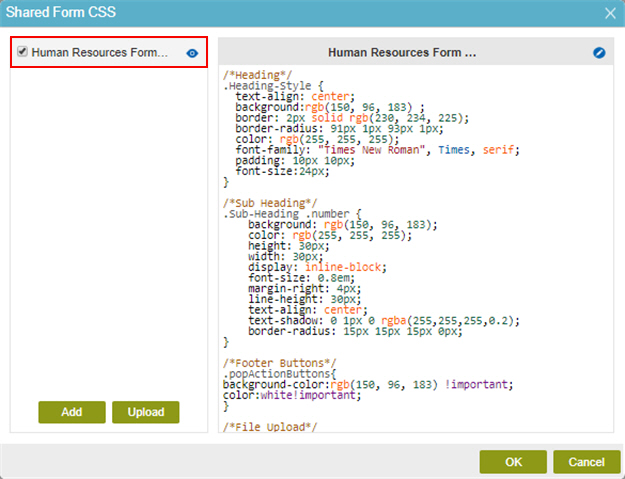
- Click OK.
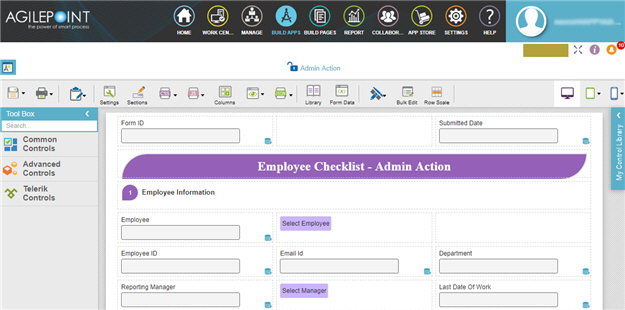
The Employee Exit Checklist Request form shows your custom CSS format.
Step 3: (Optional) Use the Shared CSS in a Different eForm
Add a shared CSS file to a different eForms in Employee Exit Checklist app.
Good to Know
- This example step shows how to add a shared CSS file to Employee Checklist - Admin Action form. You can use a similar procedure for other forms in the Employee Exit Checklist app.
- This procedure is required only if you want to use the custom CSS in more than one eForm.
How to Start
- On the Application Explorer screen,
on the My Applications pane, click Employee Exit Checklist > Processes > Employee Exit Checklist > Forms > Task Forms > select the form you want to change.
Procedure
- On the eForm Builder screen,
click CSS >
Shared CSS .
- On the Shared Form CSS screen, select Human Resources Form Style.
- Click OK.
The Employee Checklist - Admin Action form shows the custom CSS format.
How to Get the App
This example is based on the Employee Exit Checklist app from the AgilePoint NX App Store. Use this procedure to get the app.
Prerequisites
- AgilePoint NX OnDemand (public cloud), or AgilePoint NX PrivateCloud or AgilePoint NX OnPremises v7.0 or higher.
Good to Know
- This procedure is optional. It is provided so you can test the example with an out-of-the-box app.
- This is part of the Background and Setup procedures, but many users preferred this step to appear after the example, not before it.
Procedure
- Click App Store
 .
.
- In the CATEGORY section, click All.
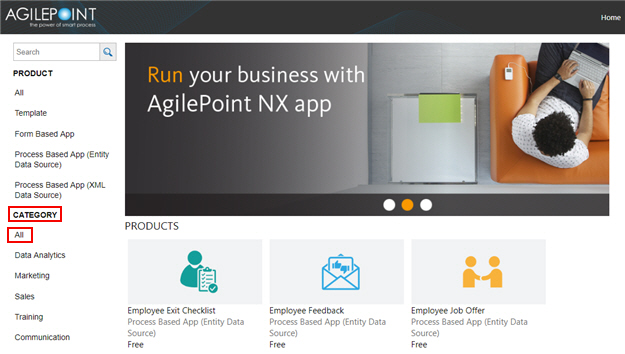
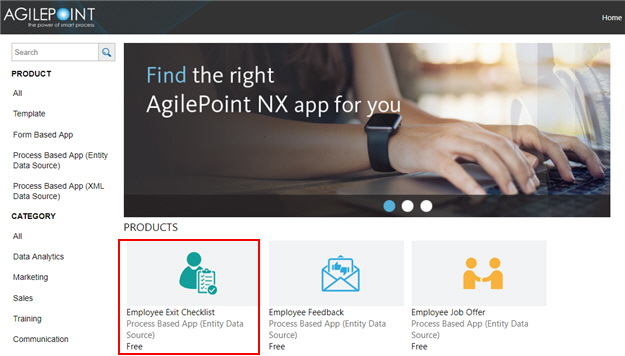
- Click the Employee Exit Checklist app.
- On the Employee Exit Checklist screen, click Add.
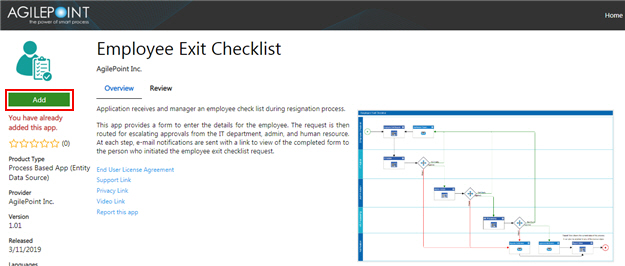
- On the Trust App screen, click Trust it.
- Click Return to site.
- Publish the Employee Exit Checklist app.
For more information, refer to Publish a process-based application.
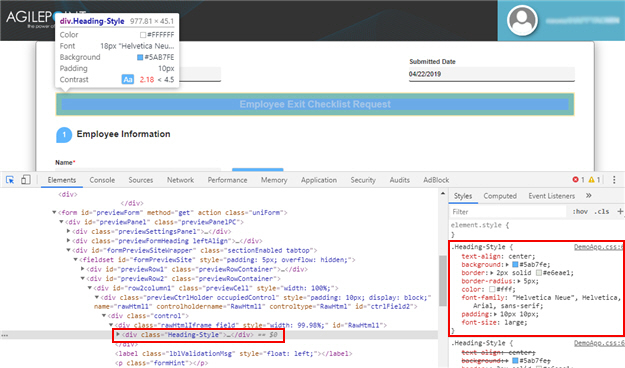
How to Get the CSS Class Names for an eForm
This examples shows how to get the CSS class names from the eForm.
Good to Know
- AgilePoint does not provide documentation for the CSS style names in eForms, custom pages in Page Builder, or other customizable web elements. You must get the CSS style names from the forms or pages at runtime or through a runtime preview.
- This example uses the Google Chrome web browser. The procedures are different for different web browsers.
- This example shows how to get the CSS class name for one form control in the Employee Checklist form. Use a similar procedure to get the CSS class names for other elements in an eForm.
How to Start
- Click Build Apps .
- On the Application Explorer screen,
on the My Application pane, click Employee Exit Checklist > Processes > Employee Exit Checklist > Forms > Task Forms > Employee Checklist.
Procedure
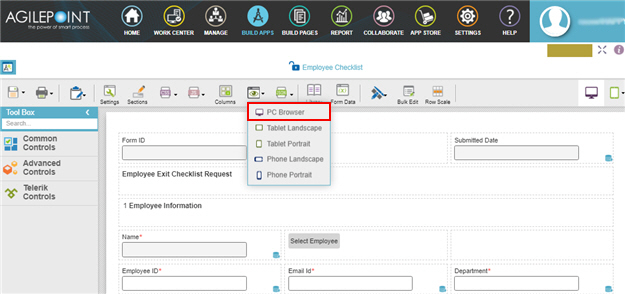
- On the eForm Builder screen, click Perspective View
 > PC Browser
  .
.
- In the runtime view of the eForm that opens in a new tab in your web browser, right-click the runtime view of the form, and click Inspect.
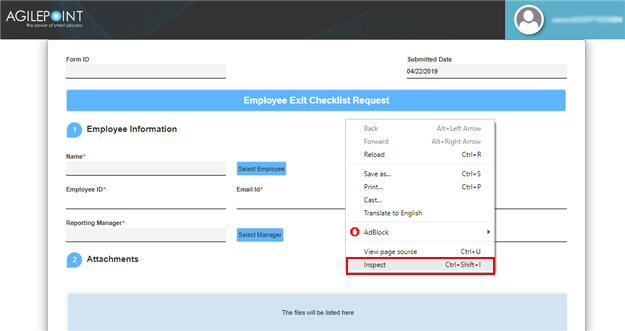
- On the source code pane in Google Chrome, select the pointer.
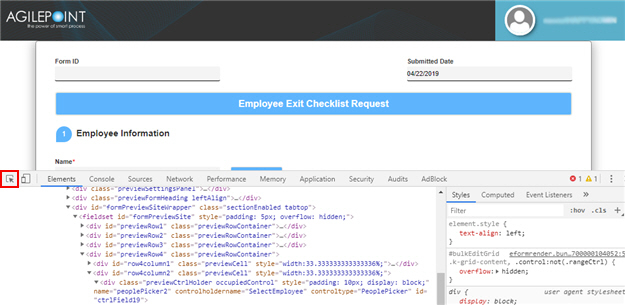
- Place the pointer over the form control.
The CSS class name for the specified element is highlighted on the source code.