
Get More than One Record from AgilePoint NX Entity
To get more than one record from an AgilePoint NX entity, do the procedure in this topic.
Prerequisites
- AgilePoint NX OnDemand (public cloud), or AgilePoint NX PrivateCloud or AgilePoint NX OnPremises v7.0 or higher.
Good to Know
- In most text fields, you can use process data variables as an alternative to literal data values.
- You can configure whether this activity waits for other activities before it runs.
For more information, refer to How Do I Configure an Activity to Wait for Other Incoming Activities?
How to Start
- On the Application Explorer screen, do one of these:
- Do one of these:
- Add an activity:
- In the Process Builder, in the Activity Library,
open the AgilePoint Data Entities
 tab.
tab. - On the AgilePoint Data Entities
tab,
drag the Query Multiple Records
 activity onto your process.
- In the Process Builder, in the Activity Library,
open the AgilePoint Data Entities
- Change an activity:
- In your process, double-click your activity.
- Add an activity:
- Click Query Multiple Records Configuration
 .
.
Procedure
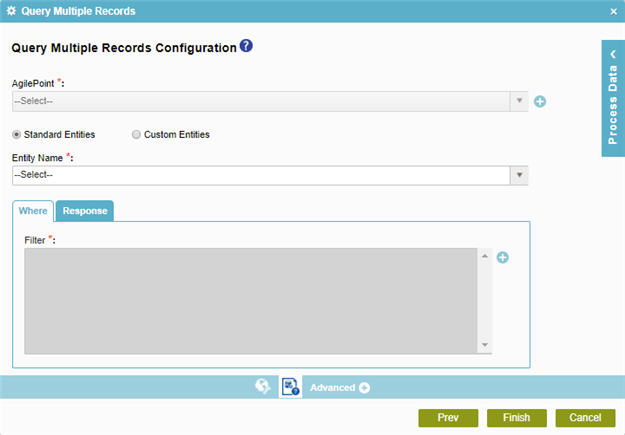
- On the Query Multiple Configuration screen, in the Entity Name list, select your entity..
- (Optional) Complete this field:
Field Name Definition Custom Entities Only
- Function:
- Specifies whether to show only custom entities in the Primary Entity Name list.
- Accepted Values:
-
- Selected - Shows only the custom entities in the Primary Entity Name list.
- Deselected - Shows both standard entities and custom entities in the Primary Entity Name list.
- Default Value:
- Deselected
- Accepts Process Data Variables:
- No
- To filter the records with a condition,
do this procedure.
- On the Where tab, Click Create
 .
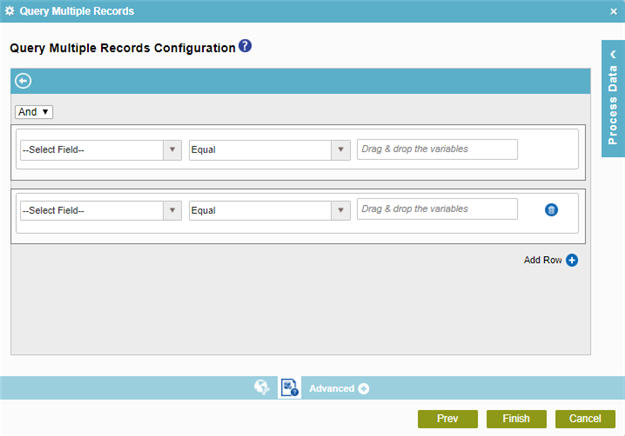
. - On the Query Multiple Records Configuration > Create Conditions screen, in the Column field, select the entity field to use in your query.
- In the Comparer field, select the operator to compare the values in your
logical expression.
Field Name Definition Comparer
- Function:
- Specifies the operator to use in your query.
- Accepted Values:
-
- Equal
- NotEqual
- GreaterThan
- LessThan
- GreaterEqual
- LessEqual
- Like
- NotLike
- In
- NotIn
- Between
- NotBetween
- Null
- NotNull
- Yesterday
- Today
- Tomorrow
- Last7Days
- Next7Days
- LastWeek
- ThisWeek
- NextWeek
- LastMonth
- ThisMonth
- NextMonth
- On
- Default Value:
- Equal
- In the Value field, enter the value to compare or drag a process data variable from the Process Data screen.
- (Optional) Click Add Row
to add a condition
that can be connected to the previous expression with a logical AND or OR operator.
- (Optional) Click Subcondition
 to add a
statement
that adds a subordinate condition to a query.
to add a
statement
that adds a subordinate condition to a query. - Click Back
 to save your condition.
- On the Where tab, Click Create
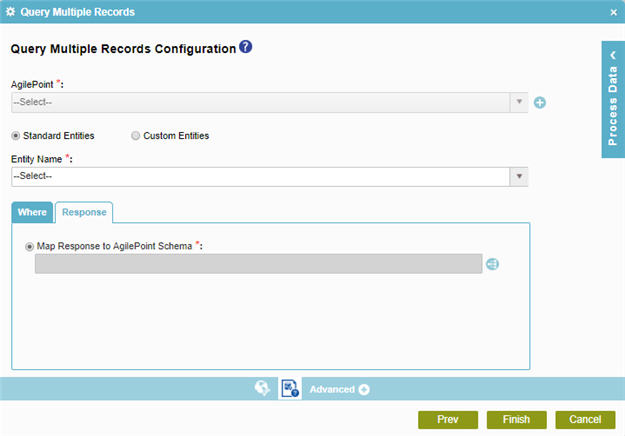
- Click the Response tab.
- To connect the response to your process schema, complete this field
as necessary.
Field Name Definition Map Response to AgilePoint Schema
- Function:
- Maps AgilePoint NX entity fields to your schema.
- Accepted Values:
- Click the Schema Mapping
 button to open the
Schema Mapper.
button to open the
Schema Mapper. Use this screen to connect the response to the data model for your process.
- Default Value:
- None