
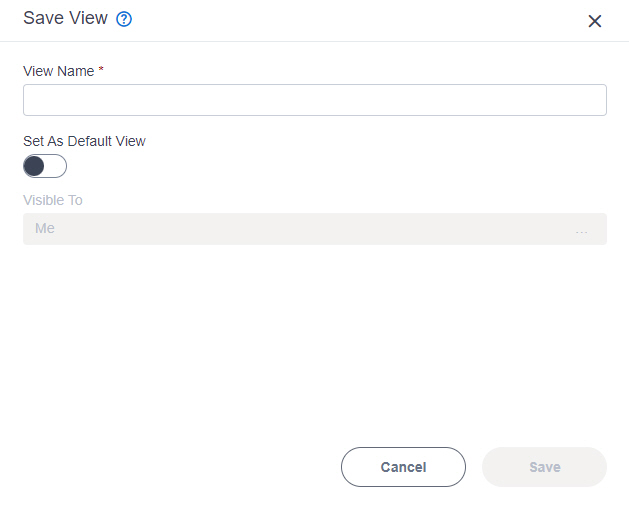
Save View screen
Creates a custom view in Data Entities.
Prerequisites
- You must have the Create, Update, Remove Custom Views and Quick Launch
access right to create a custom view.
For more information, refer to Add Role screen.
- AgilePoint NX OnDemand (public cloud), or AgilePoint NX Private Cloud or AgilePoint NX OnPremises v8.0 Software Update 2 or higher.
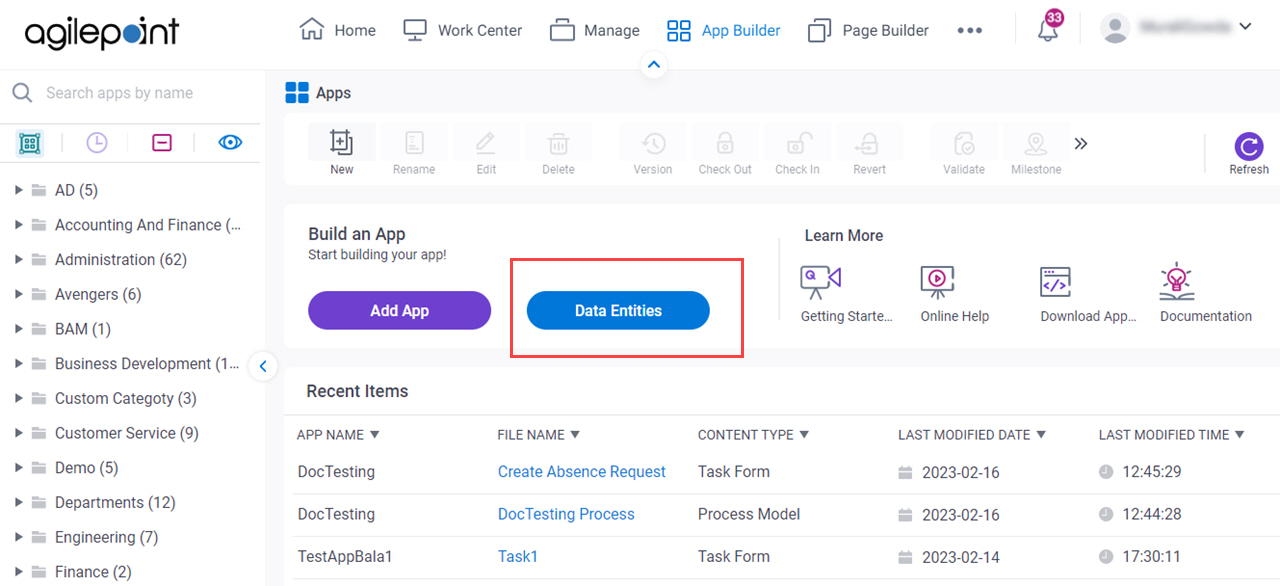
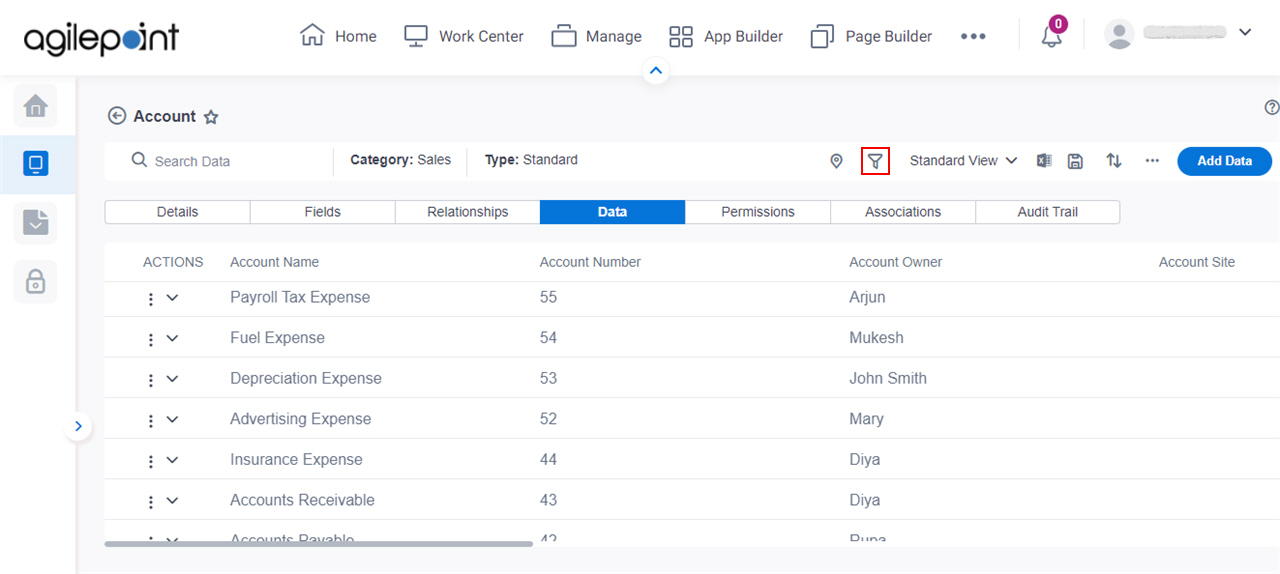
How to Start
- Click App Builder.

- On the App Explorer screen,
click Data Entities.
- On the Data Entities Home screen, click Entities.
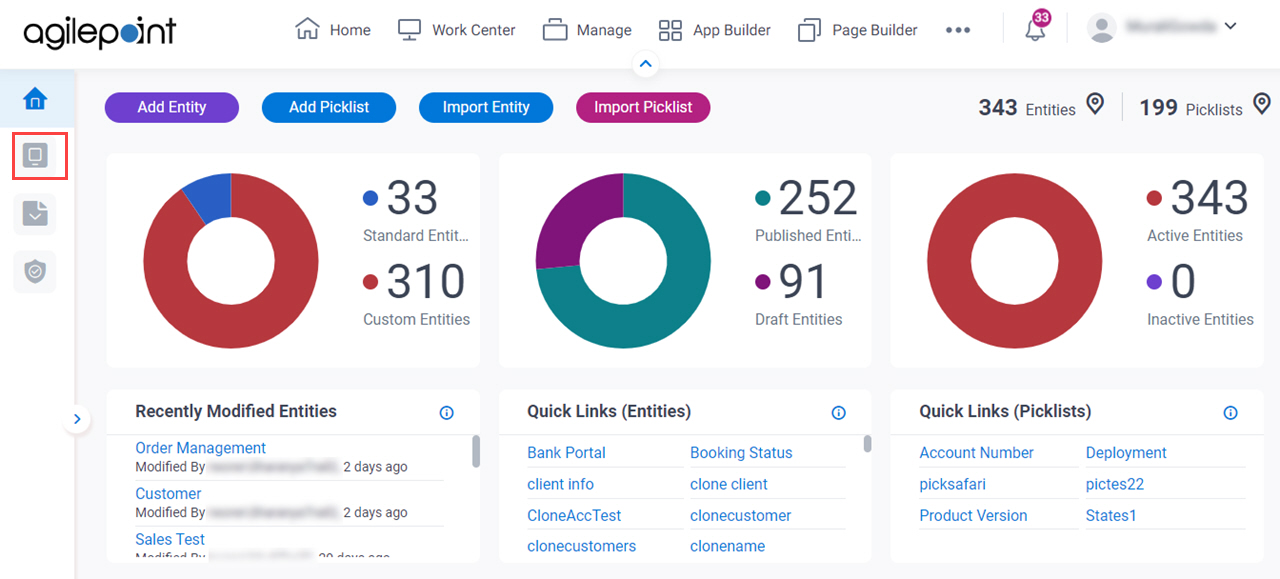
- On the Entities screen,
click an entity.

- Click the Data tab.
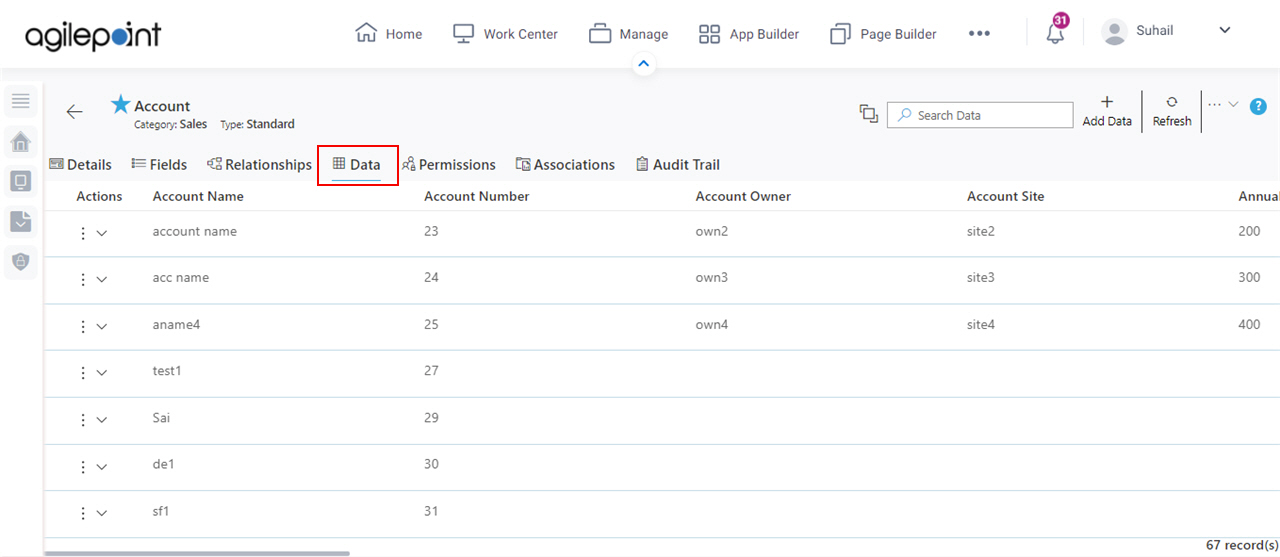
- On the Data tab,
click Filters
 .
.
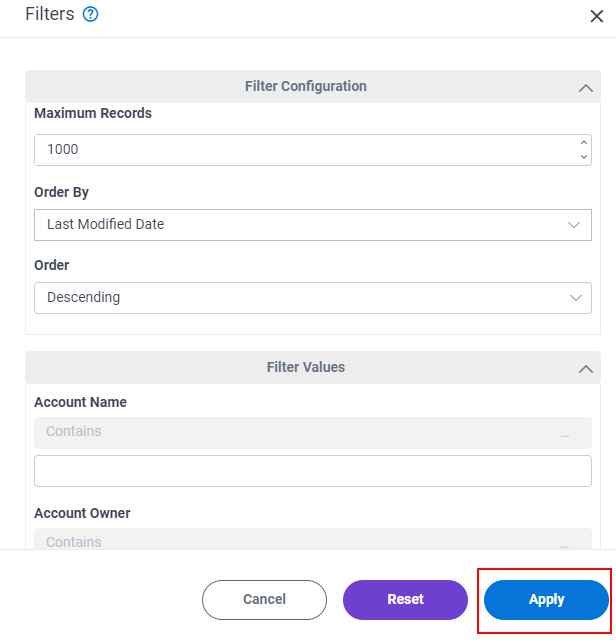
- On the Filters screen, configure the filter criteria, and click Apply.
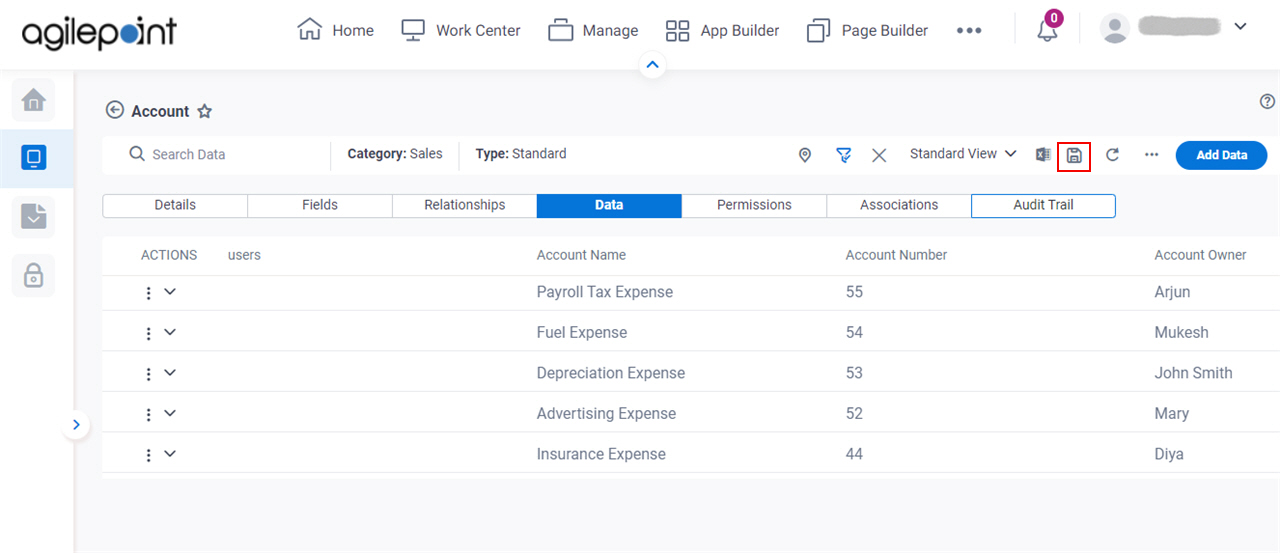
- On the Data tab,
click Save View
 .
.
Fields
| Field Name | Definition |
|---|---|
View Name |
|
Set As Default View |
|
|
Visible To |
|
|
Save |
|