Examples - Step-by-step use case examples, information about what types of examples are
provided in the AgilePoint NX Product Documentation, and other resources where you
can find more examples.
In AgilePoint NX releases before AgilePoint NX Private Cloud
or AgilePoint NX OnPremises
v7.0, Software Update 2, Cumulative Update 6,
if you deleted a relationship, the dependent field or child field was
deleted in the child entity. In AgilePoint NX Private Cloud
or AgilePoint NX OnPremises
v7.0, Software Update 2, Cumulative Update 6 or higher,
if you delete a relationship, only the relationship is deleted. The dependent field is
not deleted in the child entity.
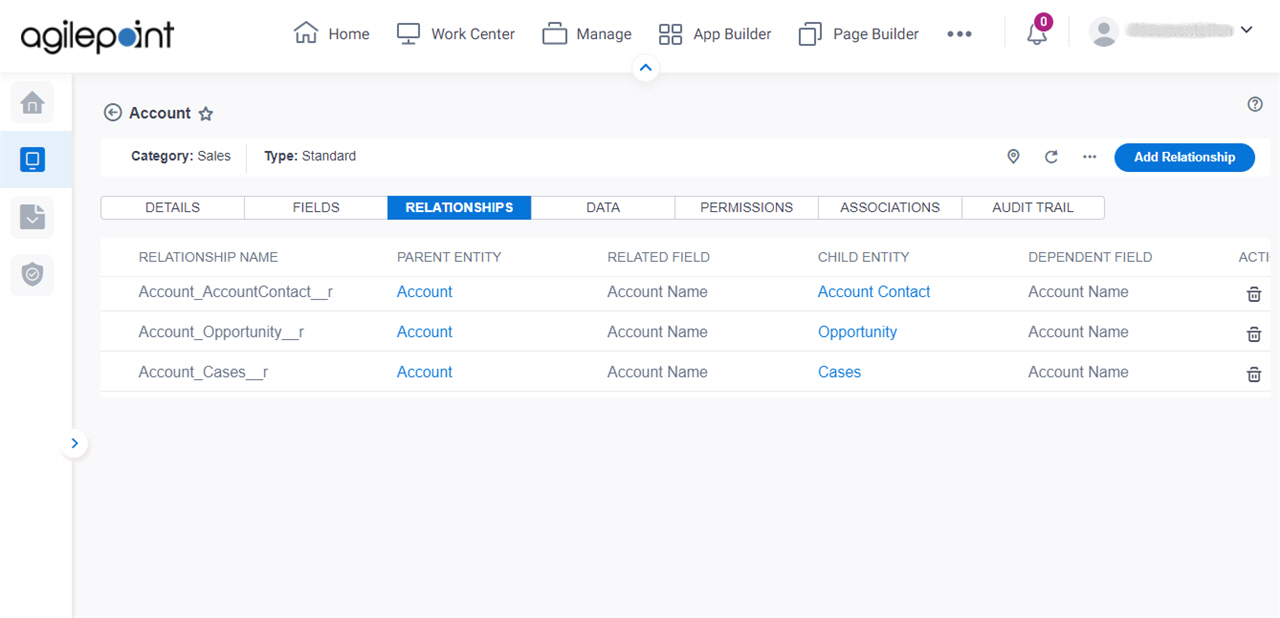
Actions
Function:
Specifies the type of action for the
relationship to do.
Accepted Values:
Delete - Deletes a relationship.
Default Value:
None
Limitations:
In AgilePoint NX releases before AgilePoint NX Private Cloud
or AgilePoint NX OnPremises
v7.0, Software Update 2, Cumulative Update 6,
if you deleted a relationship, the dependent field or child field was
deleted in the child entity. In AgilePoint NX Private Cloud
or AgilePoint NX OnPremises
v7.0, Software Update 2, Cumulative Update 6 or higher,
if you delete a relationship, only the relationship is deleted. The dependent field is
not deleted in the child entity.