
Entity screen > Fields tab
Creates custom entity fields for a custom entity.
Background and Setup
To create a custom entity field, do the procedure in this topic.
Video: Build Your First Data Entity
Examples
- (Example) Create a Custom Entity in Data Entities
- Examples - Step-by-step use case examples, information about what types of examples are provided in the AgilePoint NX Product Documentation, and other resources where you can find more examples.
Prerequisites
- AgilePoint NX OnDemand (public cloud), or AgilePoint NX Private Cloud or AgilePoint NX OnPremises v7.0 or higher.
Good to Know
- All entities create 5 standard fields by default. These fields are read-only. You can not change or delete these fields, and you can not give them values:
- ID
- Created Date
- Last Modified Date
- Created By
- Last Modified By
- After you configure the field type, you can not change it.
- What Types of Entity Field Can I Use in a Form Control?.
How to Start
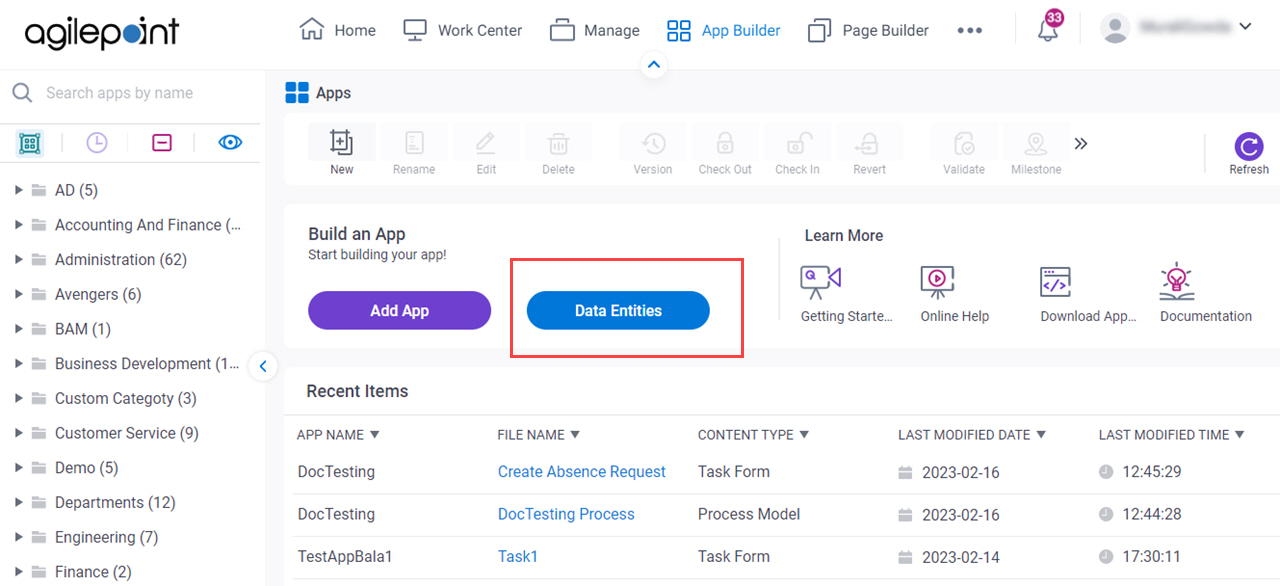
- Click App Builder.

- On the App Explorer screen,
click Data Entities.
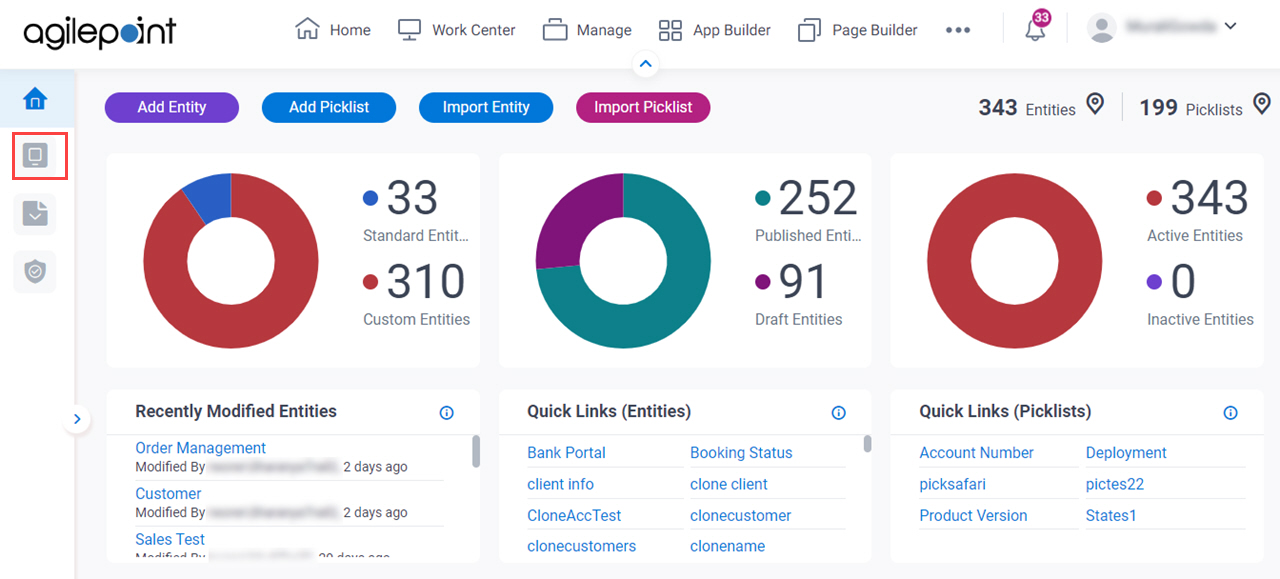
- On the Data Entities Home screen, click Entities.
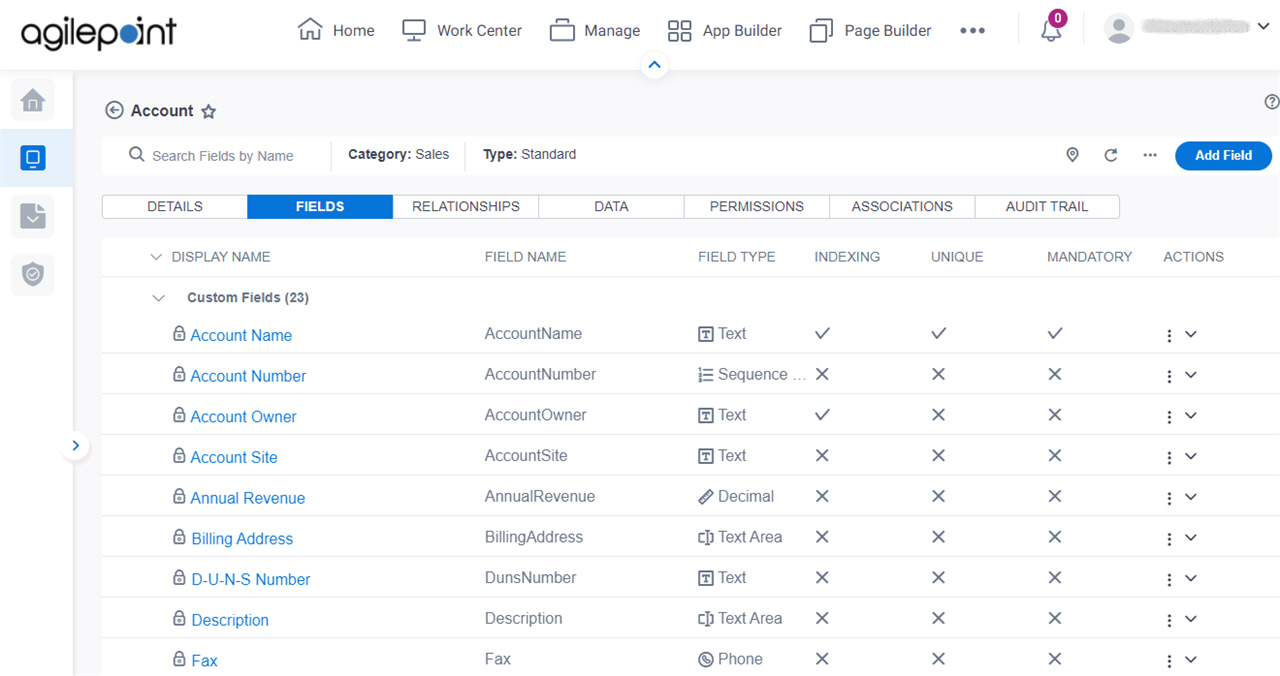
- On the Entities screen,
click an entity.

Entity screen > Fields tab
Creates or changes one or more custom entity fields.
How to Start
- On the Entity screen, click the Fields tab.
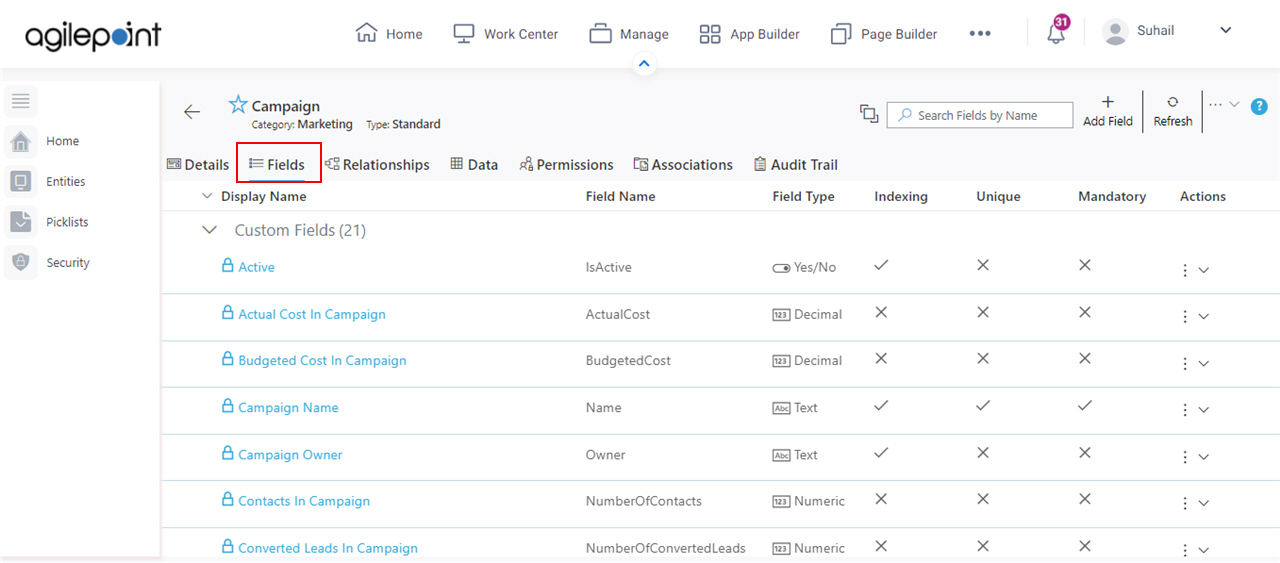
Fields
| Field Name | Definition |
|---|---|
Navigate To Other Entity |
|
Search |
|
Add Field |
|
Refresh |
|
Clone Entity |
|
Export Entity Model |
|
Export Data |
|
Export Fields |
|
Import Data |
|
Import Fields |
|
|
Sync Analytics | |
Display Name |
|
Field Name |
|
|
Field Type |
|
Indexing |
|
Unique |
|
|
Mandatory |
|
|
Actions |
|


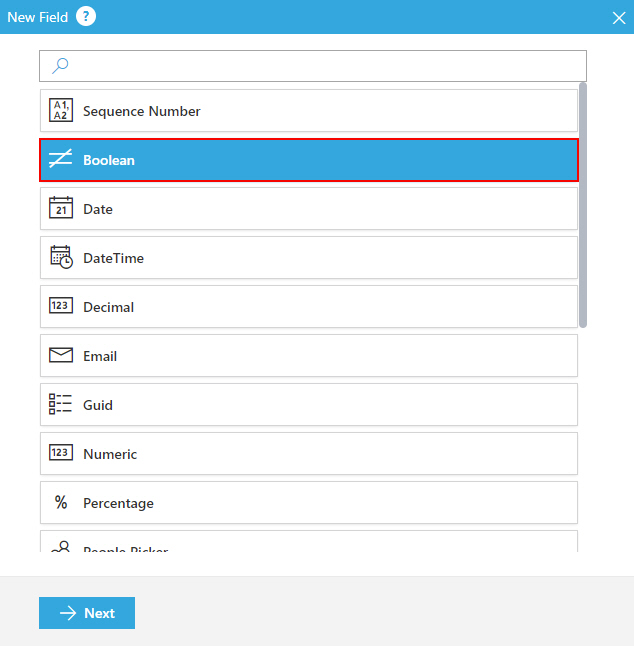
New Field screen
Specifies the type of data that the entity field contains.
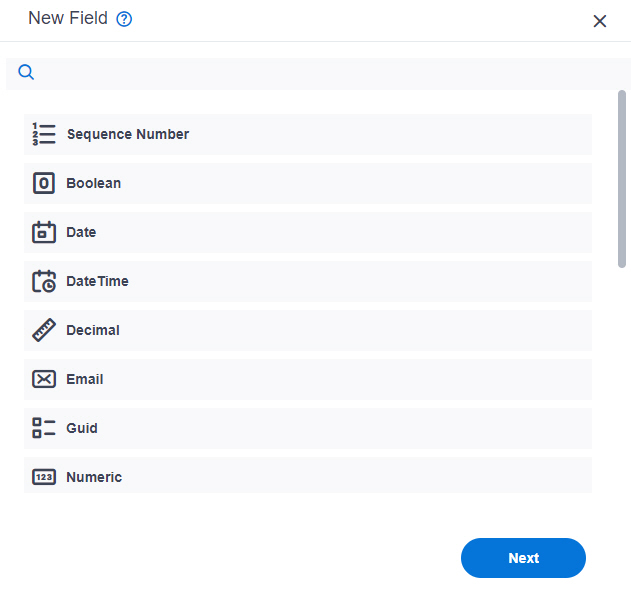
How to Start
- On the Fields tab, click Add Field
 .
.

Fields
| Field Name | Definition |
|---|---|
Boolean |
|
Date |
|
DateTime |
|
Decimal |
|
| |
GUID |
|
Numeric |
|
People Picker |
|
Percentage |
|
Phone |
|
Picklist |
|
Range |
|
Rich Text |
|
Text |
|
Text Area |
|
URL |
|
Sequence Number |
|
Yes/No |
|
Search |
|
|
Next |
|
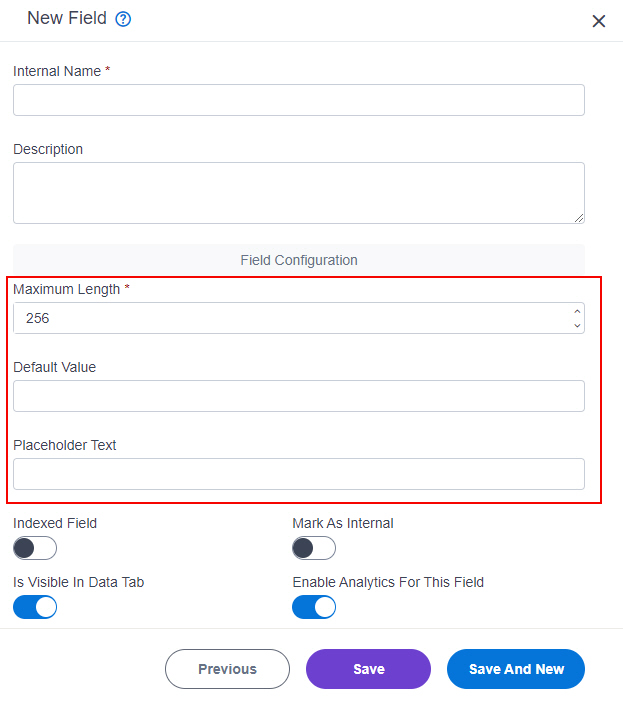
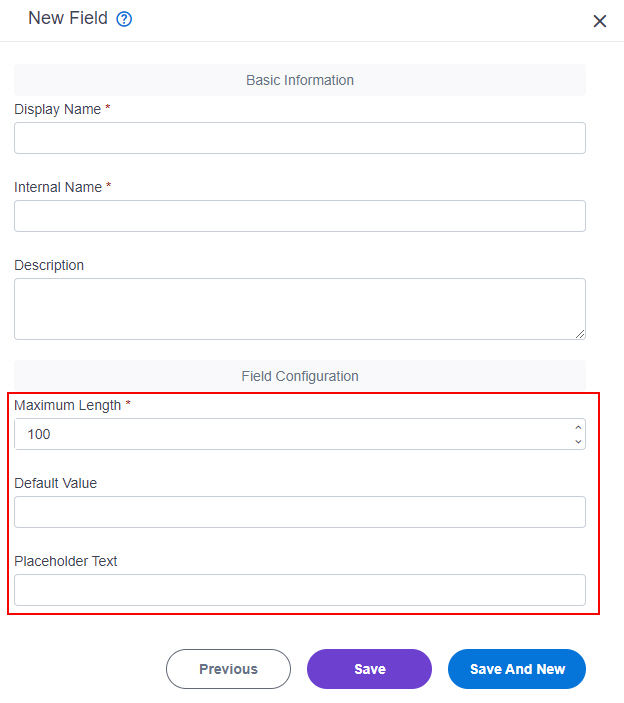
New Field screen: Common Fields
Specifies the configuration for your field.
This topic gives the settings that are common to all field types. Refer to the next sections for information about the settings for specific field types.
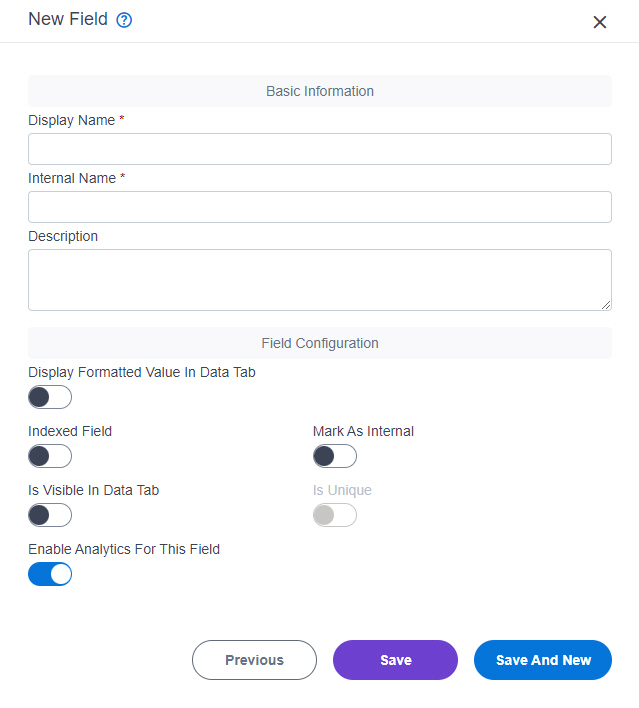
How to Start
- On the New Field screen, select your data type, and click Next.
Fields
| Field Name | Definition |
|---|---|
Display Name |
|
Internal Name |
|
|
Description |
|
Indexed Field |
|
Mark As Internal |
|
|
Is Visible In Data Tab |
|
|
Is Unique |
|
Enable Analytics For This Field |
|
Previous |
|
|
Save |
|
|
Save And New |
|
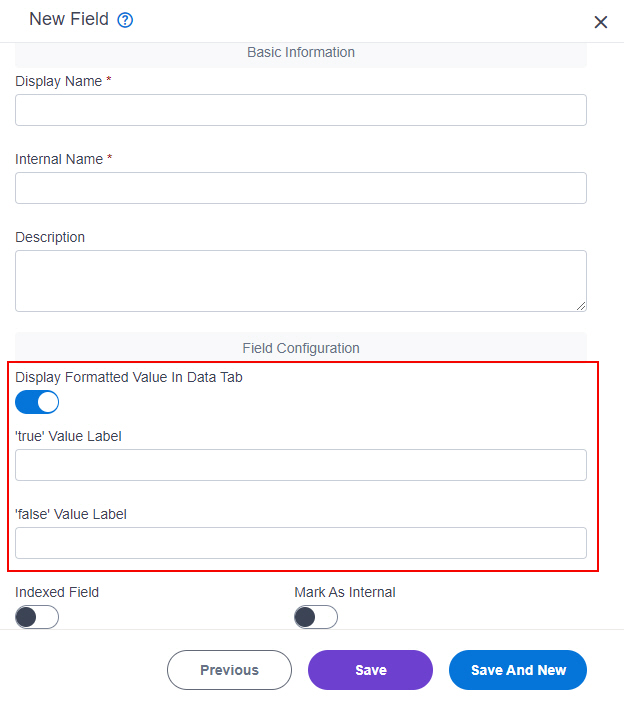
New Field screen: Boolean
This topic gives the settings that are specific to the entity field type Boolean.
Prerequisites
- AgilePoint NX OnDemand (public cloud), or AgilePoint NX Private Cloud or AgilePoint NX OnPremises v7.0 Software Update 2 or higher.
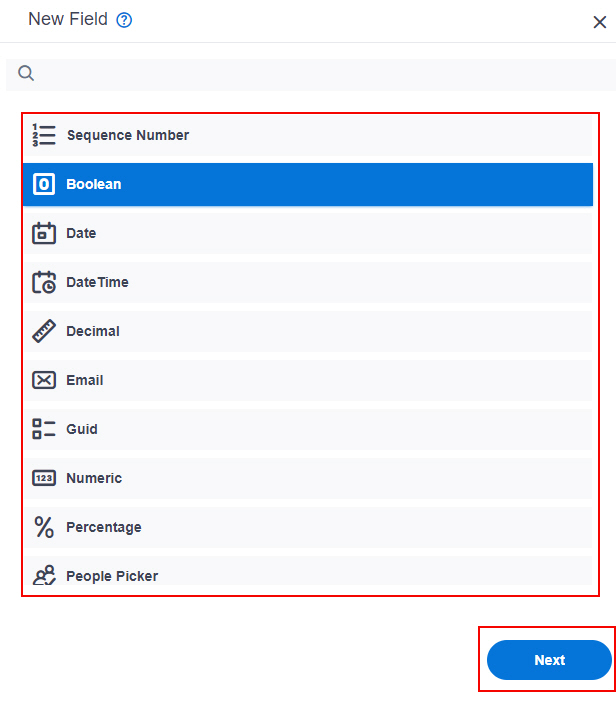
How to Start
- On the New Field screen, select Boolean.
- Click Next.
Fields
| Field Name | Definition |
|---|---|
True Value Label |
|
False Value Label |
|
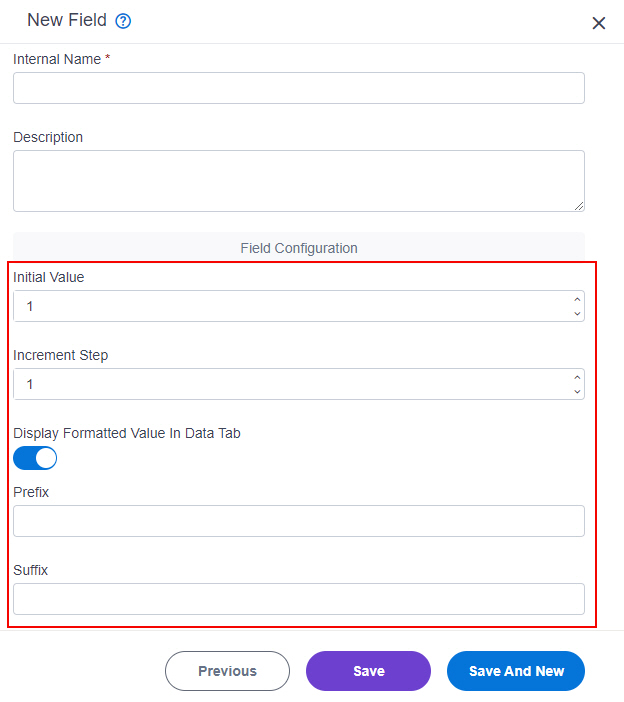
New Field screen: Sequence Number
This topic gives the settings that are specific to the entity field type Sequence Number.
How to Start
- On the New Field screen, select Sequence Number.
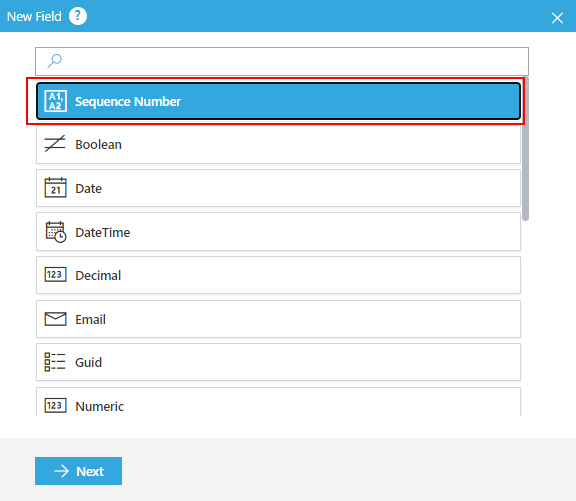
- Click Next.
Fields
| Field Name | Definition |
|---|---|
Initial Value |
|
Increment Step |
|
Prefix |
|
Suffix |
|
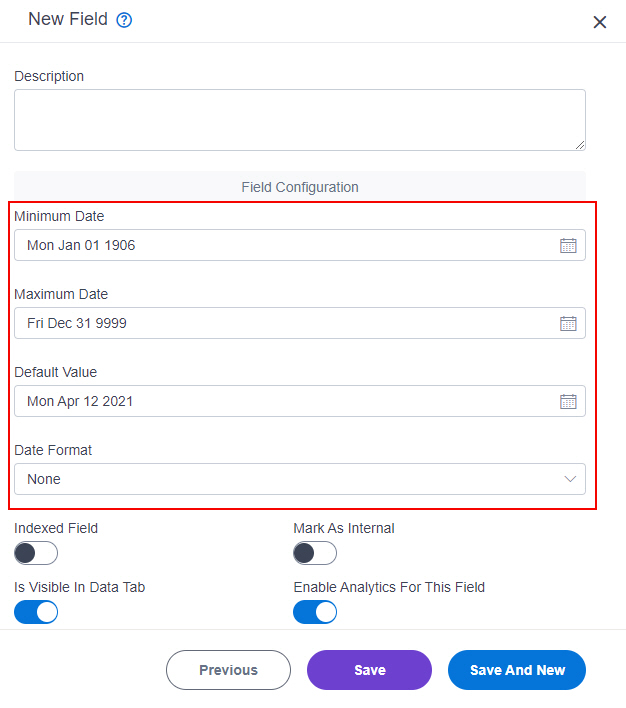
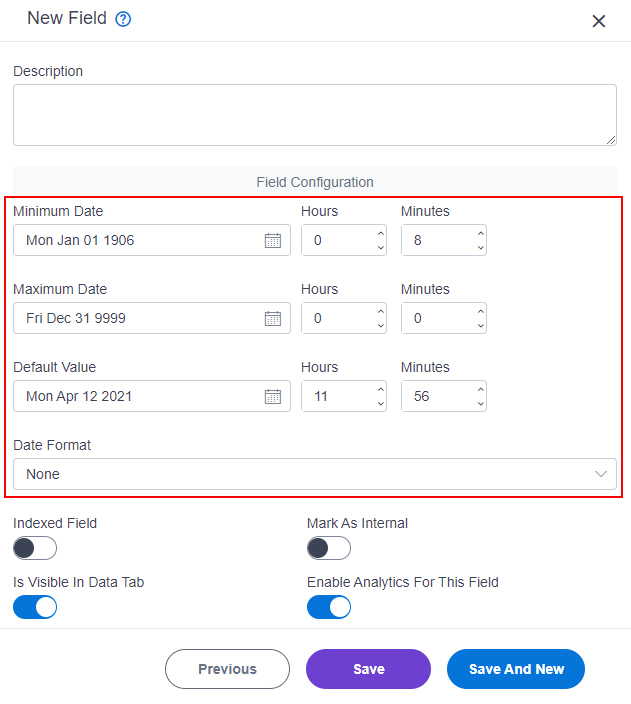
New Field screen: Date
This topic gives the settings that are specific to the entity field type Date.
How to Start
- On the New Field screen, select Date.
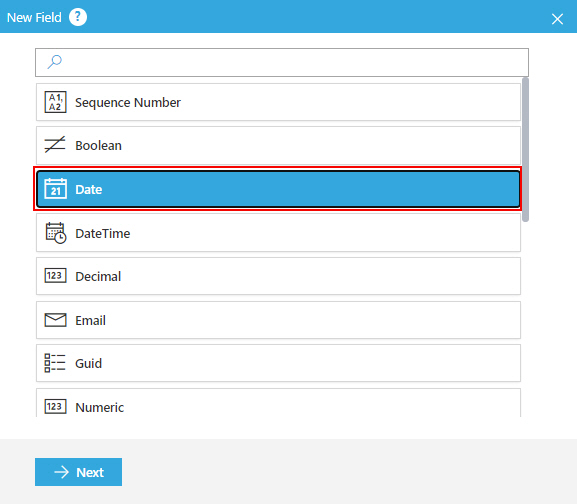
- Click Next.
Fields
| Field Name | Definition |
|---|---|
Minimum Date |
|
Maximum Date |
|
Default Value |
|
Date Format |
|
New Field screen: DateTime
This topic gives the settings that are specific to the entity field type DateTime.
How to Start
- On the New Field screen, select DateTime.
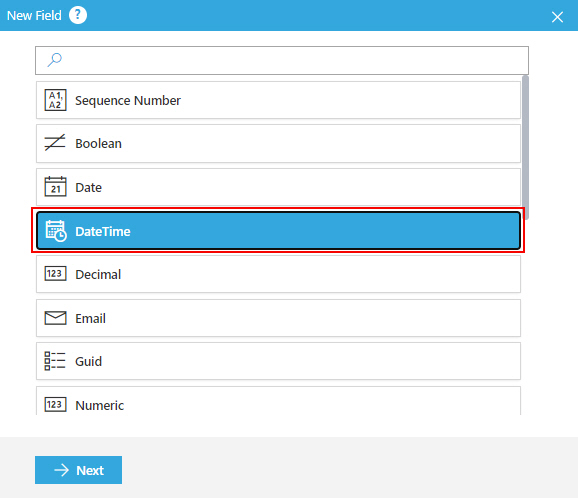
- Click Next.
Fields
| Field Name | Definition |
|---|---|
Minimum Date |
|
Maximum Date |
|
Default Value |
|
Date Format |
|
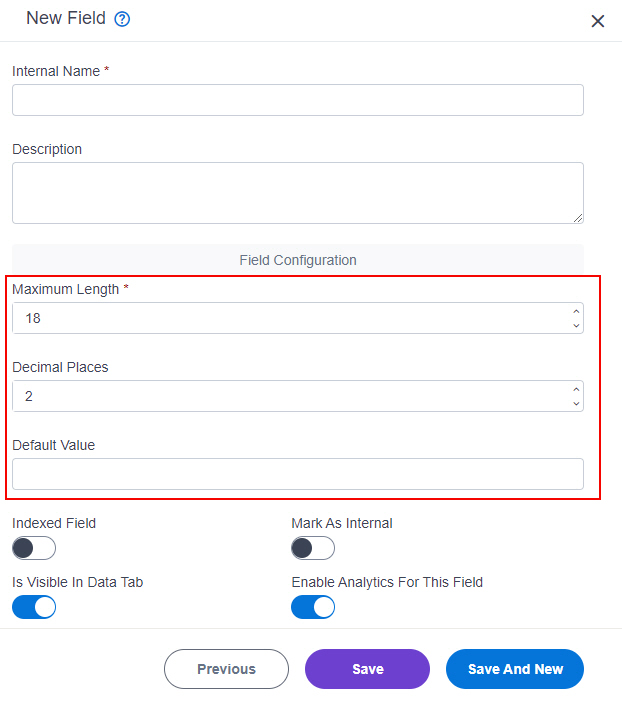
New Field screen: Decimal
This topic gives the settings that are specific to the entity field type Decimal.
How to Start
- On the New Field screen, select Decimal.
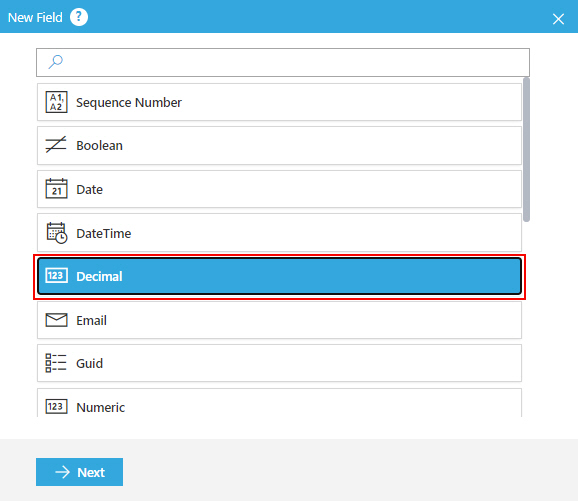
- Click Next.
Fields
| Field Name | Definition |
|---|---|
Maximum Length |
|
Decimal Places |
|
Default Value |
|
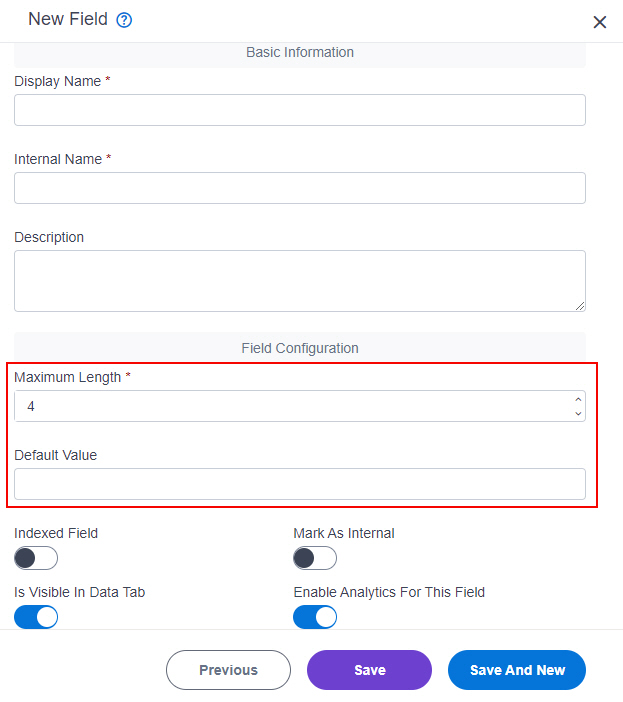
New Field screen: Email
This topic gives the settings that are specific to the entity field type Email.
How to Start
- On the New Field screen, select Email.
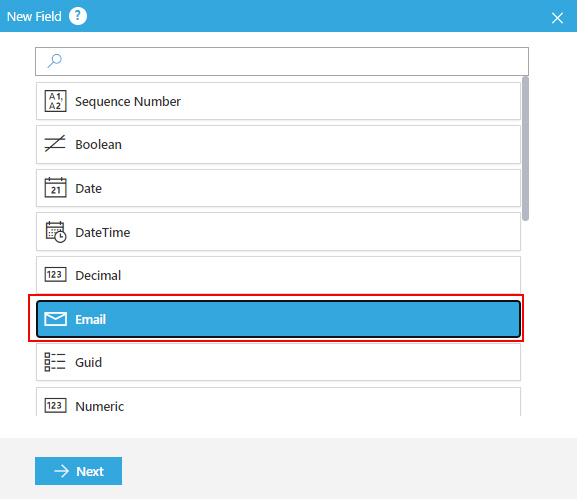
- Click Next.
Fields
| Field Name | Definition |
|---|---|
Maximum Length |
|
Default Value |
|
Placeholder Text |
|
New Field screen: Numeric
This topic gives the settings that are specific to the entity field type Numeric.
How to Start
- On the New Field screen, select Numeric.
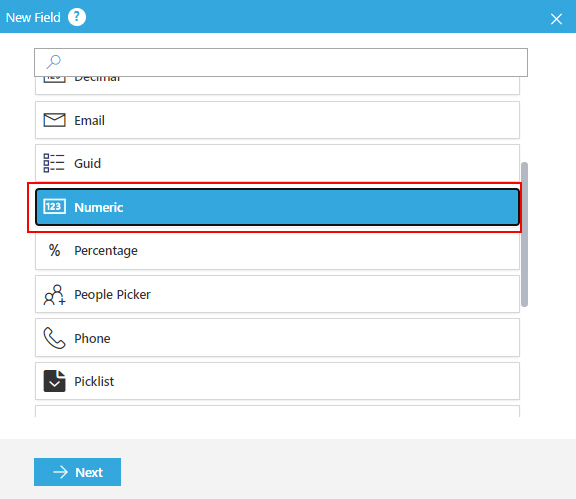
- Click Next.
Fields
| Field Name | Definition |
|---|---|
Maximum Length |
|
Default Value |
|
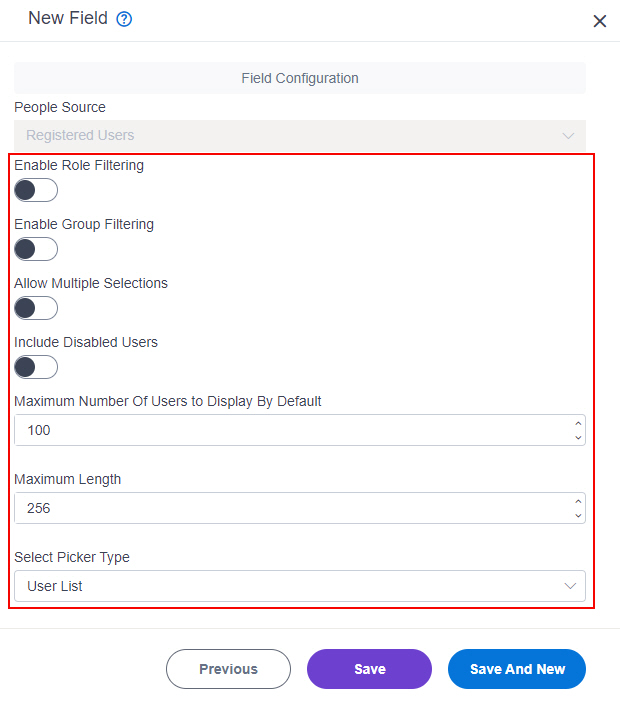
New Field screen: People Picker
This topic gives the settings that are specific to the entity field type People Picker.
How to Start
- On the New Field screen, select People Picker.
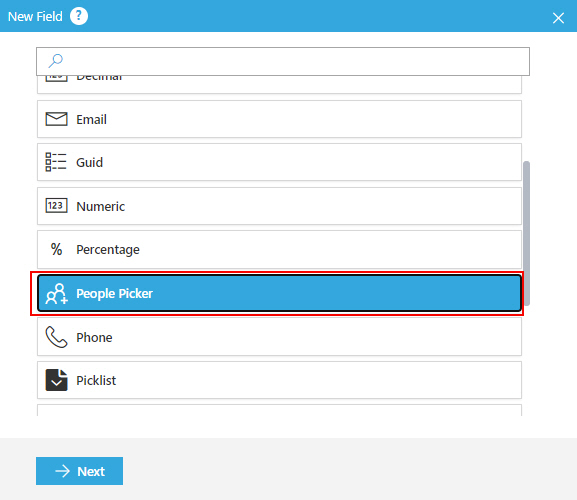
- Click Next.
Prerequisites
- AgilePoint NX OnDemand (public cloud), or AgilePoint NX Private Cloud or AgilePoint NX OnPremises v7.0 Software Update 1 or higher.
Fields
| Field Name | Definition |
|---|---|
People Source |
|
Enable Role Filtering |
|
Select Roles | |
Enable Group Filtering |
|
Select Groups | |
Allow Multiple Selections |
|
Include Disabled Users |
|
Maximum Number Of Users to Display By Default | |
Maximum Length |
|
New Field screen: Phone
This topic gives the settings that are specific to the entity field type Phone.

How to Start
- On the New Field screen, select Phone.
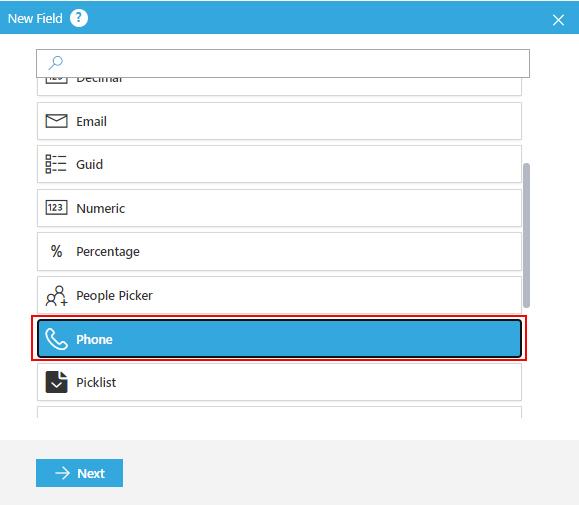
- Click Next.
Fields
| Field Name | Definition |
|---|---|
Maximum Length |
|
Default Value |
|
Placeholder Text |
|
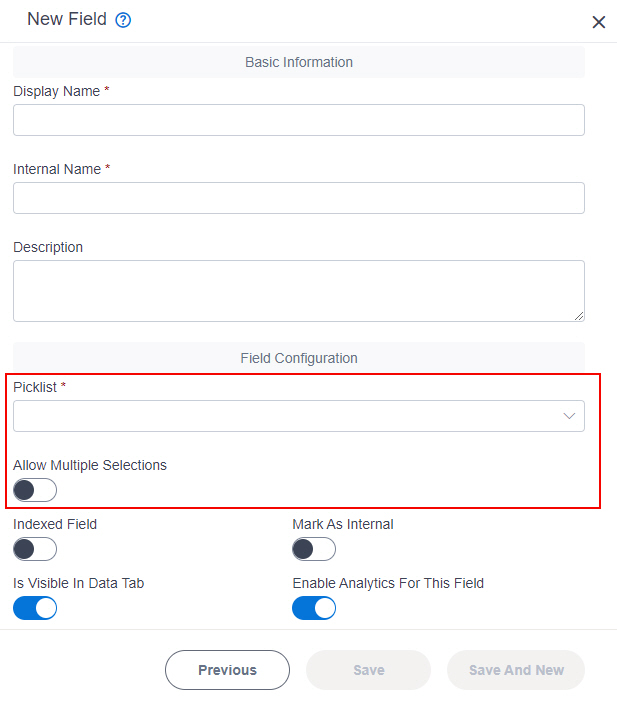
New Field screen: Picklist
This topic gives the settings that are specific to the entity field type Picklist.
How to Start
- On the New Field screen, select Picklist.
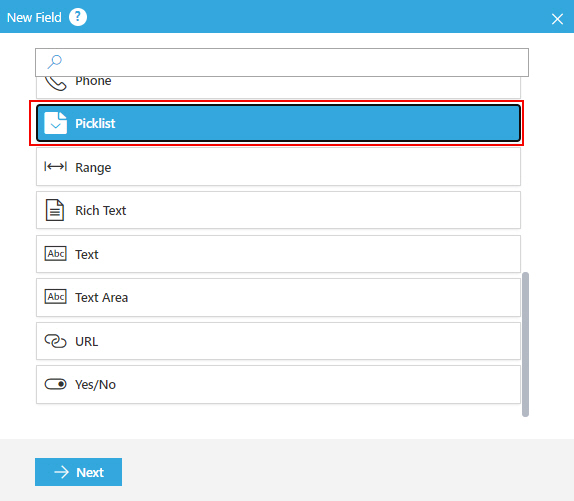
- Click Next.
Fields
| Field Name | Definition |
|---|---|
Picklist |
|
Allow Multiple Selections |
|
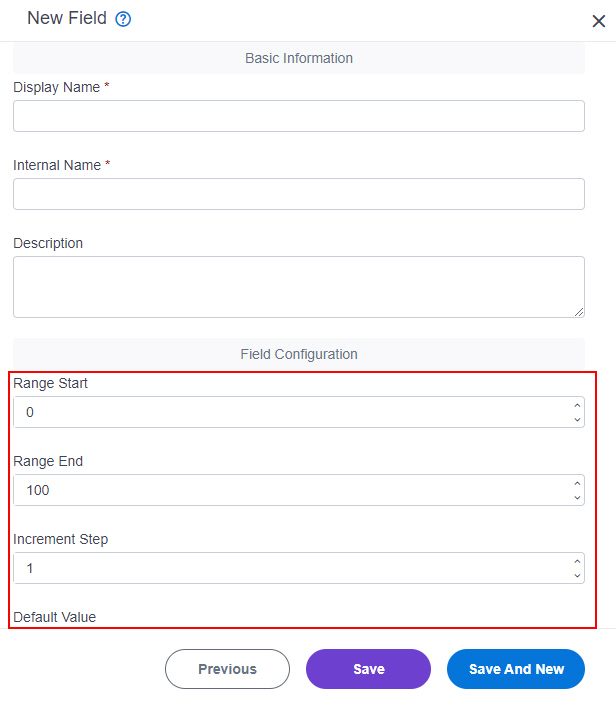
New Field screen: Range
This topic gives the settings that are specific to the entity field type Range.
How to Start
- On the New Field screen, select Range.
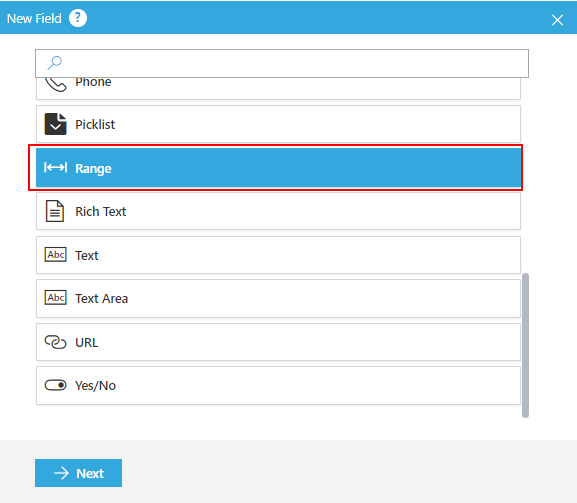
- Click Next.
Fields
| Field Name | Definition |
|---|---|
Range Start |
|
Range End |
|
Increment Step |
|
Default Value |
|
New Field screen: Rich Text
This topic gives the settings that are specific to the entity field type Rich Text.

How to Start
- On the New Field screen, select Rich Text.
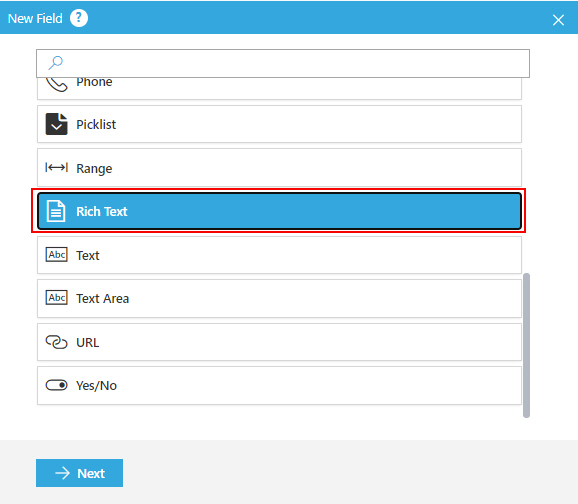
- Click Next.
Fields
| Field Name | Definition |
|---|---|
Maximum Length |
|
Default Value |
|
Placeholder Text |
|
New Field screen: Text
This topic gives the settings that are specific to the entity field type Text.
How to Start
- On the New Field screen, select Text.
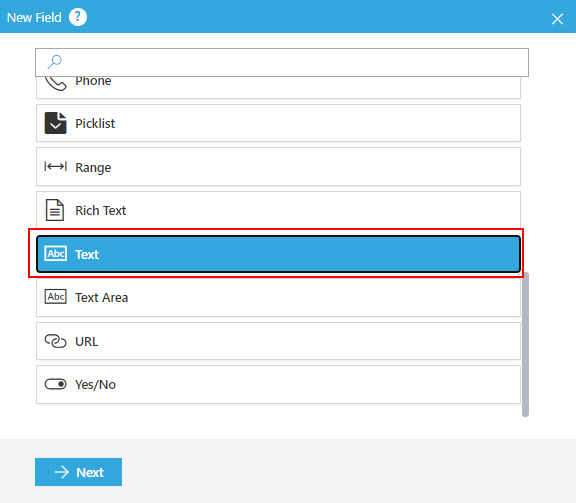
- Click Next.
Fields
| Field Name | Definition |
|---|---|
Maximum Length |
|
Default Value |
|
Placeholder Text |
|
New Field screen: Text Area
This topic gives the settings that are specific to the entity field type Text Area.

How to Start
- On the New Field screen, select Text Area.
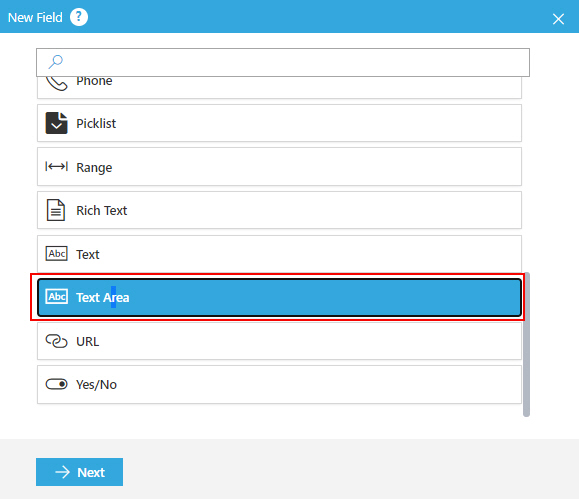
- Click Next.
Fields
| Field Name | Definition |
|---|---|
Maximum Length |
|
Default Value |
|
Placeholder Text |
|
New Field screen: URL
This topic gives the settings that are specific to the entity field type URL.

How to Start
- On the New Field screen, select URL.
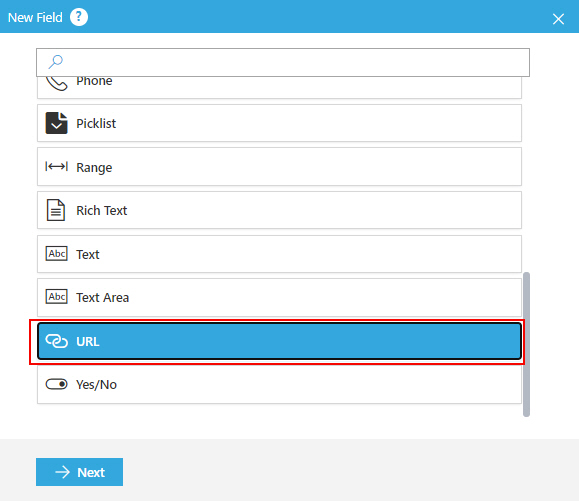
- Click Next.
Fields
| Field Name | Definition |
|---|---|
Maximum Length |
|
Default Value |
|
Placeholder Text |
|
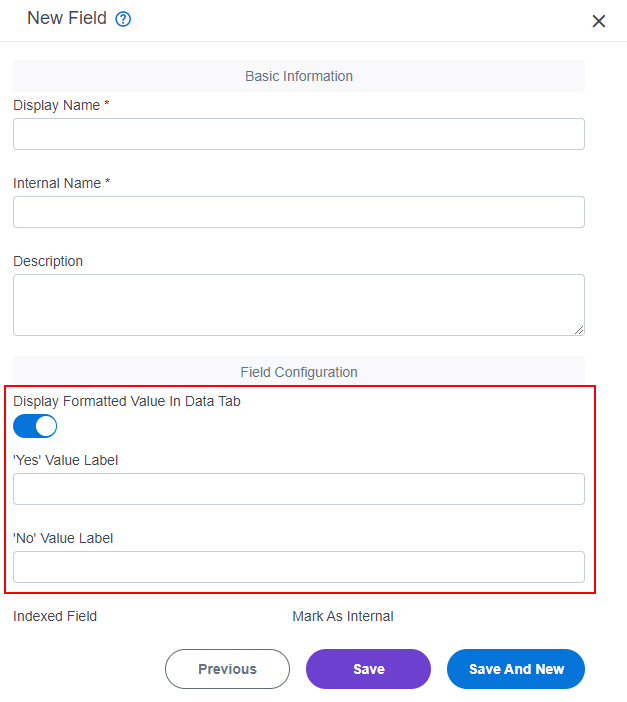
New Field screen: Yes/No
This topic gives the settings that are specific to the entity field type Yes/No.
How to Start
- On the New Field screen, select Yes/No.
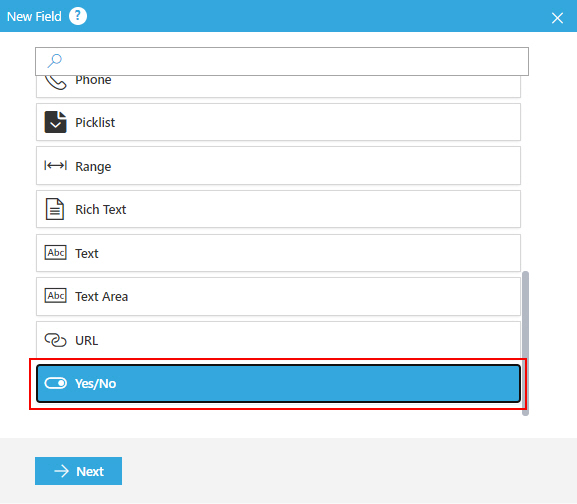
- Click Next.
Fields
| Field Name | Definition |
|---|---|
Yes Value Label |
|
No Value Label |
|