Configure Lookup for REST Service > Multiple Columns > Advanced Configuration tab
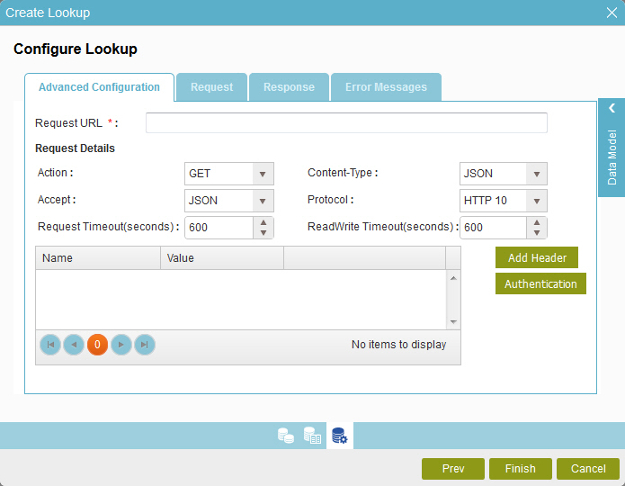
Configures a lookup in details for the REST service.

Figure: Configure Lookup screen > Advanced Configuration tab

Advanced Configuration tab

How to Start

  1. On the Application Explorer screen, do one of these:
  2. Do one of these:
    • Add your form control:
      1. On the eForm Builder screen, in the Toolbox, open one of these tabs:
        • Common Controls Common Controls icon
        • Advanced Controls Advanced Controls icon
        • Telerik Controls Telerik Controls icon
      2. On your tab, drag one of these controls onto your form:
        • Auto-Suggest Auto-Suggest icon
        • List Box List Box icon
        • Subform Subform icon
        • Check Box Check Box icon
        • Auto Lookup Auto Lookup icon
        • List View List View icon
        • Pop-Up Select Pop-Up Select icon
        • Drop-Down List Drop-Down List icon
        • Auto-Suggest Auto-Suggest icon
        • Chart Chart icon
        • Data Grid Data Grid icon
        • Drop-Down List Drop-Down List icon
        • Data Grid Data Grid icon
        • Multi-Select List Box Multi-Select List Box icon
    • Change your form control:
      1. On your eForm, click the control, and click Edit Edit icon.
  3. On the Configure tab, click Add Lookup Add Lookup icon.
  4. On the Select Data Source Type screen, select REST Service REST Service icon, and click Next.
  5. On the Lookup Details screen, select Advanced Configuration.
  6. Select Multiple Columns, and click Next.

Fields

Field Name Definition

Request URL

Function:
Specifies the REST service URL for your method.
Accepted Values:
A valid REST service URL.
Default Value:
None

Action

Function:
Specifies the type of action for the REST service to do.
Accepted Values:
  • POST
  • GET
  • DELETE
  • PUT
  • PATCH
Default Value:
GET

Content Type

Function:
Specifies the type of content the REST service uses.

JSON or XML patch files are also supported to patch the document with the specified changes.

Accepted Values:
  • XML
  • JSON
Default Value:
JSON

Accept

Function:
Specifies the data format to accept in a REST service.
Accepted Values:
  • XML
  • JSON
Default Value:
JSON

Protocol

Function:
Specifies the communication protocol for your REST service.
Accepted Values:
  • HTTP 1.0
  • HTTP 1.1
Default Value:
None

Request Timeout (Seconds)

Function:
Specifies the maximum amount of time, in seconds, to complete the REST service call for the activity.
Accepted Values:
An integer, representing a number of seconds.
Default Value:
60

Read/Write Timeout (Seconds)

Function:
Specifies the maximum amount of time, in seconds, for read and write methods.
Accepted Values:
An integer, representing a number of seconds.
Default Value:
60

Header Information

Function:
Specifies the custom headers for the REST service.

Request headers are usually used to give security information, such as authentication credentials.

Accepted Values:
  • Header Name
  • Header Value
Default Value:
None
Accepts Process Data Variables:
Yes

Authentication

Opens this Screen:

Advanced Configuration > Authentication screen > Basic Authentication tab

Creates REST service authentication credentials to connect to a REST service URL with basic authentication.
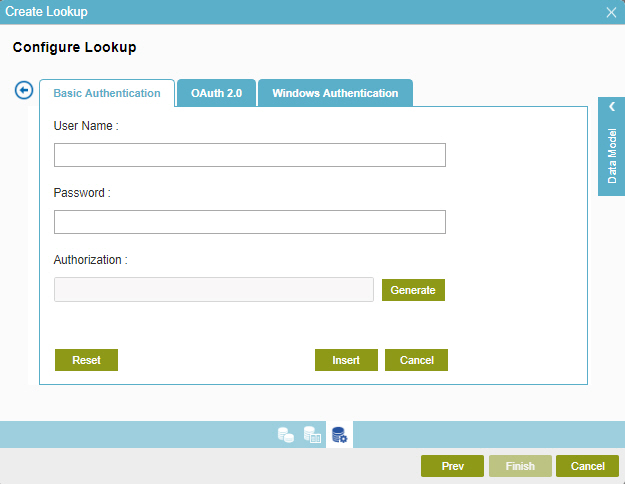
Figure: Basic Authentication tab

Basic Authentication tab

Fields

Field Name Definition

User Name

Function:
Specifies the user name for REST service authentication.
Accepted Values:
A valid user name.
Default Value:
None
Example:
Refer to:

Password

Function:
The password for the authentication account.
Accepted Values:
An alphanumeric string that represents a password.
Default Value:
None
Accepts Process Data Variables:
No

Authorization

Function:
Specifies an authorization value to connect to the REST service.
Accepted Values:
A valid authorization value.

When you click Generate button, this field completes.

Default Value:
None

Generate

Function:
Gives the authorization value to connect to the REST service.

Insert

Function:
Adds the authorization name and value in the Header and Value field.

Reset

Function:
Deletes the REST service authentication credentials.

Advanced Configuration > Authentication screen > OAuth 2.0 tab

Creates REST service authentication credentials to connect to a REST service URL with the OAuth 2.0 protocol.
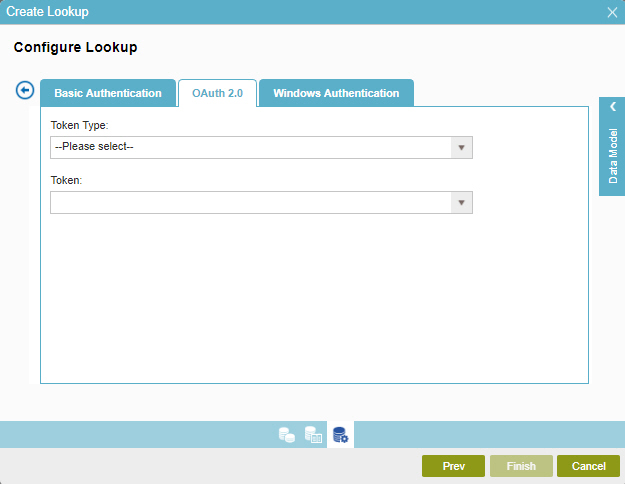
Figure: OAuth 2.0 tab

OAuth 2.0 tab

Fields

Field Name Definition

Token Type

Function:
Specifies the name of an external system, such as SharePoint, Google Drive, or Box from the list.
Accepted Values:
The name of an external system.
Default Value:
None

Token

Function:
Specifies the access token for the specified external system.
Accepted Values:
An access token from the list.
Default Value:
None.

When you select an external system from the Token Type field, the name of the access token for the specified system shows in this field.

Advanced Configuration > Authentication screen > Windows Authentication tab

Creates REST service authentication credentials to connect to a REST service URL with Windows Authentication (NTLM).
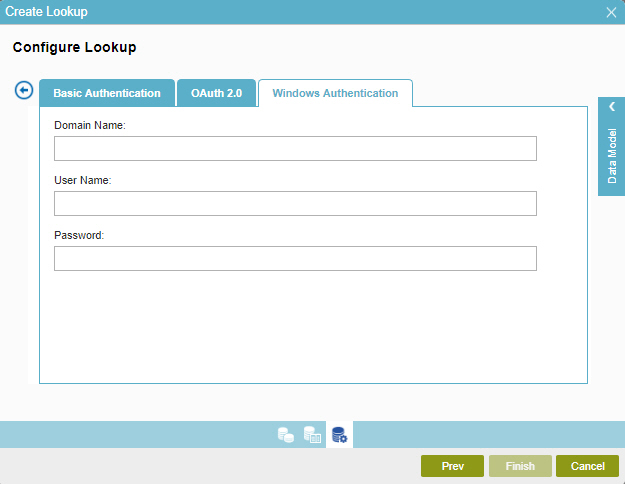
Figure: Windows Authentication tab

Windows Authentication tab

Prerequisites

Fields

Field Name Definition

Domain

Function:
The domain for the REST service authentication.
Accepted Values:
A valid domain.
Default Value:
None

User Name

Function:
Specifies the user name for the REST service authentication.
Accepted Values:
A valid user name.
Default Value:
None

Password

Function:
The password for the authentication account.
Accepted Values:
An alphanumeric string that represents a password.
Default Value:
None
Example:
Refer to: