Configure Lookup for REST Service > Multiple Columns > Response tab

Configures to connect response data from the web service call to your process.

Figure: Response tab

Response tab

How to Start

  1. On the Application Explorer screen, do one of these:
  2. Do one of these:
    • Add your form control:
      1. On the eForm Builder screen, in the Toolbox, open one of these tabs:
        • Common Controls Common Controls icon
        • Advanced Controls Advanced Controls icon
        • Telerik Controls Telerik Controls icon
      2. On your tab, drag one of these controls onto your form:
        • Auto-Suggest Auto-Suggest icon
        • List Box List Box icon
        • Subform Subform icon
        • Check Box Check Box icon
        • Auto Lookup Auto Lookup icon
        • List View List View icon
        • Pop-Up Select Pop-Up Select icon
        • Drop-Down List Drop-Down List icon
        • Auto-Suggest Auto-Suggest icon
        • Chart Chart icon
        • Data Grid Data Grid icon
        • Drop-Down List Drop-Down List icon
        • Data Grid Data Grid icon
        • Multi-Select List Box Multi-Select List Box icon
    • Change your form control:
      1. On your eForm, click the control, and click Edit Edit icon.
  3. On the Configure tab, click Add Lookup Add Lookup icon.
  4. On the Select Data Source Type screen, select REST Service REST Service icon, and click Next.
  5. On the Lookup Details screen, select Multiple Columns, and click Next.
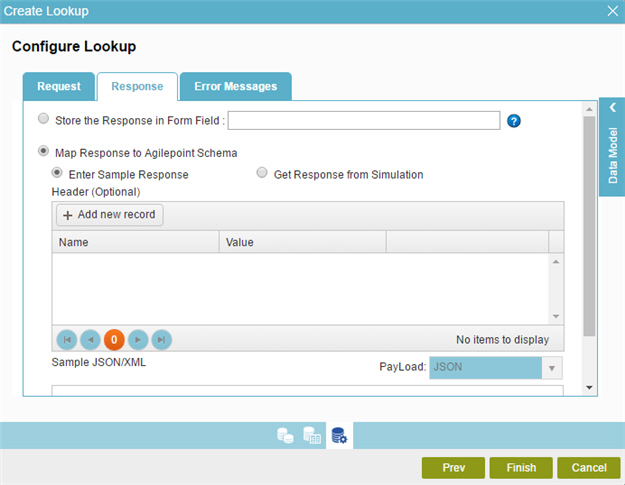
  6. On the Configure Lookup screen, click the Response tab.

Fields

Field Name Definition

Store the Response in Form Field

Function:
Specifies the variable that contains the response to a method call. The method calls a REST service.

This field is applicable only for Multiple Columns lookup type.

Accepted Values:
A process data variable.
Default Value:
None
Accepts Process Data Variables:
Yes

Enter Sample Response

Function:
Specifies sample response schema to connect to your process.
Accepted Values:
  • Selected - Configures sample response schema to connect to your process.
  • Deselected - Configures a response schema with a simulation.
Default Value:
Selected

Header (Optional)

Function:
Specifies the custom headers for the REST service
Accepted Values:
  • Name - Specifies a name of the custom header.
  • Value - Specifies a value to use for the custom header.
Default Value:
None

Add New Record

Function:
Adds the row for Name and Value fields.
To Open this Field:
  1. On the Configure Lookup screen, in the Response tab, select Enter Sample Response.

Update

Function:
Updates the row with Name and Value fields.
To Open this Field:
  1. On the Configure Lookup screen, in the Response tab, click Add New Record.

Delete

Function:
Deletes the row with Name and Value fields.
To Open this Field:
  1. On the Configure Lookup screen, in the Response tab, click Update.

Edit

Function:
Changes the row with Name and Value fields.
To Open this Field:
  1. On the Configure Lookup screen, in the Response tab, click Update.

Sample JSON/XML

Function:
Specifies an example response payload to connect the schema in JSON or XML format.
Accepted Values:
Sample payload data in XML or JSON format.
Default Value:
None

Payload

Function:
Specifies JSON or XML response payload to connect to the schema.
Accepted Values:
  • XML
  • JSON
Default Value:
JSON

Simulate

Opens this Screen:
REST Response Configuration > Simulate
To Open this Field:
  1. On the Configure Lookup screen, in the Response tab, click Get Response from Simulation.
Function of this Screen:
Configures the response settings with a simulated REST method call.

Map Schema

Opens this Screen:
Schema Mapper screen
Function of this Screen:
Maps SharePoint fields, form fields, web methods, or other input sources to an XML schema..