
Configure General Options for the Document Transfer Activity
To configure the basic options for the Document Transfer activity, do the procedure in this topic.
Good to Know
- In most text fields, you can use process data variables as an alternative to literal data values.
- You can configure whether this activity waits for other activities before it runs.
For more information, refer to How Do I Configure an Activity to Wait for Other Incoming Activities?
How to Start
- On the Application Explorer screen, do one of these:
- Do one of these:
- Add an activity:
- In the Process Builder, in the Activity Library,
open the Document
 tab.
tab. -
On the Document
tab,
drag the Document Transfer
 activity onto your process.
- In the Process Builder, in the Activity Library,
open the Document
- Change an activity:
- In your process, double-click your activity.
- Add an activity:
Procedure
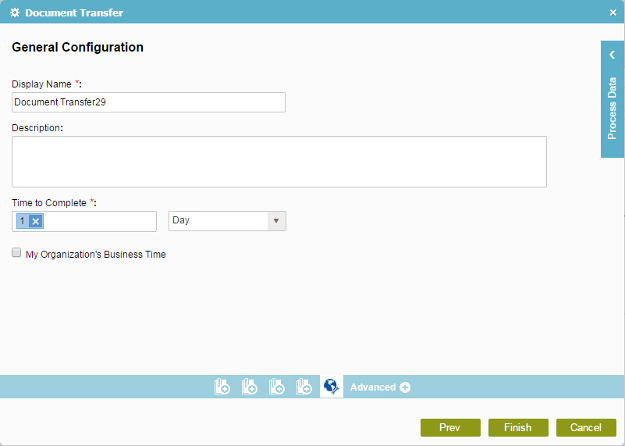
- On the General Configuration screen, in the Display Name field, enter the name you want to show in your process.
- (Optional) In the Description field, enter more than one line of text description for your activity.
- (Optional) In the Time to Complete section, set the allowed time limit for your
task.
If a task takes more time than you specify, it goes into Overdue status. A task shows as Overdue in the participants' task list. You can also set more actions — send an e-mail notification, for example.
Set your limit as a number of time units — for example, 2 hours or 3 days.
- In the time units list, select your time unit — for example, Days, Hours, or Minutes.
- In the Enter the Variable field, enter your number of time units. For example, if you enter 3, the activity will expire in 3 Days, Hours, or Minutes, as you specified in the time units list.
You can use Process Variables screen for this value.
- To set a limit on your expiration to your hours of operation, select My Organization's Business Time.