
Email Notifications screen (Process Activities)
Sends an email notification from any activity when an event occurs in a process.
Background and Setup
Video: Add an E-mail Activity
Video: Process-Based App
Examples
- (Example) Create a Process-Based App (Modern)
- (Example) Configure an Email Activity (Notify Requester If Requested Hours Not Available)
- (Example) Configure an Email Activity (Notify Requester - On Manager Approval)
- (Example) Configure an Email Activity (Notify Requester - On Manager Rejection)
- (Example) Link to a File from an E-mail
- (Example) Show a Subform in an E-mail Notification
- (Example) Create Zoom Meeting
- Examples - Step-by-step use case examples, information about what types of examples are provided in the AgilePoint NX Product Documentation, and other resources where you can find more examples.
Good to Know
- Different types of tasks have different tabs and different settings.
How to Start
- Open Process Builder.
For information about how to open this screen, refer to Process Builder.
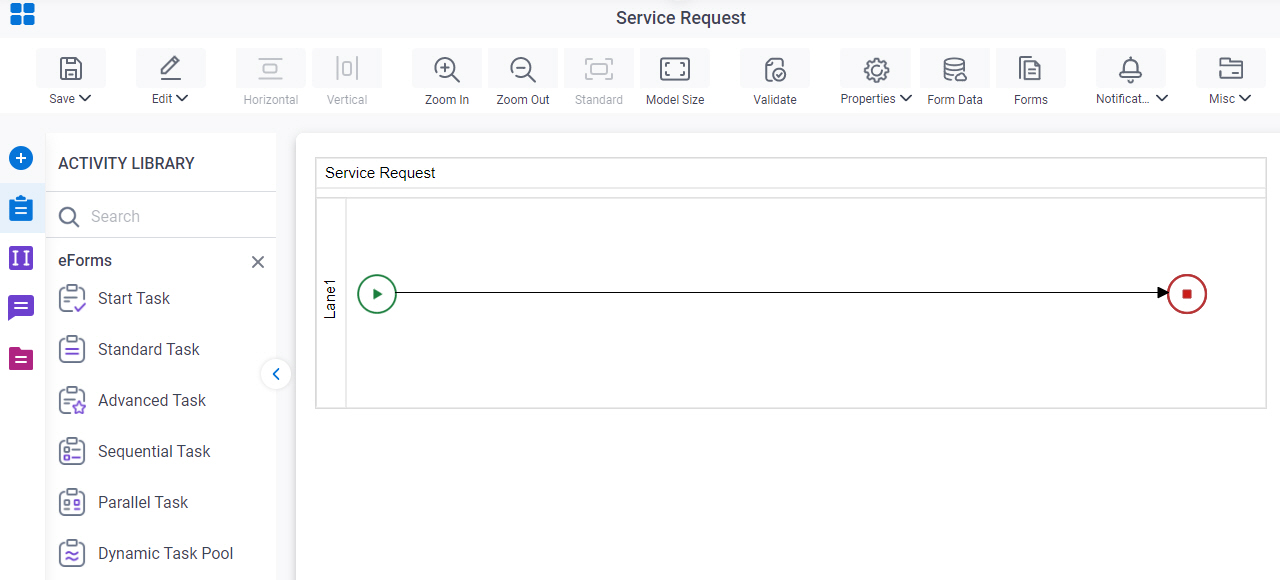
- In Process Builder, in the Activity Library, drag any activity onto your process.
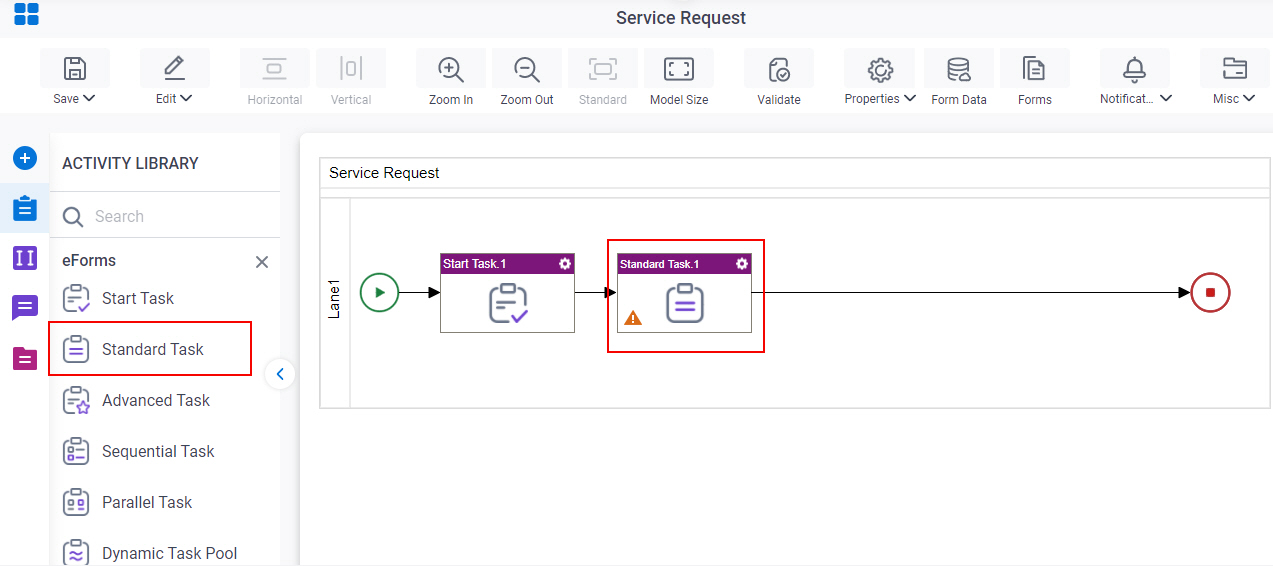
- Configure the activity.
- On the configuration screen,
click Advanced > Email Notifications.
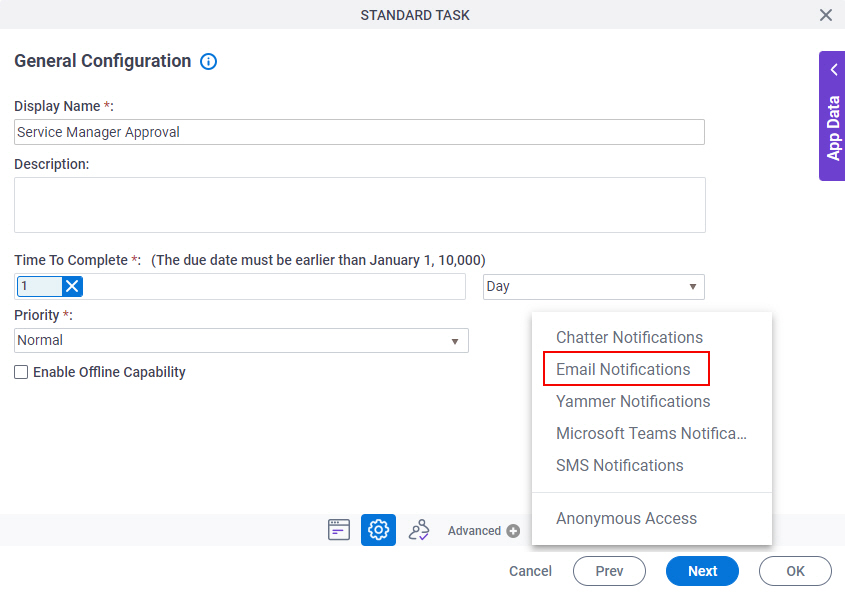
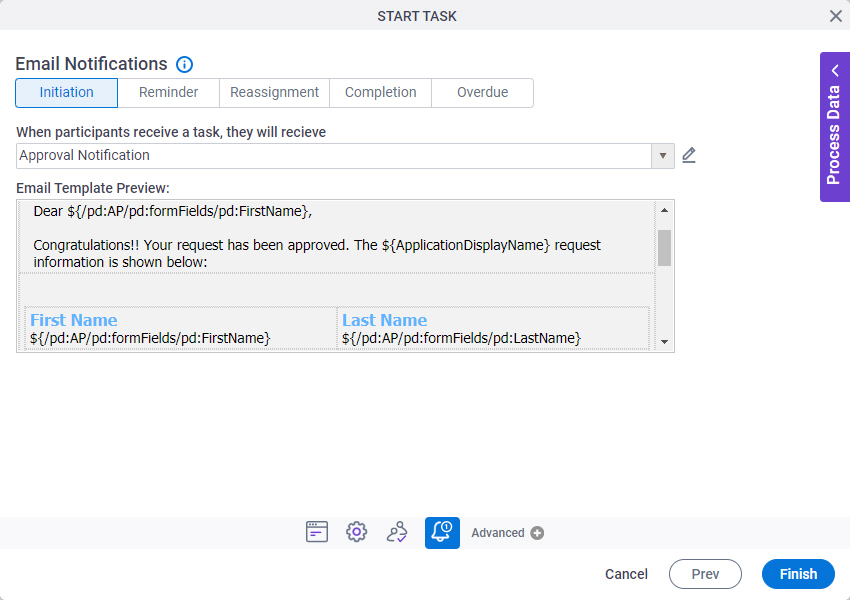
Email Notifications screen
Specifies the email notifications for your activity.
Prerequisites
- Before you can select an email template, you must create one.
For more information, refer to:
Fields
| Field Name | Definition |
|---|---|
|
Initiation |
|
|
Reminder |
|
|
Reassignment |
|
|
Completion |
|
|
Overdue |
|
|
Email Template list |
|
|
Create |
|
Edit |
|
|
Email Template Preview |
|
|
Start _ before task expires |
|
|
Frequency |
|
|
My Organization's Business Time |
|


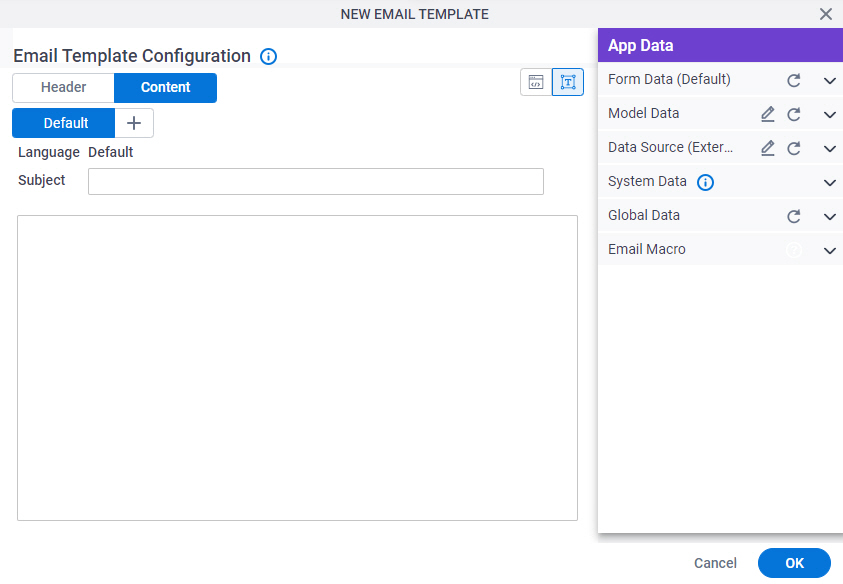
Email Template Configuration > Header tab
Specifies recipients, template name, and other aspects of an email template.
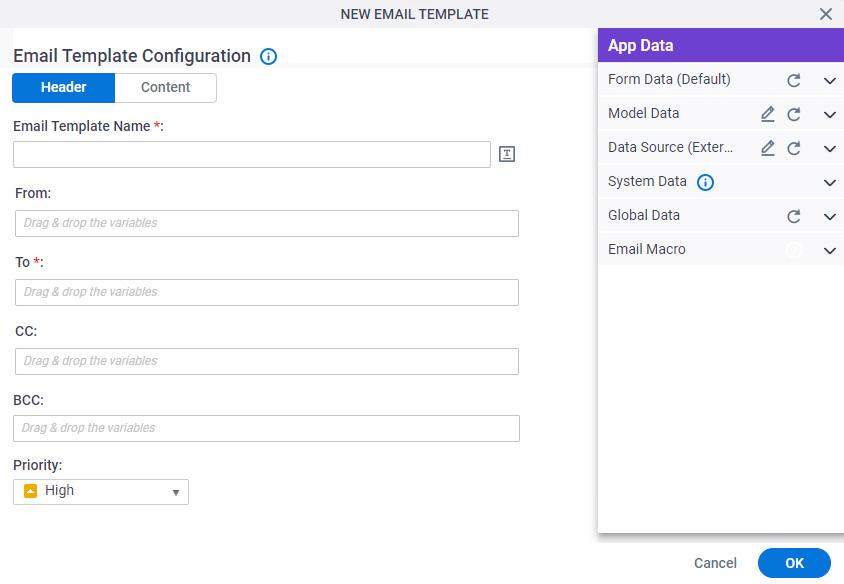
Fields
| Field Name | Definition |
|---|---|
|
Email Template Name |
|
|
Clone Email Template |
|
|
From |
|
|
To |
|
|
CC |
|
|
BCC |
|
|
Priority |
|

Email Template Configuration > Content tab
Specifies the content of an email template.
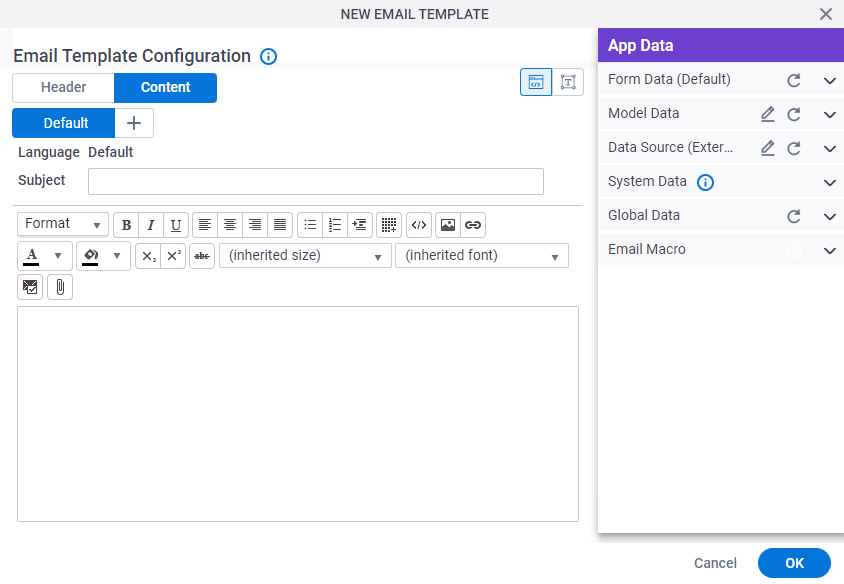
Fields
| Field Name | Definition |
|---|---|
|
Subject |
|
|
Email Body |
|
|
Add Language (+) |
|
|
HTML / TEXT |
|
|
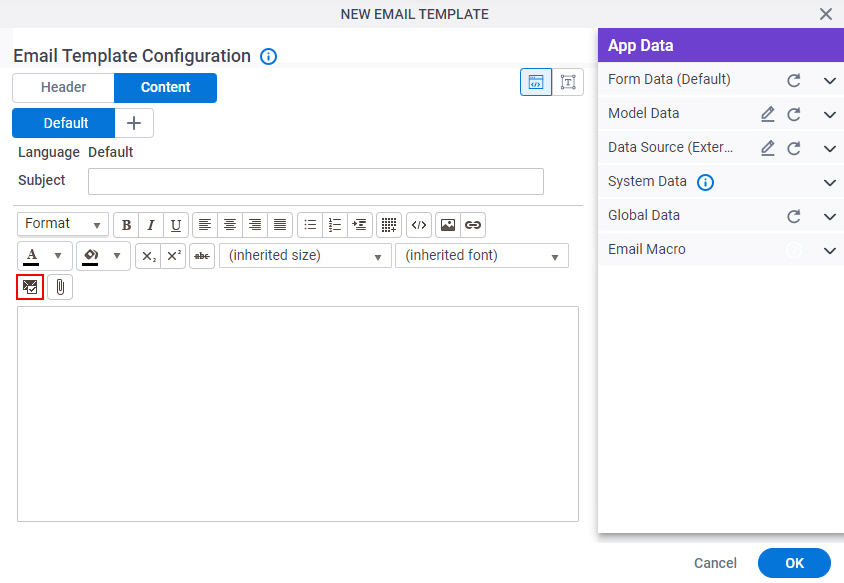
Email Approval Template |
|
|
Attachment |
|
|
Enter Server File Path |
|
|
Add |
|
Email Macro |
|

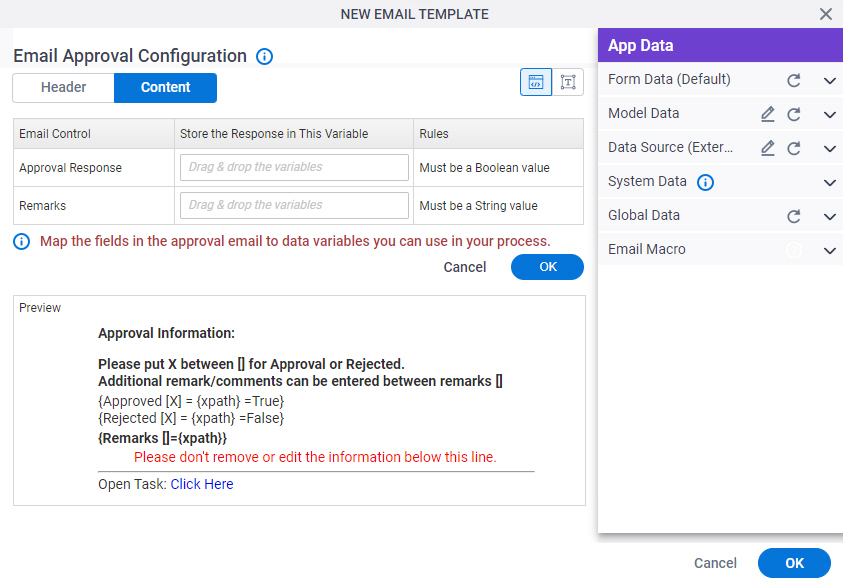
Email Approval Configuration
Configures an email template that participants can use to approve or reject a request from an email. This is an alternative to an online form. If the user has HTML email, the template shows as an HTML form. If the user has text-only email, the user sees a text-only form.
Good to Know
- Email approvals do not apply to form-based apps.
How to Start
- On the Email Template Configuration screen, in the Content tab, click Email Approval Template
 .
.
Fields
| Field Name | Definition |
|---|---|
|
Approval Response |
|
|
Remarks |
|
|
Preview |
|
Email Template Configuration > Content > Plain Text tab
Specifies the content of an email template in plain text format.
Fields
| Field Name | Definition |
|---|---|
|
Subject |
|
|
Email Body |
|
|
Add Language (+) |
|
|
HTML / TEXT |
|
Text-Based Approval Configuration
To configure a text-based approval for a task, use this format.
- Xpath-Node represents a valid Xpath node — for example, {/pd:MyFields/pd:Approval}
- Value represents the value you want to pass when the user selects this option. A common usage is True or False. The action that is selected with the X will be processed along with any information in the remarks section.
- Approved or rejected options:
Note that the terms used in the email can follow the format approved/rejected, or yes/no.
Approval Keywords Rejection Keywords {Approve [] = {Xpath-Node}=Value} {Reject [] = {Xpath-Node}=Value} {Approved [] = {Xpath-Node}=Value} {Rejected [] = {Xpath-Node}=Value} {Yes [] = {Xpath-Node}=Value} {No[] = {Xpath-Node}=Value} - {Remarks [] = {Xpath-Node}} Note: The Remarks should be entered between the [] in Remarks [].
- {Comments [] = {Xpath-Node}}
Approval Information
Please put X between [] for Approved or Rejected.
Additional remark/comment can be entered between Remarks []
{Approved [] = {pdmyFields/pd:Approved}=True}
{Rejected [] = {pdmyFields/pd:Approved}=False}
{Remarks [This task requires your approval.] = {pdmyFields/pd:Remark}}
Email Macro
These are the macros you can use as process data variable. These macros are mainly used in message templates.
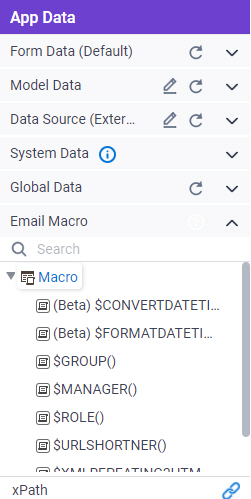
Fields
| Field Name | Definition |
|---|---|
|
$CONVERTDATETIME() |
|
|
$FORMATDATETIME() |
|
|
$GROUP() |
|
|
$ROLE() |
|
|
$MANAGER() |
|
|
$URLSHORTNER() |
|
|
$XMLREPEATING2HTML() |
|
|
$XMLREPEATING2HTMLWITHFILTER() |
|