Auto-Lookup > Oracle NetSuite > Oracle NetSuite Custom Filter > Name/Value
This topic shows how to create a lookup with Oracle NetSuite as the data source and uses a custom filter based on a name/value pair for the Auto-Lookup form control.
Background and Setup
Examples
Good to Know
- There is more than one path to configure a lookup. Make sure you use the document that shows the path for your lookup.
- Auto-Lookup > Oracle NetSuite > Oracle NetSuite Custom Filter > Name/Value
- Auto-Lookup > Oracle NetSuite > Oracle NetSuite Custom Filter > Multiple Columns
- Auto-Lookup > Oracle NetSuite > Oracle NetSuite Predefined Filter > Name/Value
- Auto-Lookup > Oracle NetSuite > Oracle NetSuite Predefined Filter > Multiple Columns
How to Start
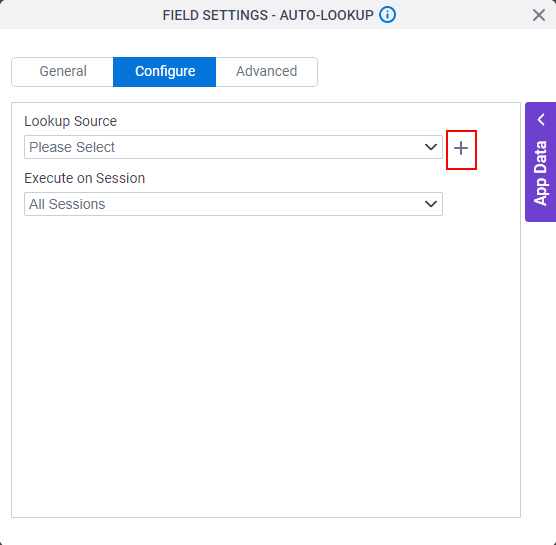
- On the Auto-Lookup form control configuration screen, on the Configure tab,
click Add Lookup.
For information about how to open this screen, refer to Auto-Lookup form control.
- On the Select Data Source Type screen,
select
Oracle NetSuite.
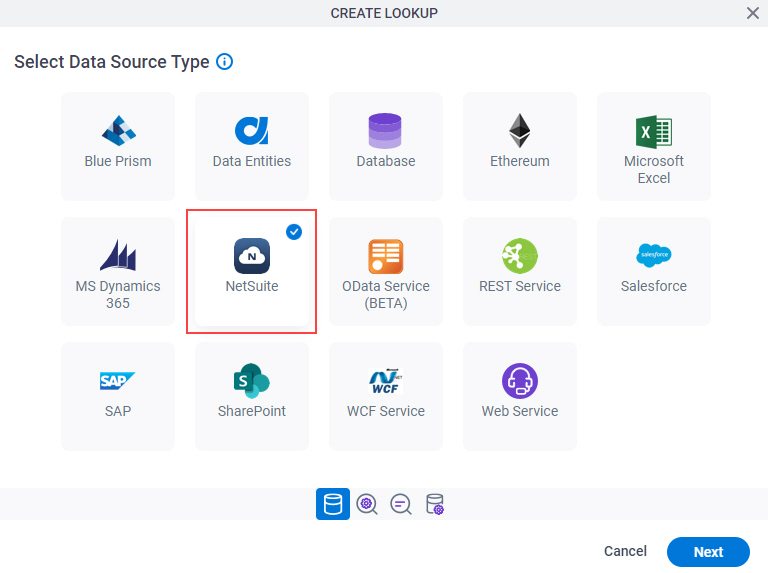
- Click Next.
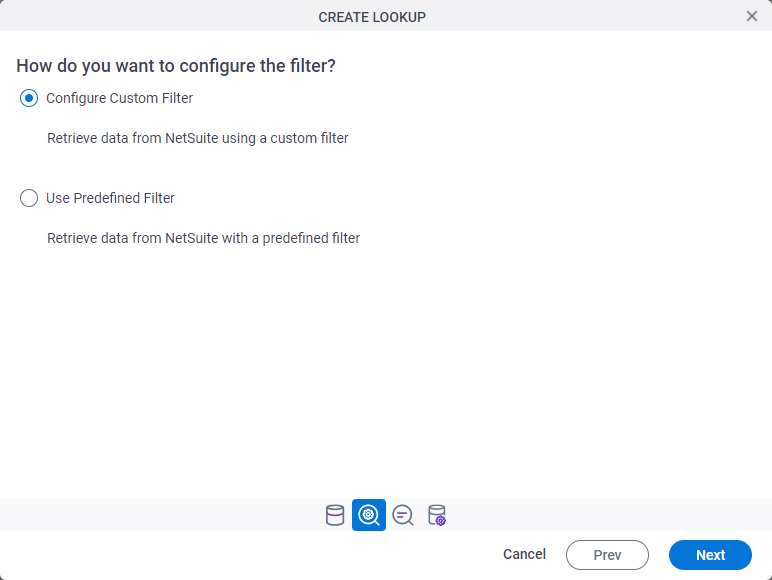
Oracle NetSuite Filter Type
Specifies the filter type for the Oracle NetSuite lookup.
Good to Know
- There is more than one path to configure a lookup. Make sure you use the document that shows the path for your lookup.
- Auto-Lookup > Oracle NetSuite > Oracle NetSuite Custom Filter > Name/Value
- Auto-Lookup > Oracle NetSuite > Oracle NetSuite Custom Filter > Multiple Columns
- Auto-Lookup > Oracle NetSuite > Oracle NetSuite Predefined Filter > Name/Value
- Auto-Lookup > Oracle NetSuite > Oracle NetSuite Predefined Filter > Multiple Columns
Fields
| Field Name | Definition |
|---|---|
Filter Types |
|
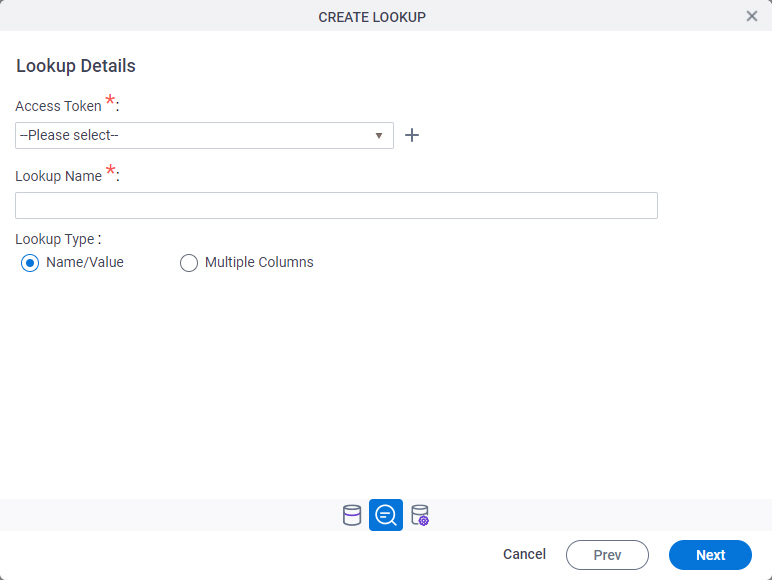
Lookup Details
Specifies the basic configuration for a lookup.
Good to Know
- There is more than one path to configure a lookup. Make sure you use the document that shows the path for your lookup.
- Auto-Lookup > Oracle NetSuite > Oracle NetSuite Custom Filter > Name/Value
- Auto-Lookup > Oracle NetSuite > Oracle NetSuite Custom Filter > Multiple Columns
- Auto-Lookup > Oracle NetSuite > Oracle NetSuite Predefined Filter > Name/Value
- Auto-Lookup > Oracle NetSuite > Oracle NetSuite Predefined Filter > Multiple Columns
Fields
| Field Name | Definition |
|---|---|
Access Token |
|
Add New |
|
Lookup Name |
|
Lookup Type |
|
Configure Lookup > Request tab
Configures a lookup with the existing data format from your data source.
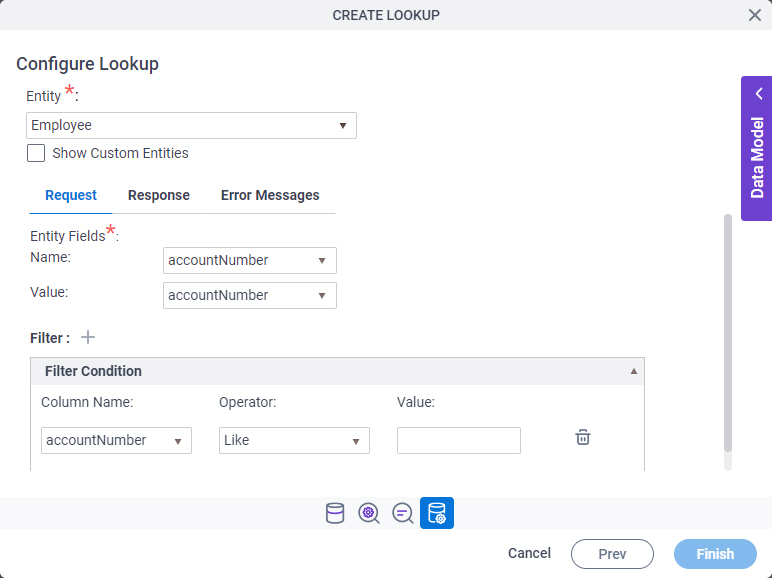
Fields
| Field Name | Definition |
|---|---|
Entity |
|
Name | |
Value |
|
Expand |
|
Collapse |
|
Add Filter |
|
Column Name |
|
Operator |
|
Select Nest Type |
|
Delete Filter |
|
Configure Lookup > Response tab
Connects the response data from the Oracle NetSuite call to your app.
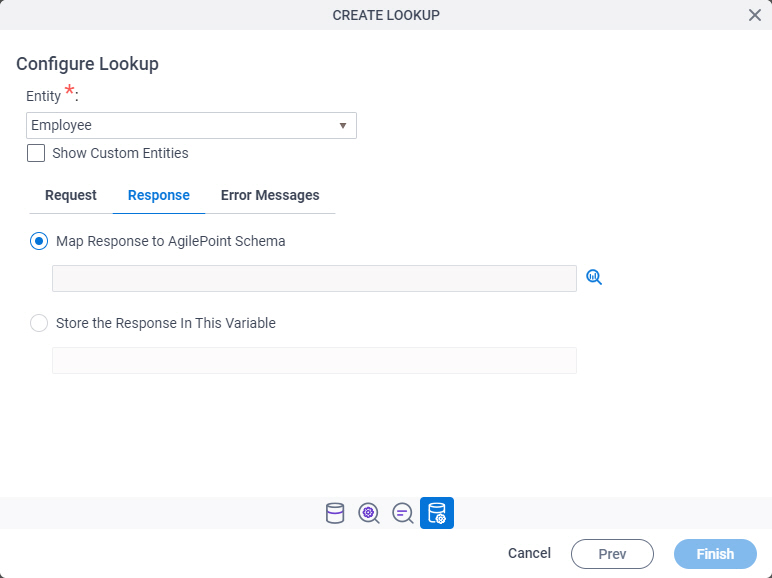
Fields
| Field Name | Definition |
|---|---|
Entity |
|
Map Response to AgilePoint Schema |
|
Store the Response In This Variable |
|
Configure Lookup > Error Messages tab
Configures the message to show if the lookup does not return any data.
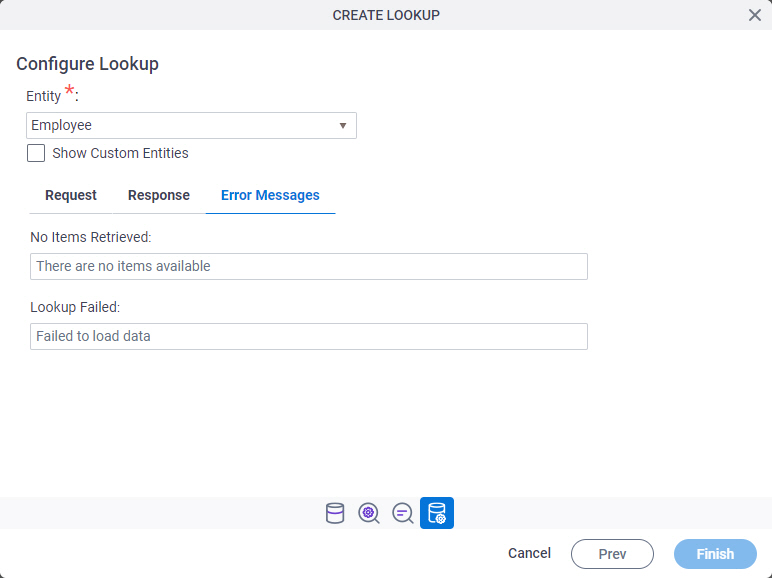
Fields
| Field Name | Definition |
|---|---|
Entity |
|
No Items Retrieved |
|
Lookup Failed |
|


