Undo |
- Function:
- Undo your last procedure.
|
Redo |
- Function:
- Cancels your last undo.
|
|
Maximize
|
- Function:
- Shows the page at its maximum size.
|
Restore |
- Function:
- Restores the page size to the normal view.
- To Open this Field:
-
- On the custom page, click Maximize
 . .
|
Check In |
- Function:
- Locks the page so users can not change the page.
- Example:
- Refer to:
|
Check Out |
- Function:
- Unlocks the page so users can change it.
|
Undo Check Out |
- Opens this Screen:
- Type CONFIRM To... screen
- Function of this Screen:
- Deletes all changes made to the specified custom page and checks in the page.
|
Set As Home Page |
- Opens this Screen:
- Type CONFIRM To... screen
- Function of this Screen:
- Shows the specified custom page or example page as the Portal home page.
|
Preview |
- Function:
- Shows the preview of a custom page.
|
Settings |
- Opens this Screen:
- Settings screen
- Function of this Screen:
- Configures the settings for your custom page in
Page Builder.
|
Edit Styles |
- Opens this Screen:
- Style Properties screen
- Function of this Screen:
- Specifies the look and feel for a custom page in Page Builder.
|
Save |
- Function:
- Saves the changes you made on the page in
Page Builder.
- Example:
- Refer to:
|
Publish |
- Opens this Screen:
- Publish screen
- To Open this Field:
-
- Your pages must be checked in.
- Function of this Screen:
- Publishes a custom page in Page Builder.
- Example:
- Refer to:
|
Export |
- Function:
- Downloads a custom page
as a JSON file to your local machine.
- To Open this Field:
-
- Select a page.
- On the right side of a page,
click Ellipses (...).
|
Publish History |
- Opens this Screen:
- Publish History screen
- To Open this Field:
-
- Select a page.
- On the right side of a page,
click Ellipses (...).
- Function of this Screen:
- Shows all the versions of the specified custom page.
|
Permissions |
- Opens this Screen:
- Manage Permission Groups screen
- To Open this Field:
-
- Select a page.
- On the right side of a page,
click Ellipses (...).
- Function of this Screen:
- Specifies the users and groups who are
Page Owners,
Page Designers, or
Page Viewers.
|
Deactivate |
- Opens this Screen:
- Specifies to deactivate the page.
When you deactivate the page, you can not set this page as a home page.
- To Open this Field:
-
- Select a page.
- On the right side of a page,
click Ellipses (...) > Activate
 . .
|
Activate |
- Opens this Screen:
- Specifies to activate the page.
You can set the page as a home page only if your page is active.
- To Open this Field:
-
- Select a page.
- On the right side of a page,
click Ellipses (...) > Deactivate .
|
Clone Page |
- Opens this Screen:
- Clone Page screen
- To Open this Field:
-
- Select a page.
- On the right side of a page,
click Ellipses (...).
- Function of this Screen:
- Creates a copy of an existing page in Page Builder..
|
Bookmark |
- Function:
- Adds a page to a bookmark for easy access.
- To Open this Field:
-
- Select a page.
- On the right side of a page,
click Ellipses (...).
|
Move To Trash |
- Opens this Screen:
- Type CONFIRM To... screen
- To Open this Field:
-
- On the right side of a page,
click Ellipses (...).
- Function of this Screen:
- Deletes a page and moves to trash in
Page Builder.
|
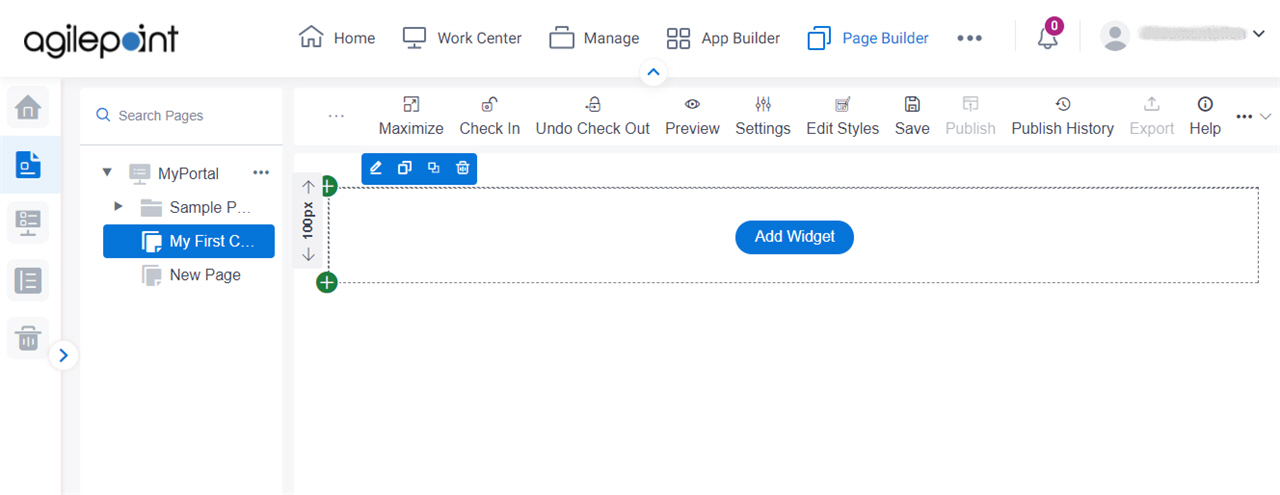
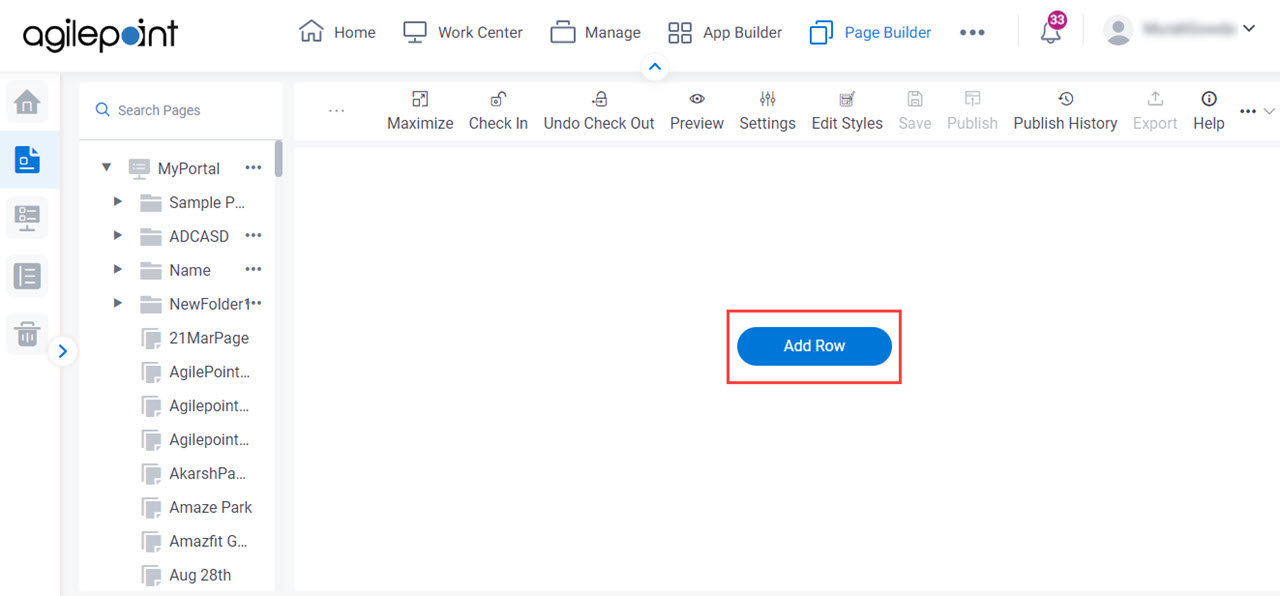
Add Row  |
- Function:
- Creates a row for a custom page to add a
widget .
To expand or reduce height of row, position the cursor
over the bottom horizontal line so the line becomes red line.
Click and drag the bottom line downward to increase row height or upward to decrease height.
- To Open this Field:
-
- Click the bottom horizontal line of the row.
|
Add Column |
- Function:
- Creates a new column for a custom page to add a
widget.
To expand or reduce width of column, position the cursor
over the right side vertical line so the line becomes red line.
Click and drag the boundary on the right side of the column until
the column is the width that you want.
- To Open this Field:
-
- Click the right side vertical line of the row or column.
|
Switch To Auto  |
- Function:
- Change the row height or column width to automatically fit the contents.
- To Open this Field:
-
- Do one of these:
- Click the bottom horizontal line of the row.
- Click the right side vertical line of the row or column.
|
Add Widget |
- Opens this Screen:
- Pick a Widget screen
- Function of this Screen:
- Specifies a widget
to add in a custom page.
|
Edit Row Properties  |
- Function:
- Row Properties screen.
- To Open this Field:
-
- Click the bottom horizontal line of the row.
- Function of this Screen:
- Configures the properties, borders, margins, padding, and background of a row on a custom page.
|
Copy Format  |
- Function:
- Copies the format of a row, column, or widget on your custom page.
- To Open this Field:
-
- Do one of these:
- Click the bottom horizontal line of the row.
- Click the right side vertical line of the row or column.
- Limitations:
-
This field
is available in these releases:
|
Paste Format  |
- Function:
- Pastes the copied format on the row, column, or widget.
- To Open this Field:
-
- Do one of these:
- Click the bottom horizontal line of the row.
- Click the right side vertical line of the row or column.
- Limitations:
-
This field
is available in these releases:
|
Clone Widget  |
- Function:
- Creates a copy of an existing row, column, or widget on your custom page.
- To Open this Field:
-
- Do one of these:
- Click the bottom horizontal line of the row.
- Click the right side vertical line of the row or column.
- Limitations:
-
This field
is available in these releases:
|
Delete  |
- Function:
- Deletes a row or column from a custom page in
Page Builder.
- To Open this Field:
-
- Do one of these:
- Click the bottom horizontal line of the row.
- Click the right side vertical line of the row or column.
|