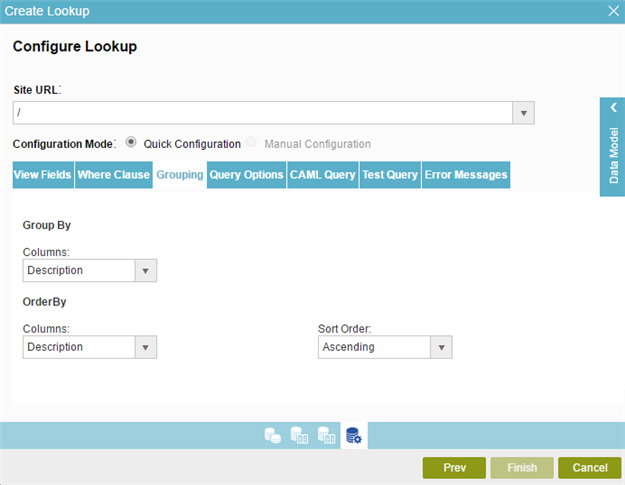
Configure Lookup for SharePoint > CAML Query Name/Value > Grouping tab
Groups SharePoint list data by a specified column name, either in ascending or descending order

Good to Know
- Some information about third-party integrations is outside the scope of the AgilePoint NX Product Documentation, and it is the responsibility of the vendors who create and maintain these technologies to provide this information. This includes specific business uses cases and examples; explanations for third-party concepts; details about the data models and input and output data formats for third-party technologies; and various types of IDs, URL patterns, connection string formats, and other technical information that is specific to the third-party technologies. For more information, refer to Where Can I Find Information and Examples for Third-Party Integrations?
How to Start
- On the Application Explorer screen, do one of these:
- Do one of these:
- Add your form control:
- On the eForm Builder screen, in the Toolbox, open one of these tabs:
- Common Controls

- Advanced Controls

- Telerik Controls

- Common Controls
- On your tab, drag one of these controls onto your form:
- Auto-Suggest

- List Box

- Subform

- Check Box

- Auto Lookup

- List View

- Pop-Up Select

- Drop-Down List

- Auto-Suggest

- Chart

- Data Grid

- Drop-Down List

- Data Grid

- Multi-Select List Box

- Auto-Suggest
- On the eForm Builder screen, in the Toolbox, open one of these tabs:
- Change your form control:
- On your eForm, click the control, and click Edit
 .
.
- On your eForm, click the control, and click Edit
- Add your form control:
- On the Configure tab, click Add Lookup
 .
. - On the Select Data Source Type screen, select SharePoint
 , and click Next.
 - On the SharePoint Type screen, select SharePoint Lookup.
- On the Lookup Details screen, select Name/Value, and click Next.
- On the Configure Lookup screen, click the Grouping tab.
Fields
| Field Name | Definition |
|---|---|
Site URL |
|
Configuration Mode |
|
|
Group By - Columns |
|
|
Sort By - Columns |
|
|
Sort By - Sort Order |
|


