(Example) Create and Run a Form-Based Application with AgilePoint NX Data Entities
This example shows how to create and run a form-based app that uses an entity in AgilePoint NX Data Entities as its data source.
Video: Form-Based App Overview
Video: Know Your App Builder IDE
Prerequisites
- AgilePoint NX OnDemand (public cloud), or AgilePoint NX PrivateCloud or AgilePoint NX OnPremises v7.0 or higher.
Good to Know
- This topic provides an example based on the Customer Request app, which you can download from the App Store.
- You can create other types of form-based applications that are not shown in this example. For more information, refer to:
- By default, the runtime app user can change the form, but you can set the application permissions to configure which AgilePoint NX users can create or update form data.
For more information, refer to How Do I Use Application Level Permissions?
Step 1: Create a Form-Based Application
The first step is to create a form-based app that uses an entity in AgilePoint NX Data Entities as its data source.
How to Start
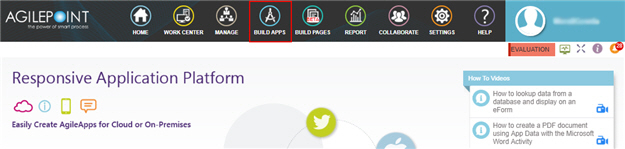
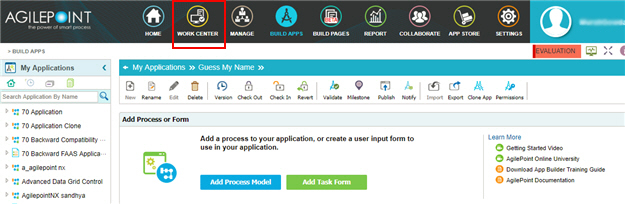
- Click Build Apps
 .
.
Procedure
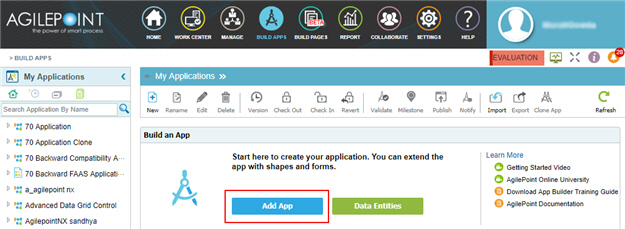
- On the Application Explorer screen, click Add App.
- On the Application Type screen, click Form-Based Application.
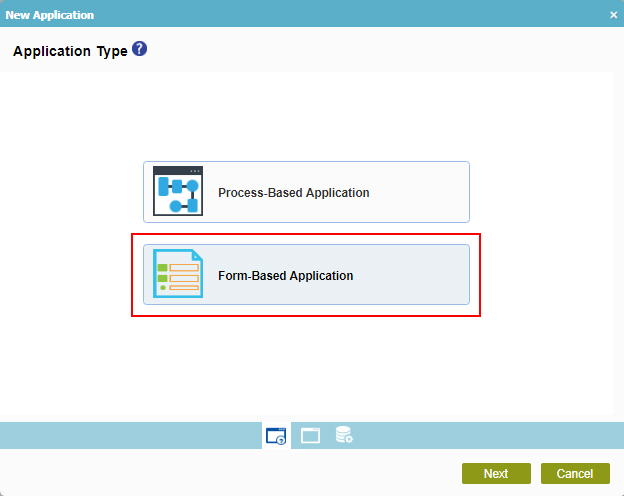
- Click Next.
- On the New Application screen, in the Application Name field, enter Customer Request Application.
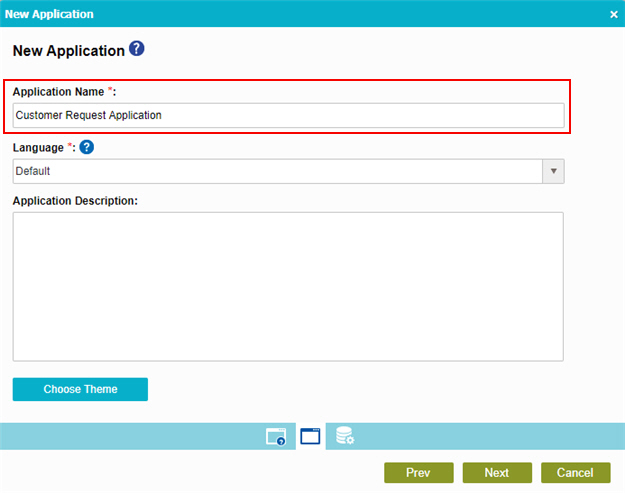
- Click Next.
- On the Select Primary Data Source screen, select
Data Entity
 .
.
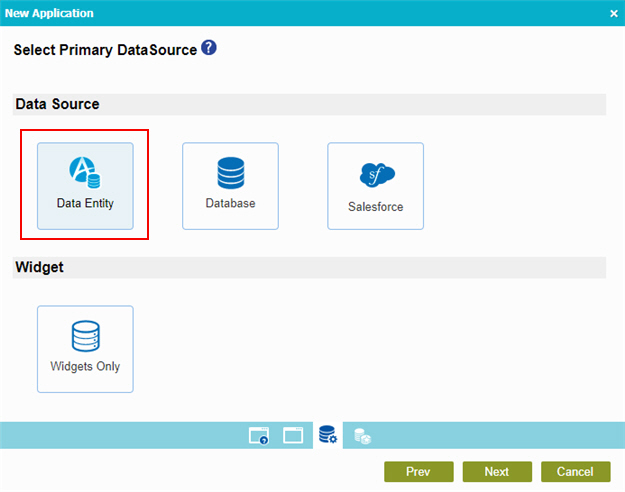
- Click Next.
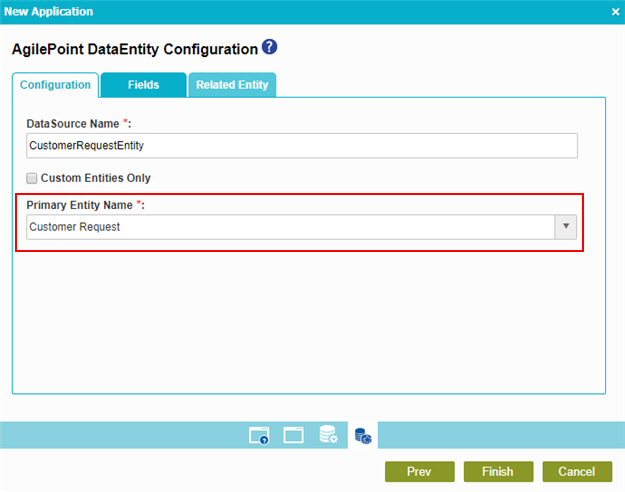
- On the AgilePoint Data Entity Configuration screen, in the Data Source Name field, enter
CustomerRequestEntity.
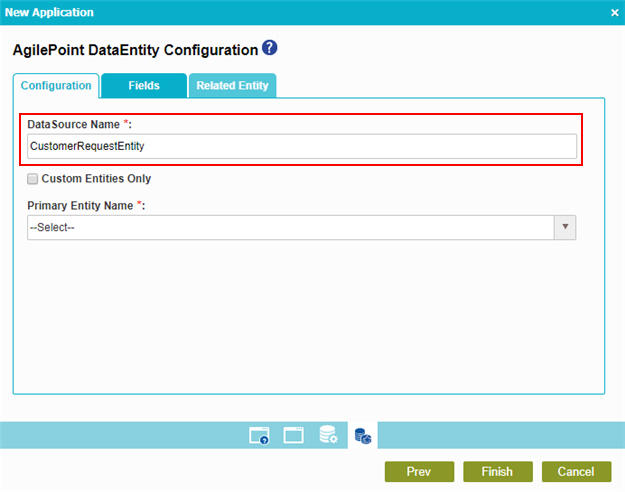
- In the Primary Entity Name field, select Customer Request.
- Click the Fields tab.
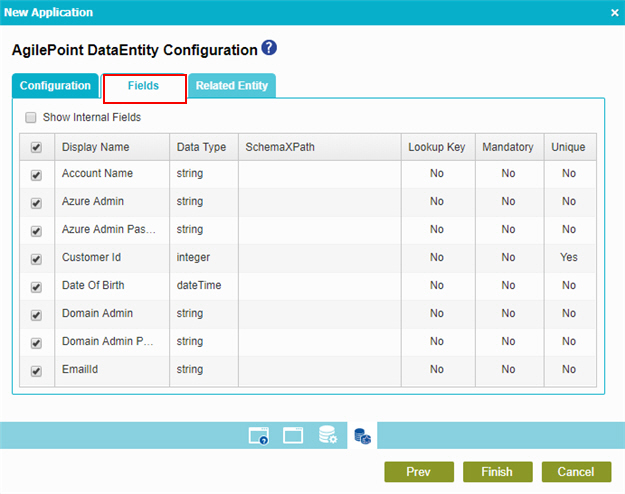
- On the Fields tab, select these fields:
- Display Name
- Customer Id
- Date Of Birth
- EmailId
- First Name
- Gender
- Last Name
- Click Finish.
- On the Information screen, Click OK.
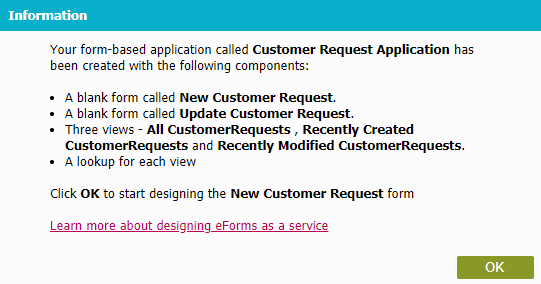
The eForm Builder opens the Form Settings screen for the Create form, New Customer Request.
Step 2: Create an eForm
Create an eForm in the eForm Builder.
Good to Know
- Every form-based application has 3 form types:
This procedure shows how to create the Create form, which is the form that runtime app users use to enter data.
Procedure
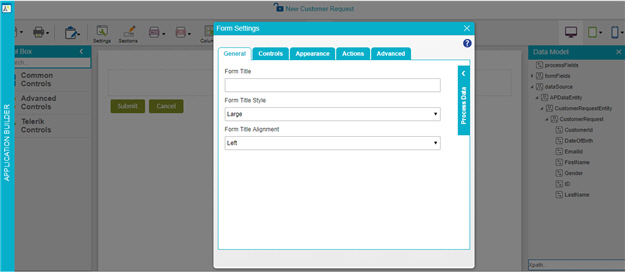
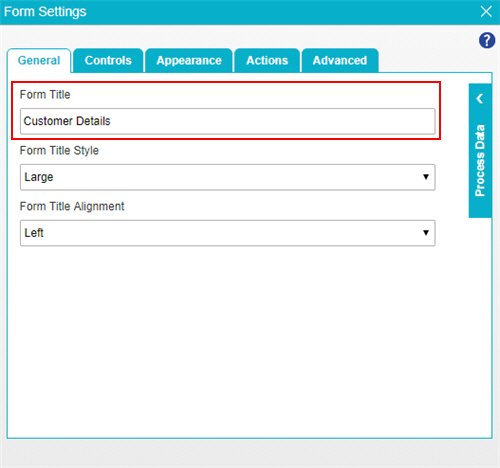
- On the Form Settings screen, click General tab.

- On the General tab, in the Form Title field, enter Customer Details.
- To save the changes, click Close Screen
 .
. The eForm Builder opens the eForm.
Step 3: Add Form Controls to the eForm
Add form controls to the eForm.
Good to Know
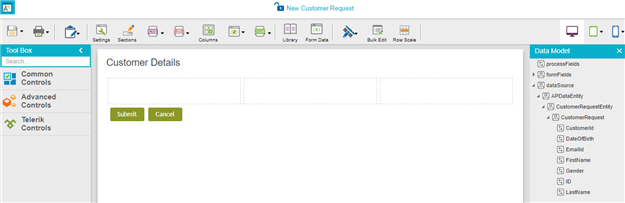
- In a form-based application, form controls are mapped to fields from the data model in the associated data source. In this example, the form controls are mapped to fields in the associated entity.
Procedure
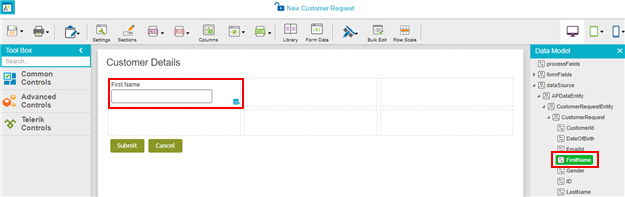
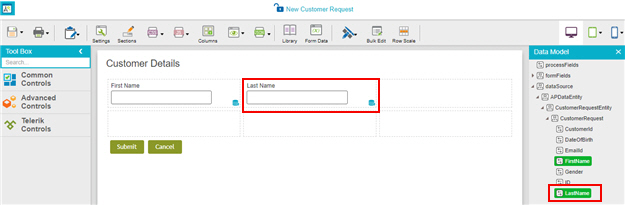
- On the Data Model screen, in the dataSource list, drag the FirstName variable onto your eForm.
- Drag the LastName variable onto your eForm.
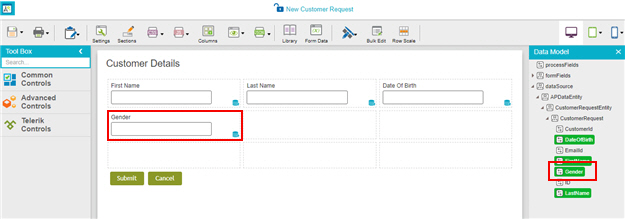
- Drag the Date Of Birth variable onto your eForm.

- Drag the Gender variable onto your eForm.
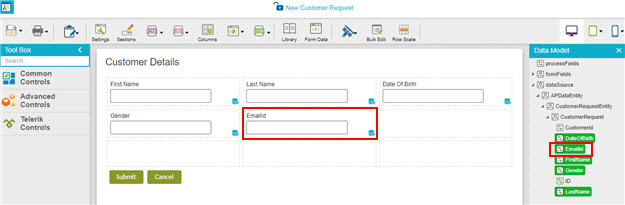
- Drag the EmailId variable onto your eForm.
Step 4: Publish the App
Publish the application so users can run it.
Procedure
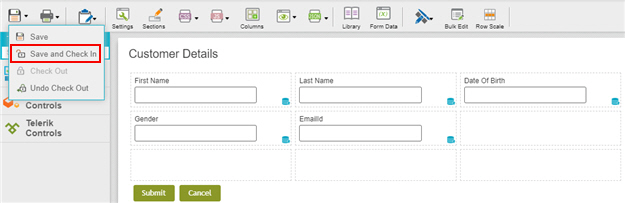
- On the Save quick menu, click Save and Check In
 .
.
The eForm Builder closes, and the Application Explorer opens.
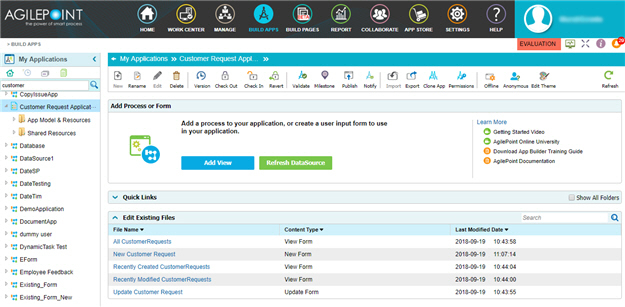
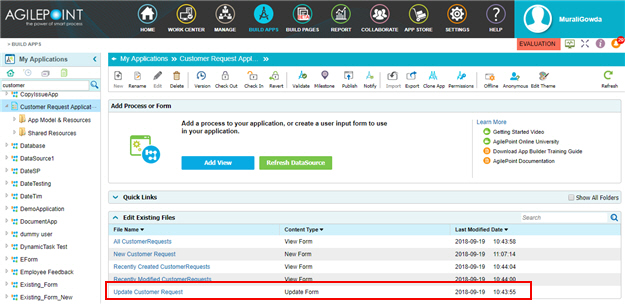
- On the Application Explorer screen, click the Update Customer Request form.
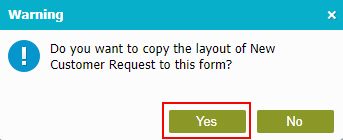
Configuration for the Update form is required before you can publish the application. This example uses an Update form that is the same as the Create form. However, you can change it if necessary.
- On the Warning screen, click Yes.
- On the Save quick menu, click Save and Check In .
The eForm Builder closes, and the Application Explorer opens.
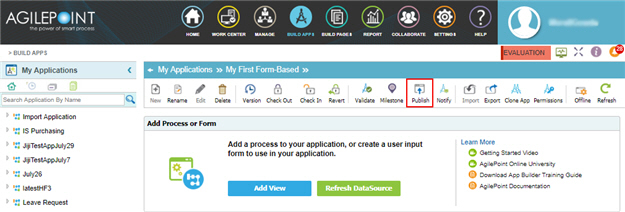
- On the Application Explorer screen, click Publish
 .
.
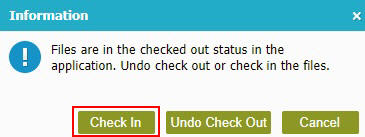
- On the Information screen, click Check In.
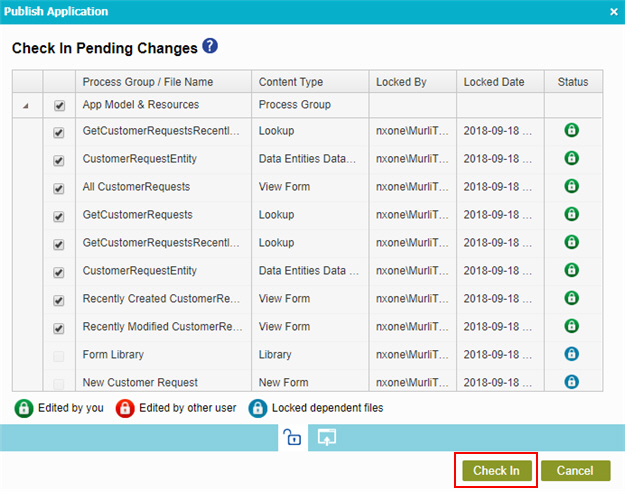
- On the Check In Pending Changes screen, click Check In.
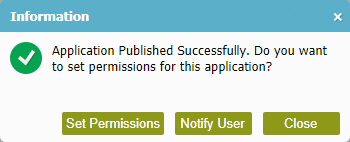
- On the Publish Application screen, click Publish.

- On the Information screen, click Close.
For information about application permissions, refer to Change Application Permissions (App Builder).
The eForm Builder opens the Application Explorer screen.
Step 5: Start the App
After your application is published, you can run it.
Procedure


Step 6: Complete the eForm
Complete the eForm.
Procedure
- On the My First Form-Based Application screen, click Add
 .
.
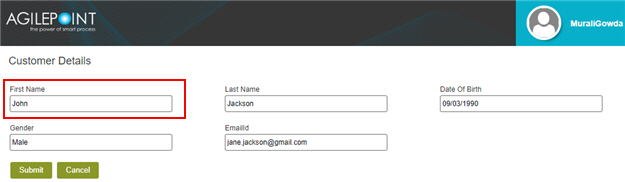
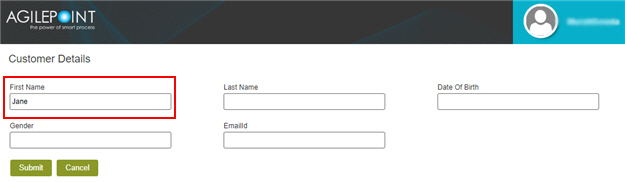
- On the Customer Details Form screen, in the First Name field, enter Jane.
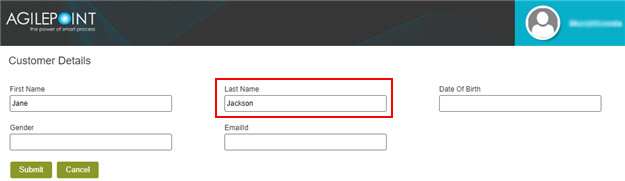
- In the Last Name field, enter Jackson.
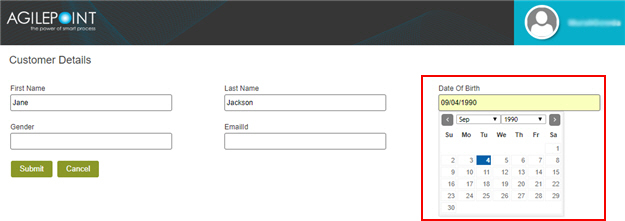
- In the Date Of Birth field, select 09/04/1990 from the
calendar.
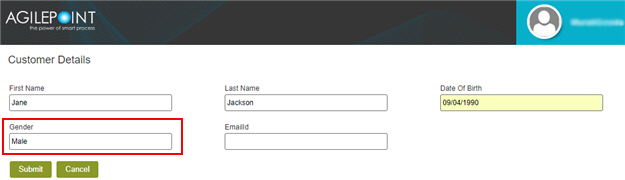
- In the Gender field, enter Male.
- In the EmailId field, enter jane.jackson@gmail.com.
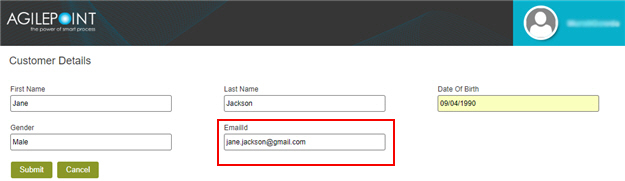
- Click Submit.
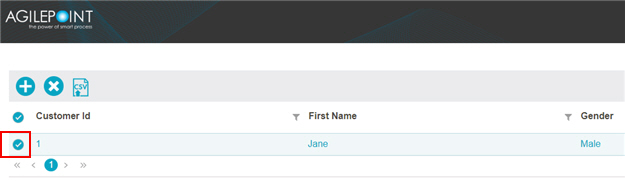
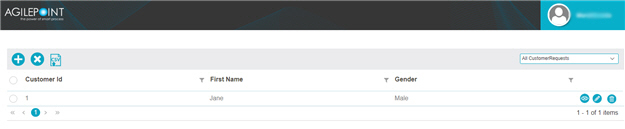
The View form shows. the name you entered in the records list.
Step 7 (Optional): Change the eForm Data
Optionally, you can change the data you entered in the Create form.
Good to Know
- This step uses the Update form that was configured in the Publish step. In this example, the Update form looks the same as the Create form, but behind the scenes, they are different eForms. You can change the Update form if necessary.