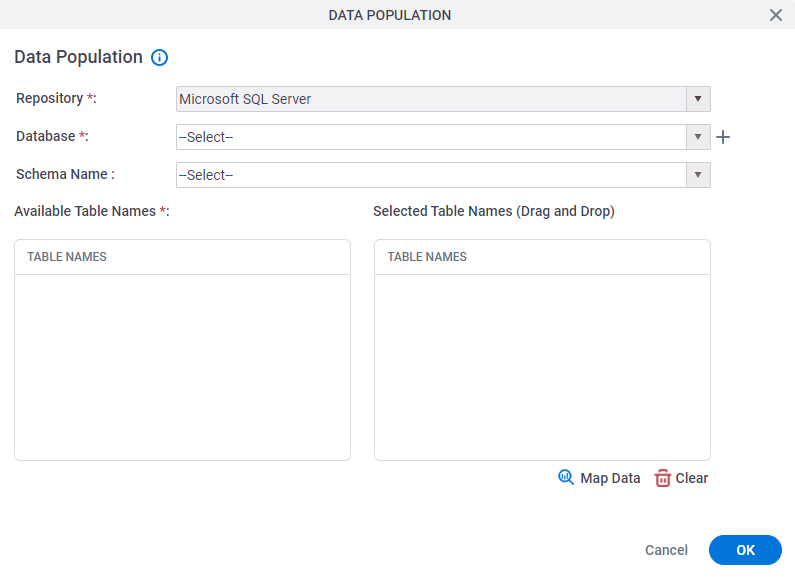
Figure 1 . Data Population screen How to Start Open Process Builder .
For information about how to
open this screen, refer to
Process Builder
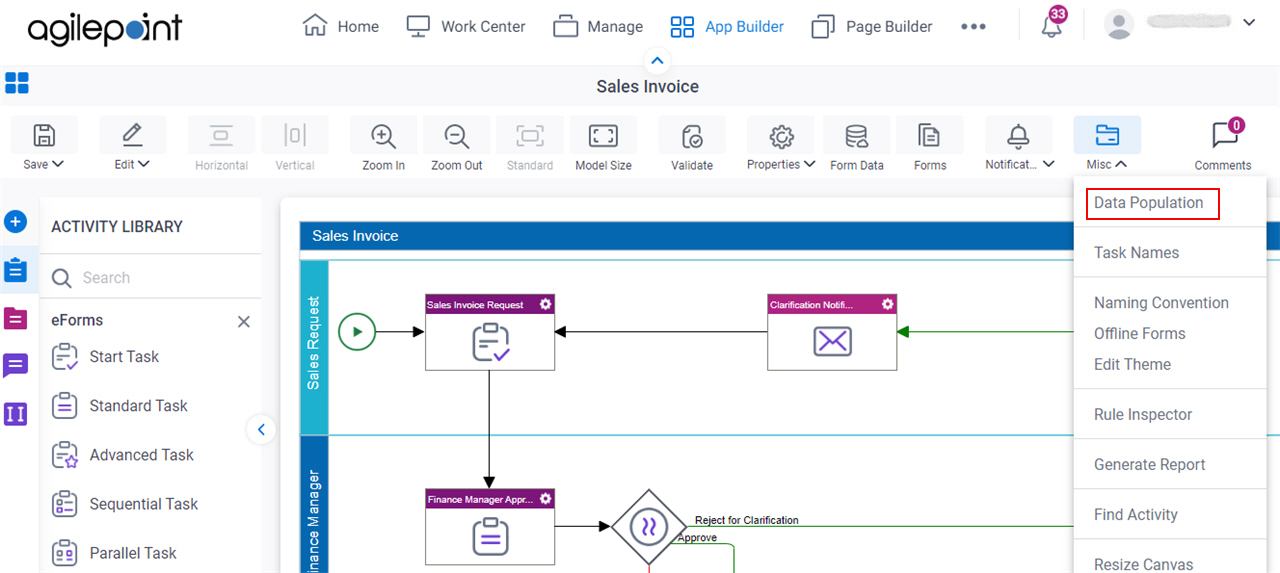
In Process Builder , click Misc Data Population .
Fields Field Name Definition
Repository
Description: Specifies whether to write the data to a database SharePoint Allowed Values:
Microsoft SQL Server - Writes the data to a Microsoft SQL Server database.Sharepoint - Writes the data to a SharePoint list. Default Value: None Example: Refer to :
Database
Description: Specifies the access token database To Open this Field:
On the Data Population screen, in the Repository list, select
Database . Allowed Values: A list of access tokens . Default Value: None Accepts Variables: No Example: Refer to :
Schema Name
Description: Specifies your process schema To Open this Field:
On the Data Population screen, in the Repository list, select
Database . Allowed Values: A schema name from the list.
When you select the database from the Database field, this field shows the schemas associated with the database.
Default Value: None Example: Refer to :
Limitations:
Create
Opens this Screen: Access Token for Database To Open this Field:
On the Data Population screen, in the Repository list, select
Database . Function of this Screen: Configure an access token to a database
SharePoint
Description: Specifies the access token To Open this Field:
On the Data Population screen, in the Repository list, select
SharePoint . Allowed Values: A list of access tokens configured for your environment. Default Value: None Accepts Variables: No
Create
Opens this Screen: Access Token for SharePoint To Open this Field:
On the Data Population screen, in the Repository list, select
SharePoint . Function of this Screen: Configure an access token
to SharePoint
Table Names
Description: Shows all the table names of the specified database To Open this Field:
On the Data Population screen, in the Repository list, select
Database . Allowed Values: A database table names selected from the database. Default Value: None Accepts Variables: No Example: Refer to :
Selected Table Names
Description: Specifies the database To Open this Field:
On the Data Population screen, in the Repository list, select
Database . Allowed Values: The table names selected from the Table Names list. Default Value: None Accepts Variables: No Example: Refer to :
Site URL
Description: Specifies the URL for your SharePoint To Open this Field:
On the Data Population screen, in the Repository list, select
SharePoint . Allowed Values: A valid SharePoint site URL .Default Value: None Accepts Variables: Yes Example:
List Name
Description: Shows the name of your SharePoint . To Open this Field:
On the Data Population screen, in the Repository list, select
Database . Allowed Values: The name of your SharePoint list .
Default Value: None Accepts Variables: No
Selected List Names
Description: Specifies the name and primary key of your SharePoint To Open this Field:
On the Data Population screen, in the Repository list, select
SharePoint . Allowed Values:
Field Name - Specifies the name of your SharePoint list.Primary Key - Specifies the primary key to be used for each list. Default Value: None Accepts Variables: No
Map Data
Opens this Screen: Schema Mapper screen Function of this Screen: Maps SharePoint fields, form fields, web methods, or other
input sources to an XML schema. .