Single Select Lookup > OData Service

This topic shows how to create a lookup with an OData service as the data source for the Single Select Lookup form control.

Background and Setup

Prerequisites

Good to Know

  • Some information about third-party integrations is outside the scope of the AgilePoint NX Product Documentation. It is the responsibility of the vendors who create and maintain these technologies to provide this information. This includes specific business use cases and examples; explanations for third-party concepts; details about the data models and input and output data formats for third-party technologies; and various types of IDs, URL patterns, connection string formats, or other technical information that is specific to the third-party technologies. For more information, refer to Where Can I Find Information and Examples for Third-Party Integrations?

How to Start

  1. On the Single Select Lookup form control configuration screen, on the Configure tab, click Add Lookup.

    For information about how to open this screen, refer to Single Select Lookup form control.
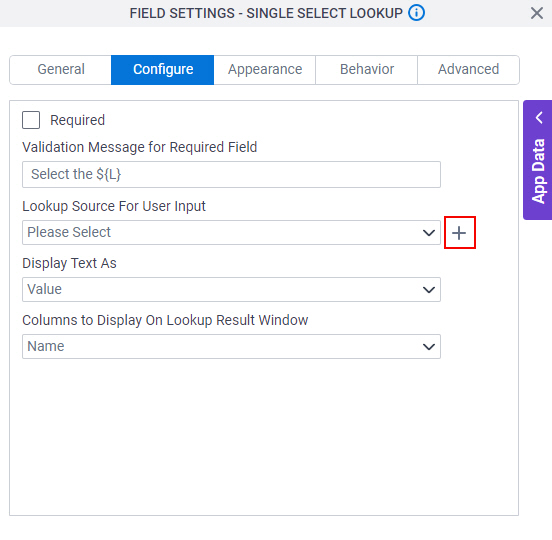

    Click Add Lookup
  2. On the Select Data Source Type screen, select OData Service.
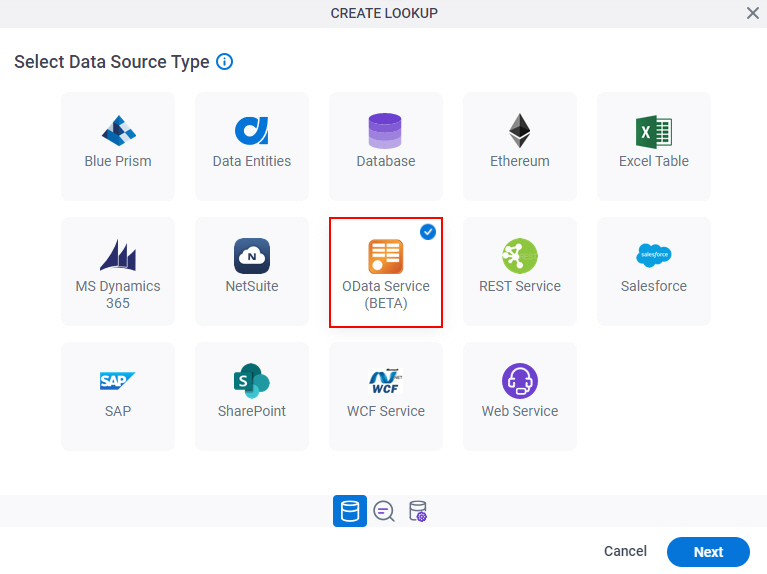
    Select OData Service
  3. Click Next.

Lookup Details

Specifies the basic configuration for a lookup.
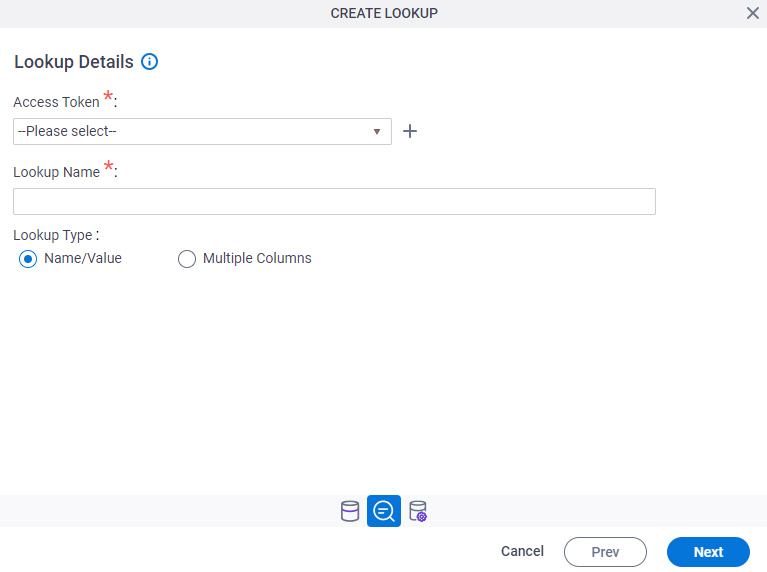
Figure: OData Service Lookup Details screen

OData Service Lookup Details screen

Fields

Field NameDefinition

Access Token

Function:
Specifies the access token that connects to your data source.
Accepted Values:
A list of access tokens configured for your environment.
Default Value:
None
Accepts Process Data Variables:
No
Example:
This is a common configuration field that is used in many examples. Refer to:
  • Examples - Step-by-step use case examples, information about what types of examples are provided in the AgilePoint NX Product Documentation, and other resources where you can find more examples.

Add New Add New icon

Opens this Screen:
Access Token for OData
Function of this Screen:
Configure an access token to connect to an OData service.

Lookup Name

Function:
Specifies the name you want to give to your lookup procedure.
Accepted Values:
One line of text that can have spaces.
Default Value:
None
Accepts Process Data Variables:
No
Example:
Refer to:

Lookup Type

Function:
Specifies the Name/Value type for the lookup procedure.

The Single Select Lookup form control does not support Multiple Columns lookups. If you select the Multiple Columns, the configuration screen shows Name/Value lookup type.

Accepted Values:
Read only.
Default Value:
Name/Value

Configure Lookup > Request tab

Configures a lookup with the existing data format from your data source.
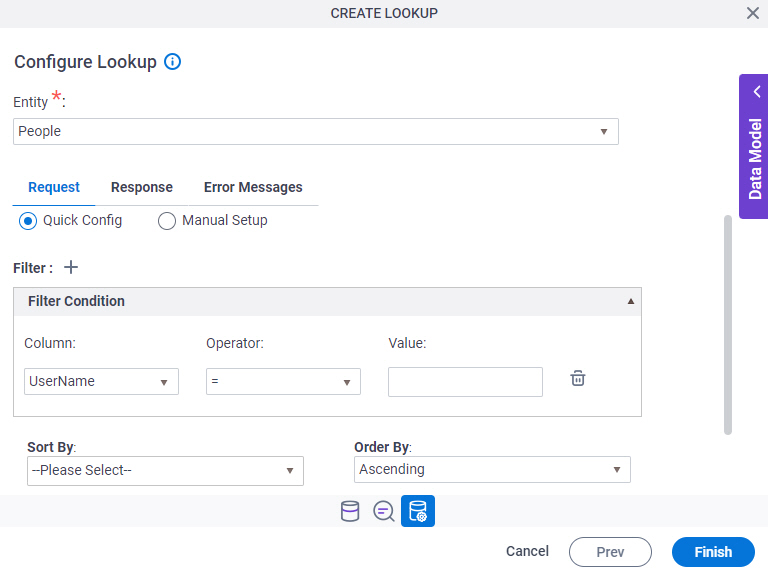
Figure: Configure Lookup > Request tab

Configure Lookup Request tab

Fields

Field NameDefinition

Entity

Function:
Specifies the name for your entity.
Accepted Values:
An entity name from the list.

When you select the access token from the Access Token field, this field shows the entity names associated with the access token.

Default Value:
None
Example:
Refer to:

Configuration

Function:
Specifies the type of configuration.
To Open this Field:
  1. On the Configure Lookup screen, in the Entity list, select an entity.
Accepted Values:
  • Quick Config - Configures the conditions to use in your query to filter the entity sets.
  • Manual Setup - Specifies a query string to filter the entity sets.
Default Value:
Quick Config

Add Filter Add Filter icon

Function:
Adds a row to configure a condition for the filter.
To Open this Field:
  1. On the Configure Lookup screen, in the Entity list, select an entity.

Expand Expand icon

Function:
Shows the field list options.
To Open this Field:
  1. On the Configure Lookup screen, in the Entity list, select an entity.

Collapse Collapse icon

Function:
Closes the field list.
To Open this Field:
  1. On the Configure Lookup screen, in the Entity list, select an entity.

Column

Function:
Specifies the name of the entity property to use in your query.
To Open this Field:
  1. On the Configure Lookup screen, in the Entity list, select an entity.
  2. Click Add Filter Add Filter icon
Accepted Values:
An entity property from the list.

When you select an entity from the Entity field, this field shows the entity property names associated with the entity.

Default Value:
None

Operator

Function:
Specifies the operator to use in the filter.
To Open this Field:
  1. On the Configure Lookup screen, in the Entity list, select an entity.
  2. Click Add Filter Add Filter icon
Accepted Values:
  • =
  • !=
  • >
  • >=
  • <
  • <=
  • Contains
  • Does Not Contain
  • Starts With
  • Ends With
Default Value:
=

Value

Function:
Specifies the value for the entity property to use in the filter.
To Open this Field:
  1. On the Configure Lookup screen, in the Entity list, select an entity.
  2. Click Add Filter Add Filter icon
Accepted Values:
A valid column value.
Default Value:
None
Accepts Process Data Variables:
Yes
Limitations:

Some information about third-party integrations is outside the scope of the AgilePoint NX Product Documentation. It is the responsibility of the vendors who create and maintain these technologies to provide this information. This includes specific business use cases and examples; explanations for third-party concepts; details about the data models and input and output data formats for third-party technologies; and various types of IDs, URL patterns, connection string formats, or other technical information that is specific to the third-party technologies. For more information, refer to Where Can I Find Information and Examples for Third-Party Integrations?

Select Nest Type

Function:
Specifies the AND and OR logical operators to filter the lookup.
To Open this Field:
  1. On the Configure Lookup screen, in the Entity list, select an entity.
  2. Click Add Filter Add Filter icon
Accepted Values:
  • AND - Specifies the AND operator.
  • OR - Specifies the OR operator.
Default Value:
And

Delete Delete icon

Function:
Deletes the selected row.
To Open this Field:
  1. On the Configure Lookup screen, in the Entity list, select an entity.
  2. Click Add Filter Add Filter icon

Sort By

Function:
Specifies the name of the entity property to make a sequence for the query results.
To Open this Field:
  1. On the Configure Lookup screen, in the Entity list, select an entity.
Accepted Values:
An entity property from the list.

When you select an entity from the Entity field, this field shows the entity property names associated with the entity.

Default Value:
None

Order By

Function:
Specifies the sort order for the result set.
To Open this Field:
  1. On the Configure Lookup screen, in the Entity list, select an entity.
Accepted Values:
  • Ascending - Sorts the entity sets in ascending order.
  • Descending - Sorts the entity sets in descending order.
Default Value:
Ascending.

Top

Function:
Specifies to only retrieve the specified number of entity sets, starting with the first result.
To Open this Field:
  1. On the Configure Lookup screen, in the Entity list, select an entity.
Accepted Values:
A positive integer.
Default Value:
None

Query String Parameter

Function:
Specifies the query string to retrieve entity sets from OData.
To Open this Field:
  1. On the Configure Lookup screen, click Manual Setup.
Accepted Values:
One line of text (a string) that can have special charaters with no spaces.
Default Value:
None
Accepts Process Data Variables:
Yes
Limitations:

Some information about third-party integrations is outside the scope of the AgilePoint NX Product Documentation. It is the responsibility of the vendors who create and maintain these technologies to provide this information. This includes specific business use cases and examples; explanations for third-party concepts; details about the data models and input and output data formats for third-party technologies; and various types of IDs, URL patterns, connection string formats, or other technical information that is specific to the third-party technologies. For more information, refer to Where Can I Find Information and Examples for Third-Party Integrations?

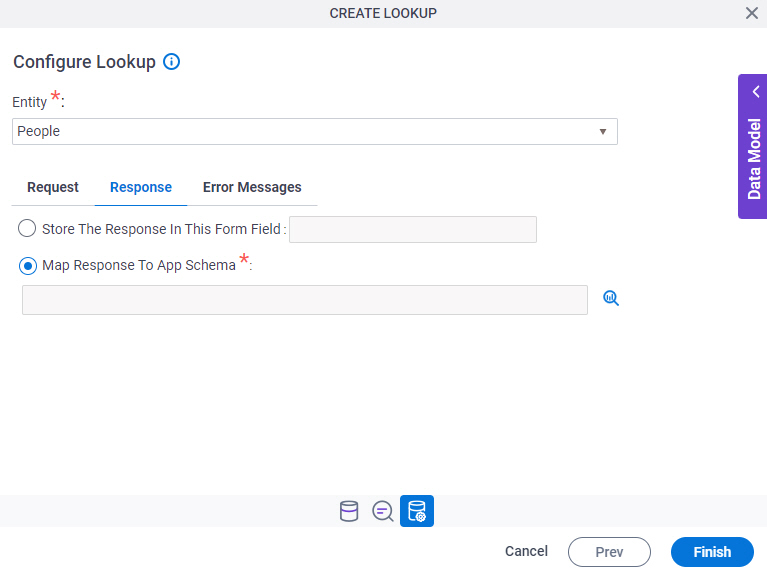
Configure Lookup > Response tab

Connects the response data from the OData call to your app.

Figure: Configure Lookup > Response tab

Response tab

Fields

Field NameDefinition

Entity

Function:
Specifies the name for your entity.
Accepted Values:
An entity name from the list.

When you select the access token from the Access Token field, this field shows the entity names associated with the access token.

Default Value:
None
Example:
Refer to:

Store The Response In This Form Field / Map Response to App Schema

Function:
Specifies where to store the response from OData.
Accepted Values:
  • Store The Response In This Form FieldSelect this option if you expect OData to return only one data item.

    In the text field, specify a variable to store the data OData returns.

  • Map Response to App SchemaSelect this option if you expect OData to return more than one data item.

    Click the Schema Mapping Schema Mapping icon button to open the Schema Mapper.

    Use this screen to connect the response to the data model for your process.

    Because the query can return more than one result, the parent node in the external data source must be mapped to a node in the AgilePoint NX process schema that is a repeating schema element. The child nodes in both data models must also be mapped, but child nodes in AgilePoint NX inherit the repeating behavior from their parent node

Default Value:
Map Response To App Schema
Accepts Process Data Variables:
Yes
Limitations:

Some information about third-party integrations is outside the scope of the AgilePoint NX Product Documentation. It is the responsibility of the vendors who create and maintain these technologies to provide this information. This includes specific business use cases and examples; explanations for third-party concepts; details about the data models and input and output data formats for third-party technologies; and various types of IDs, URL patterns, connection string formats, or other technical information that is specific to the third-party technologies. For more information, refer to Where Can I Find Information and Examples for Third-Party Integrations?

Configure Lookup > Error Messages tab

Configures the message to show if the lookup does not return any data.
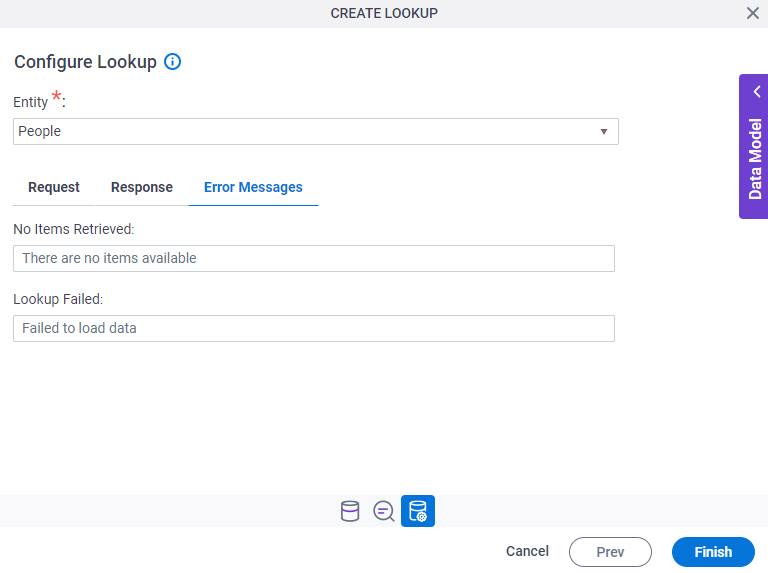
Figure: Configure Lookup > Error Messages tab

Error Messages tab

Fields

Field NameDefinition

Entity

Function:
Specifies the name for your entity.
Accepted Values:
An entity name from the list.

When you select the access token from the Access Token field, this field shows the entity names associated with the access token.

Default Value:
None
Example:
Refer to:

No Items Retrieved

Function:
Specifies the error message to show if the lookup does not return any data.
Accepted Values:
One line of text that can have spaces.
Default Value:
None

Lookup Failed

Function:
Specifies the message to show if the data fails to load.
Accepted Values:
More than one line of text.
Default Value:
Failed to load data.