(Example) Create a Subprocess
This example shows how to create a subprocess for human resources leave verification in an app.
Background and Setup
Use Case
In this example, the Human Resources wants to divide the tasks into a separate subprocess, so that it can be changed without affecting the main parent process.
Final Result


Prerequisites
- This example uses the app created in (Example) Create a Process-Based App (Modern).
Refer to that topic for information about creating the app.
The app name is Absence Request app.
Step 1: Create a Subprocess
First, create a subprocess for Human Resources Leave Verification in the Absence Request app.
How to Start
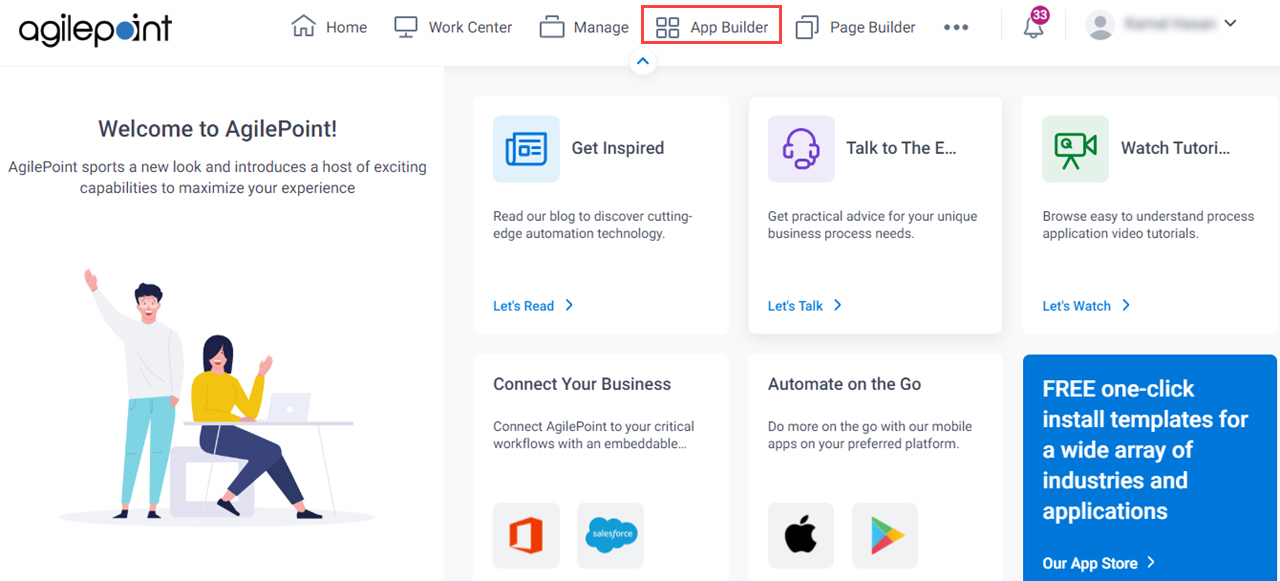
- Click App Builder.
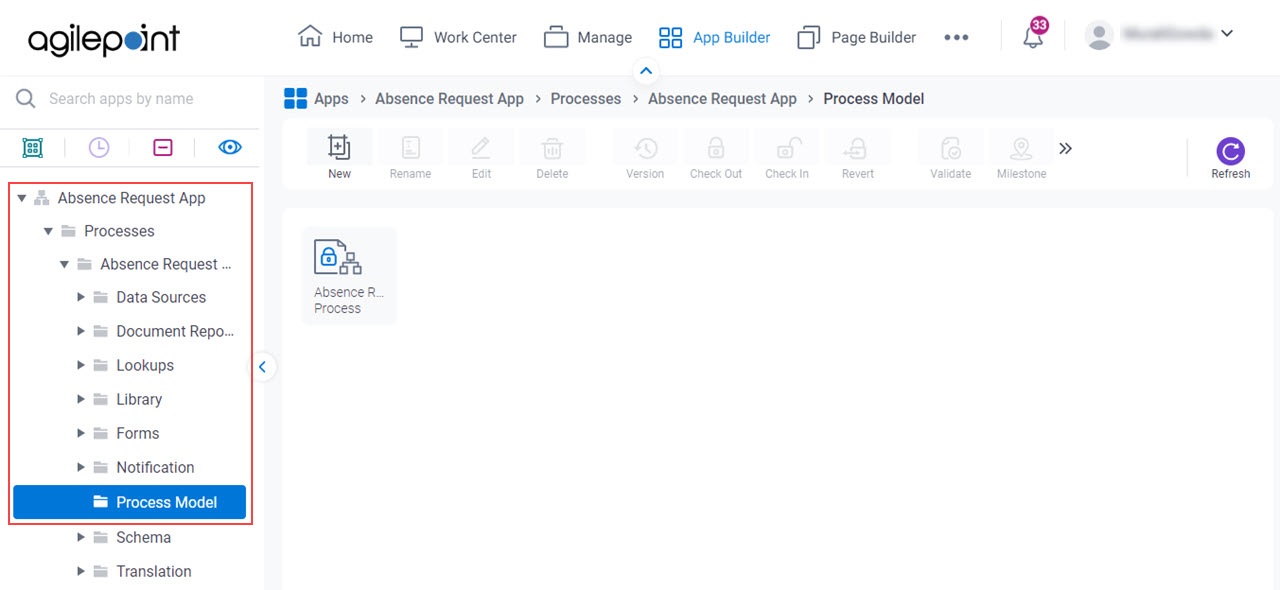
- On the App Explorer screen,
click Absence Request App > Processes >
Absence Request App > Process Model.
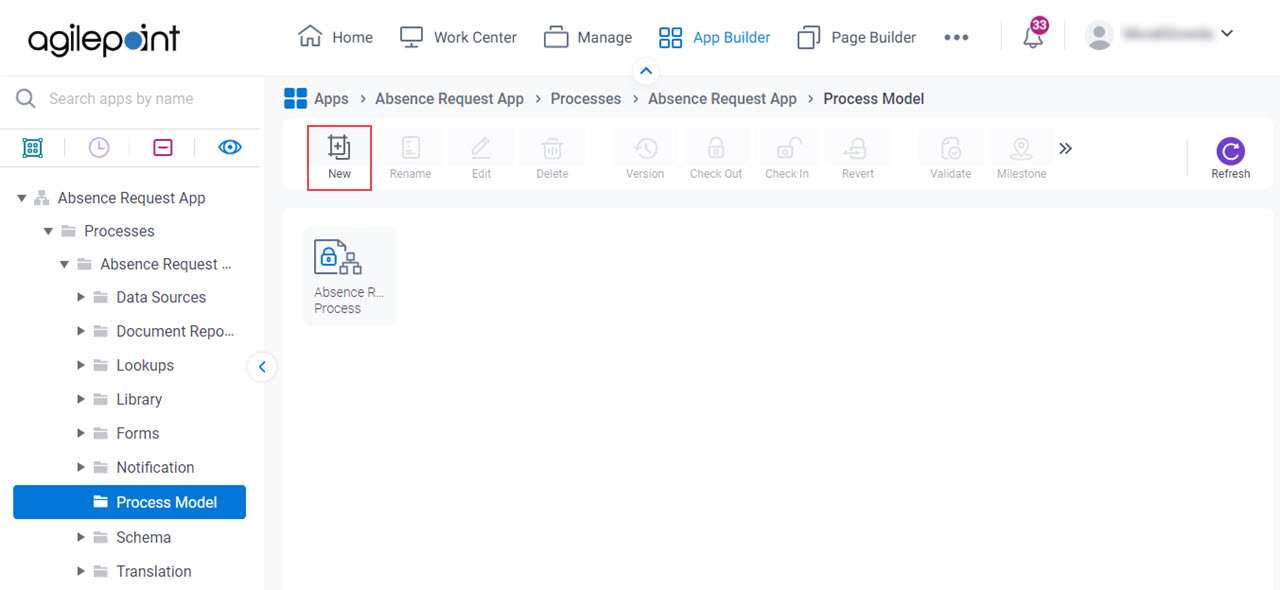
- Click New.
Procedure
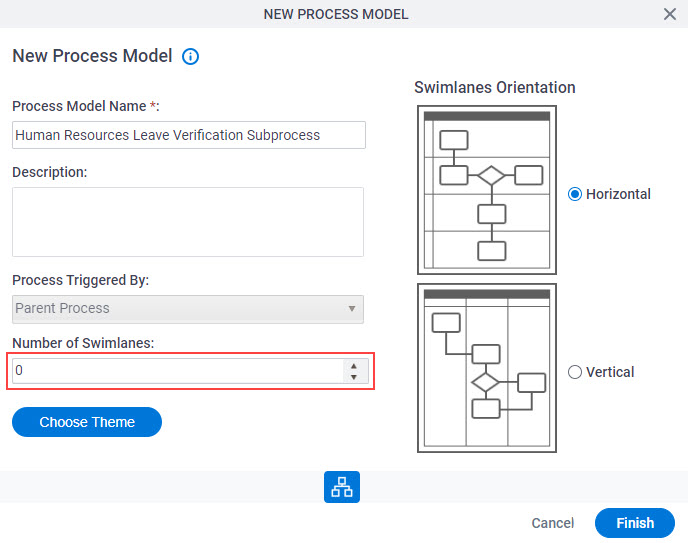
- On the New Process Model screen, in the Process Model Name field, enter Human Resources Leave Verification Subprocess.
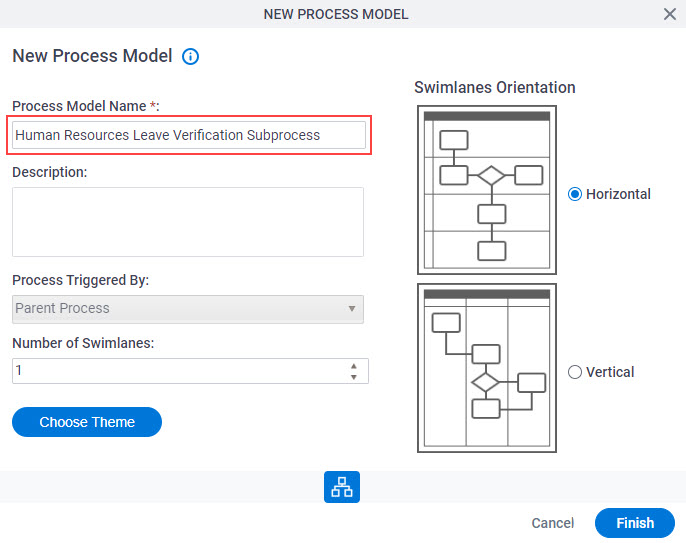
- In the Number of Swimlanes field, enter 0.
- Click Finish.
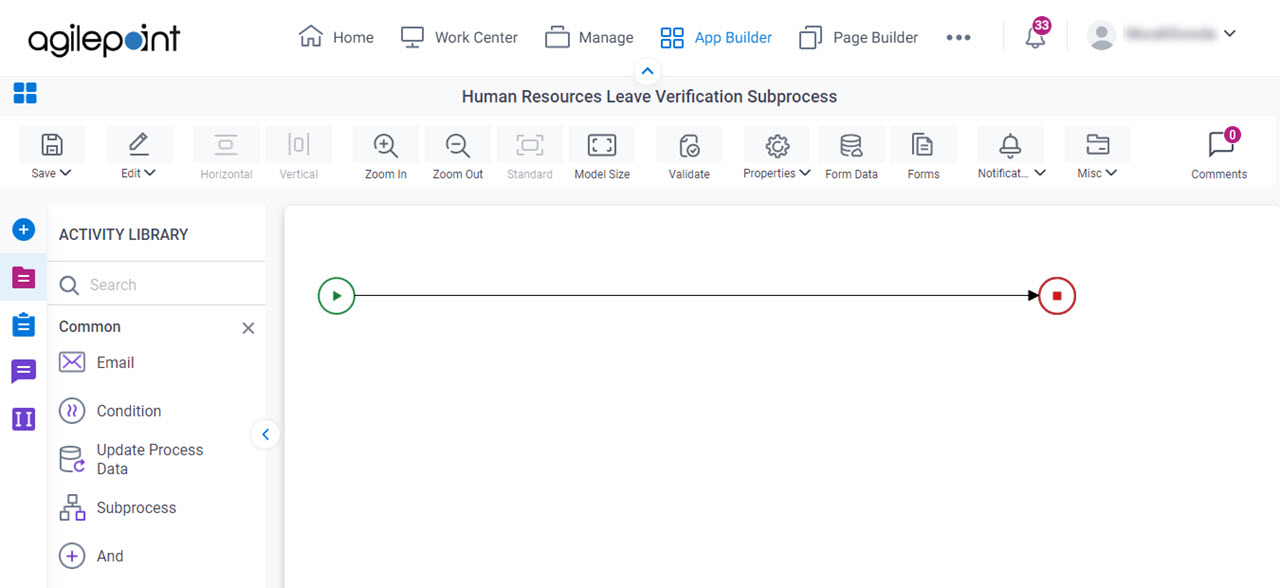
The Process Builder opens the process model, Human Resources Leave Verification Subprocess.
Step 2: Configure a Task in the Subprocess
Next, configure a Set Available Leave Hours task in the Human Resources Leave Verification subprocess.
Procedure
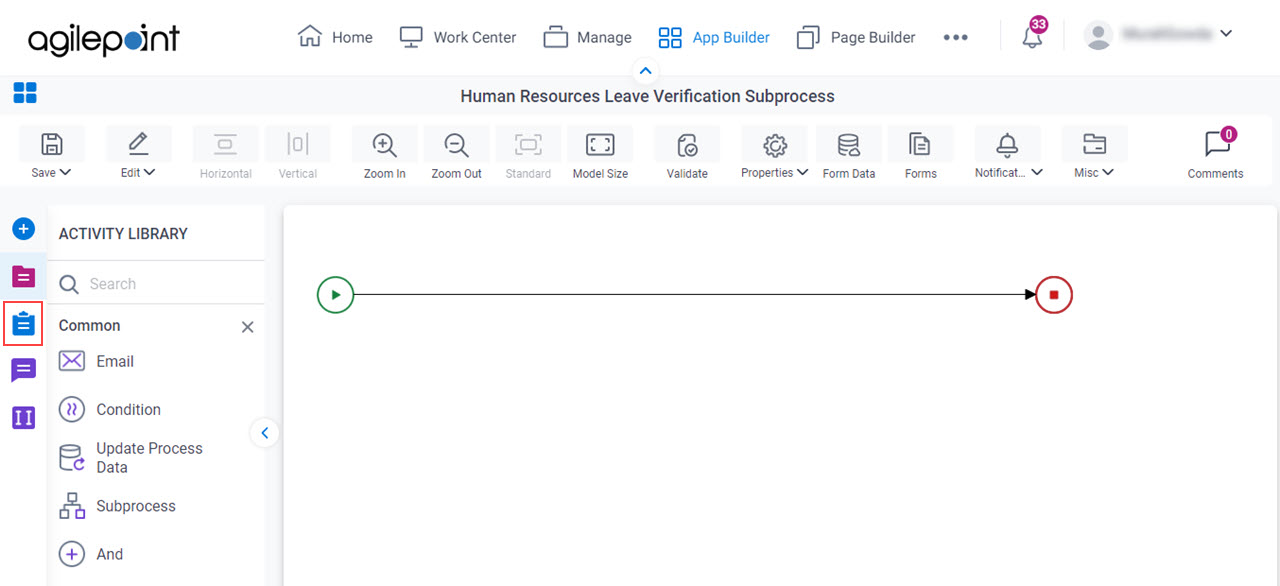
- In Process Builder, in the Activity Library,
open the eForms
 tab.
tab.
- On the eForms
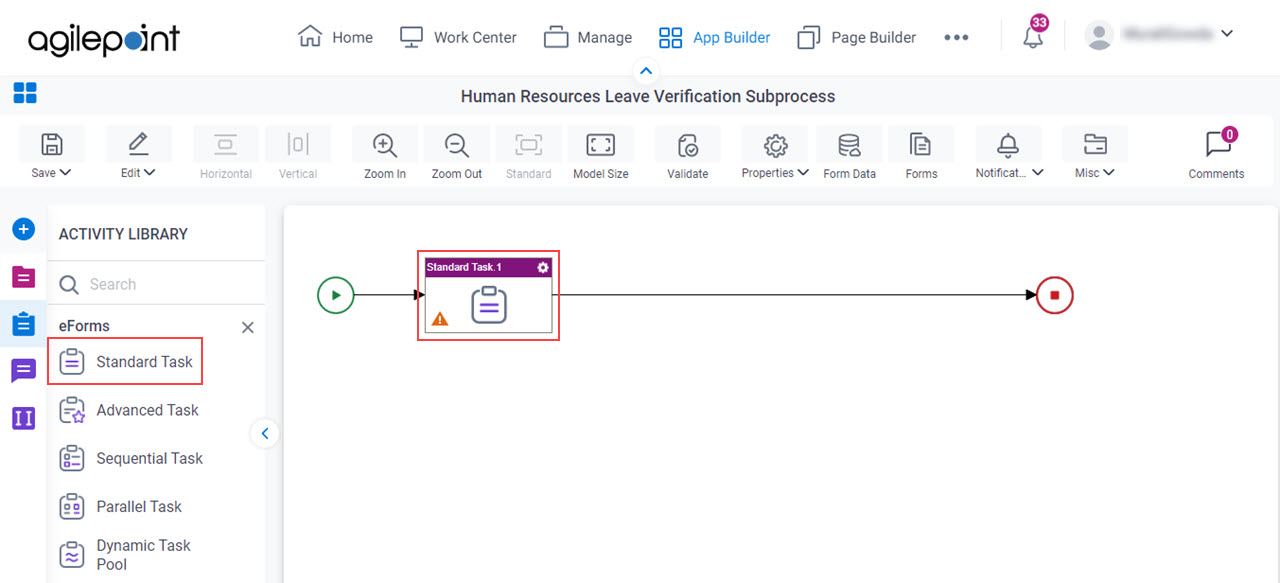
tab, drag the Standard Task
activity onto your process.
- On the eForm Configuration screen, select the Set Available Leave Hours eForm.
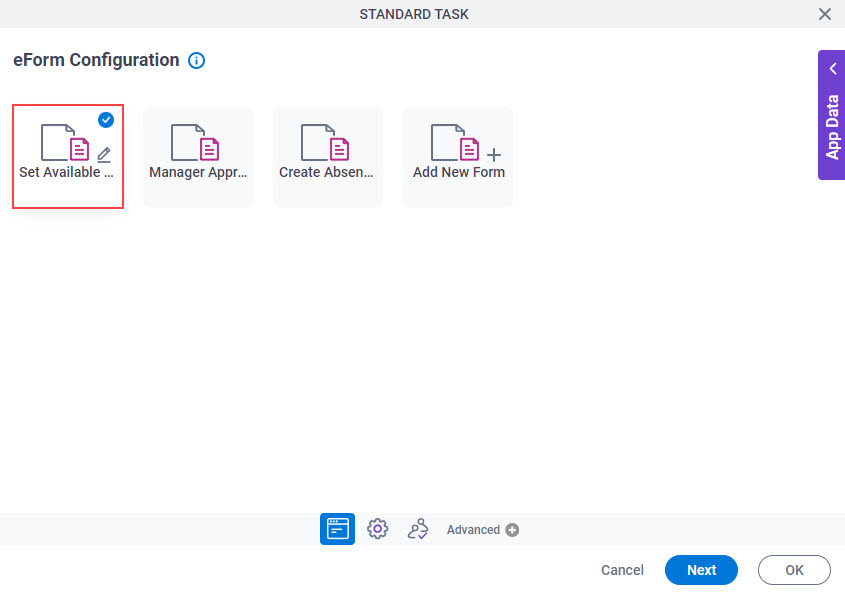
- Click Next.
- On the General Configuration screen, in the Display Name field, enter Set Available Leave Hours.
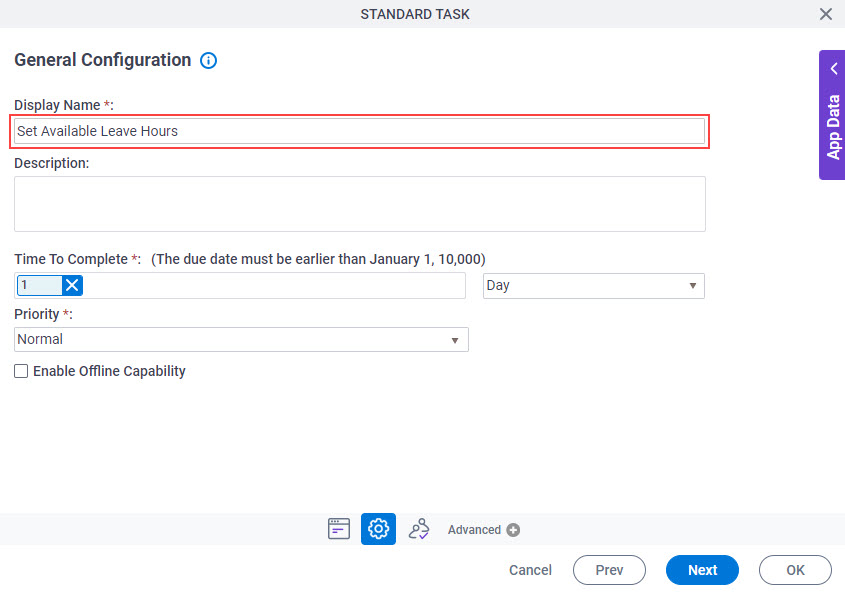
- Click Next.
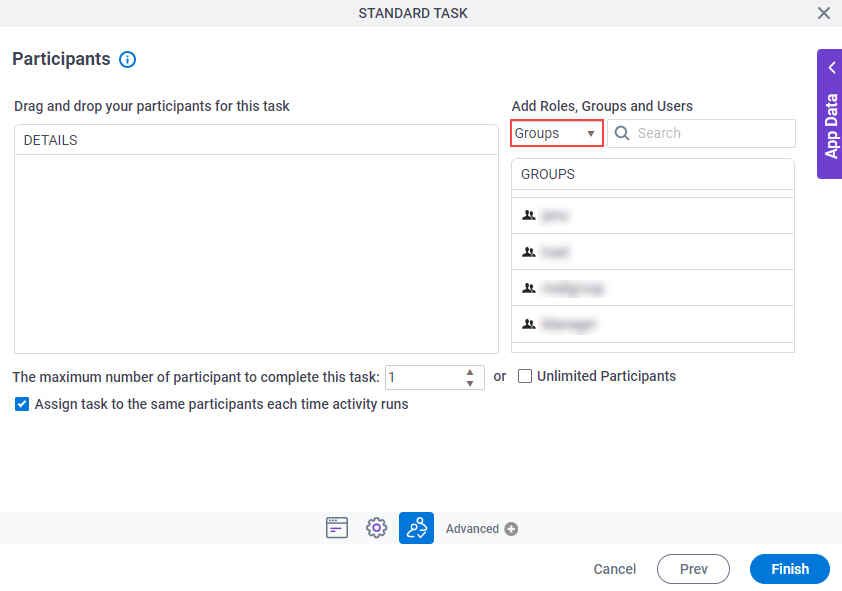
- On the Participants screen, in the Add Roles, Groups and Users field, select Groups.
- In the Search field, enter Human Resources.
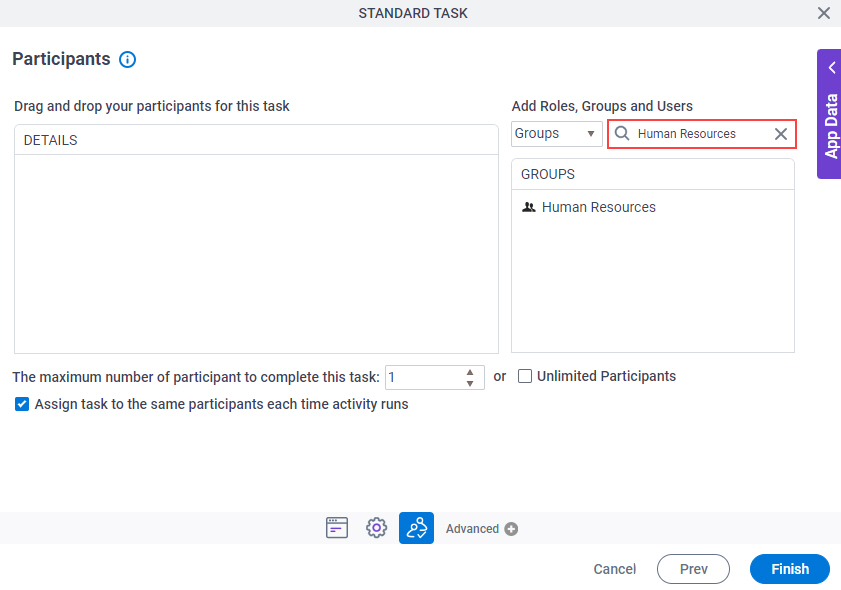
The Groups list show the Human Resources group.
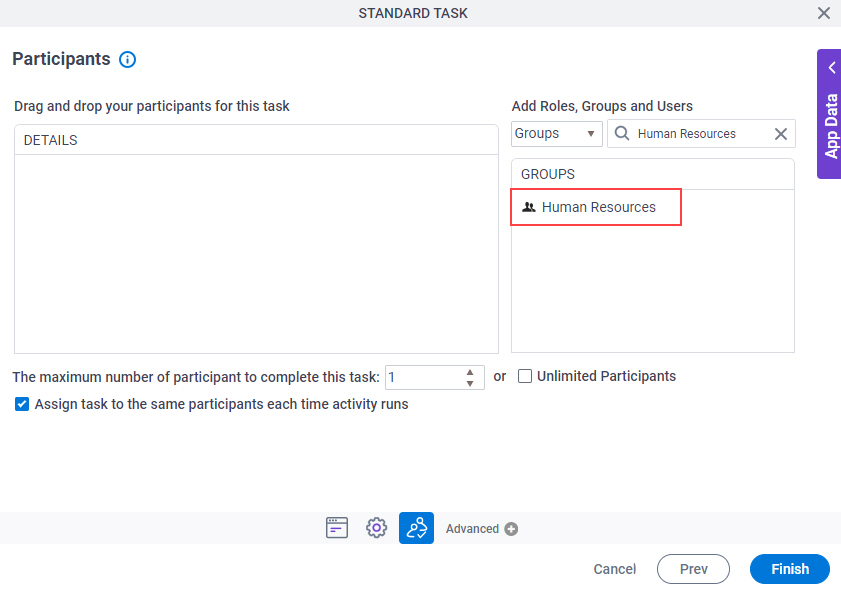
- On the Details field, drag the Human Resources group.
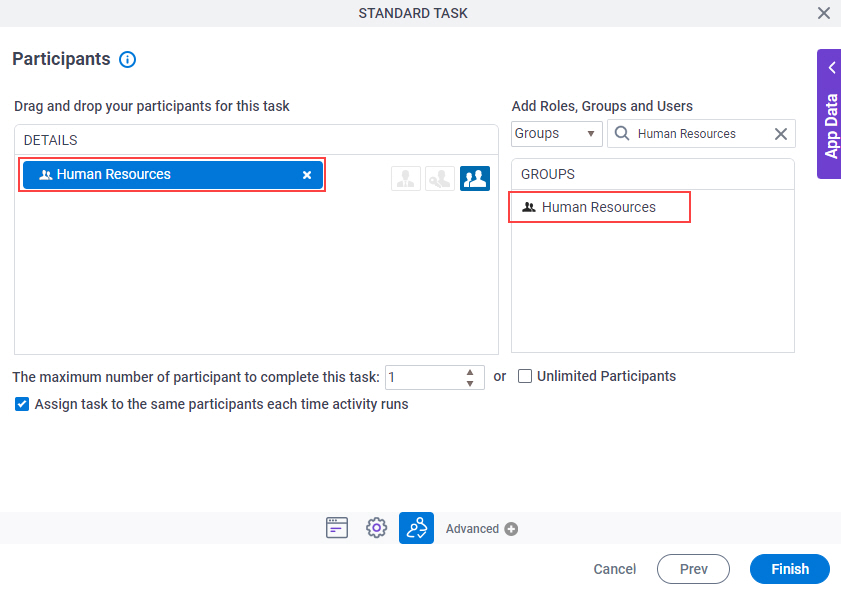
- Click Finish.
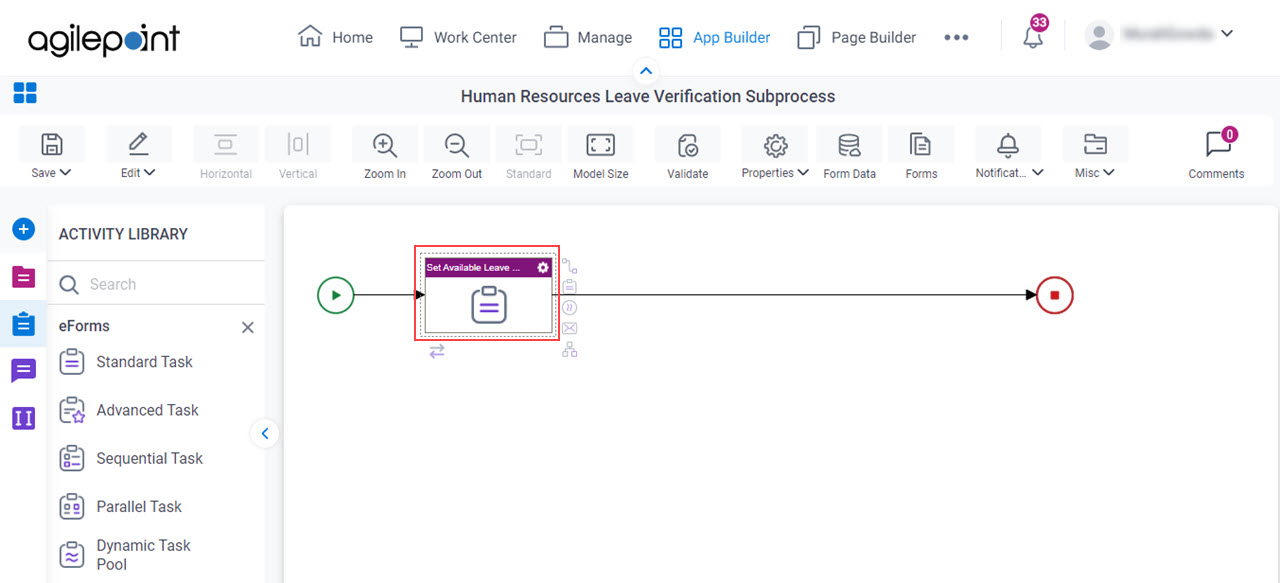
The Process Builder shows the process model with the Set Available Leave Hours standard task.
Step 3: Configure a Pass Milestone Activity
Next, configure a Pass Milestone activity in the Human Resources Leave Verification subprocess.
This activity, when used together with the Wait For Milestone activity, lets parent process wait for the Human Resources to complete their verification.
Procedure
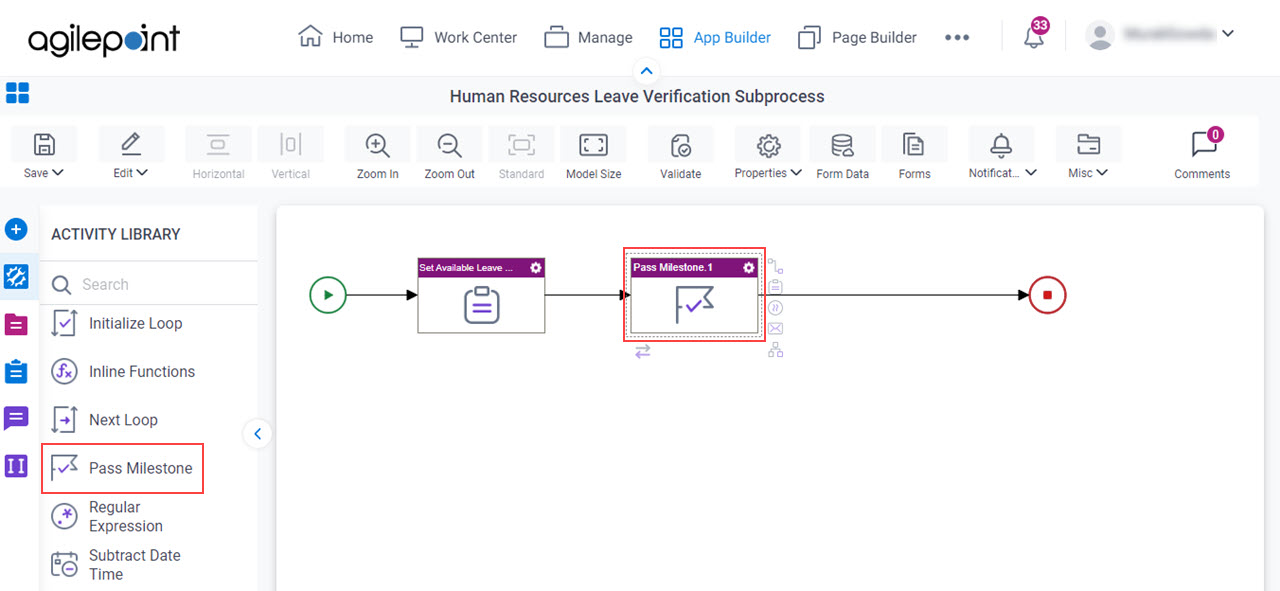
- In Process Builder, in the Activity Library, open the Utilities tab.
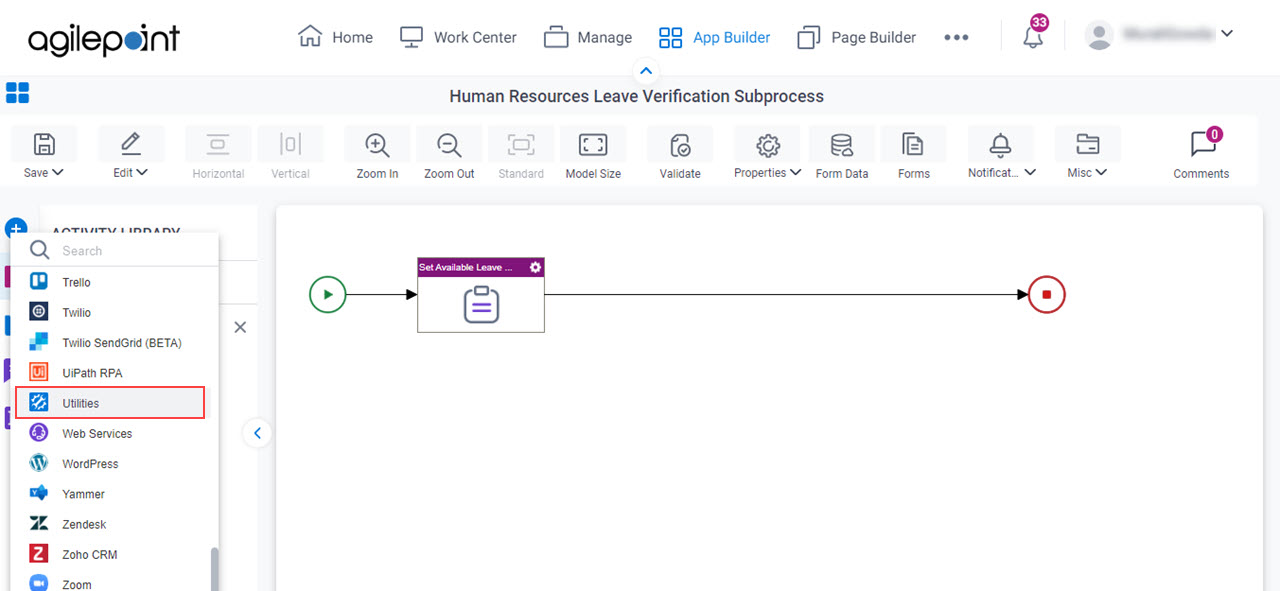
- On the Utilities tab,
drag the Pass Milestone
activity onto your process.
- On the General Configuration screen, in the Display Name field, enter Human Resources Verification Complete.
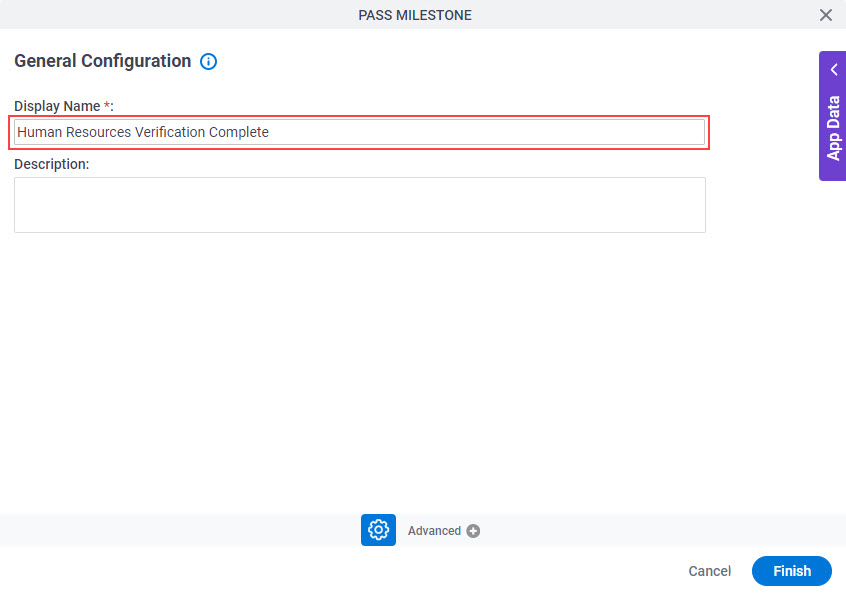
- Click Finish.
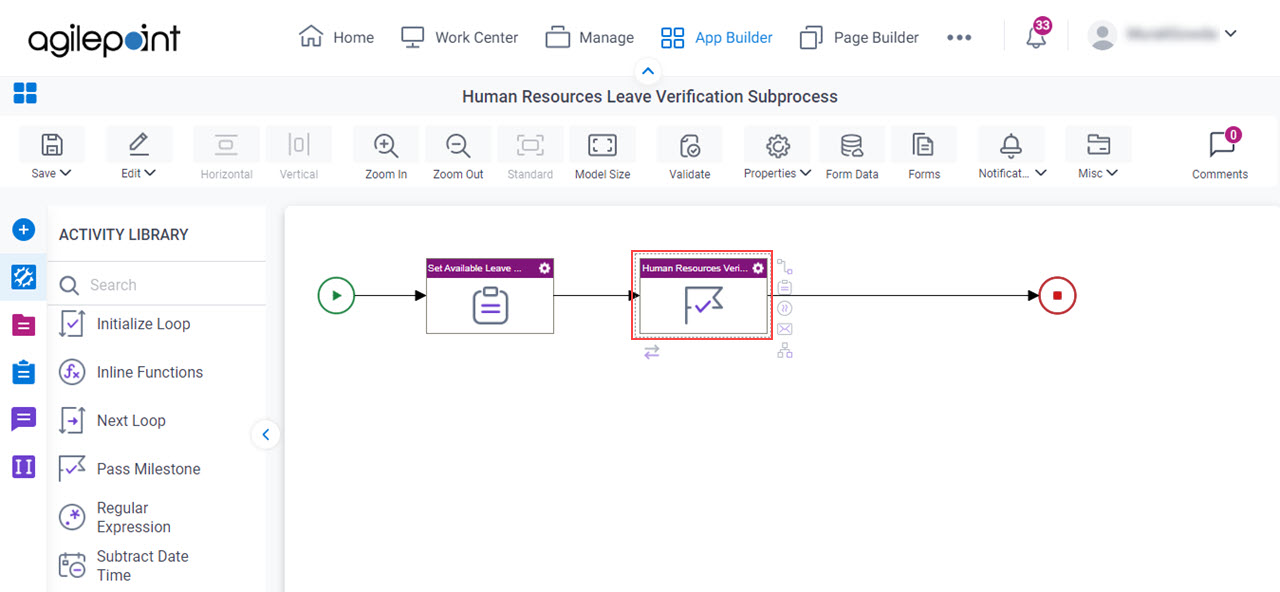
The Process Builder shows the process model with the Human Resources Verification Complete Pass Milestone activity.
Step 4: Save, Check In, and Publish the Process-Based App
Next, save, check in, and publish the process-based app.
For more information, refer to (Example) Save, Check In, and Publish a Process-Based App.
Step 5: Configure a Subprocess Activity
Next, configure the Human Resources Leave Verification Subprocess activity in the Absence Request app.
How to Start
- On the App Explorer screen,
click Absence Request App > Processes >
Absence Request App > Process Model.
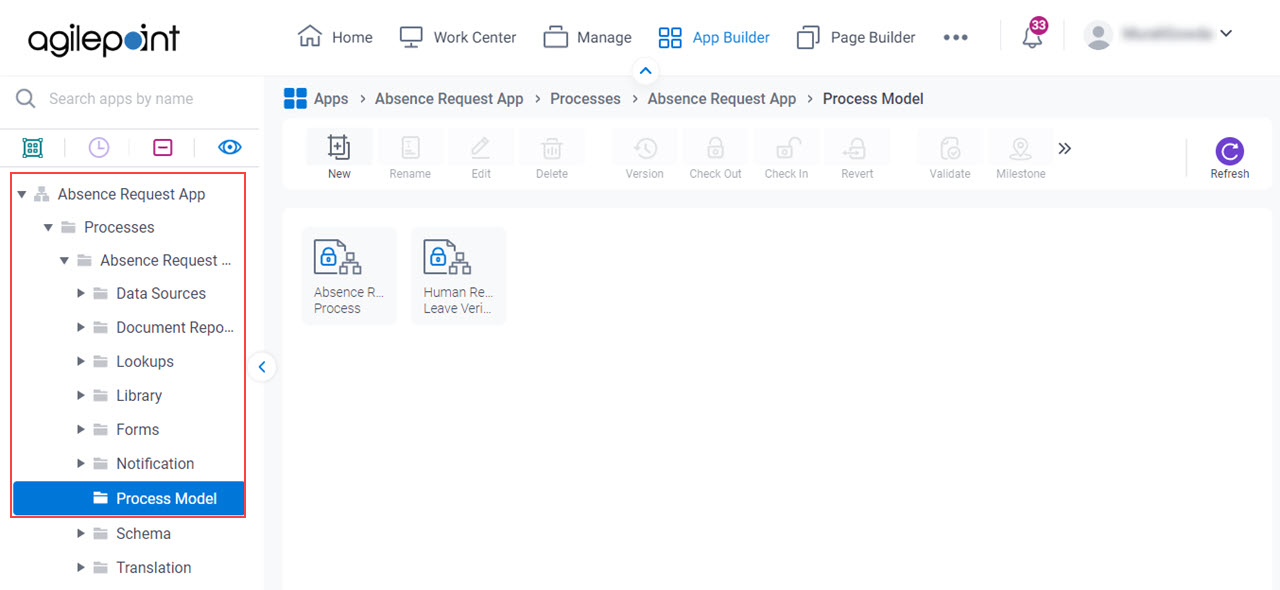
- Double-click the Absence Request Process.
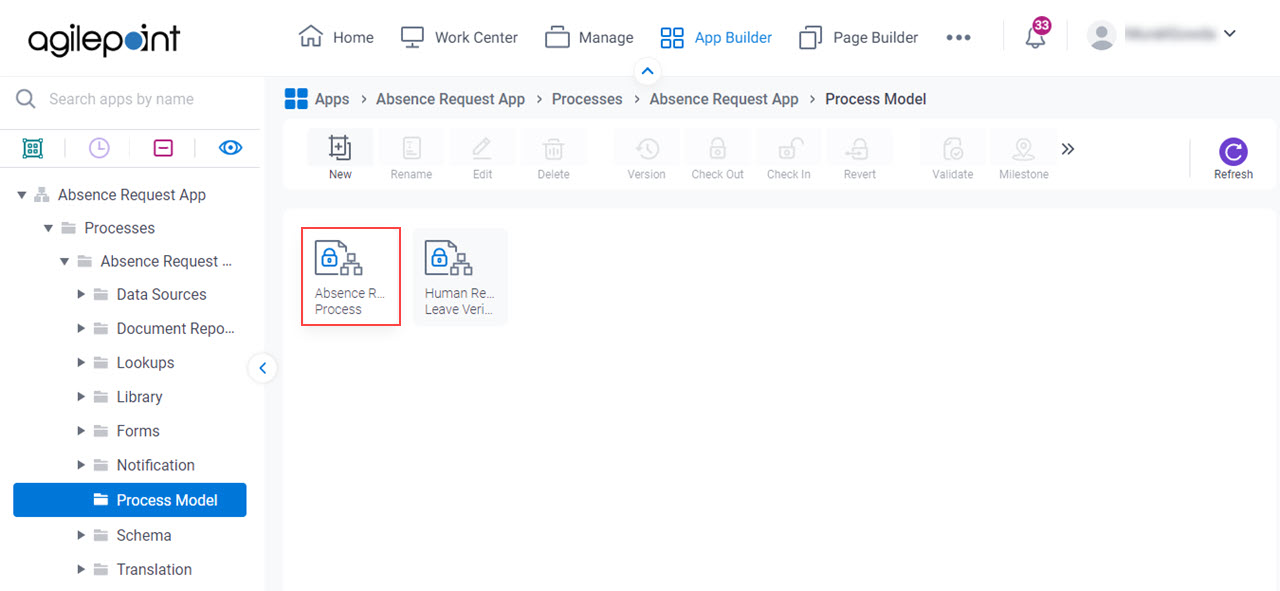
Procedure
- In the Absence Request process, delete the Set Available Leave Hours standard task activity.
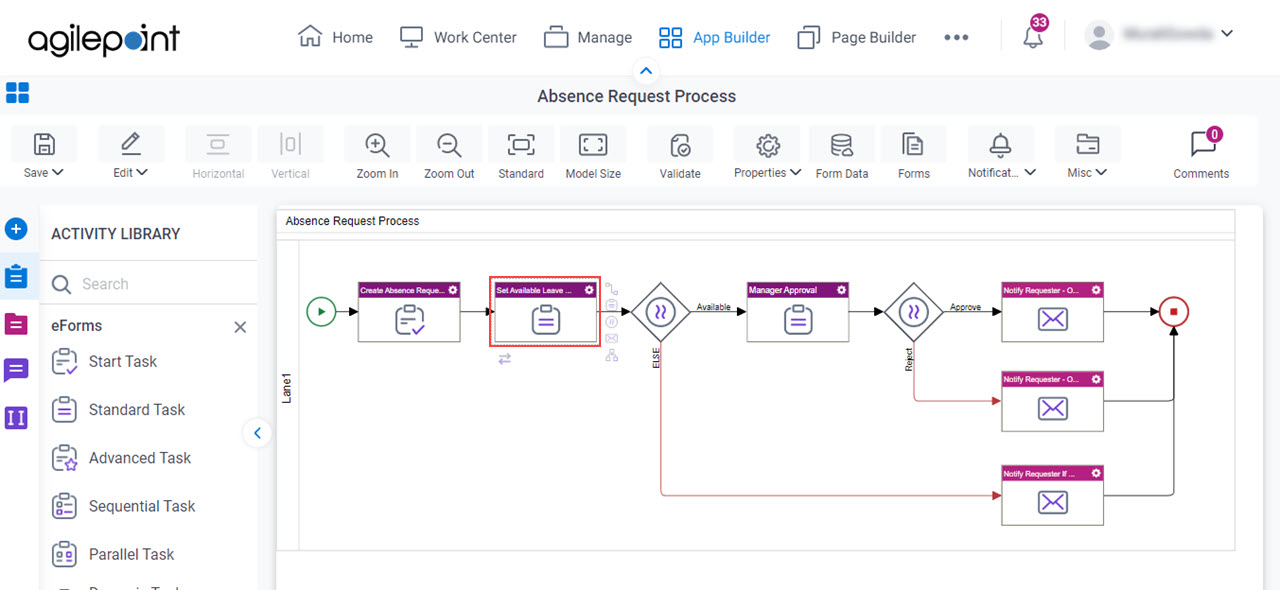
- In Process Builder, in the Activity Library, open the Common
 tab.
tab.
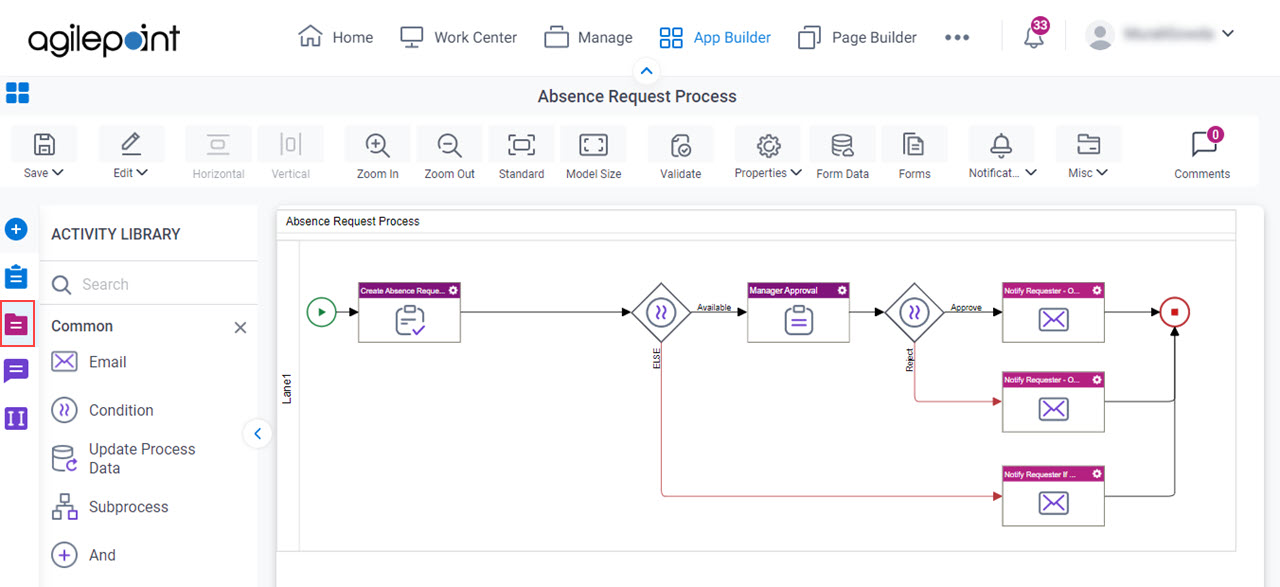
- On the Common tab,
drag the Subprocess
activity onto your process.
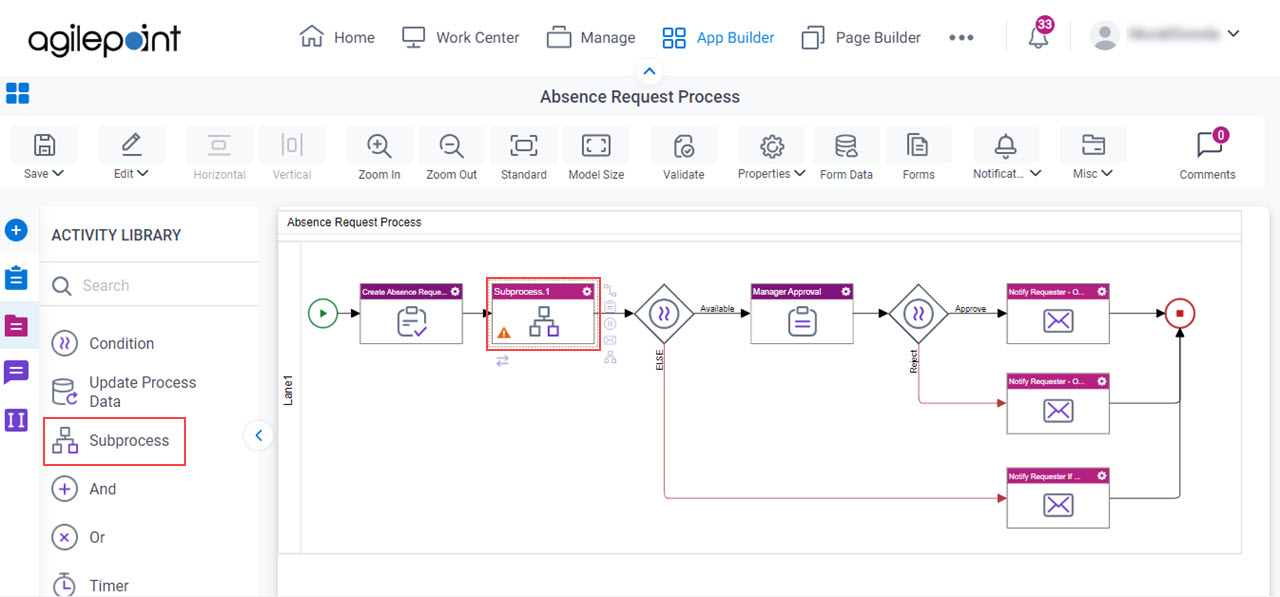
- On the General Configuration screen, in the Display Name field, enter Human Resources Leave Verification.
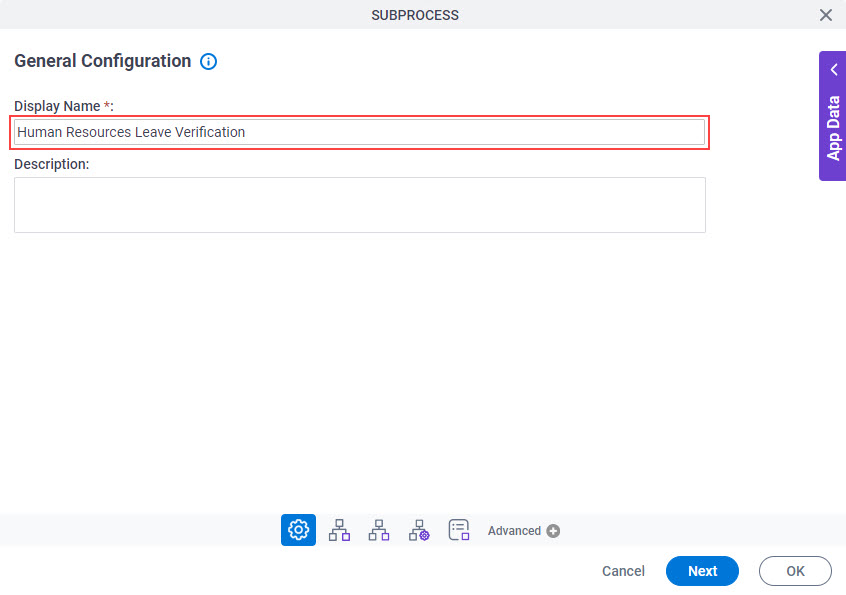
- Click Next.
- On the Subprocess screen, select Predefined Subprocess (Only From This App).
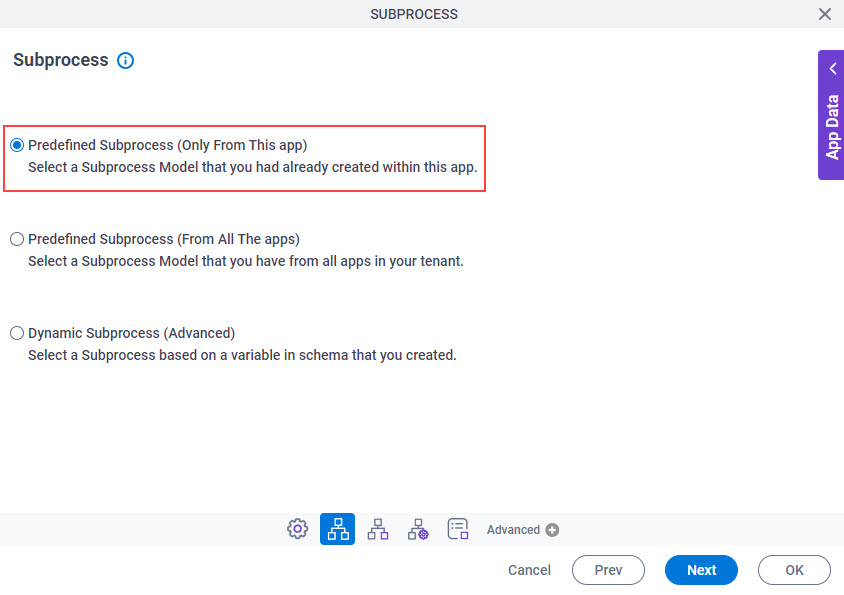
- Click Next.
- On the Subprocess Model screen, in the Subprocess Model field, select Human Resources Leave Verification Subprocess.
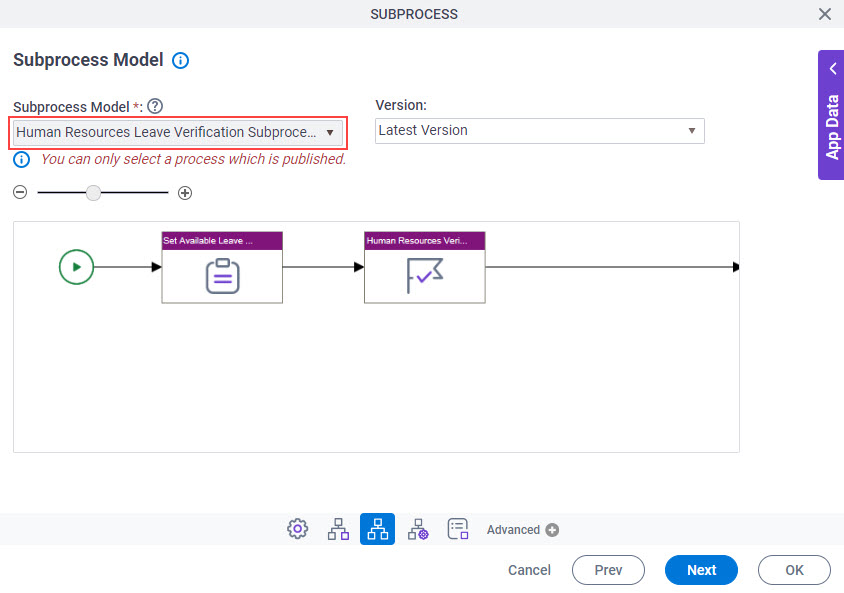
- Click Next.
- On the Subprocess Configuration screen, click Next.
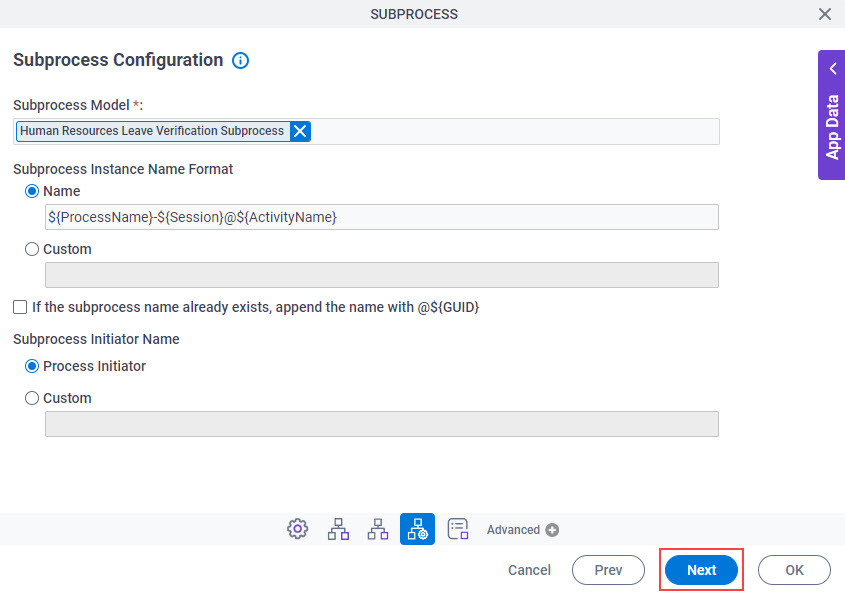
- On the Mapping Attributes screen, select Share all Attributes (Basic).
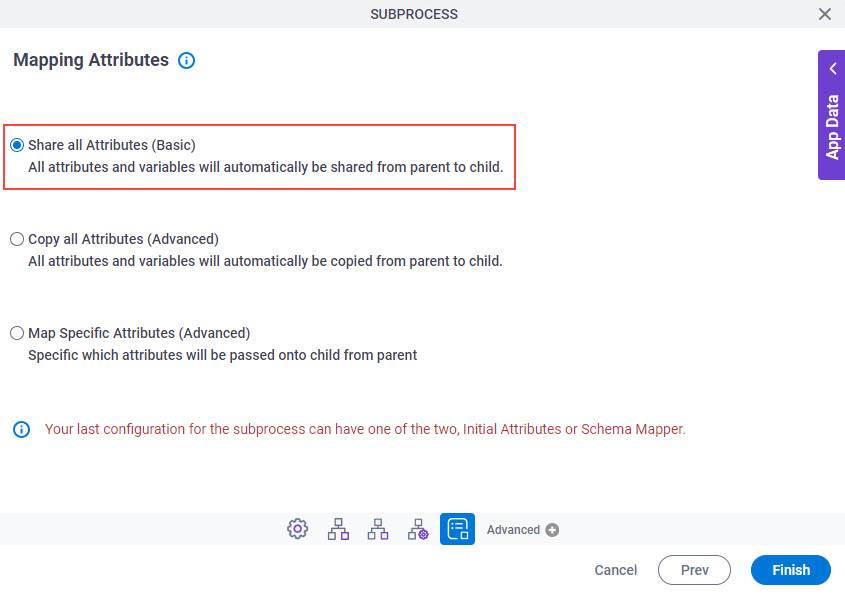
- Click Finish.
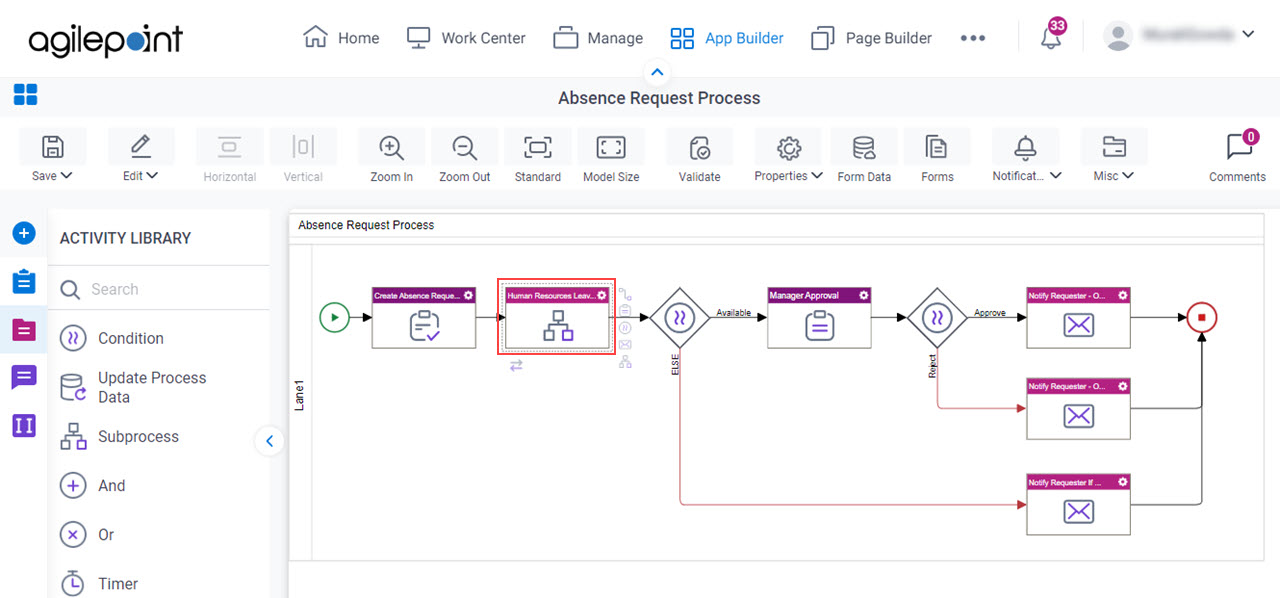
The Process Builder shows the Human Resources Leave Verification Subprocess activity in the Absence Request Process.
Step 6: Configure a Subprocess Activity
Next, configure the Wait for Milestone activity in the Human Resources Leave Verification subprocess.
This activity, when used together with the Pass Milestone activity, lets parent process wait for the Human Resources to complete their verification.
Procedure
- In Process Builder, in the Activity Library, open the Utilities tab.
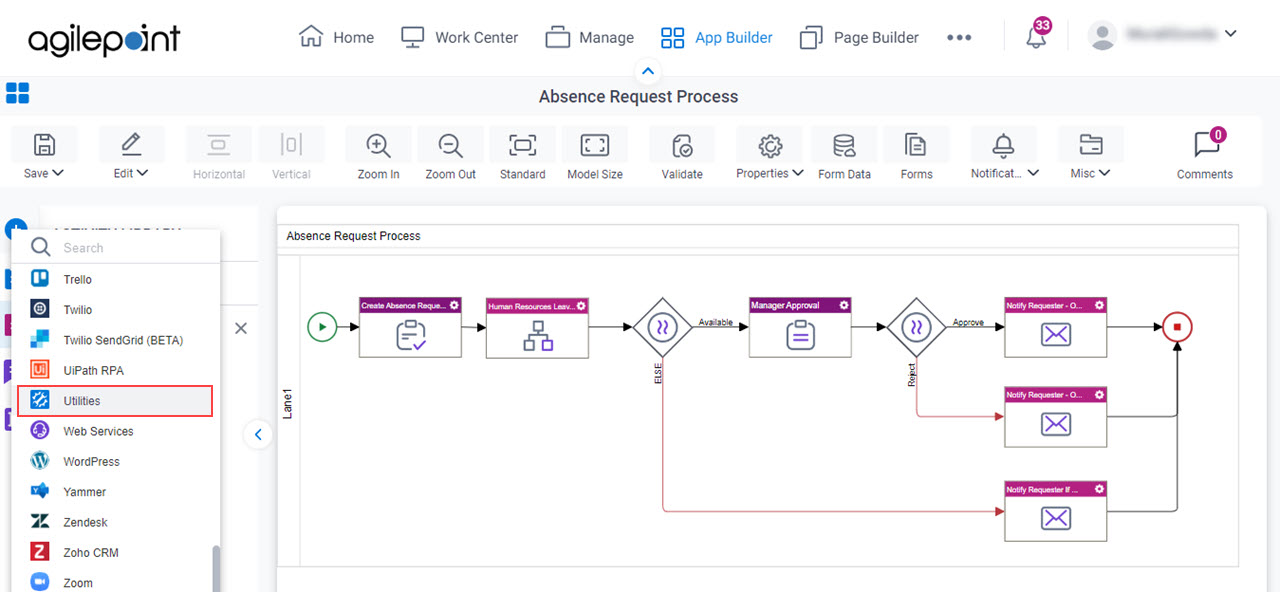
- On the Utilities tab,
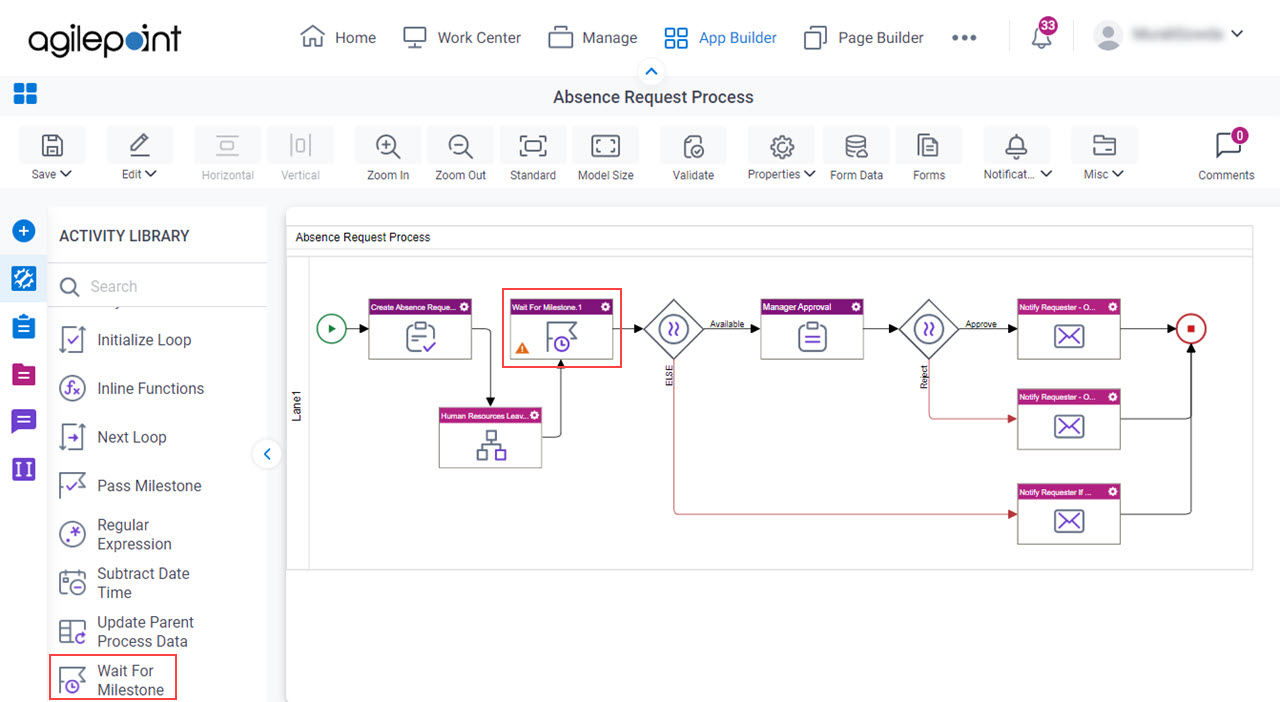
drag the Wait For Milestone
activity onto your process.
- On the General Configuration screen, in the Display Name field, enter Wait for Human Resources to Complete Verification.
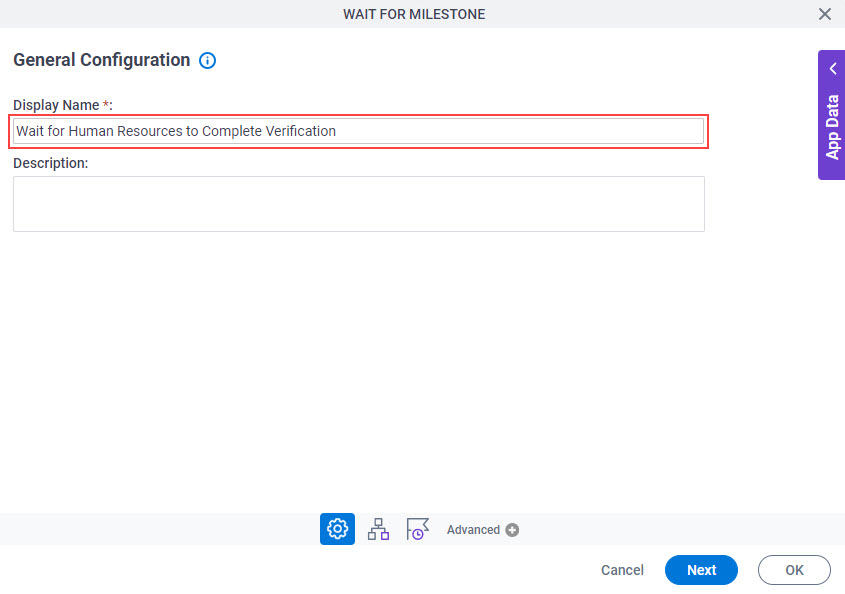
- Click Next.
- On the Select Process screen, in the Select Pass Milestone For field, select Sub Process.
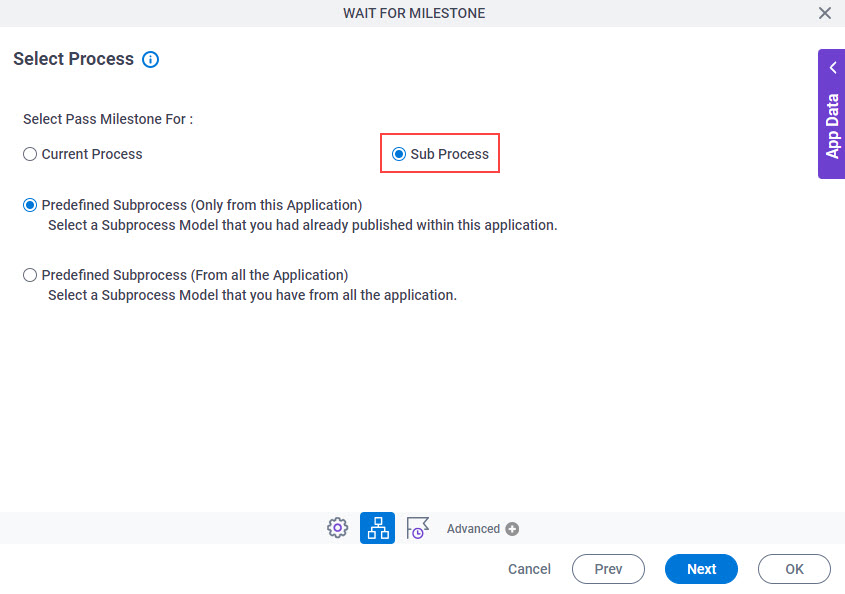
- Select Predefined Subprocess (Only from this App).
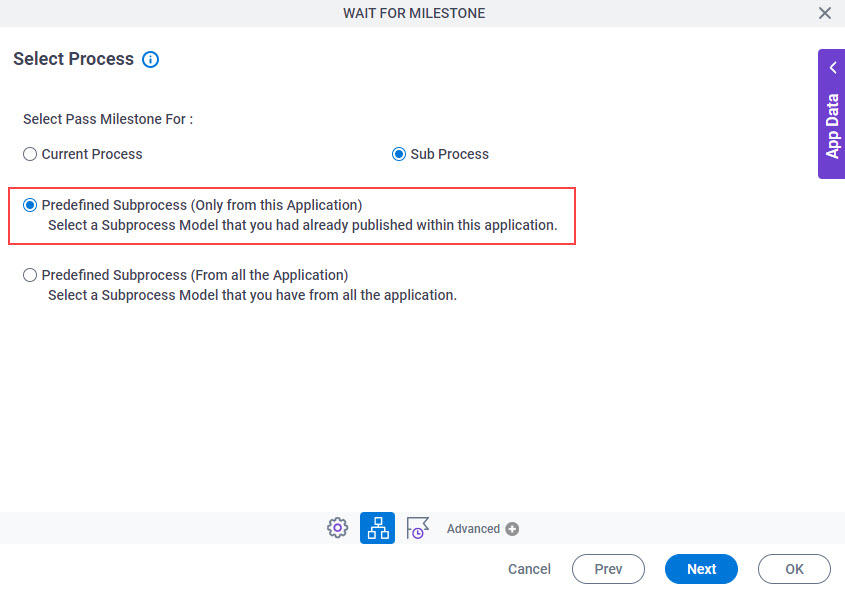
- Click Next.
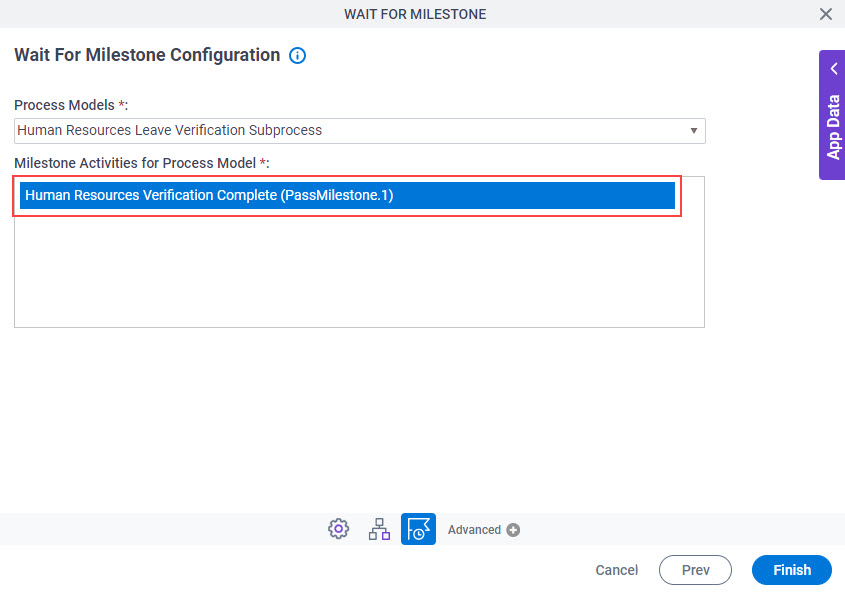
- On the Wait For Milestone Configuration screen, in the Process Models field, select Human Resources Leave Verification Subprocess.
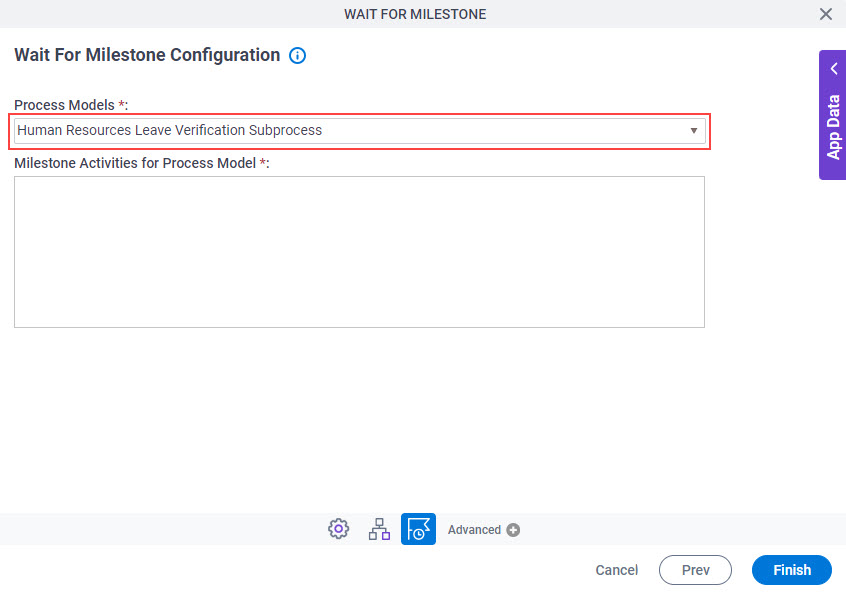
When you select the subprocess in the Wait For Milestone Configuration field, the Milestone Activities for Process Model field shows the Pass Milestone activity associated with the specified subprocess.
- Click Finish.
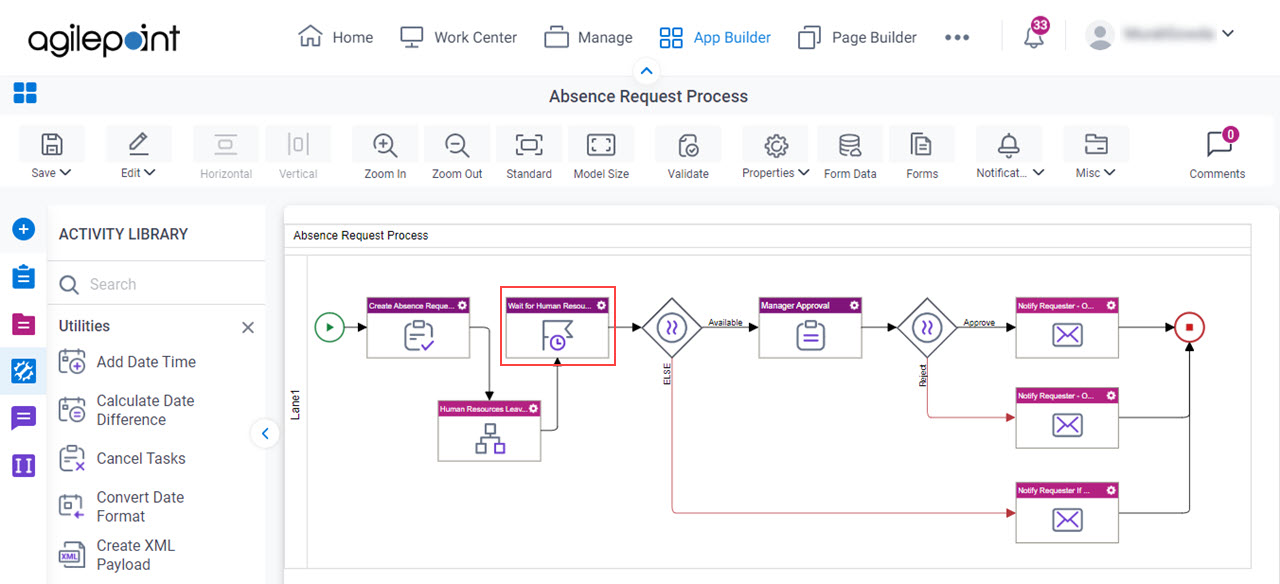
The Process Builder shows the Wait for Human Resources to Complete Verification Wait For Milestone sctivity in the Absence Request Process.
Step 7: (Optional) Save, Check In, and Publish the Process-Based App
Next, save, check in, and publish the process-based app.
For more information, refer to (Example) Save, Check In, and Publish a Process-Based App.
Step 8: (Optional) Run the App
Next, run the app.
For more information, refer to My Apps screen


