
(Example) Use a Validation Mask in a Form Control
This example shows how to use a validation mask in a form control.
Background and Setup
Prerequisites
- This example uses the Travel Reimbursement app from the AgilePoint NX
App Store.
For more information, refer to How to Get the App
Good to Know
- Travel Reimbursement is an app that requests reimbursement for your official travel expenses.
This app provides a Travel Reimbursement form to enter the details of the travel.
For the use case in this example, configure a validation mask in the Travel Reimbursement form to make sure the value entered in the email address field is in valid email address format.
Step 1: Create a Validation Mask
First, create a validation mask in Manage Center.
How to Start
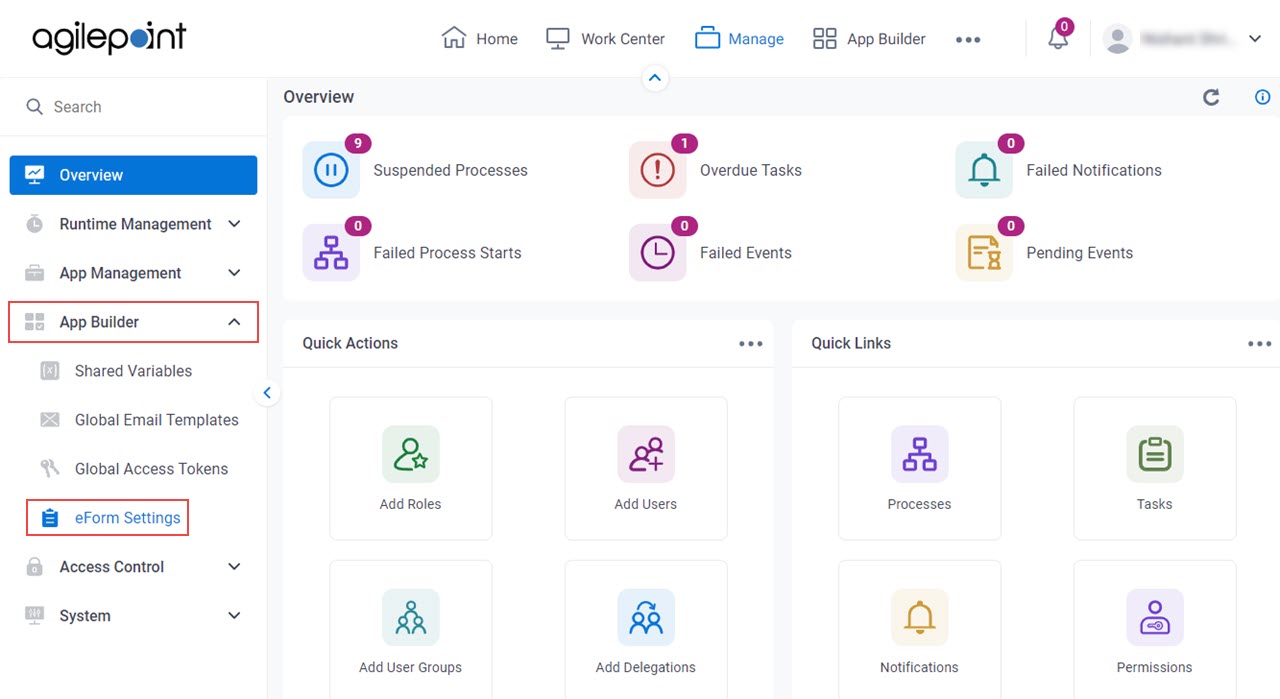
- Click Manage.

- In Manage Center,
click App Builder > eForms Settings.
- On the eForms Settings screen,
click Validation Mask.
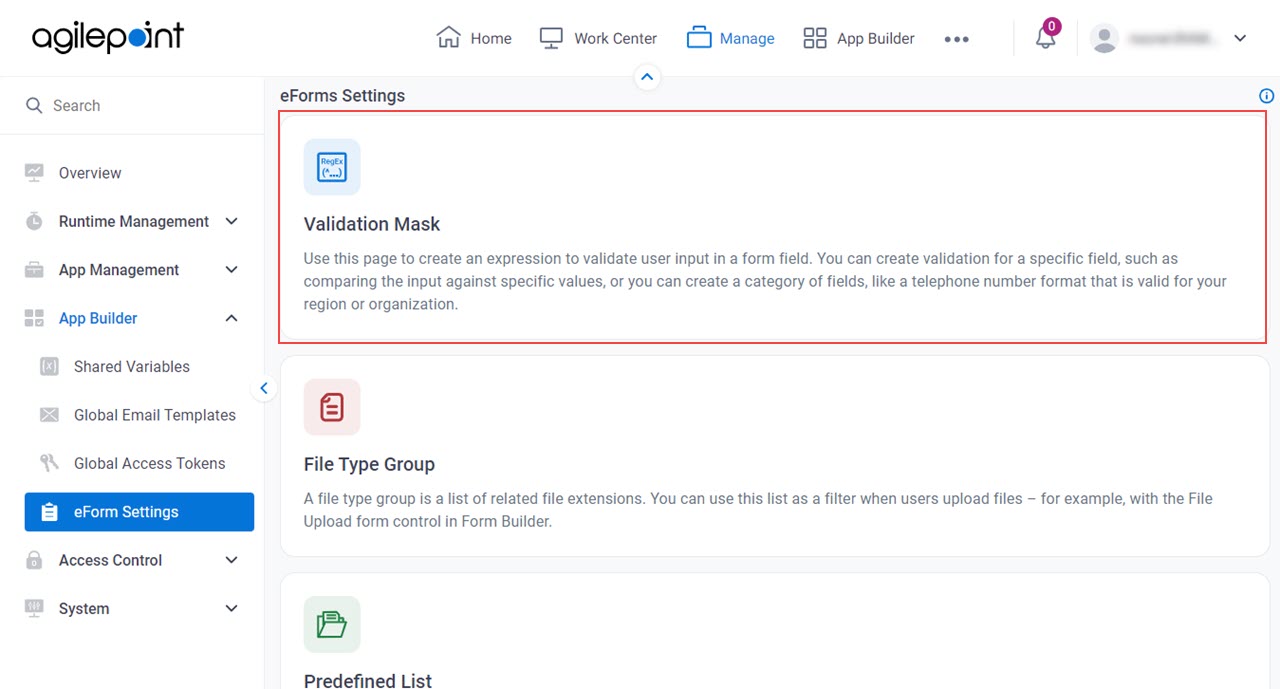
- On the Validation Mask screen, click Add Validation Mask.

Procedure
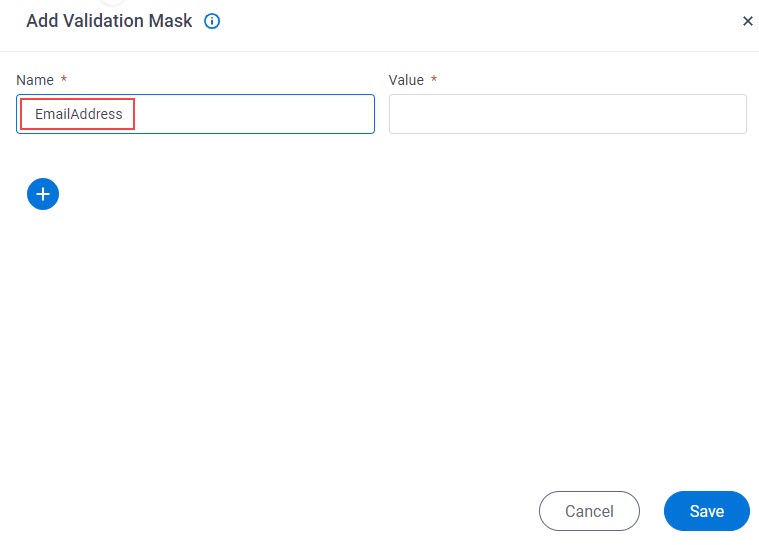
- On the Add Validation Mask screen, in the Name field, enter EmailAddress.
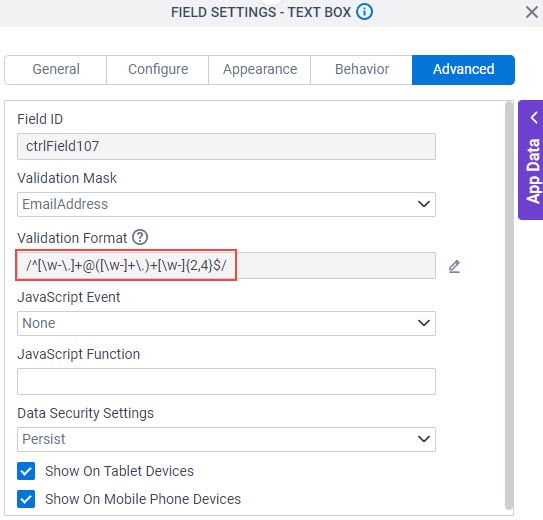
- In the Value field, enter this value:
/^[\w-\.]+@([\w-]+\.)+[\w-]{2,4}$/.
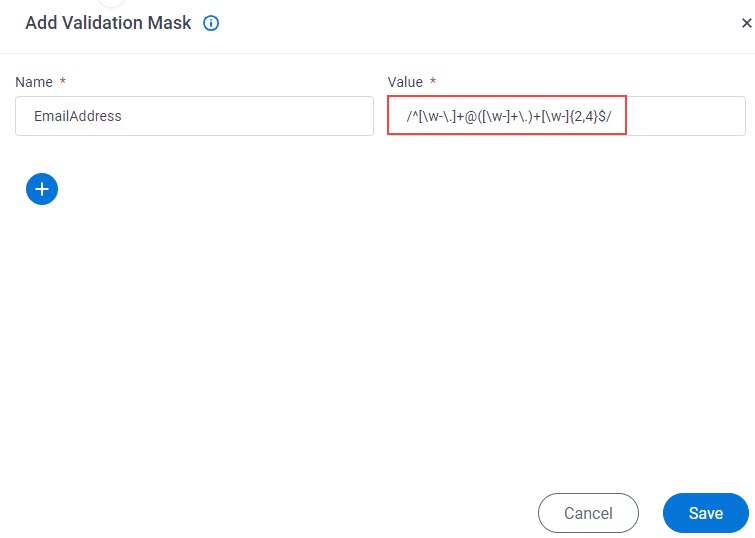
- Click Save.
The Validation Mask screen shows the EmailAddress validation mask.

Step 2: Add a Validation Mask to a Form Control
Next, add a validation mask in the form control Travel Reimbursement form.
How to Start
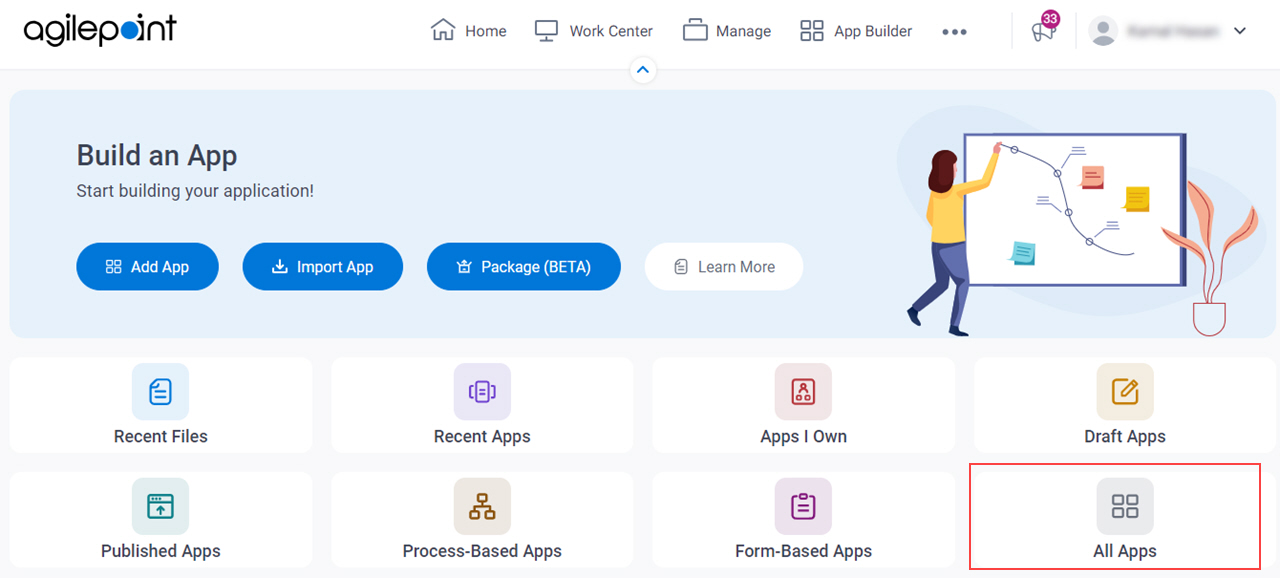
- Click App Builder.
- On the App Builder Home screen, click All Apps.
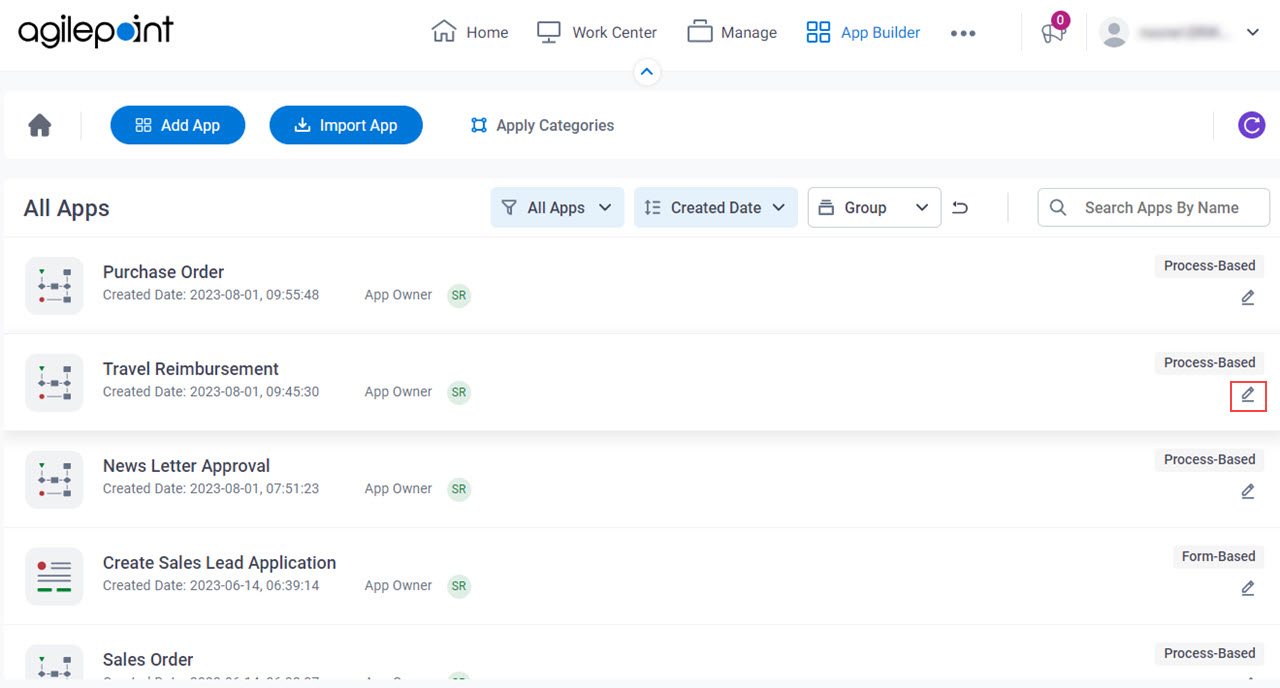
- On the All Apps screen, on the Travel Reimbursement app,
click Edit
 .
.
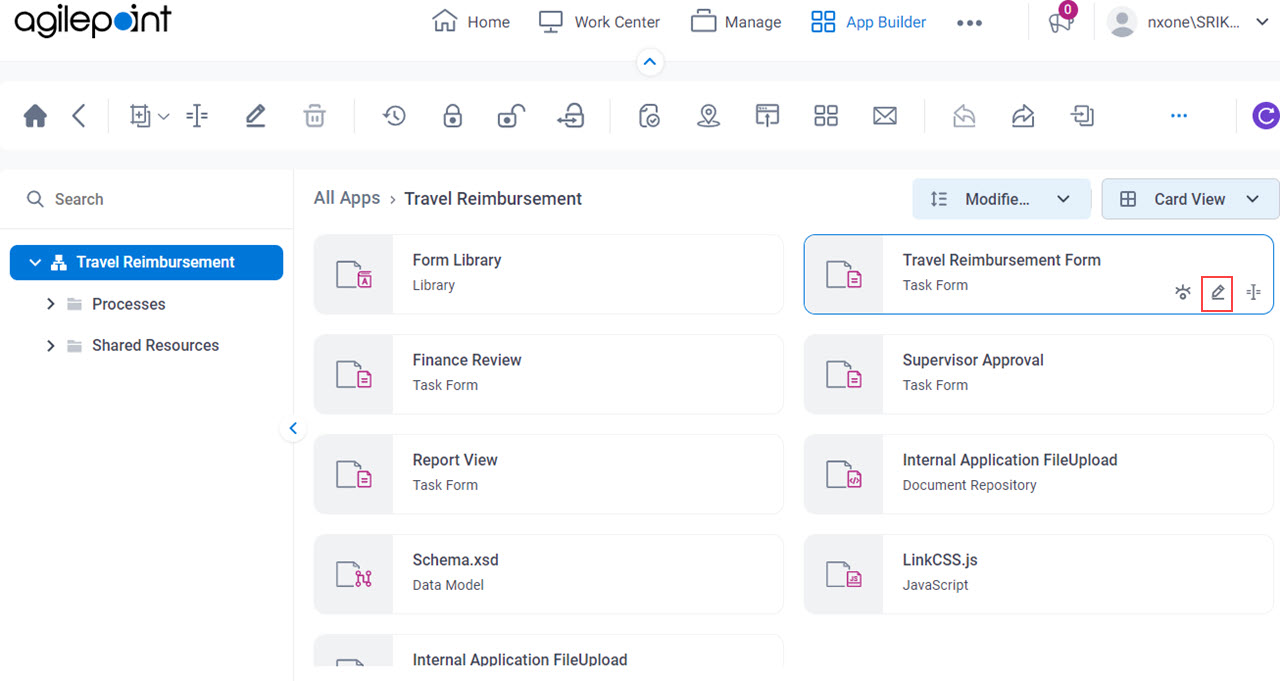
- On the App Details screen,
hover over the Travel Reimbursement Form, and click Edit .
Procedure
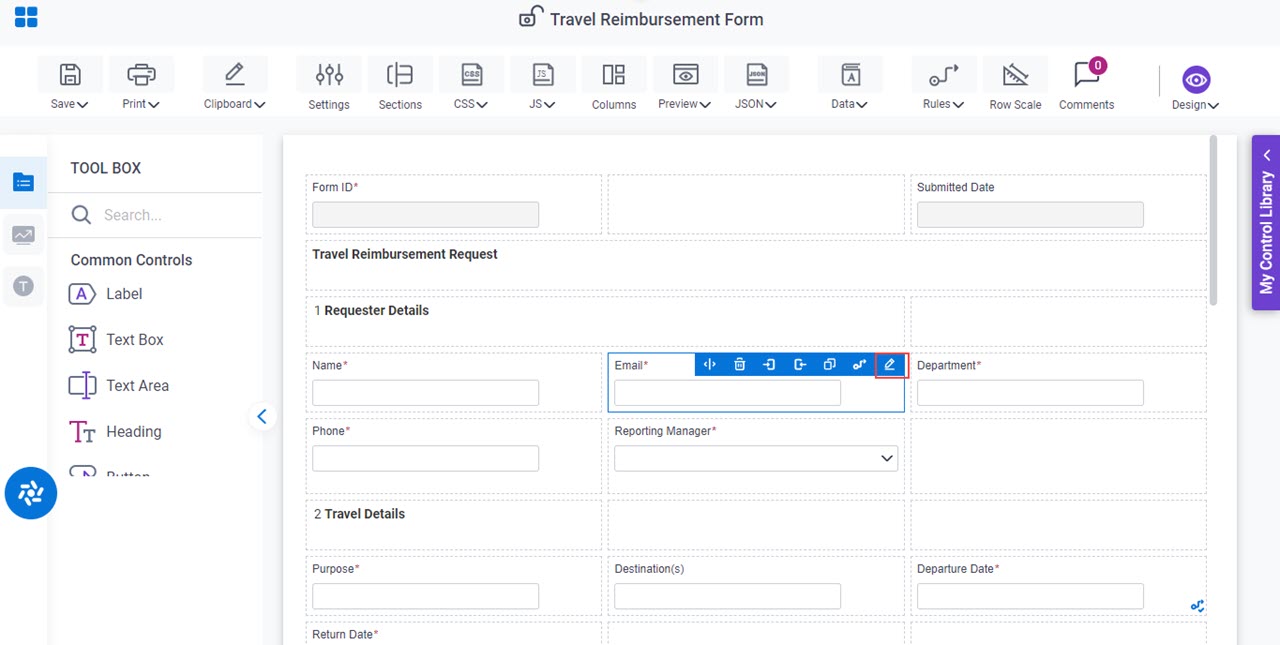
- On the Travel Reimbursement form, put your cursor over the Email form control,
and the form control toolbar shows.
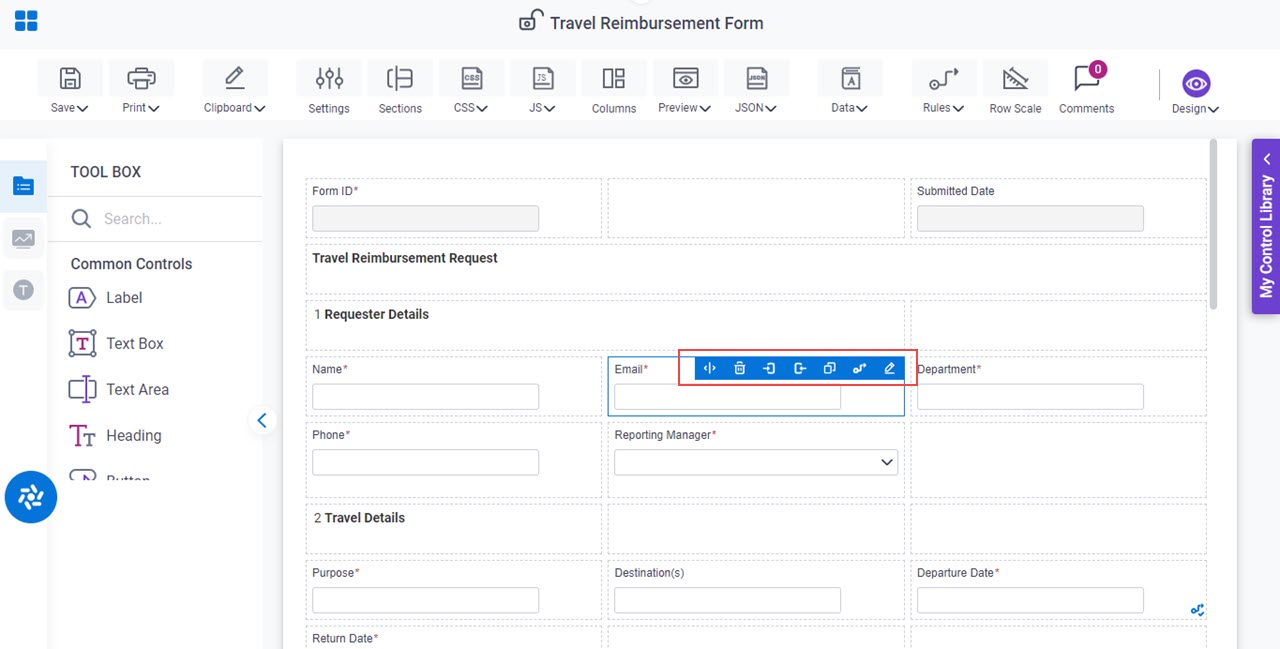
- Click Edit Properties .
- On the Field Settings - Text Box screen, click the Advanced tab.
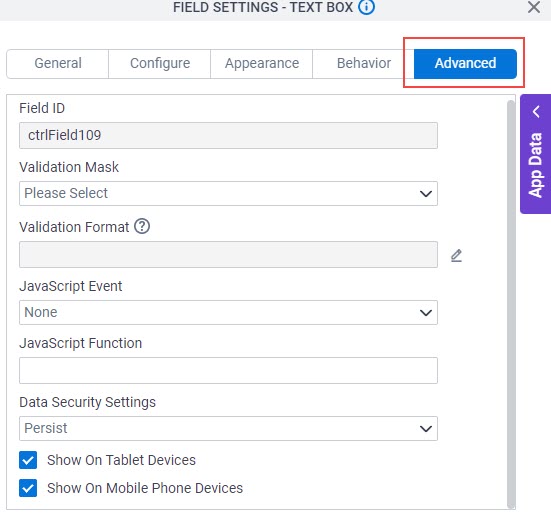
- On the Advanced tab, in the Validation Mask list, select EmailAddress.
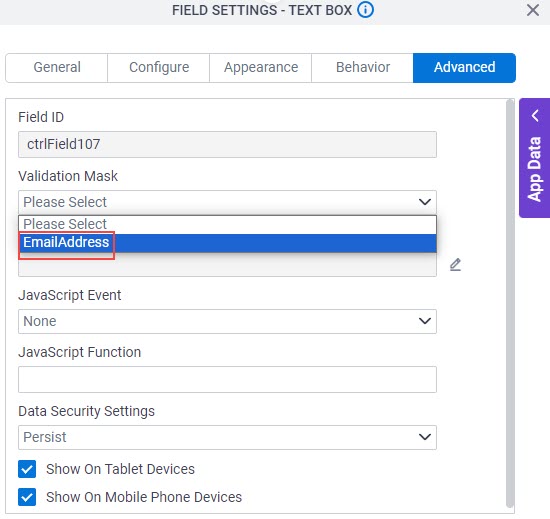
When you select the Validation Mask field, the Validation Format field completes by default based on the selected validation mask.
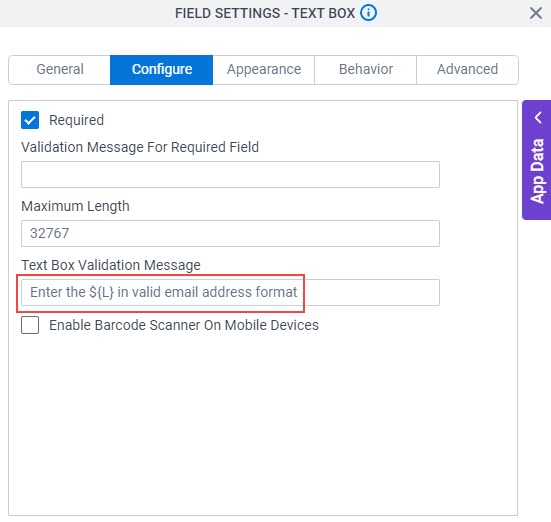
- On the Configure tab, in the Text Box Validation Message field, enter Enter the ${L} in valid email address format.
- Click Close.
Step 3: (Optional) Test the Validation Mask
Next, test the validation mask in the Travel Reimbursement Form.
Procedure
- Click Preview
 > PC Browser
  .
.
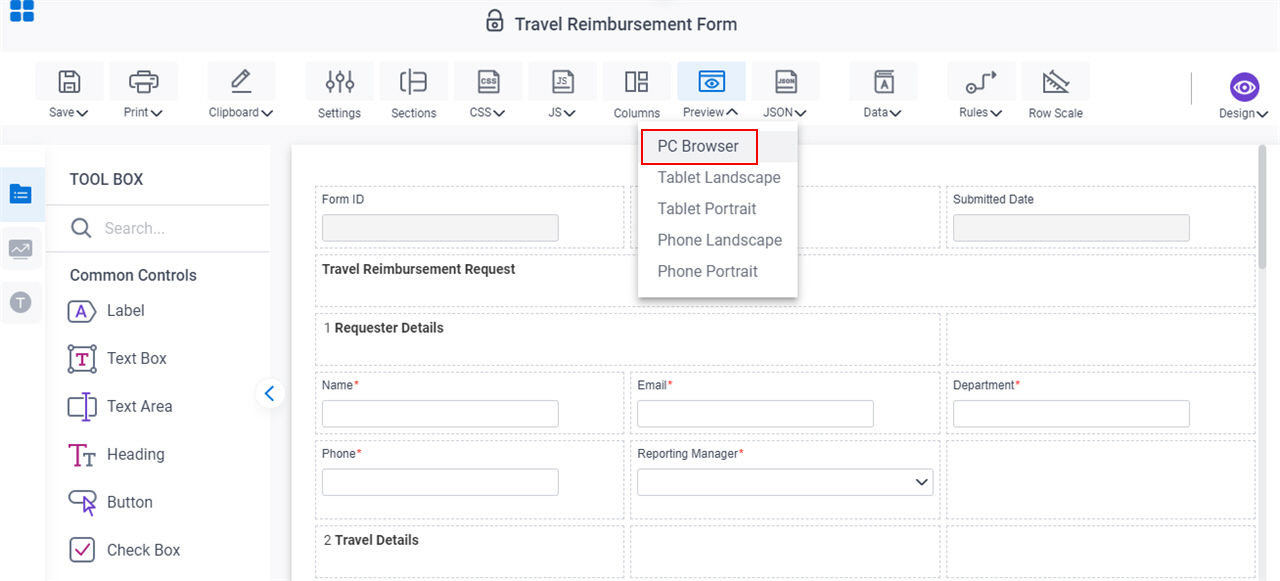
The Travel Reimbursement form opens in a new browser tab.
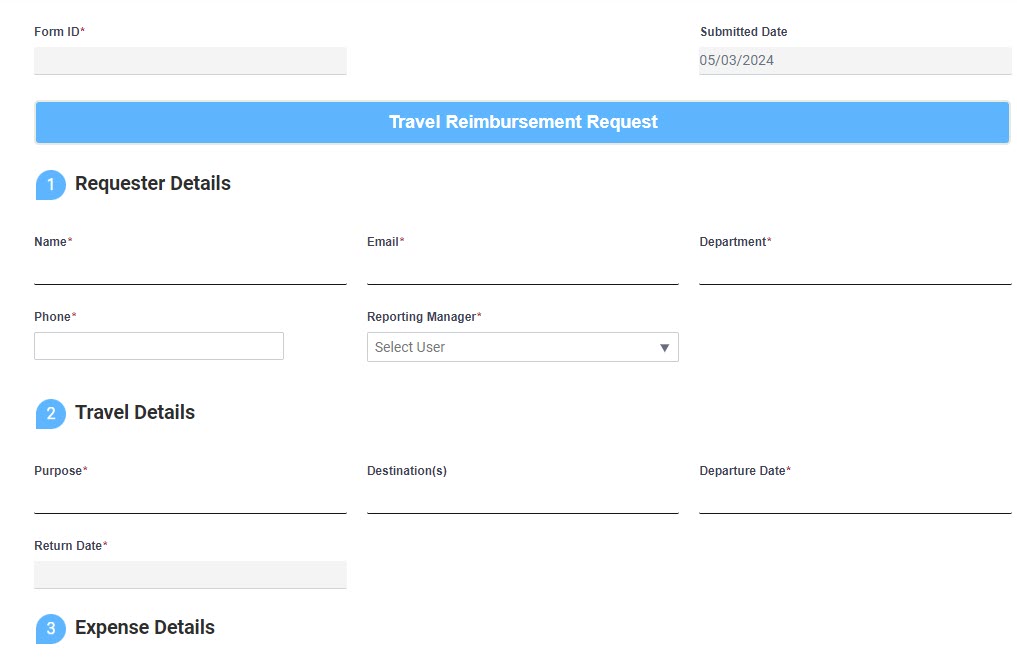
- On the Travel Reimbursement form, in the Email field, enter an email address that is not in valid email address format.
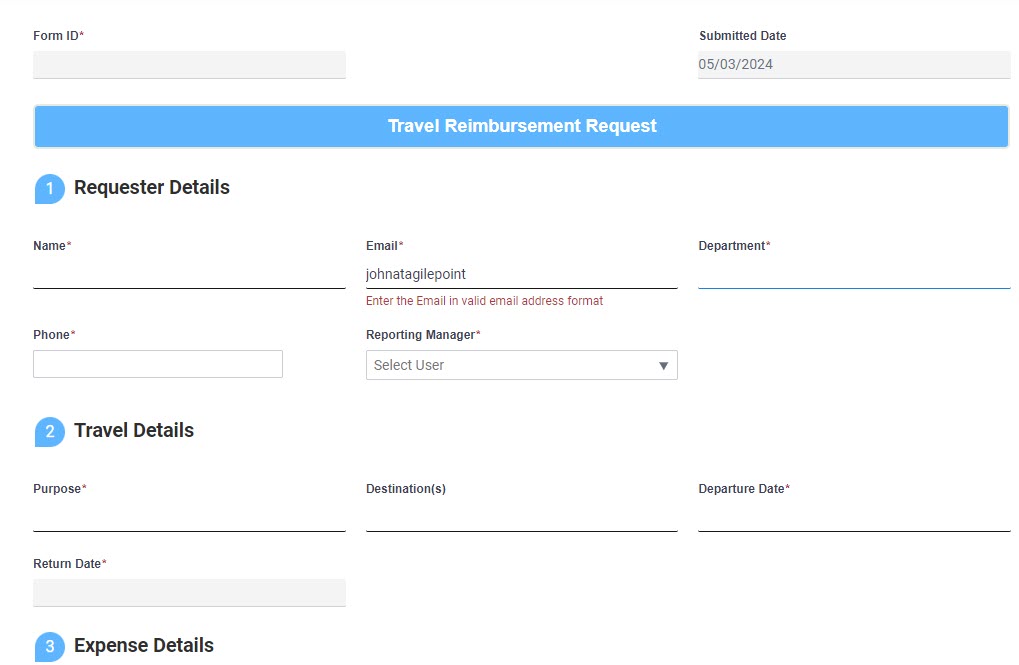
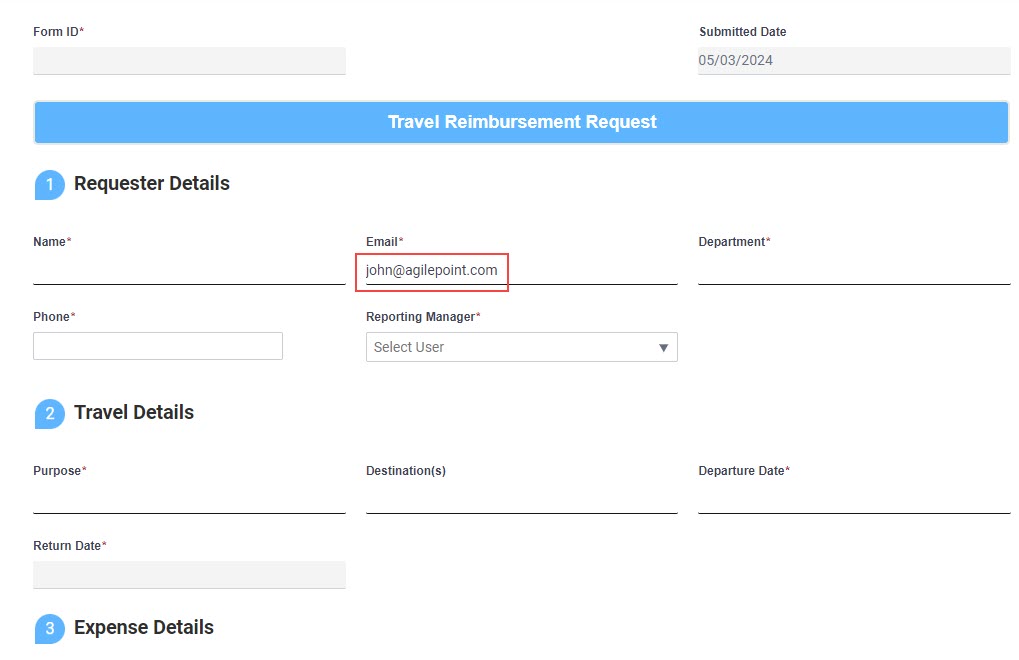
- Enter an email address that is in valid email address format. No error shows.
Step 4: (Optional) Save, Check In, and Publish the Process-Based App
Next, save, check in, and publish the process-based app.
For more information, refer to (Example) Save, Check In, and Publish a Process-Based App.
Step 5: (Optional) Run the App
Next, run the app.
For more information, refer to My Apps screen
How to Get the App
This example is based on the Travel Reimbursement app from the AgilePoint NX App Store. Use this procedure to get the app..
Good to Know
- This procedure is optional. It is provided so you can test the example with an out-of-the-box app.
- This is part of the Background and Setup procedures, but many users preferred this step to appear after the example, not before it.
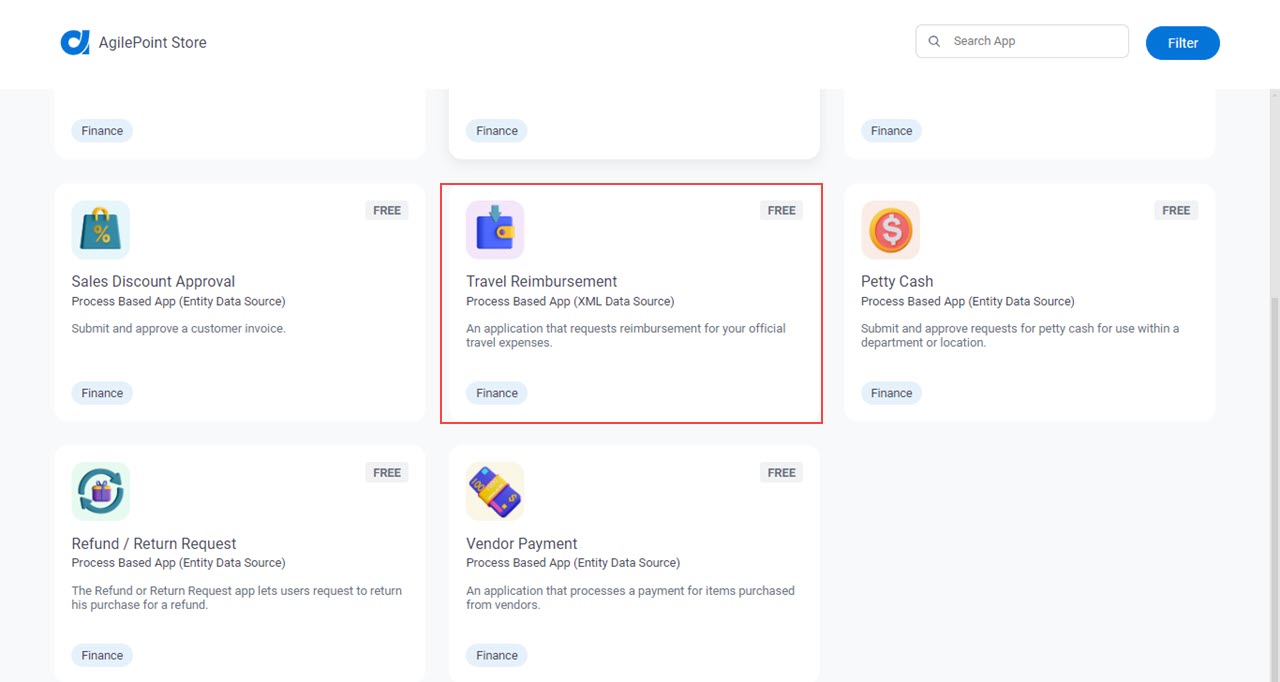
Get the App
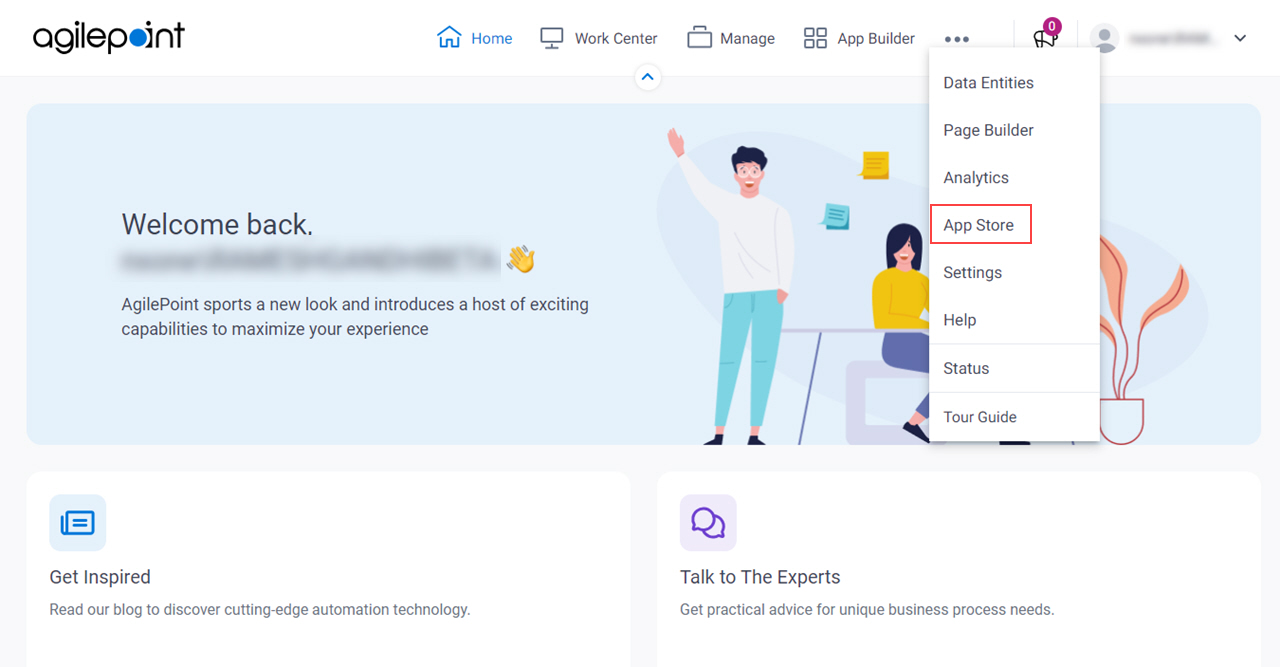
- Click App Store.
- Click Filter
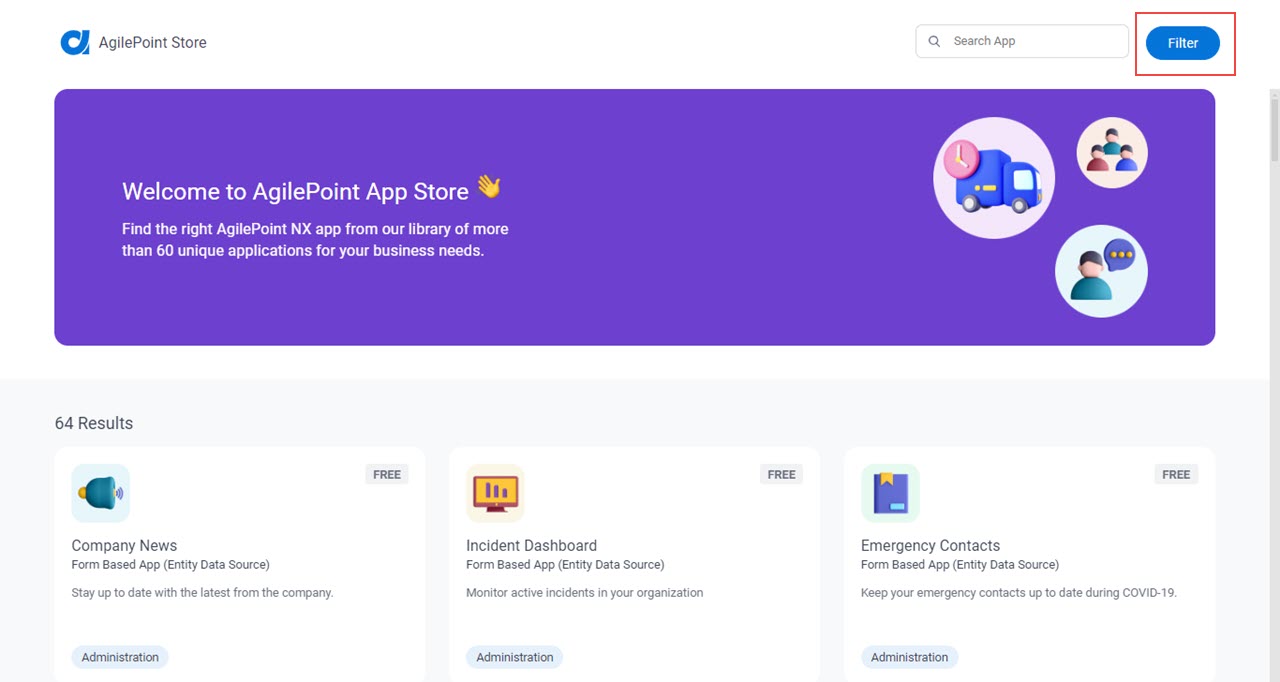
- In the CATEGORY section, click Finance.

- Click the Travel Reimbursement app.
- On the Travel Reimbursement screen, click Add.
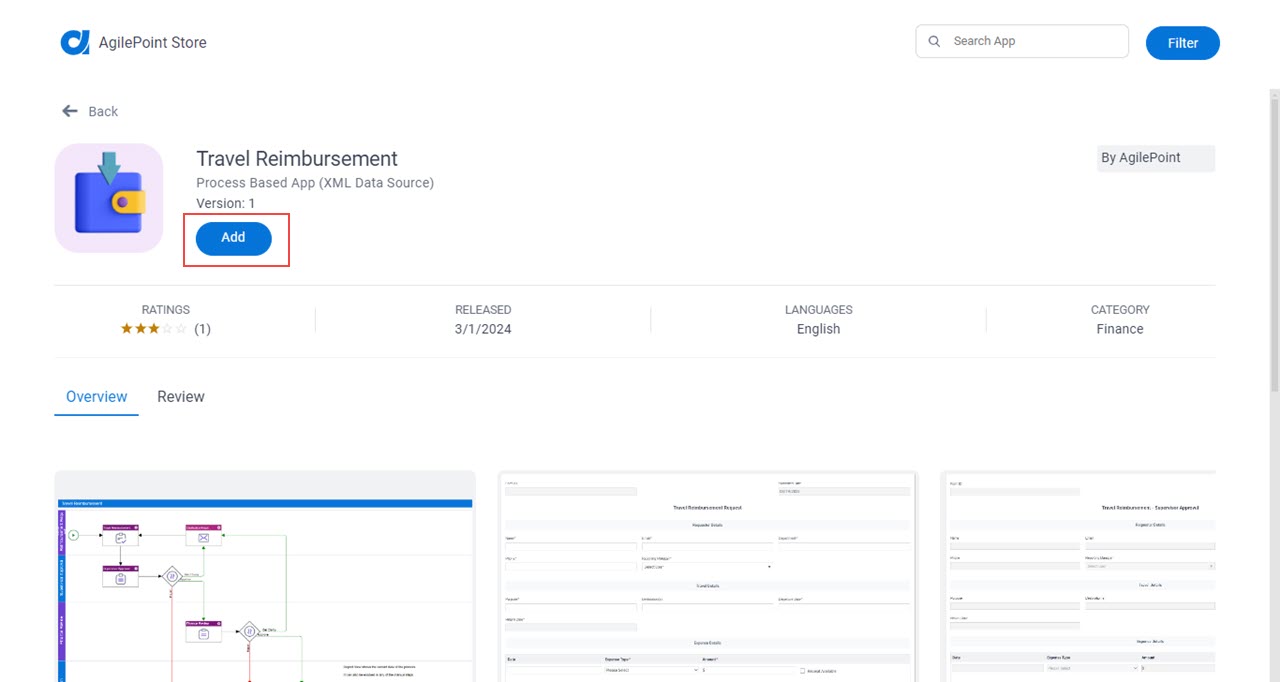
- On the Trust App screen, click Trust it.
- Click Return to site.