Add Date Time activity

An activity that adds time to a specified date and time.


Add Date Time activity

Configure the Add Date Time activity

To configure the Add Date Time activity, do the procedure in this topic.

Good to Know

How to Start

  1. On the Application Explorer screen, do one of these:
  2. Do one of these:
    • Add an activity:
      1. In the Process Builder, in the Activity Library, open the Utilities Utilities icon tab.
      2. On the Utilities Utilities icon tab, drag the Add Date Time Add Date Time icon activity onto your process.
    • Change an activity:
      1. In your process, double-click your activity.

Procedure

  1. Complete the fields on the General Configuration screen.

    For more information, refer to Configure General Options for a System Activity.

  2. Click Add Date Time Add Date Time icon.
  3. Complete the fields on the Add Date Time screen.

    For more information, refer to Add Time to a Specified Date and Time.

  4. (Optional) Click Advanced Advanced icon > E-mail Notifications E-mail Notifications icon.

    For more information, refer to Configure E-mail Notifications for Any Activity.

General Configuration

Specifies the basic settings for the Add Date Time activity.
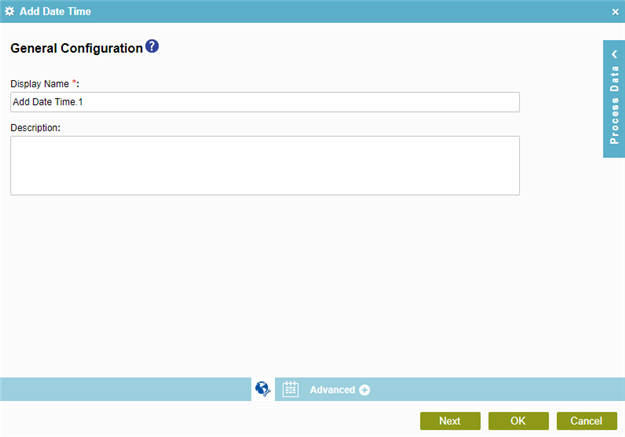
Figure: General Configuration screen

General Configuration screen

Fields

Field Name Definition

Display Name

Function:
Specifies the activity name that shows in your process.
Accepted Values:
One line of text that can have spaces.
Default Value:
None
Accepts Process Data Variables:
No
Example:
This is a common configuration field that is used in many examples. Refer to:
  • Examples - Step-by-step use case examples, information about what types of examples are provided in the AgilePoint NX Product Documentation, and other resources where you can find more examples.

Description

Function:
Specifies an optional text description for your activity.
Accepted Values:
More than one line of text.
Default Value:
None
Accepts Process Data Variables:
No

Add Date Time

Specifies the settings to add time to your specified date and time.
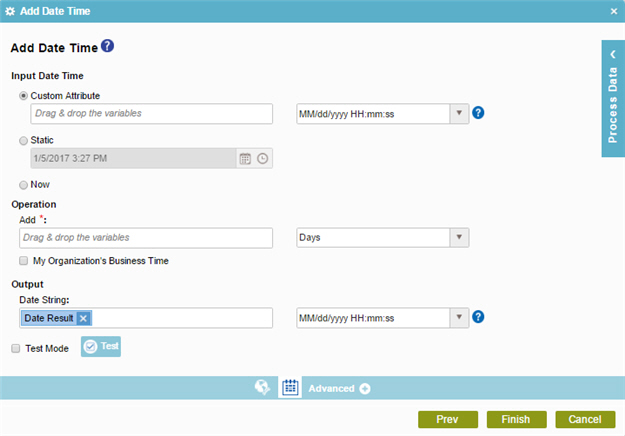
Figure: Add Date Time screen

Add Date Time screen

Fields

Field Name Definition

Input Date Time

Function:
Specifies the reference date for your date calculation.
Accepted Values:
  • Custom Attributes - Specifies a process data variable that stores the date-time value and your date-time format.

    You can use Process Data screen to specify a process data variable.

    You can also use a custom date-time format. For more information, refer to Customize Your Date-Time Format.

  • Static - Specifies a static date and time.
  • Now - The date and time the system activity starts at runtime.
Default Value:
Custom Attributes
Example:
Refer to:

Add

Function:
Specifies the time to add to the Input Date Time.
Accepted Values:
  • An integer, or a process data variable that stores an integer.

    You can use Process Data screen to specify a process data variable.

  • The time unit.

    Options are:

    • Seconds
    • Minutes
    • Hours
    • Days
    • Weeks
    • Months
    • Years
Default Value:
  • None
  • Days
Accepts Process Data Variables:
Yes
Example:
If the value is set to 10, and the time unit is set to Days, 10 Days are added or subtracted.

My Organization's Business Time

Function:
Specifies to use your work calendar for date calculations.
To Open this Field:
  1. On the Email Notifications screen, click the Reminder tab.
Accepted Values:
  • Deselected - Uses your work calendar for calculations.
  • Selected - Does not use your work calendar for calculations.
Default Value:
Deselected
Example:
The Business Time field is set as selected, and business hours of work calendar are configured as 9 AM to 5 PM. If the task with completion time 8 hours is entered at 1 PM on Monday, then the task must be completed by 12 PM on Tuesday.

Date String

Function:
Specifies the process data variable that stores the result received from the date calculations if it is in the Date Time format.

The results of the date calculations that changes from the Date Time format to a String. The format of the string is specified in the list.

Accepted Values:
A process data variable that stores the result in the selected String format.
Default Value:
None
Accepts Process Data Variables:
Yes
Example:
Refer to:

Test Mode

Function:
Lets you see if your settings give the necessary result before you run the process.
Accepted Values:
  • Deselected - Test mode is disabled.
  • Selected - Test mode is enabled.
Default Value:
Deselected

Test

Function:
Runs a test to validate the specified date-time settings.