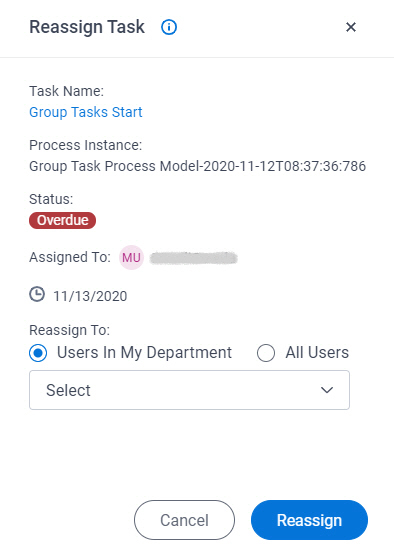
Figure 1. Reassign Task screen

Good to Know
- You can only reassign a task that is assigned to you.
How to Start
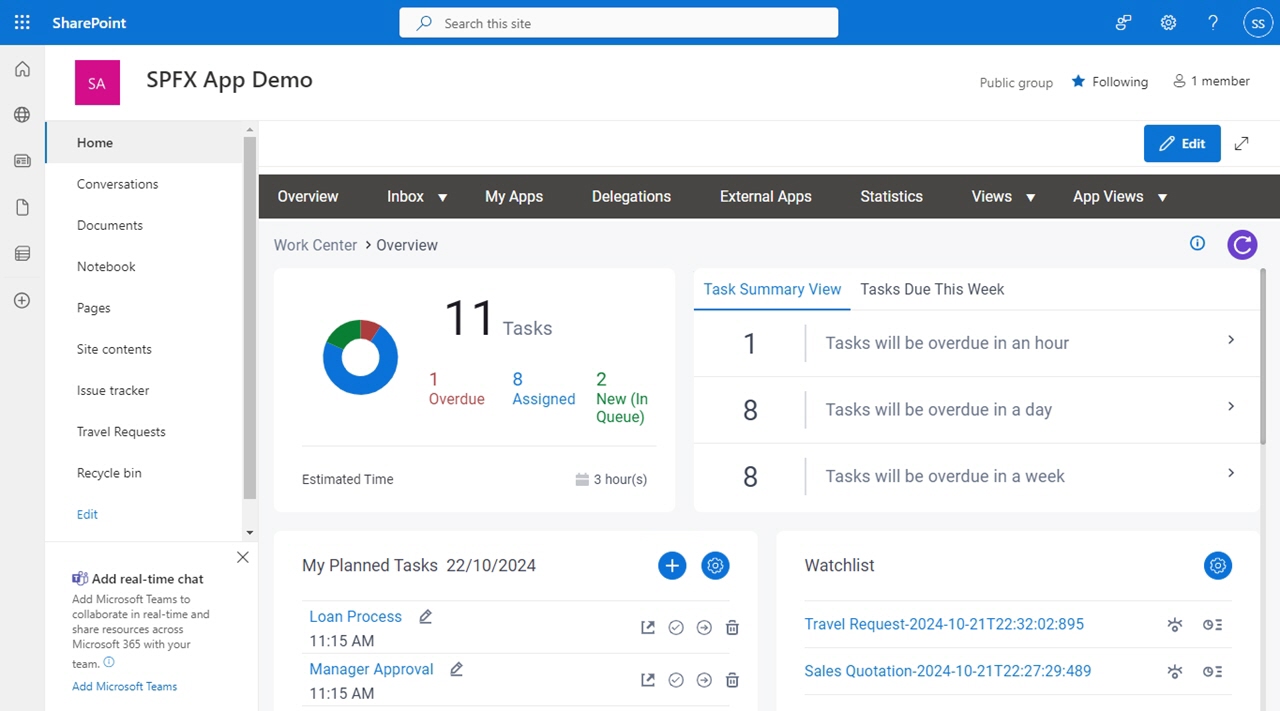
- In SharePoint for Microsoft 365, open the AgilePoint Work Center web part.

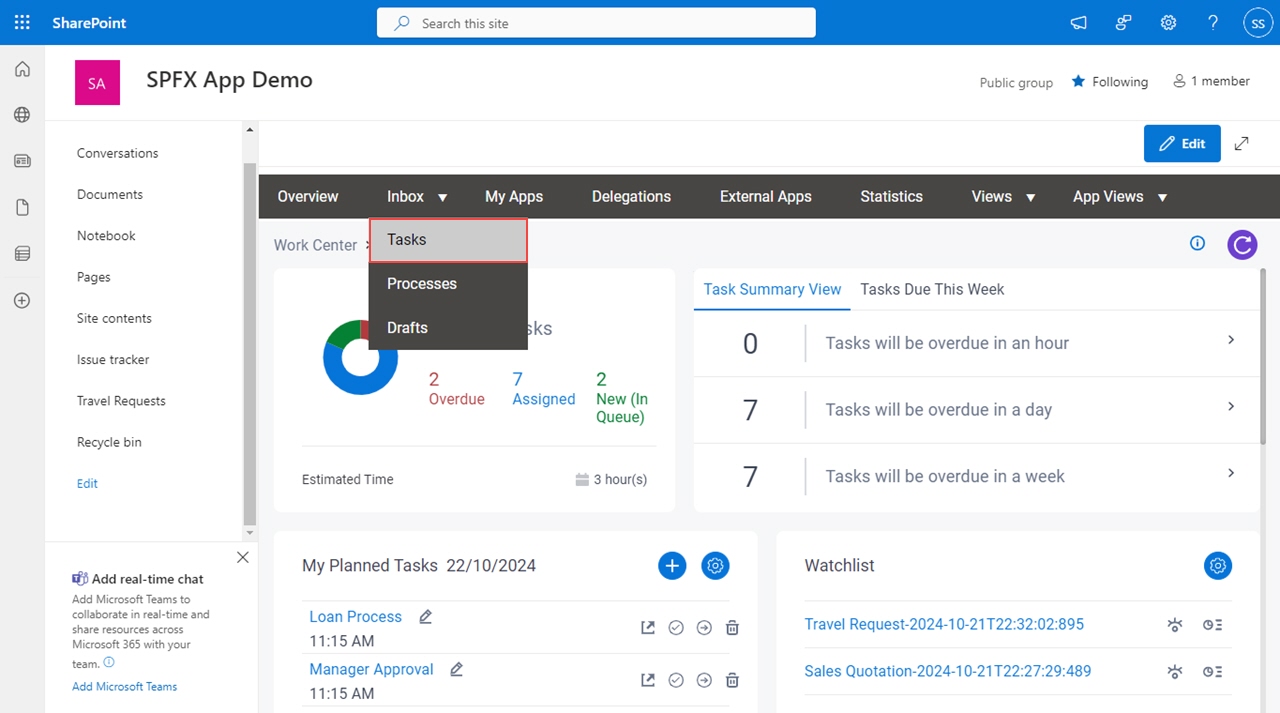
- In the AgilePoint Work Center web part, click Inbox > Tasks.

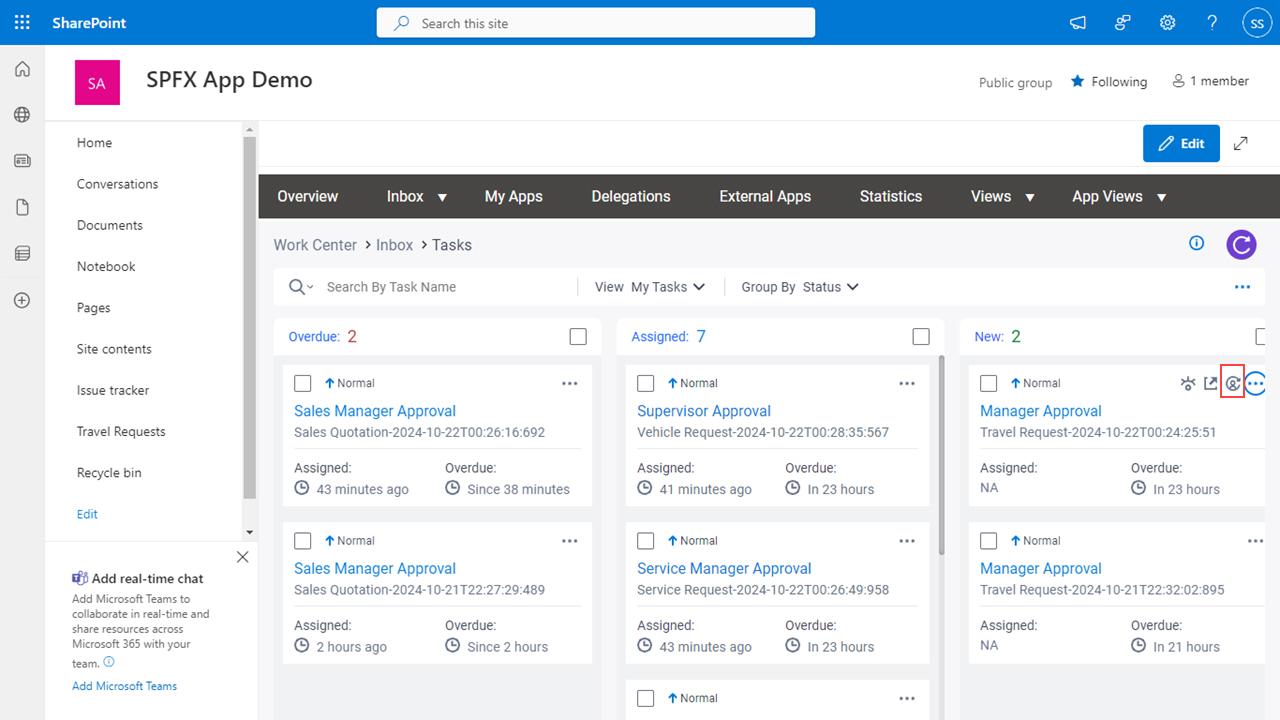
- On the task list, click Reassign Task
 .
.

Fields
| Field Name | Definition |
|---|
Task Name |
- Description:
- Shows the name of the task.
- Allowed Values:
- Read only.
|
Process Instance |
- Description:
- Shows the process instance name.
- Allowed Values:
- Read only.
|
Status | - Description:
- Shows the status of the task.
- Allowed Values:
- Read only.
The status can be one of these:
- New - Specifies a task that is New.
- Assigned - Specifies a task that is Assigned.
- Overdue - Specifies a task that is Overdue.
|
Assigned To |
- Description:
- Shows the participant assigned to the task.
- Allowed Values:
- Read only.
|
Due Date |
- Description:
- Shows the date and time the task is due to be completed.
- Allowed Values:
- Read only.
|
Users In My Department / All Users |
- Description:
- Specifies how to select the user to whom to assign the task.
- Allowed Values:
-
- Users In My Department - Lets you specify a user in your department.
- All Users - Lets you specify any user in your AgilePoint NX environment.
- Default Value:
- Users In My Department
|
Reassign To |
- Description:
- Specifies a user to assign the task.
The list of users in this field depends on the setting for the Users In My Department / All Users field.
- Allowed Values:
- A user name from the list.
- Default Value:
- None
|
|
Comments
|
- Specifies a description for the task you are reassigning to another
participant.
- More than one line of text.
- None
|
Reassign |
- Description:
- Assigns the task to the specified user.
|


 .
.


