Create a Form-Based App with an AgilePoint NX Data Entity (Classic)
To create a form-based app that uses an entity in AgilePoint NX Data Entities as its data source in the Classic Add an App experience, do the procedure in this topic.
Video: Form-Based App Overview (Classic)
Video: Know Your App Builder IDE (Classic)
Examples
- (Example) Create and Run a Form-Based App with AgilePoint NX Data Entities (Classic)
- Examples - Step-by-step use case examples, information about what types of examples are provided in the AgilePoint NX Product Documentation, and other resources where you can find more examples.
Prerequisites
- On the App Builder Process Designer Settings screen, set Default App Wizard Experience to Classic.
- AgilePoint NX OnDemand (public cloud), or AgilePoint NX Private Cloud or AgilePoint NX OnPremises v7.0 or higher.
Good to Know
- This procedure creates a new form-based app with these components:
- A Create form where a runtime app user can enter data. This form is the main UI for the app.
- An Update form where specific users can change the data that was entered on a Create form.
- A View form that shows a list view of the data from all instances the Create and Update forms for your app.
- A View form that shows a list view of the data from all instances the Create form that have been recently submitted for your app.
- A View form that shows a list view of the data from all instances the Update form that have been recently submitted for your app.
- The form name is based on your primary entity name.
Format:
- New [Primary Entity Name]
- Update [Primary Entity Name]
- All [Primary Entity Name, Plural]
- Recently Created [Primary Entity Name, Plural]
- Recently Modified [Primary Entity Name, Plural]
Example:
- New Customer
- Update Customer
- All Customers
- Recently Created Customers
- Recently Modified Customers
- By default, the runtime app user can change the form, but you can set the app permissions to configure which AgilePoint NX users can create or update form data.
For more information, refer to How Do I Use Application Level Permissions?
- After you create a form-based app, you cannot change the app to use a different data source. For example, you can not change a form-based app to use a different entity or SharePoint list than the one specified when the app was created. This limitation also applies to cloned apps. That is, you cannot clone a form-based app, and then change the data source in the cloned app.
How to Start
- Click App Builder.

- On the App Explorer screen, click Add App.

Procedure
- On the App Type screen, select Form-Based App.

- Click Next.
- On the New App screen, complete these fields:
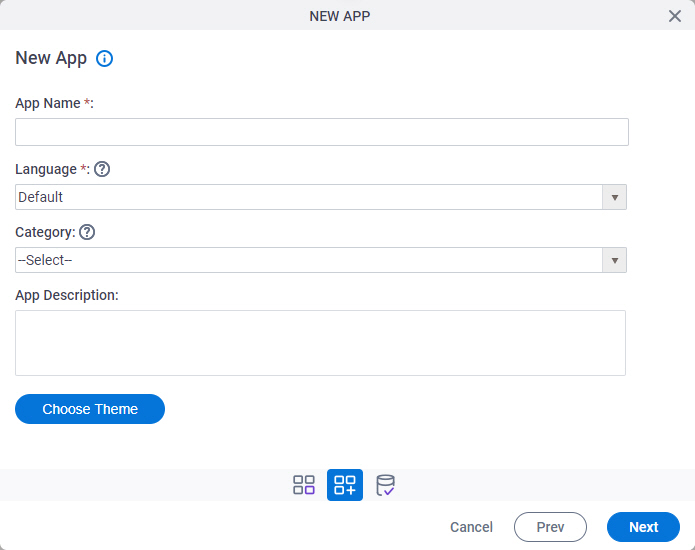
Field Name Definition App Name
- Function:
- Specifies a name for your app.
- Accepted Values:
- One line of text that can have spaces.
- Default Value:
- None
- Example:
- Refer to:
Language
- Function:
- Specifies the language for your app.
- Accepted Values:
- A language from the list.
- Default Value:
- None
- Accepts Process Data Variables:
- No
- Example:
- Refer to:
Category
- Function:
- Specifies a category for your app.
- Accepted Values:
- A category from the list.
The category list comes from Tenant Settings > Categories tab.
- Default Value:
- None
- Limitations:
-
This field is available in these releases:
App Description
- Function:
- An optional description for your app.
- Accepted Values:
- More than one line of text.
- Default Value:
- None
- Example:
- Refer to:
Choose Theme
- Opens this Screen:
- Choose Process Model Theme
- Function of this Screen:
- Specifies a process theme.
- Click Next.
- On the Select Primary Data Source screen, select
Data Entities
 .
. 
- Click Next.
- On the AgilePoint Data Entity Configuration screen, click the Configuration tab.
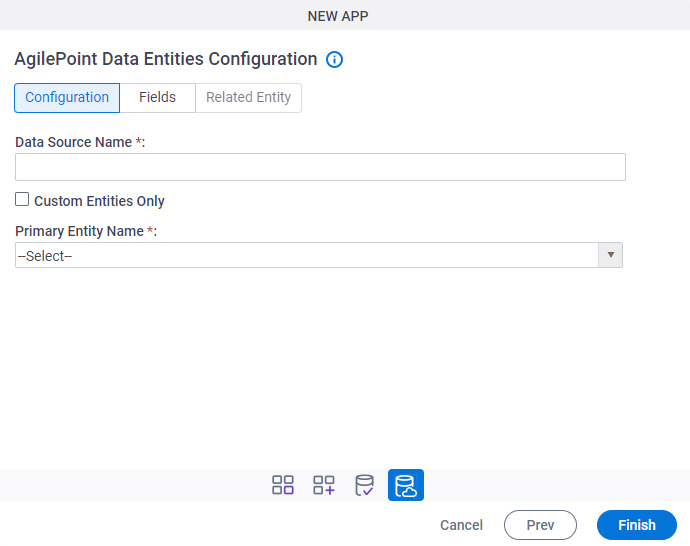
- On the Configuration tab, in the Data Source Name field, enter a custom name for your Data Entities repository.
- (Optional) Complete this field
as necessary.
Field Name Definition Custom Entities Only
- Function:
- Specifies whether to show only custom entities in the Primary Entity Name list.
- Accepted Values:
-
- Selected - Shows only the custom entities in the Primary Entity Name list.
- Deselected - Shows both standard entities and custom entities in the Primary Entity Name list.
- Default Value:
- Deselected
- Accepts Process Data Variables:
- No
- Example:
- Refer to:
- In the Primary Entity Name list, select an entity that you want your form to collect data.
- Click the Fields tab.
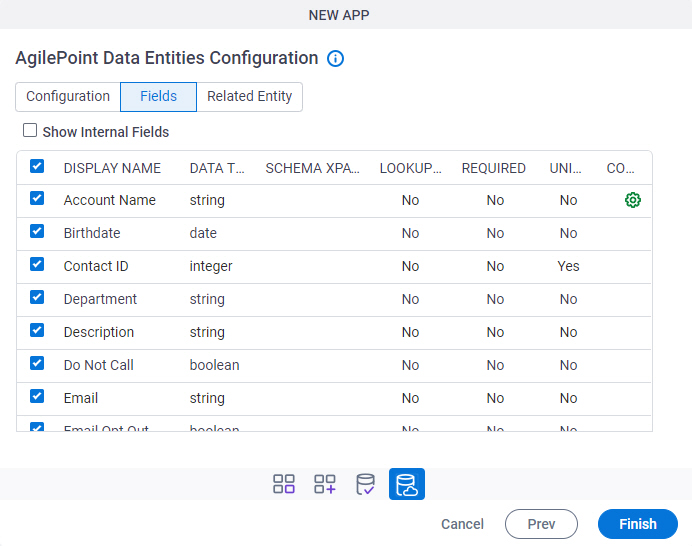
- On the Fields tab, select the fields you want your form to contain.
- Click the Related Entity tab.
Note: The word entity on this screen refers to a container within your data model. For Data Entities or Salesforce, this container is called an entity. For a database, entity refers to a database table. For SharePoint Integration, entity refers to a SharePoint list. For Microsoft Excel, entity refers to an Excel table.
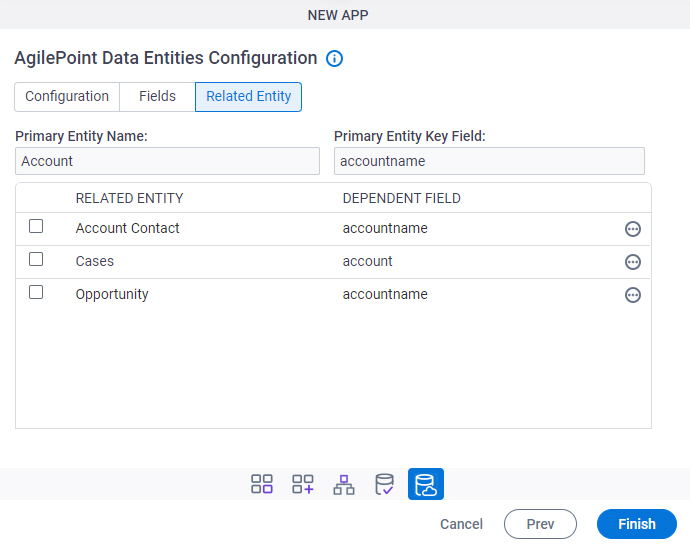
- On the Related Entity tab, select the related entities you want your form to contain.
- Click Finish.
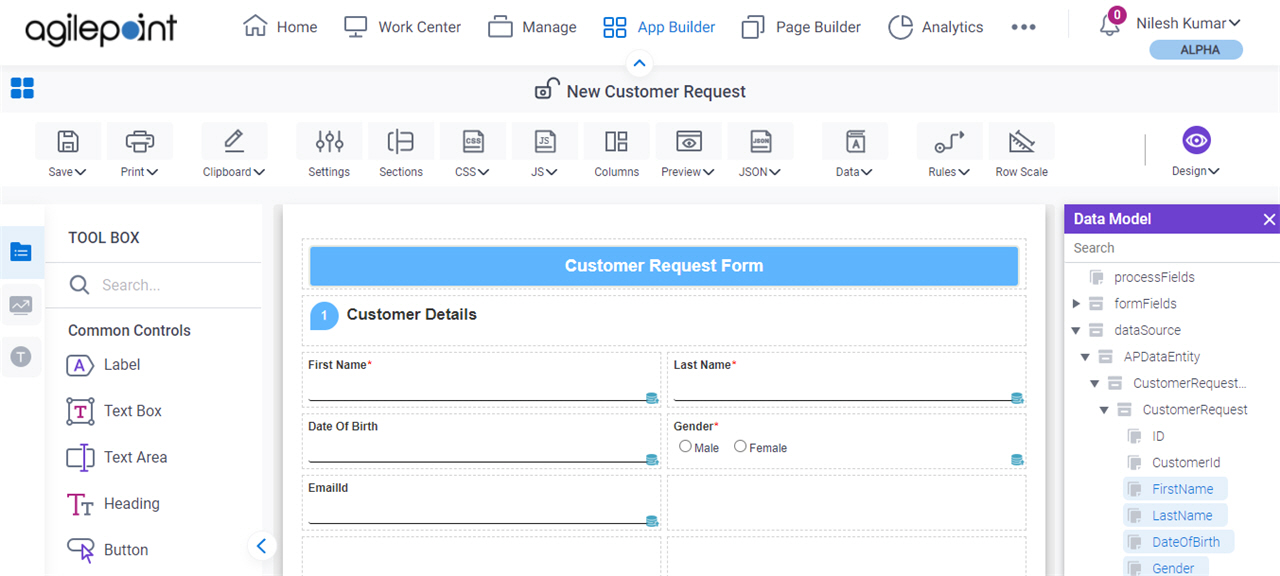
- On the eForm Builder screen, configure your form as necessary.
For more information, refer to eForm Builder.