Add Attachment (MS Dynamics 365) activity

An activity that adds an attachment to an entity in Microsoft Dynamics 365.


Add Attachment activity

Configure the Add Attachment activity

To configure the Add Attachment activity, do the procedure in this topic.

Examples

Good to Know

How to Start

  1. Open Process Builder.

    For information about how to open this screen, refer to Process Builder.
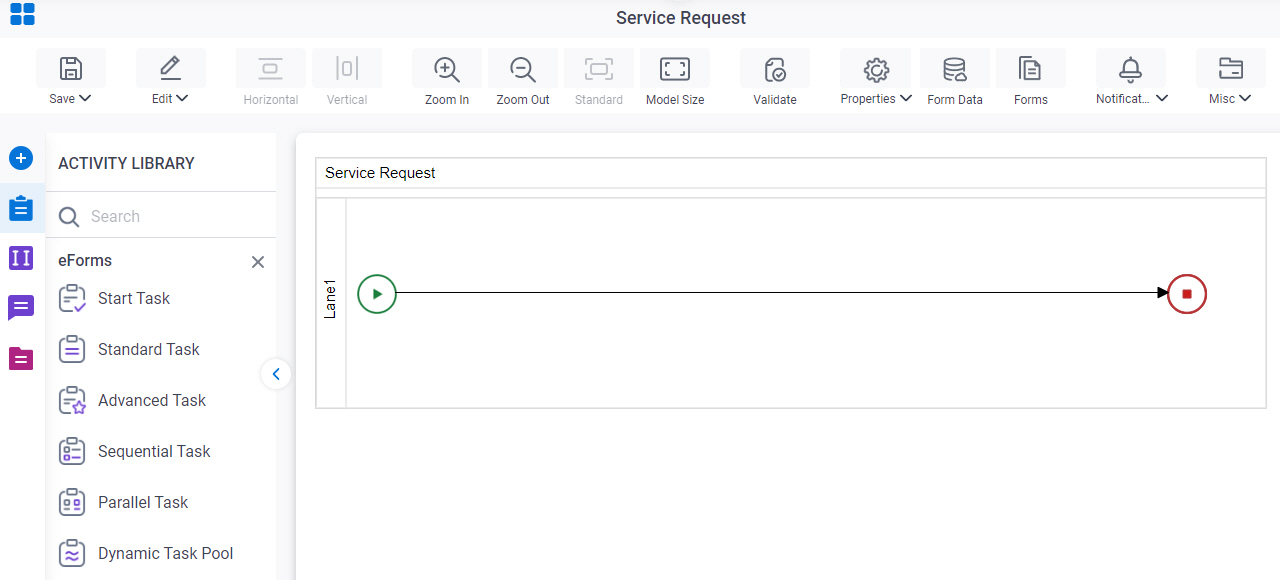

    Open Process Builder
  2. In Process Builder, in the Activity Library, open the MS Dynamics 365 tab.
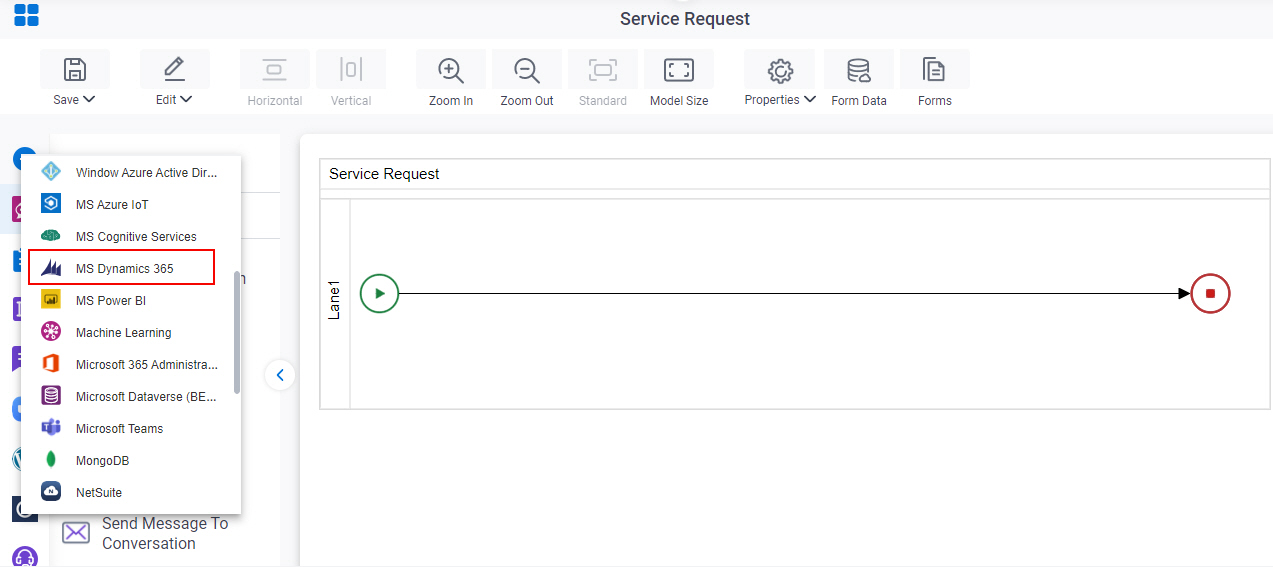
    Open MS Dynamics 365 tab
  3. On the MS Dynamics 365 tab, drag the Add Attachment activity onto your process.
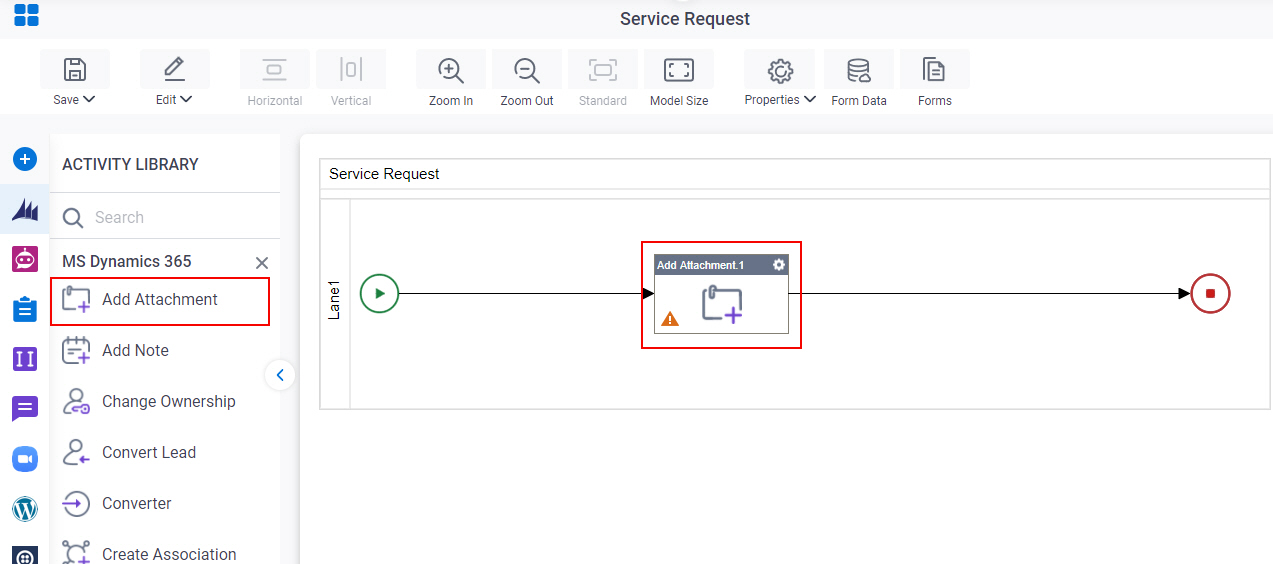
    Drag Add Attachment activity

General Configuration

Specifies the basic settings for the Add Attachment activity.
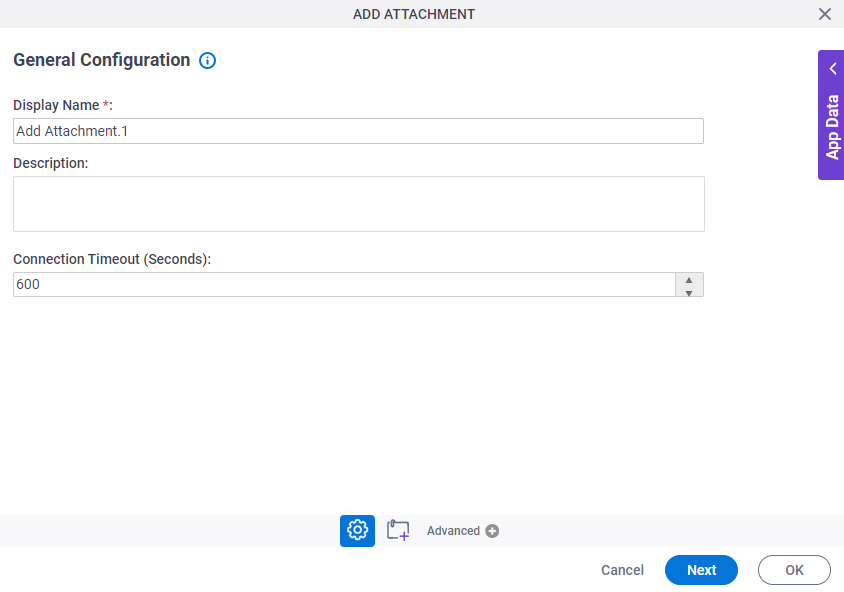
Figure: General Configuration screen

General Configuration screen

Fields

Field NameDefinition

Display Name

Description:
Specifies the activity name that shows in your process.
Allowed Values:
One line of text (a string).

Accepted:

  • Letters
  • Numbers
  • Spaces
Default Value:
None
Accepts Variables:
No
Example:
This is a common configuration field that is used in many examples. Refer to:
  • Examples - Step-by-step use case examples, information about what types of examples are provided in the AgilePoint NX Product Documentation, and other resources where you can find more examples.

Description

Description:
Specifies an optional text description for your activity.
Allowed Values:
More than one line of text.
Default Value:
None
Accepts Variables:
No

Connection Timeout (Seconds)

Description:
Specifies the number of seconds permitted to complete an action before the connection stops.
Allowed Values:
An integer.

Represents

  • A number of seconds
Default Value:
600
Accepts Variables:
No

Add Attachment

Specifies the information to add the attachment to an entity.
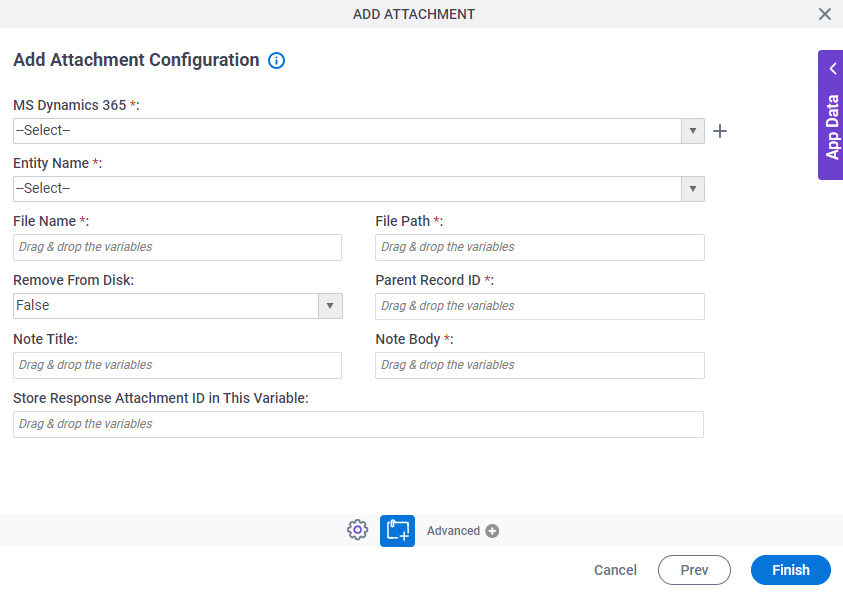
Figure: Add Attachment Configuration screen

Add Attachment Configuration screen

Fields

Field NameDefinition

MS Dynamics 365

Description:
Specifies the access token that connects to your Microsoft Dynamics 365 application.
Allowed Values:
A list of access tokens configured for your environment.
Default Value:
None
Example:
Refer to:

Create Add Token icon

Opens this Screen:
Access Token for Microsoft Dynamics 365
Function of this Screen:
Configure an access token to connect to Microsoft Dynamics 365.
Example:
Refer to:

Entity Name

Description:
Specifies the name for your entity.
Allowed Values:
One line of text (a string).

Accepted:

  • Letters
  • Numbers
  • Spaces
Default Value:
None

When you select the Microsoft Dynamics 365 access token, the name of the entity shows in the Entity Name field.

Accepts Variables:
No

File Name

Description:
Specifies the name of the file to attach.
Allowed Values:
One line of text (a string).

Accepted:

  • Letters
  • Numbers
  • Spaces
Default Value:
None
Accepts Variables:
Yes

File Path

Description:
Specifies the location of the attachment file.
Allowed Values:
An absolute path and file name on the AgilePoint Server or SharePoint Server.

Note these:

  • The file size must be less than 5 MB.
  • Only one attachment is supported.
Default Value:
None
Accepts Variables:
Yes
Example:
  • c:\My Documents\sample1.doc
  • ${HomeDirectory}\sample2.doc
  • http://demo3:8000/DocumentLib1/sample3.doc

Remove From Disk

Description:
Specifies if you must remove the file from the storage when it is attached.
Allowed Values:
  • True - Removes the file from storage.
  • False - Does not remove the file from storage.
Default Value:
True

Parent Record ID

Description:
Specifies the ID of the entity associated with your attachment.
Allowed Values:
A record internal ID.
Default Value:
None
Accepts Variables:
Yes
Limitations:

Some information about third-party integrations is outside the scope of the AgilePoint NX Product Documentation. It is the responsibility of the vendors who create and maintain these technologies to provide this information. This includes specific business use cases and examples; explanations for third-party concepts; details about the data models and input and output data formats for third-party technologies; and various types of IDs, URL patterns, connection string formats, or other technical information that is specific to the third-party technologies. For more information, refer to Where Can I Find Information and Examples for Third-Party Integrations?

Note Title

Description:
Specifies your note title.
Allowed Values:
One line of text (a string).

Accepted:

  • Letters
  • Numbers
  • Spaces
Default Value:
None
Accepts Variables:
Yes

Note Body

Description:
Specifies the content of your note.
Allowed Values:
More than one line of text.
Default Value:
None
Accepts Variables:
Yes

Store Response Attachment ID in This Variable

Description:
Specifies the process data variable that contains your attachment ID.
Allowed Values:
A process data variable that accepts an alphanumeric string with no spaces or special characters.
Default Value:
None
Accepts Variables:
Yes
Limitations:

Some information about third-party integrations is outside the scope of the AgilePoint NX Product Documentation. It is the responsibility of the vendors who create and maintain these technologies to provide this information. This includes specific business use cases and examples; explanations for third-party concepts; details about the data models and input and output data formats for third-party technologies; and various types of IDs, URL patterns, connection string formats, or other technical information that is specific to the third-party technologies. For more information, refer to Where Can I Find Information and Examples for Third-Party Integrations?