
Prediction - Send Notification (Amazon SageMaker) activity
An activity that creates predictions created from data provided from an AgilePoint NX app to Amazon SageMaker. If conditions configured in the AI model occur in the prediction, the app can send an email notification.
This feature is part of the AI Control Tower.
Configure the Prediction - Send Notification activity
Examples
- (External) Supercharge Your end-to-end Orchestration with AI Control Tower: Real-Time Monitoring and Smart Decision Making
- Examples - Step-by-step use case examples, information about what types of examples are provided in the AgilePoint NX Product Documentation, and other resources where you can find more examples.
Prerequisites
- AgilePoint NX OnDemand (public cloud), AgilePoint NX PrivateCloud, or AgilePoint NX OnPremises v9.0 Software Update 1 or higher.
Good to Know
- To send an email notification, click
Advanced
 >
Email Notifications
>
Email Notifications  .
. For more information, refer to Email Notifications screen (Process Activities).
- In most text fields, you can use process data variables as an alternative to literal data values.
- You can configure whether this activity waits for other activities before it runs.
For more information, refer to How Do I Configure an Activity to Wait for Other Incoming Activities?
- This section shows the configuration settings on the configuration screens for this activity. Other configuration settings apply to system activities. For more information, refer to:
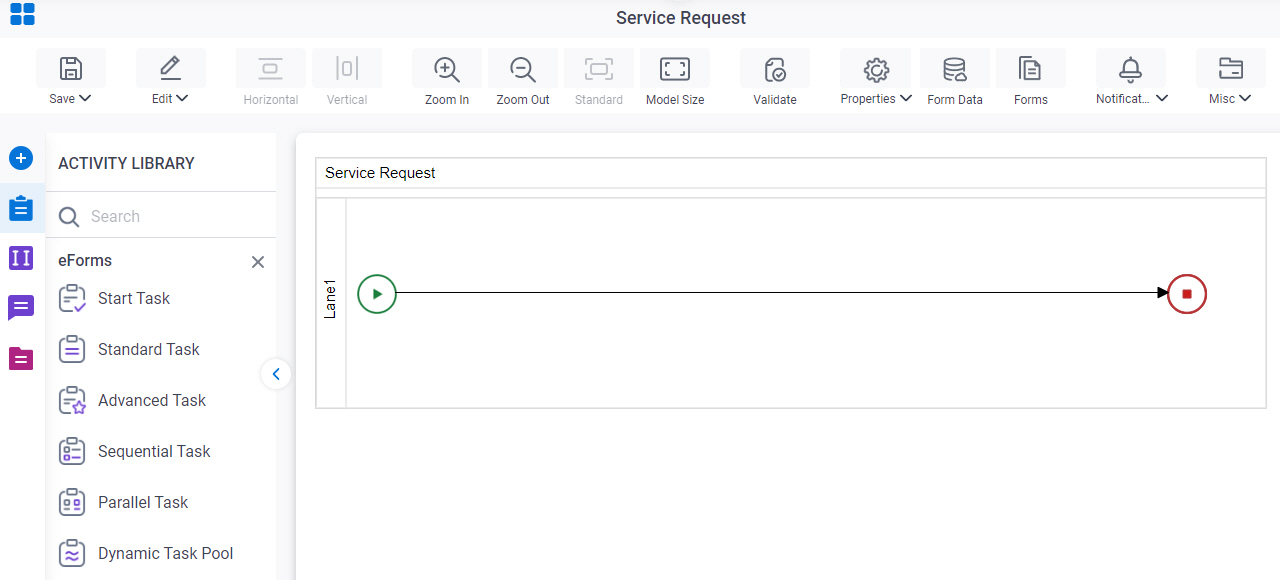
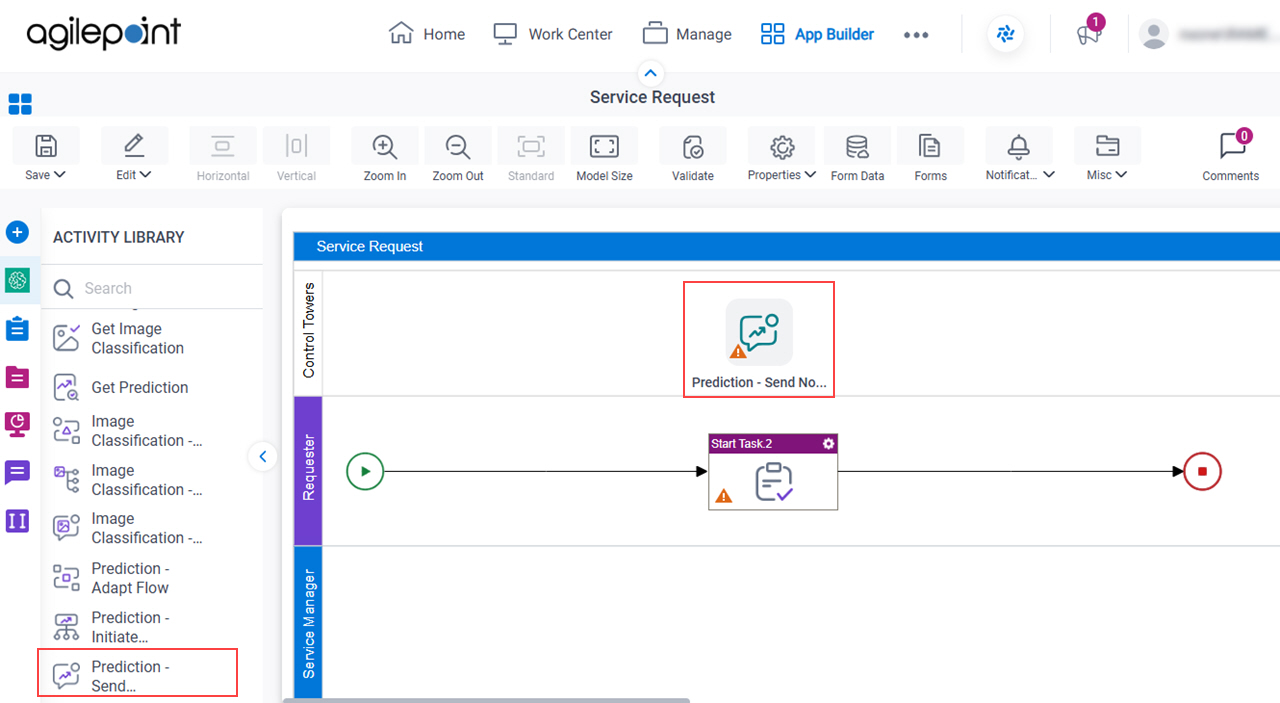
How to Start
- Open Process Builder.
For information about how to open this screen, refer to Process Builder.
- In Process Builder, in the Activity Library,
open the Amazon SageMaker tab.

- On the Amazon SageMaker tab,
drag the Prediction - Send Notification
activity onto your process.
General Configuration
Specifies the basic settings for the Prediction - Send Notification activity.
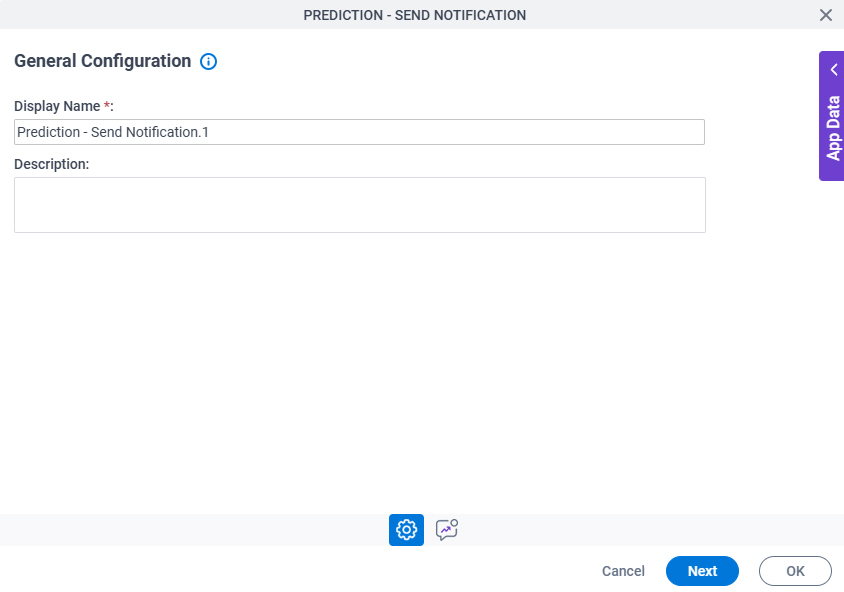
Good to Know
- Documentation for this screen is provided for completeness. The fields are mostly self-explanatory.
Fields
| Field Name | Definition |
|---|---|
|
Display Name |
|
|
Description |
|
Prediction - Send Notification Configuration > Amazon Web Services tab
Configures the Amazon SageMaker model to use to create predictions.
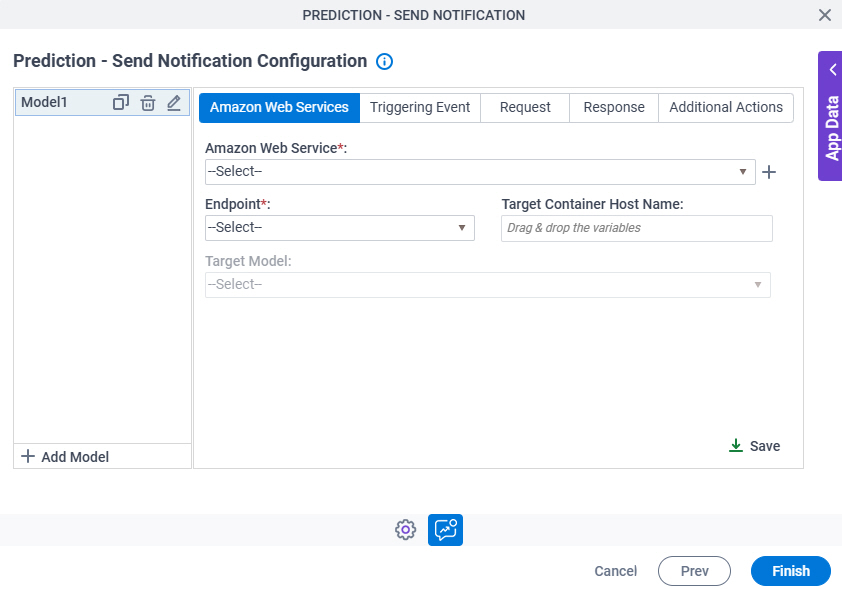
Fields
| Field Name | Definition |
|---|---|
|
Add Model |
|
Clone |
|
|
Edit |
|
|
Delete |
|
|
Amazon Web Services |
|
|
Create |
|
Endpoint |
|
Target Container Host Name |
|
Target Model |
|
|
Save |
|


Prediction - Send Notification Configuration > Triggering Event tab
Configures an activity on which to run the Amazon SageMaker model.
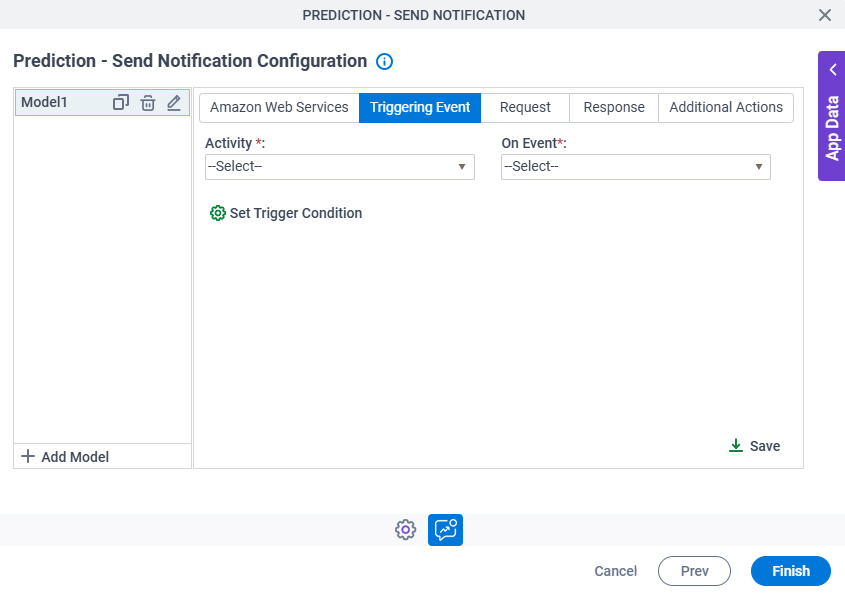
Fields
| Field Name | Definition |
|---|---|
|
Activity |
|
On Event |
|
Set Trigger Condition |
|
Prediction - Send Notification Configuration > Triggering Event tab > Set Trigger Condition
Specifies the conditions that cause the Amazon SageMaker model to run.

Fields
| Field Name | Definition |
|---|---|
|
Rule Type |
|
Condition | |
|
Edit |
|
|
Delete |
|
Prediction - Send Notification Configuration > Triggering Event > Condition Builder screen
Creates or changes logical rules. You can put one statement inside another statement to create complex logical expressions.
Fields
| Field Name | Definition | ||||||||||
|---|---|---|---|---|---|---|---|---|---|---|---|
|
Condition Name |
| ||||||||||
|
Preview |
| ||||||||||
|
Validate |
| ||||||||||
|
Rule Variable |
| ||||||||||
|
Operator |
| ||||||||||
|
Rule Value |
| ||||||||||
|
Add Row |
| ||||||||||
Select Nest Type |
| ||||||||||
|
Indent Right |
| ||||||||||
|
Delete |
| ||||||||||
|
Back |
|


Prediction - Send Notification Configuration > Request tab
Specifies the format to send the request.
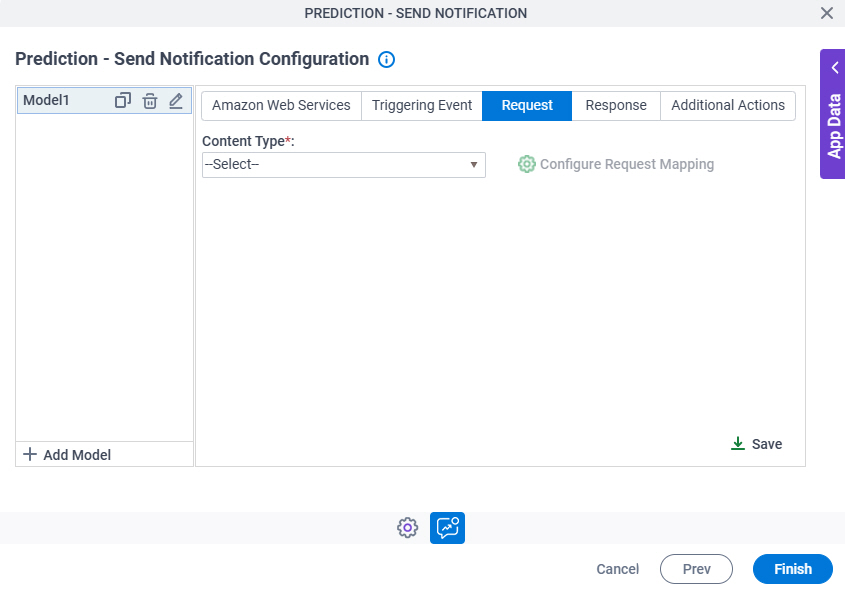
Fields
| Field Name | Definition |
|---|---|
|
Content Type |
|
Configure Request Mapping |
|
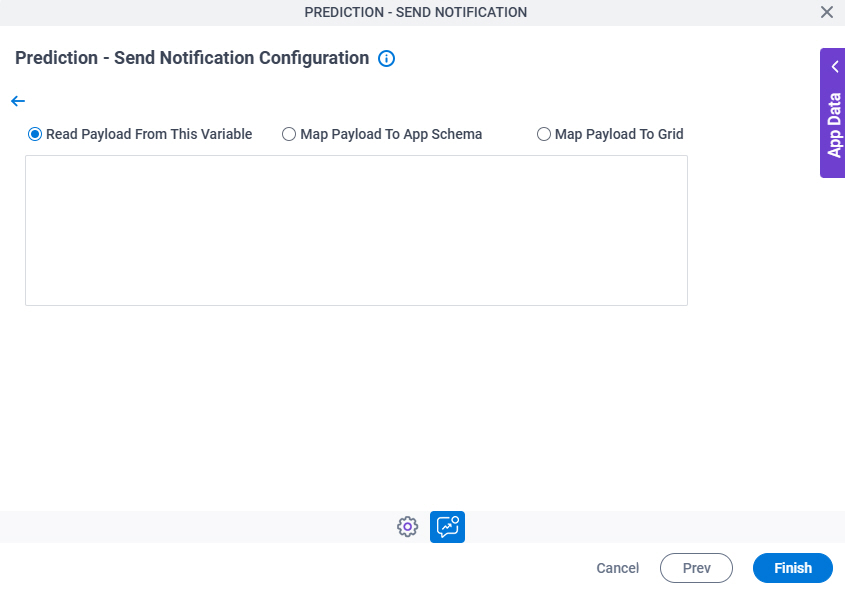
Prediction - Send Notification Configuration > Request tab > Configure Request Mapping
Connects the request payload from Amazon SageMaker to the process schema.
Fields
| Field Name | Definition |
|---|---|
|
Read Message From This Variable / Map Payload To App Schema / Map Payload To Grid |
|
|
Import |
|
|
Column Name |
|
|
Column Value |
|
Create |
|
Delete |
|
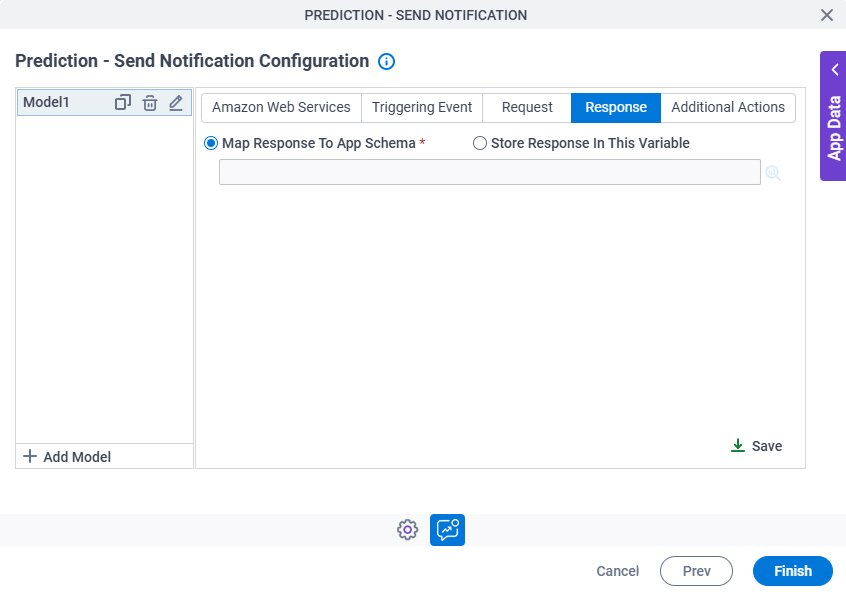
Prediction - Send Notification Configuration > Response tab
Specifies where to store the response from Amazon SageMaker.
Fields
| Field Name | Definition |
|---|---|
|
Map Response To App Schema / Store Response In This Variable |
|

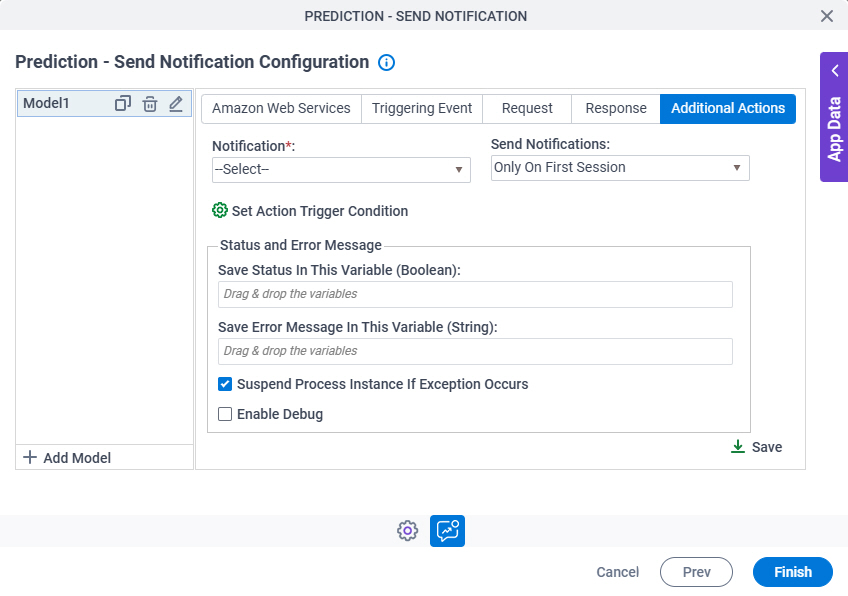
Prediction - Send Notification Configuration > Additional Actions tab
Specifies an email template to use to send the notification when the specified conditions occur in the prediction.
Fields
| Field Name | Definition |
|---|---|
|
Notification |
|
|
Send Notifications |
|
Set Action Trigger Condition |
|
|
Save Status In This Variable (Boolean) | |
|
Save Error Message In This Variable (String) | |
Suspend Process Instance If Exception Occurs |
|
Enable Debug |
|
|
Save |
|
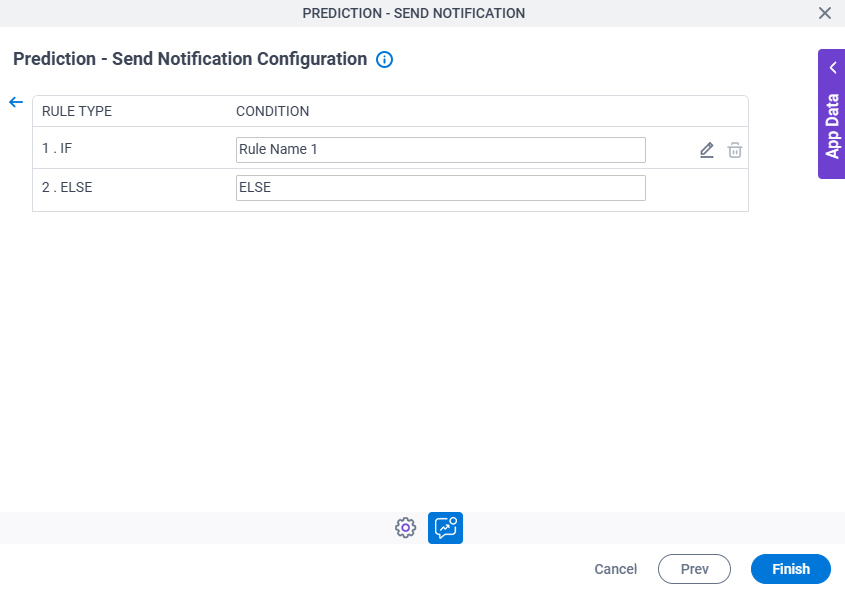
Prediction - Send Notification Configuration > Additional Actions tab > Set Action Trigger Condition
Specifies the conditions to send an email notification in AgilePoint NX.
Fields
| Field Name | Definition |
|---|---|
|
Rule Type |
|
Condition | |
|
Edit |
|
|
Delete |
|
Prediction - Send Notification Configuration > Additional Actions tab > Condition Builder screen
Creates or changes logical rules. You can put one statement inside another statement to create complex logical expressions.
Fields
| Field Name | Definition | ||||||||||
|---|---|---|---|---|---|---|---|---|---|---|---|
|
Condition Name |
| ||||||||||
|
Preview |
| ||||||||||
|
Validate |
| ||||||||||
|
Rule Variable |
| ||||||||||
|
Operator |
| ||||||||||
|
Rule Value |
| ||||||||||
|
Add Row |
| ||||||||||
Select Nest Type |
| ||||||||||
|
Indent Right |
| ||||||||||
|
Delete |
| ||||||||||
|
Back |
|