
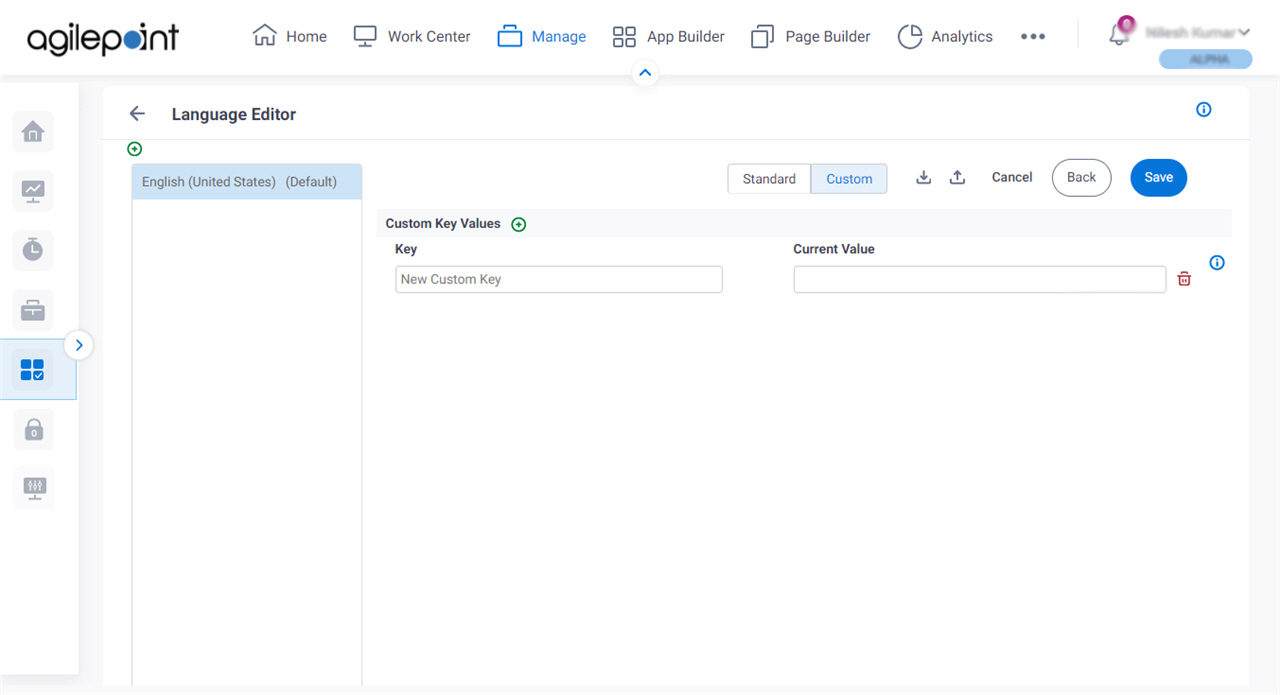
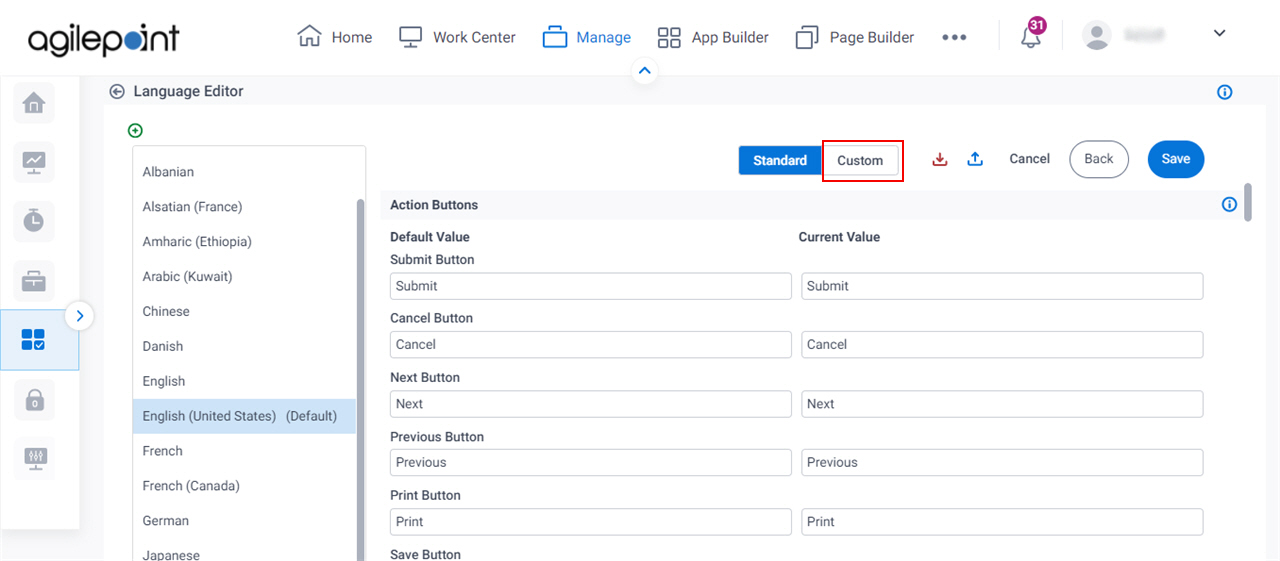
Language Editor > Custom tab
Lets you specify the custom key to add locale text to your eForm.
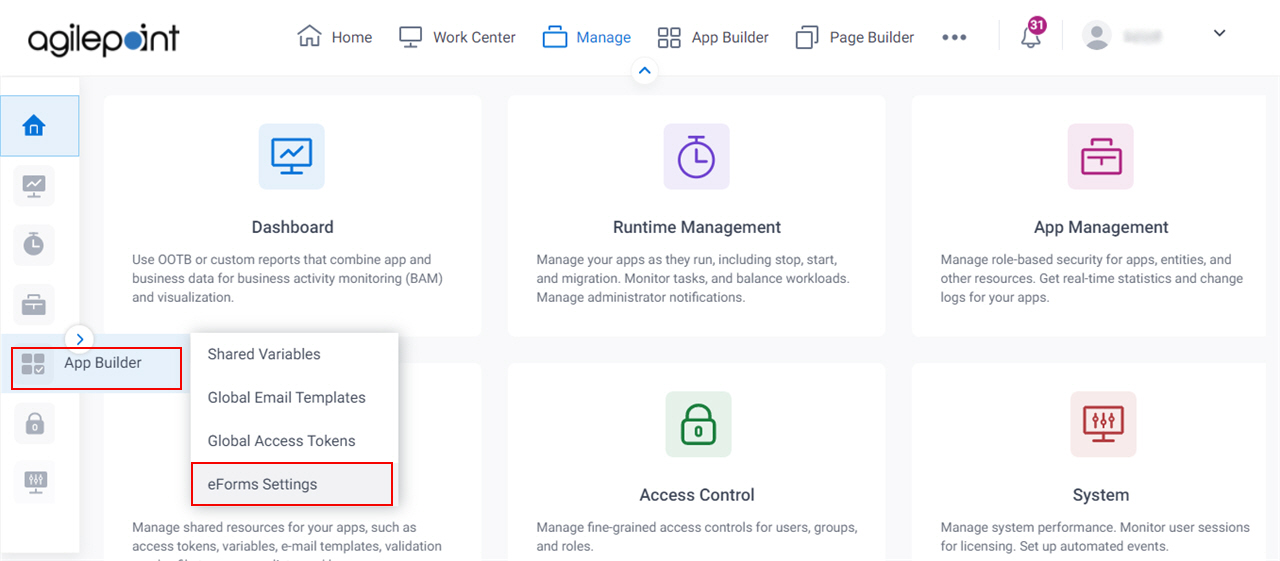
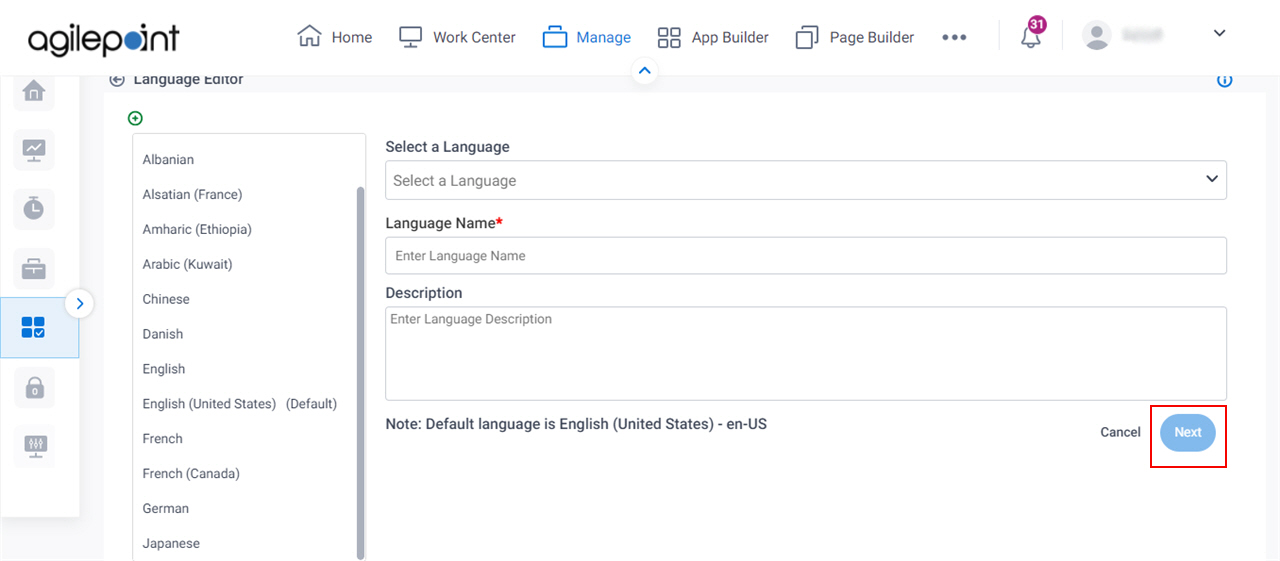
How to Start
- Click Manage.
- In the Manage Center, click App Builder
> eForms Settings.
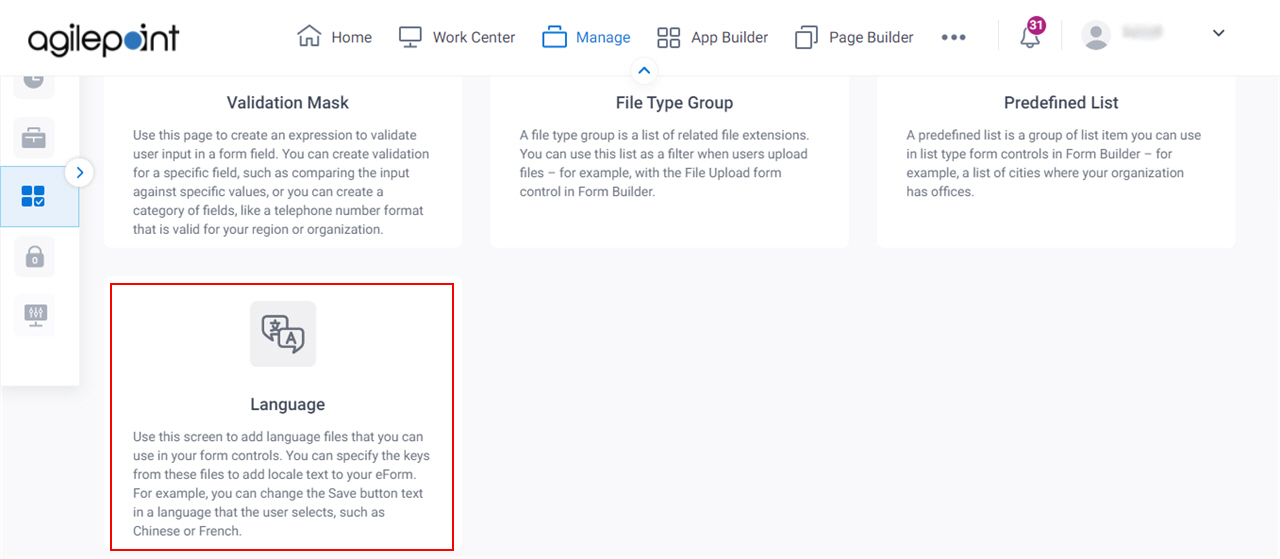
- On the eForms Settings screen, click Language.
- On the Add A New Language screen, click Next.
- Click the Custom tab.
Fields
| Field Name | Definition |
|---|---|
Back  |
|
Add Custom Key  |
|
Key |
|
Current Value |
|
Save |
|
Delete Custom Key  |
|
Rename Custom Key  |
|