
Configure a Timer for One or More Activities
To configure a timer for one or more activities in a process, do the procedure in this topic.
Good to Know
- In most text fields, you can use process data variables as an alternative to literal data values.
- You can configure whether this activity waits for other activities before it runs.
For more information, refer to How Do I Configure an Activity to Wait for Other Incoming Activities?
How to Start
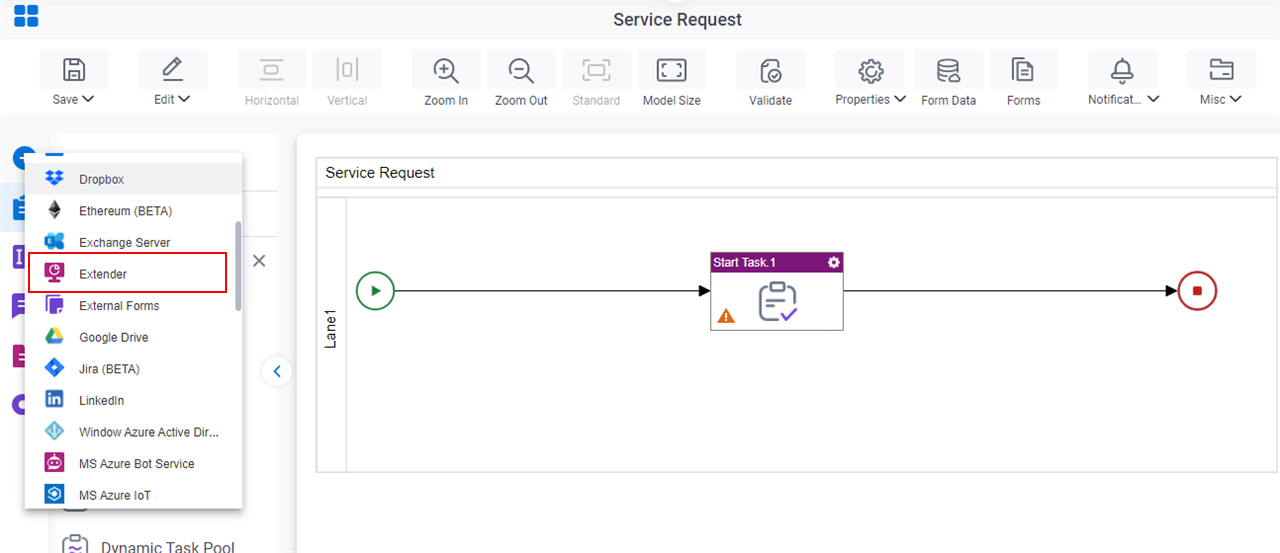
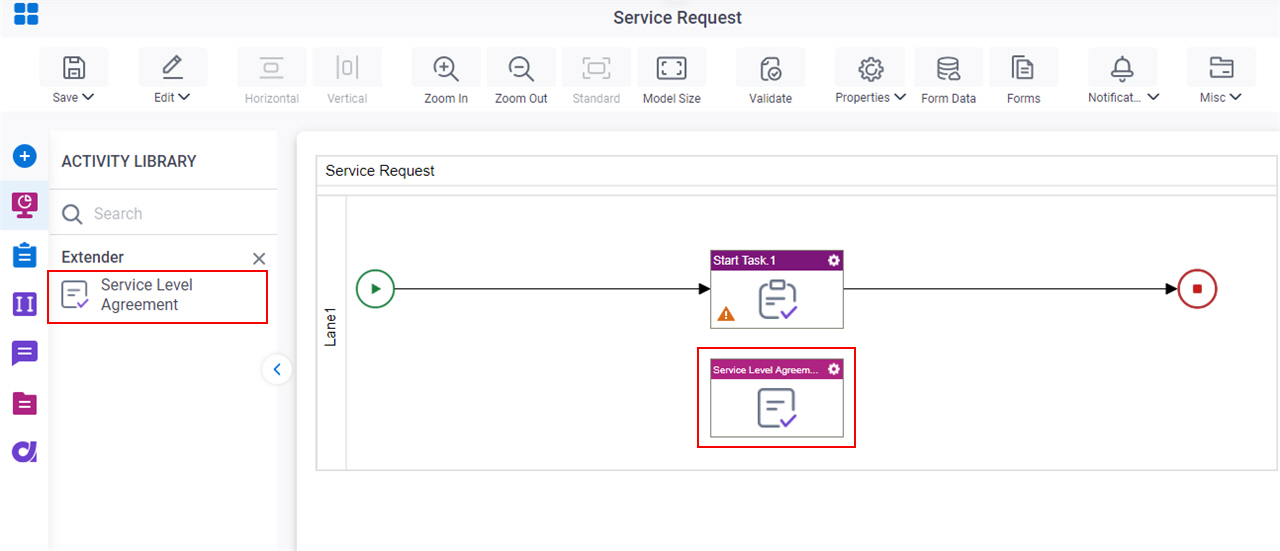
- On the App Explorer screen, do one of these:
- Do one of these:
- Click SLA Configuration
 .
.
Procedure
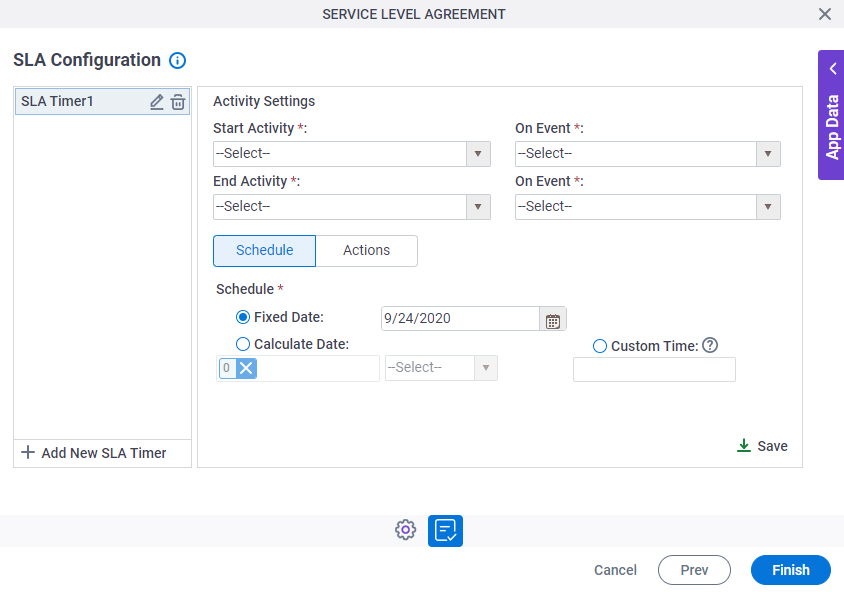
- On the SLA Configuration screen, click Add New SLA Timer
 .
. - In the Start Activity list, select the activity in your process to start the timer.
- In the On Event list, select the activity event to start the timer — for example, start or complete.
- In the End Activity list, select the activity in your process to end the timer.
- On the On Event list, select the activity event to end the timer — for example, start or complete.
- (Optional) To set the timer expiration, do one of these.
- To set the timer to expire on a fixed date, complete this field
as necessary.
Field Name Definition Fixed Date
- Function:
- Specifies a date to expire the timer.
- Accepted Values:
- Selected - Specifies to use a date to expire the timer.
- Deselected - Specifies not to use a date to expire the timer.
- Default Value:
- Selected
- To calculate a date for the timer to expire, complete these fields.
Field Name Definition Calculate Date
- Function:
- Specifies whether to calculate a date to expire the timer based on the information you enter.
- Accepted Values:
-
- Deselected - Specifies not to calculate a date to expire the timer.
- Selected - Specifies to calculate a date to expire the timer. This calculation includes the following elements:
- An integer.
This represents the frequency of the time unit.
- A time unit.
These types of time units are used to calculate the time:
- Minute
- Hour
- Day
- Week
- An integer.
- Default Value:
- Deselected
- Example:
- If the length is set to 3, and the time unit is set to Day, this indicates 3 days. For example, this sets a duration of 3 days after which the timer expires.
Business Time
- Function:
- Specifies to use your work calendar for date calculations.
- Accepted Values:
-
- Deselected - Uses your work calendar for calculations.
- Selected - Does not use your work calendar for calculations.
- Default Value:
- Deselected
- Example:
- The Business Time field is set as selected, and business hours of work calendar are configured as 9 AM to 5 PM. If the task with completion time 8 hours is entered at 1 PM on Monday, then the task must be completed by 12 PM on Tuesday.
- To set a custom date for the timer, complete this field
as necessary.
Field Name Definition Custom Time
- Function:
- Specifies a variable that identifies a time span for the timer expiration.
- Accepted Values:
- A process data variable where the value is in the format xD-yW.
- xD - Specifies x number of days.
- yW - Specifies y number of weeks.
- Default Value:
- None
- Accepts Process Data Variables:
- Yes
- Example:
- 2D-1W
This value specifies 2 days plus 1 week.
- To set the timer to expire on a fixed date, complete this field
as necessary.
- (Optional) To send a notification when the timer expires, in the Notification list, select an email template to use for the notification.
- (Optional) To start a subprocess when the timer expires, in the Subprocess list, select the process to run.