
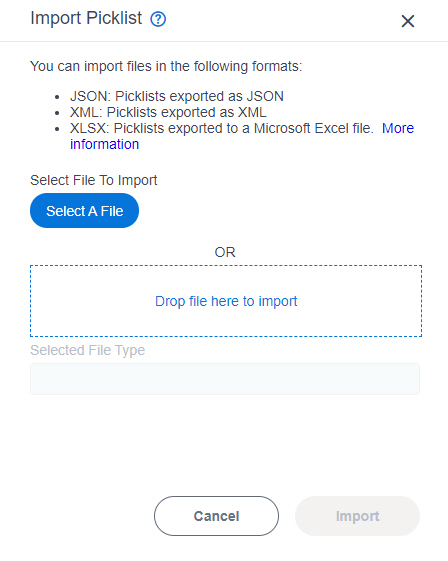
Import Picklist screen
This topic shows how to upload an exported picklist from your local machine to Data Entities.
Background and Setup
Prerequisites
- Download a picklist
as an XML file, a JSON file, or a Microsoft Excel file.
For more information, refer to Export a Picklist.
- AgilePoint NX OnDemand (public cloud), or AgilePoint NX PrivateCloud or AgilePoint NX OnPremises v7.0 or higher.
How to Start
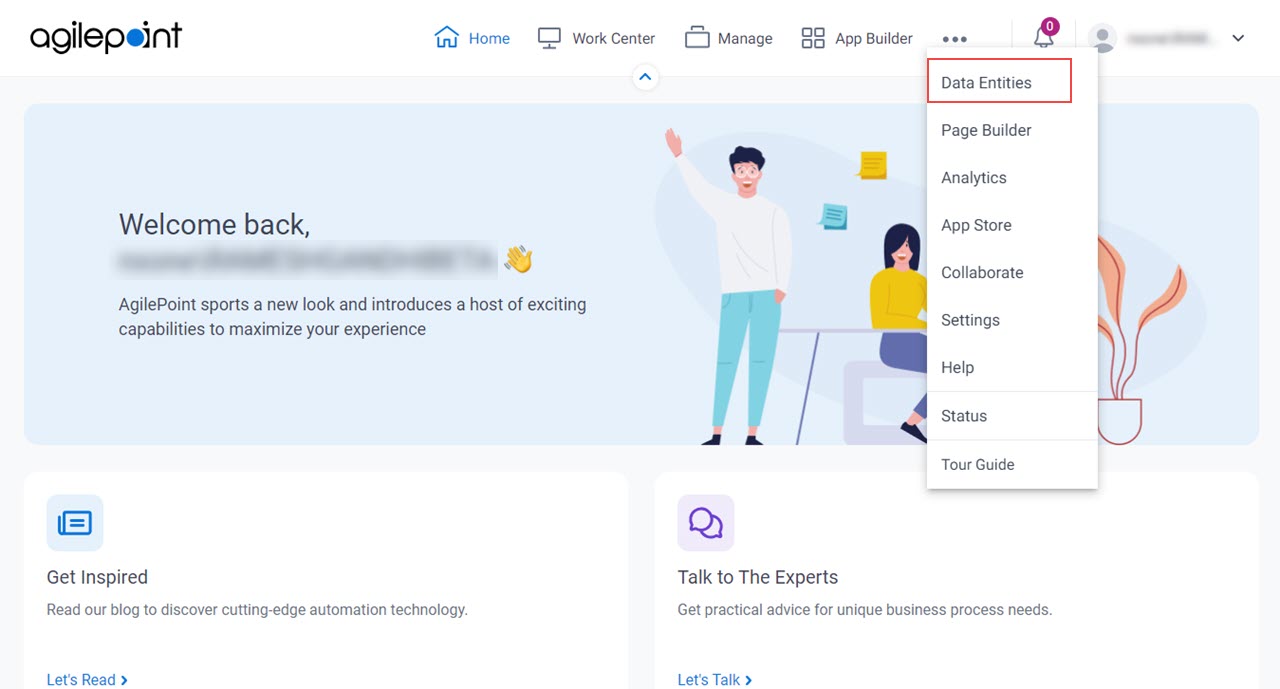
- Click Data Entities.
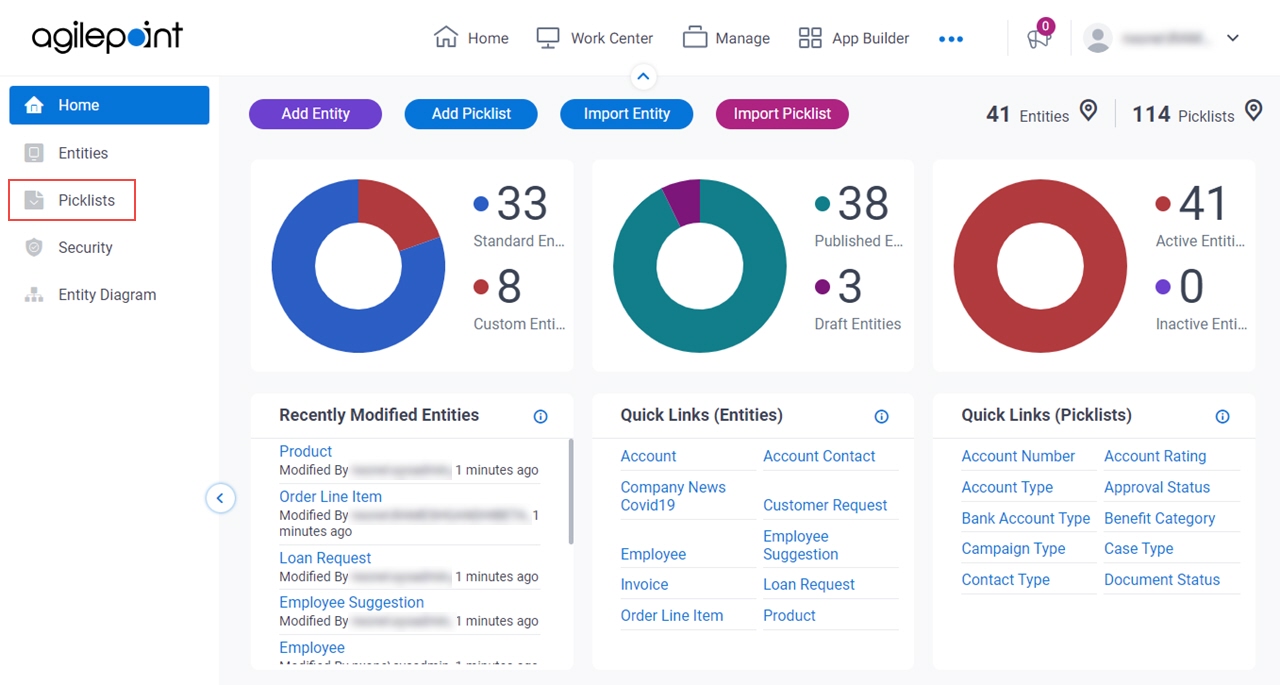
- On the Data Entities Home screen,
click Picklists
 .
.
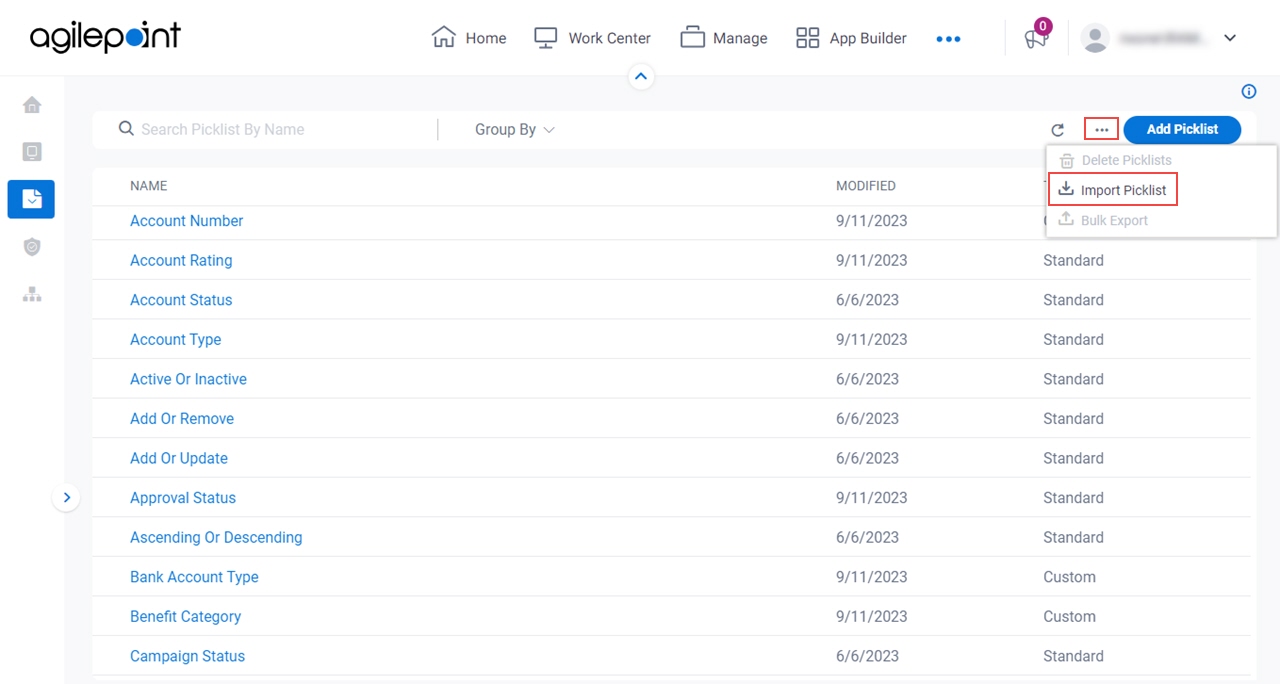
- On the right side of the screen, click Ellipses (...) > Import Picklist.
Import Picklist screen
Uploads an exported picklist from your local machine to Data Entities.
Fields
| Field Name | Definition |
|---|---|
Select File To Import |
|
Selected File Type |
|
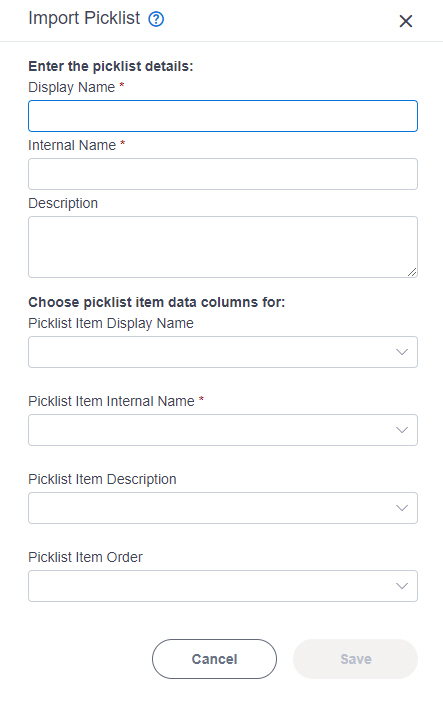
Import Picklist screen
Configures how to show the custom picklist and its associated picklist items on the Picklists > Items screen.
Prerequisites
- AgilePoint NX OnDemand (public cloud), or AgilePoint NX PrivateCloud or AgilePoint NX OnPremises v8.0 Software Update 2 or higher.
Good to Know
- This screen shows only when you import a custom picklist.
Fields
| Field Name | Definition |
|---|---|
Display Name |
|
Internal Name |
|
Description |
|
Picklist Item Display Name |
|
Picklist Item Internal Name |
|
Picklist Item Description |
|
Picklist Item Order |
|
|
Save |
|