
(Example) How Do I Configure Data from Data Population to Show in Reports?
To configure data from data population to show in a report, do the procedure in this topic.
Prerequisites
- AgilePoint Data Services installed on the AgilePoint Server machine.
- Report Center.
Good to Know
- If you want to use SharePoint for data population, your Sharepoint access token must use SharePoint user credentials. Authentication with the AgilePoint System Account is not supported for data population.
Step 1: Configure Data Population with Microsoft SQL Server
To configure data population to store data in Microsoft SQL Server, do the procedure in this topic.
Examples
- (Example) How Can I Map a Repeating Schema Element to Data Population?
- Examples - Step-by-step use case examples, information about what types of examples are provided in the AgilePoint NX Product Documentation, and other resources where you can find more examples.
Good to Know
- If you want to use SharePoint for data population, your Sharepoint access token must use SharePoint user credentials. Authentication with the AgilePoint System Account is not supported for data population.
How to Start
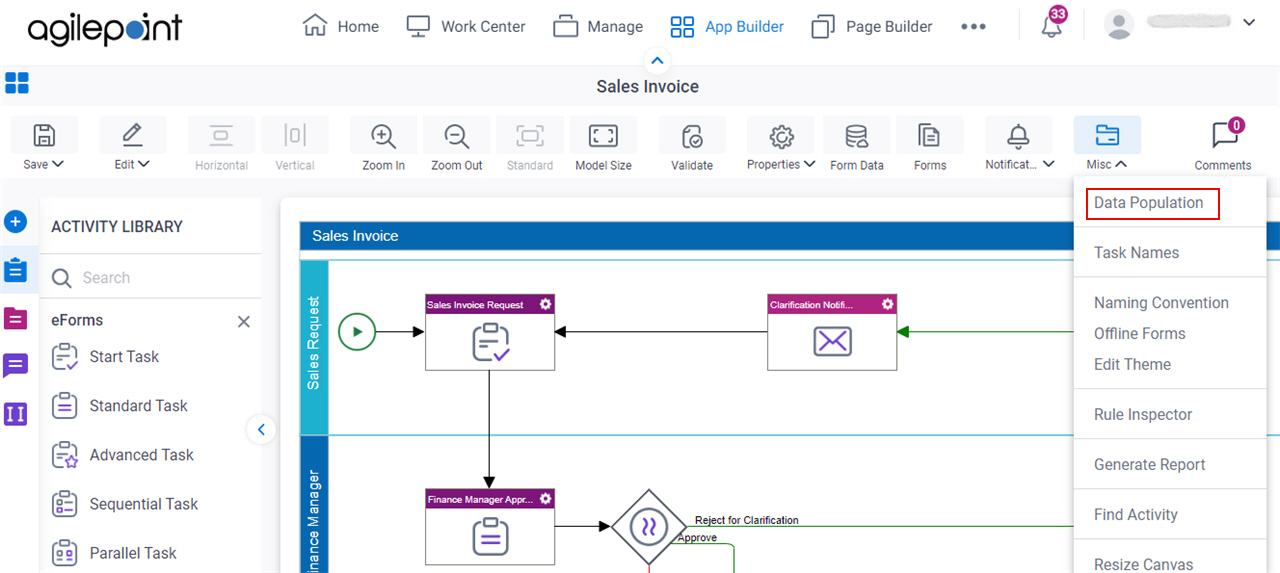
- Open Process Builder.
For information about how to open this screen, refer to Process Builder.
- In Process Builder, click Misc >
Data Population.
Procedure
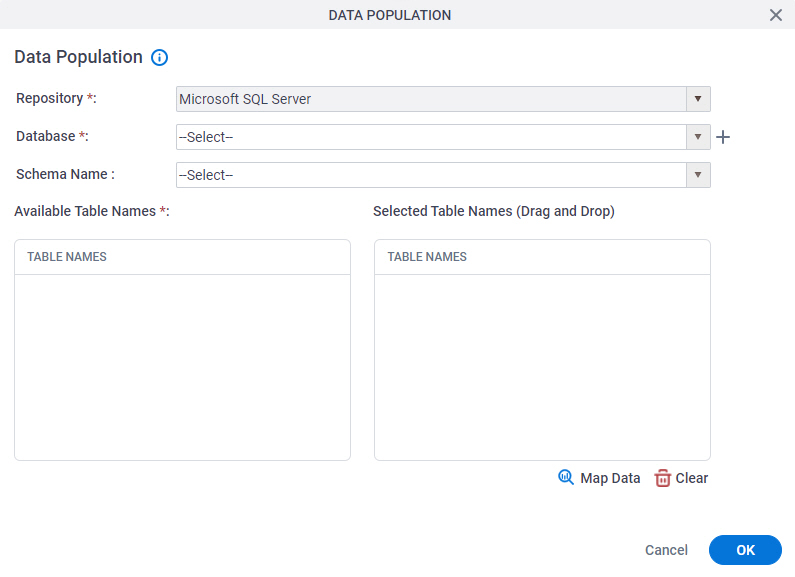
- On the Data Population screen, in the Repository field, select Microsoft SQL Server.
- In the Database list, select your databae access token.
To create a new access token, click Create
 . For more information, refer to
Access Token for Database.
. For more information, refer to
Access Token for Database. - Drag the table name from the Table Names box to the Selected Table Names box.
- Click Map Data.
- On the Schema Mapper, map the table names to the schema.
Step 2: Configure Report Database Connection
To configure the report database connection, do the procedure in this topic.
How to Start
- On your AgilePoint Server machine, open the file [Report Center installation folder]\bin\ahDbAdmin.exe
Procedure
- On the Report Center Management Console screen, click Report database Management > Report Database Connections.
- On the Report Databases screen, click Add.
- On the Report Database Configuration screen, in the Database Label field, enter the name of the report database.
- In the Database Connection String field, enter the connection string for the report
database.
Do one of these:
- To let Report Center configure the connection, click Connection Wizard links.
- To enter the connection string manually, click Edit Connection String.
- To verify that the specified connection string is correct, click Test.
- Click OK.
If there is no schema information in the metadata database related to the report database, configure the Database Connection screen to run the Import Schema wizard.
- On the Database Connection screen, click Yes.
- On the Object and Column Schema Import screen, in the Object Type column, select the SQL table.
- Click Add Selected.
- On the Object Names and Descriptions screen, click Next.
- On the Column Names and Descriptions screen, click Next.
- Click Finish.
Step 3: Add a Role to the Database
To add a role to the database, do the procedure in this topic.
Good to Know
- If more than one reporting database is available for the end-user, a Database list shows The Database ist acts as a filter for the list of reports. Only reports based on the selected database will be shown in the list. The database list does not filter the folders.
How to Start
- On the AgilePoint NX Portal,
click Report
 .
.
Procedure
- Click the Configuration tab.
- On the Configuration tab, click User Configuration > Roles.
- On the Roles screen, click Add.
- On the New Role screen, in the Role field, enter the name of the role.
- Specify Role Permissions, Role Databases, and Role Users from their Available lists to Assigned list.
- Click Save.