Install AgilePoint Server
To install AgilePoint Server for AgilePoint NX, do the procedure in this topic.
Prerequisites
- Your system meets the minimum
system requirements for this component.
For more information, refer to System Requirements for AgilePoint Server.
- You have completed all of the pre-installation instructions
for this component.
For more information, refer to Set Up Your Environment for AgilePoint NX.
- Sign in to Windows using a user login that belongs to the local system's Administrators group.
- Download the AgilePoint NX Installation Package to your AgilePoint Server machine.
Good to Know
- The AgilePoint NX installation includes AgilePoint Server, AgilePoint NX Portal, Analytics Center, if it is licensed, AgilePoint NX Developer, and SharePoint Integration.
- The installer UI is optimized for system resolutions 1366x768 or 1920x1080 with 100% scaling. If you use other screen resolutions, the installer UI may not display correctly, which can cause installation errors.
Procedure
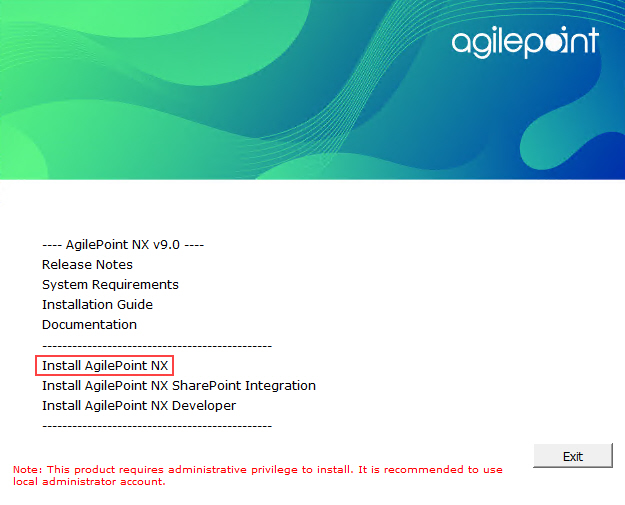
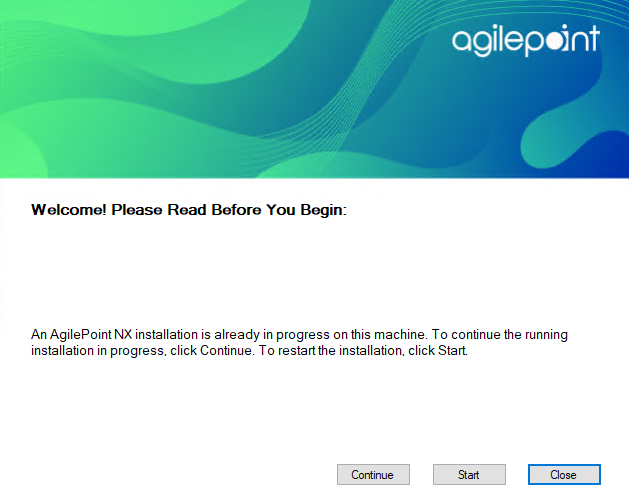
- On the AgilePoint NX v9.0 screen, click Install AgilePoint NX.
- This screen shows if an AgilePoint NX installation is running on this machine.
- To resume the installation, click Continue.
- To restart the installation, click Start.
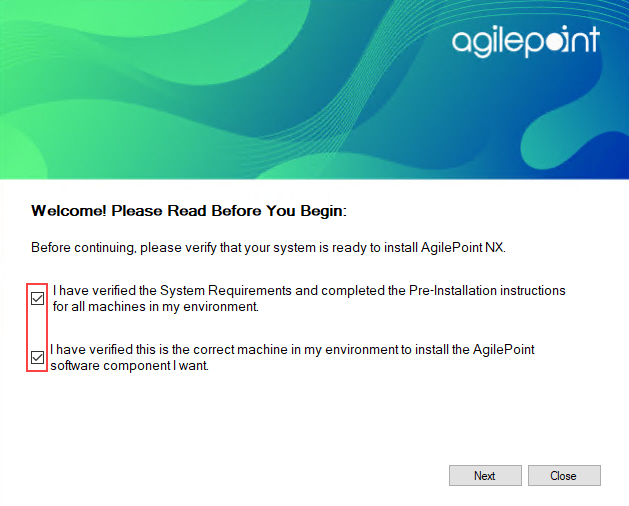
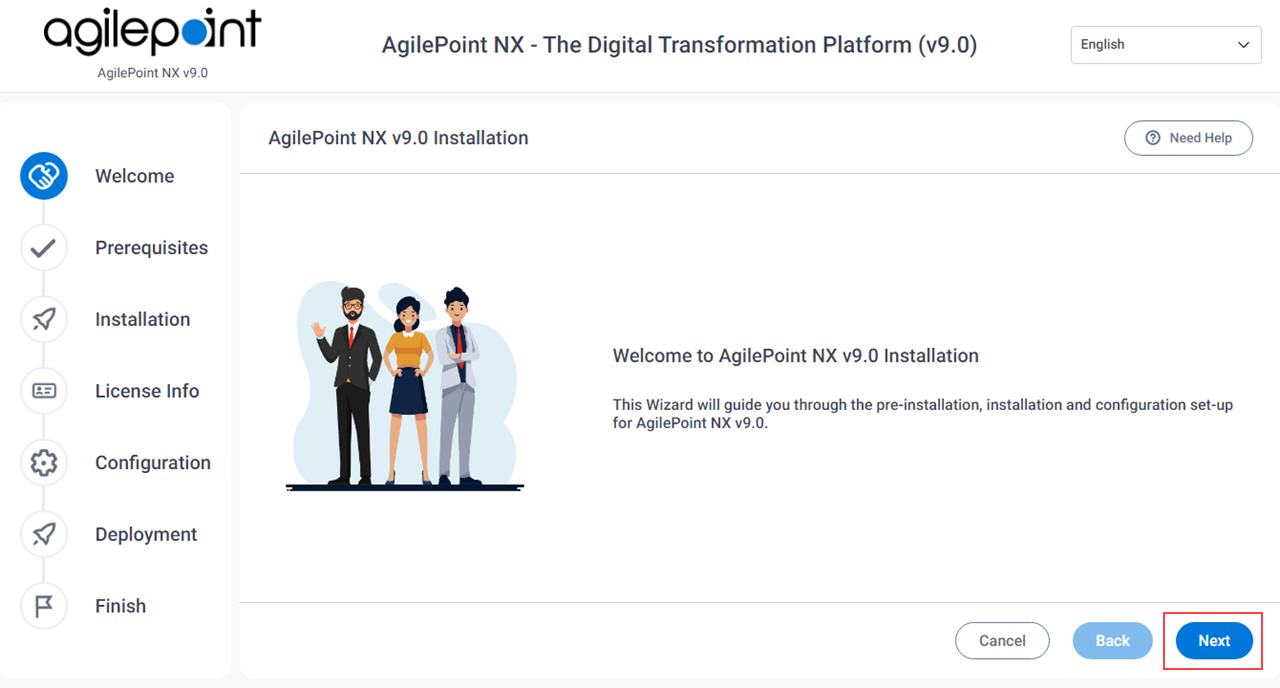
- On the Welcome to AgilePoint NX v9.0 Installation screen, click Next.
- On the Prerequisites screen, select all the items on this screen.
You can click the help icon for each item for more information.
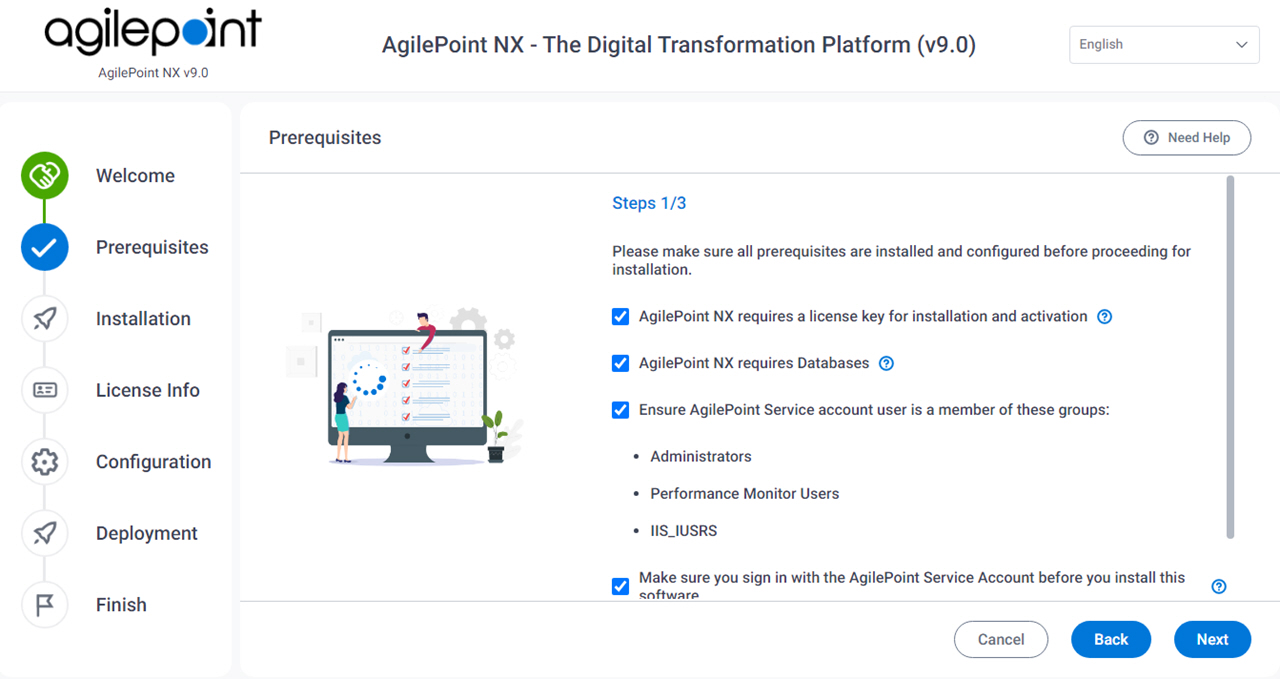
- Click Next.
- On the Select AgilePoint NX Installation Type screen, select your installation type.
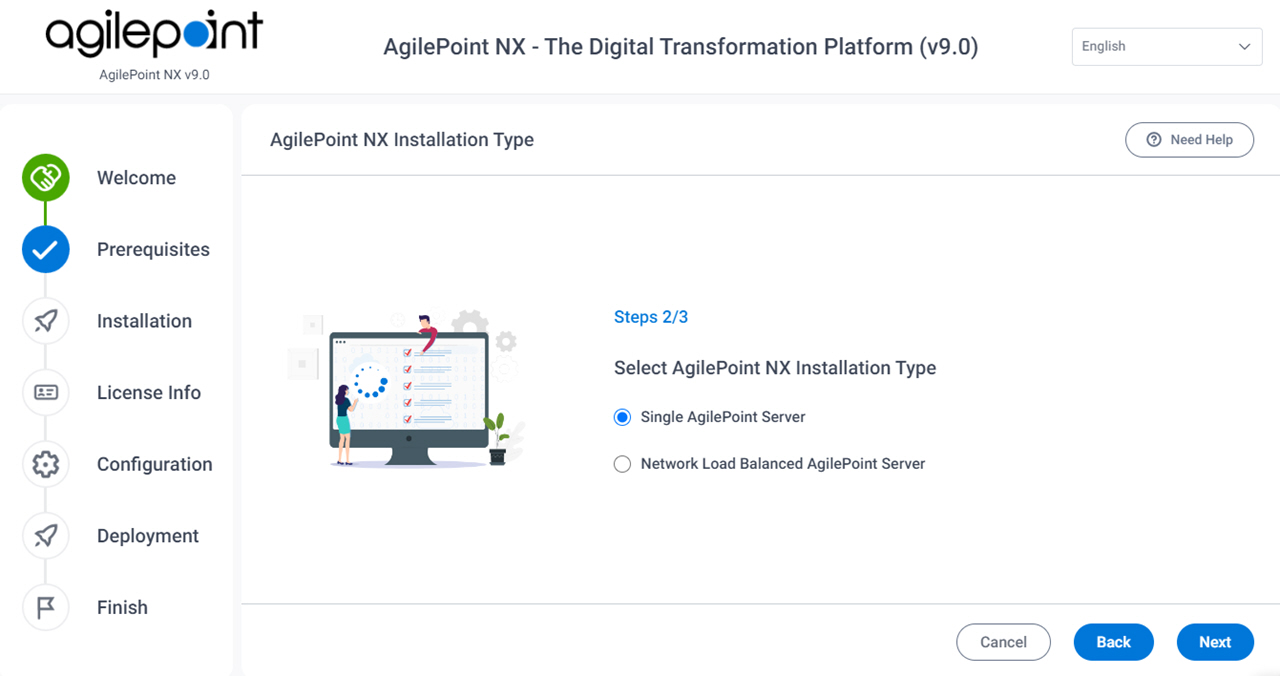
Field Name Definition Single AgilePoint Server
This AgilePoint Server instance will not use Network Load Balancing (NLB).
It is still possible to have multiple standalone instances of AgilePoint Server running as separate services in your environment. They simply cannot be load balanced in an NLB configuration.
Network Load Balance AgilePoint Server
This AgilePoint Server instance uses NLB.
If you select this option, the following applies:
- You must complete the Virtual Host Name/IP Address field.
- When you install AgilePoint Server, the AgilePoint Clustering Server Manager (CSM) component is installed in the background.
Virtual Host Name Or IP Address
The virtual host name or IP address for your NLB server. This virtual host name must be declared in the hosts file for your NLB server machine.
This is required for NLB environments only.
- Click Next.
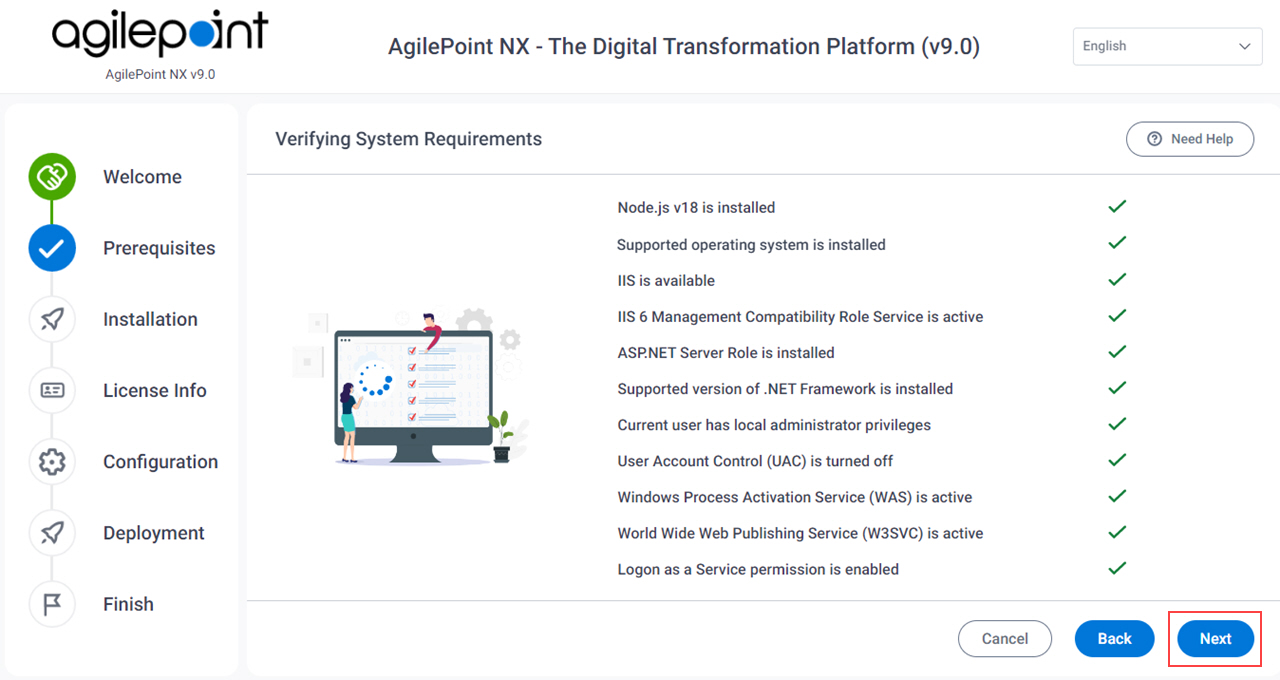
- On the Verifying System Requirements screen:
- If there are any errors, do this procedure:
- Click Cancel.
- Correct the errors.
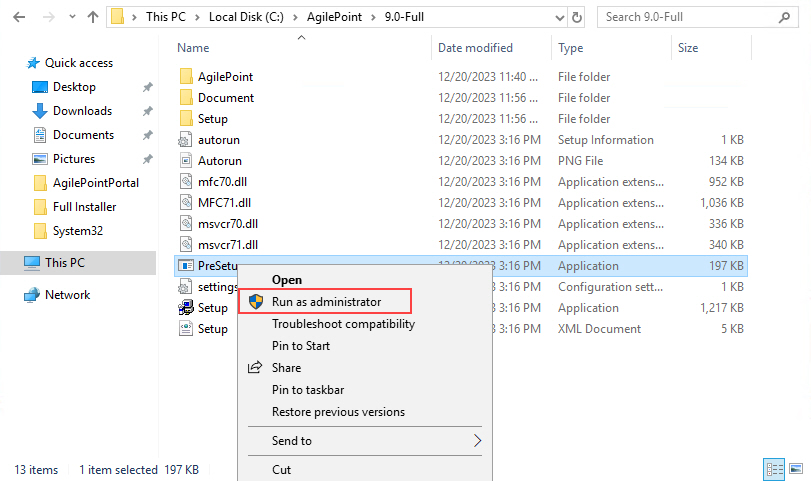
- Right-click the AgilePoint NX Setup.exe file, and
click Run as administrator.
The AgilePoint NX installation starts.
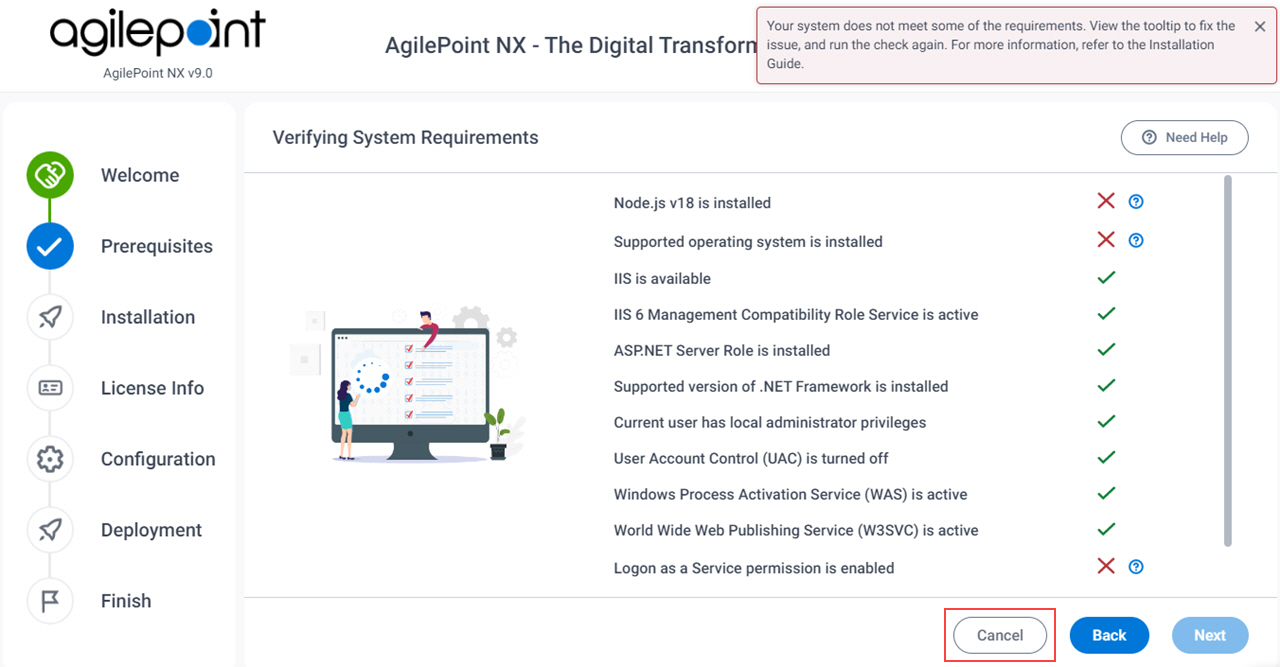
Issue Resolution Node.js v18 is installed
Install Node.js on the AgilePoint Server machine.
Supported operating system is installed
Install a supported operating system on this machine.
For more information, refer to System Requirements for AgilePoint Server.
IIS is available
Install or start an IIS version that is supported by your operating system.
IIS 6 Management Compatibility Role Service is active
Activate Management Compatibility Role Service on IIS 6 or higher.
For more information, refer to Verify the IIS 6 Management Compatibility Role Service.
ASP.NET Server Role is installed
Install ASP.NET Server Role on this machine. The correct version of the ASP.NET Server Role is different for different versions of Windows Server.
For more information, refer to Verify the ASP.NET Server Role is Installed.
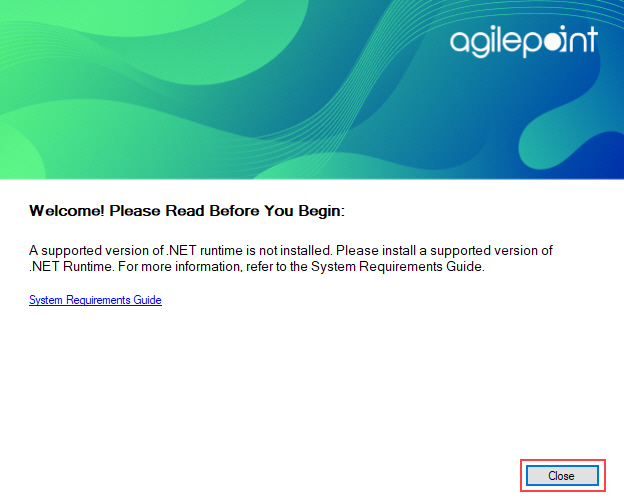
Supported version of .NET Framework is installed
Install a supported version of .NET Framework on this machine.
For more information, refer to System Requirements for AgilePoint Server.
Current user has local administrator privileges
Sign in to this machine as a user with administrator privileges.
User Account Control (UAC) is turned off
Turn user access control (UAC) off.
For more information, refer to Turn Off User Account Control (UAC).
Windows Process Activation Service (WAS) is active
Activate Windows Process Activation Service (WAS) on this machine.
For more information, refer to Windows Process Activation Service (WAS) is Active.
World Wide Web Publishing Service (W3SVC) is active
Activate World Wide Web Publishing Service (W3SVC) on this machine.
For more information, refer to IIS World Wide Web Publishing Service (W3SVC) is Active.
Logon as a Service permission is enabled
Add the Log on as a Service permission to the account.
For more information, refer to Add the Log on as a service Right to the AgilePoint Service Account.
- If there are no errors, click Next.
- If there are any errors, do this procedure:
- On the AgilePoint NX Installation screen, complete these fields:
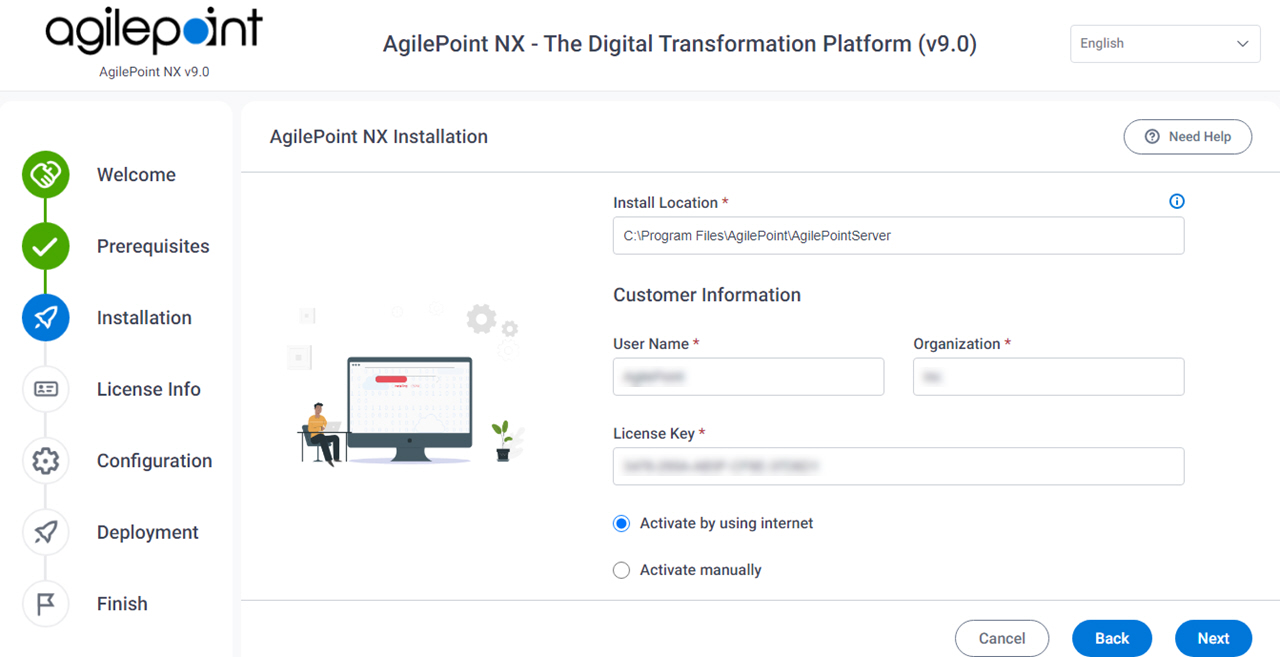
Field Name Definition Install location
The folder where you want to install AgilePoint NX.
User Name
Usually the first and last name of the person responsible for the AgilePoint Server administration or software license.
Organization
The name of your organization, or company.
License Key
Your AgilePoint NX license key.
For more information, refer to Obtain, Apply, and Activate AgilePoint License Keys.
Activate by using internet / Activate manually
Specifies how to activate the AgilePoint NX license key.
For more information, refer to Obtain, Apply, and Activate AgilePoint License Keys.
- Click Next.
- On the AgilePoint NX Installation screen, click Install.
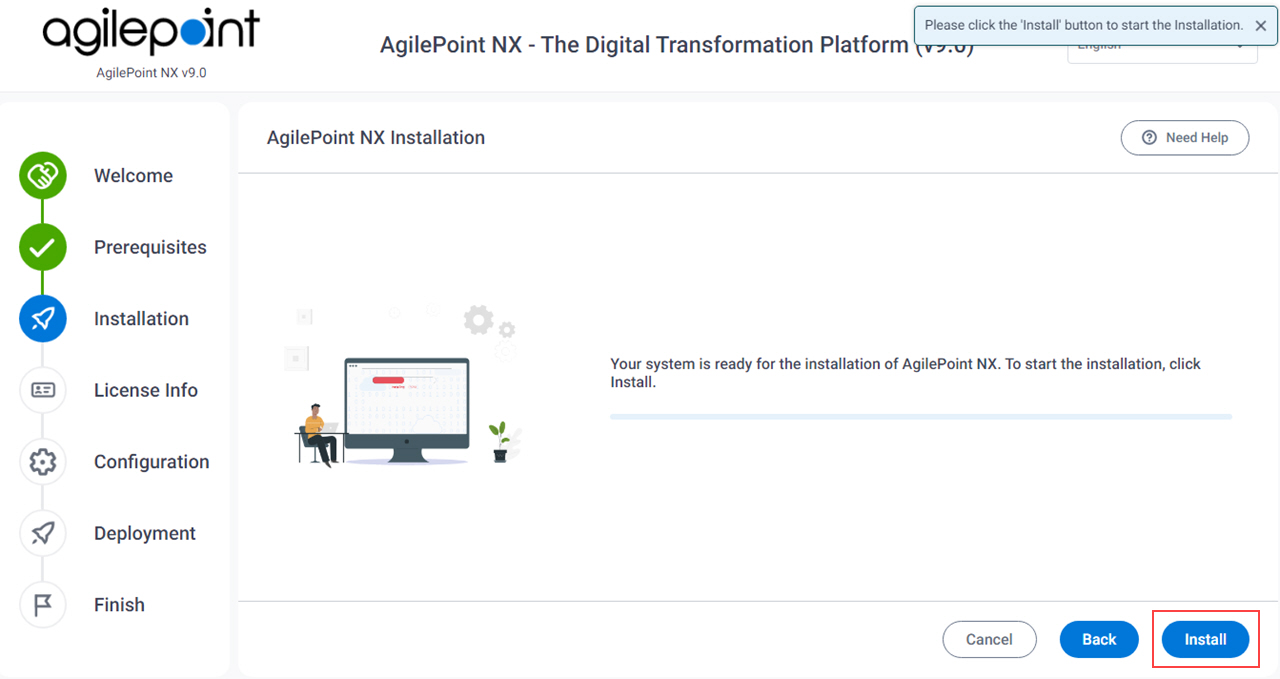
The AgilePoint NX installation starts.
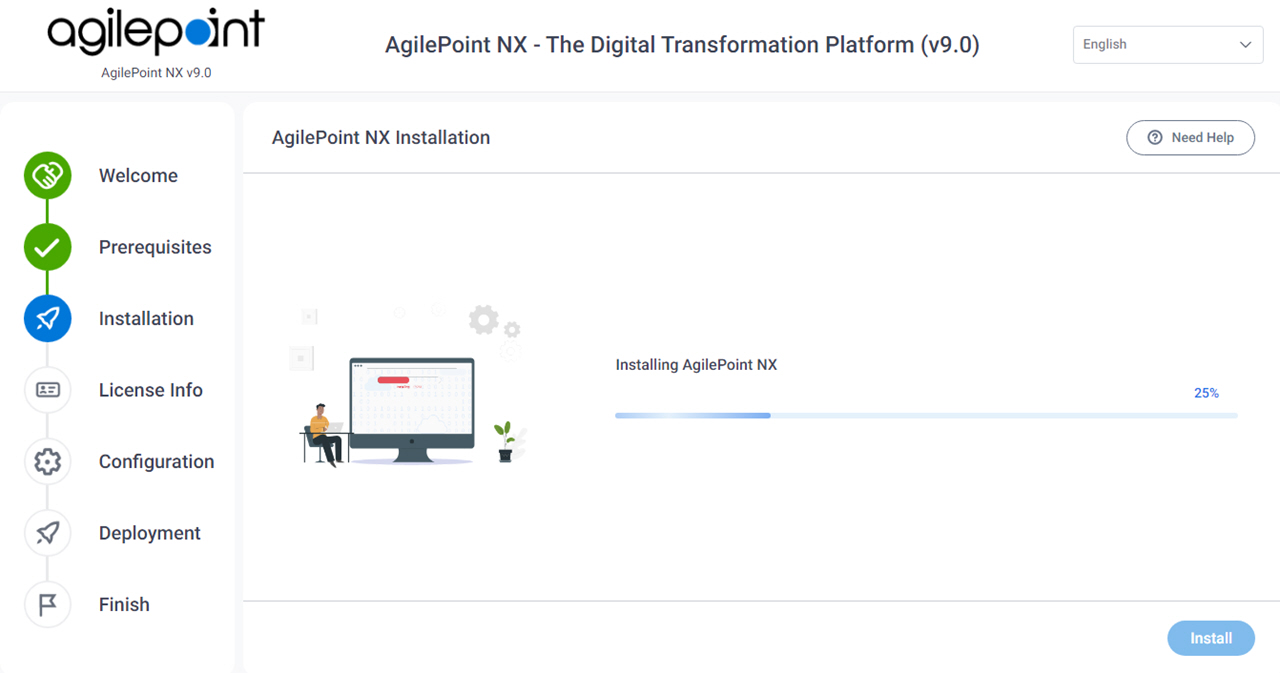
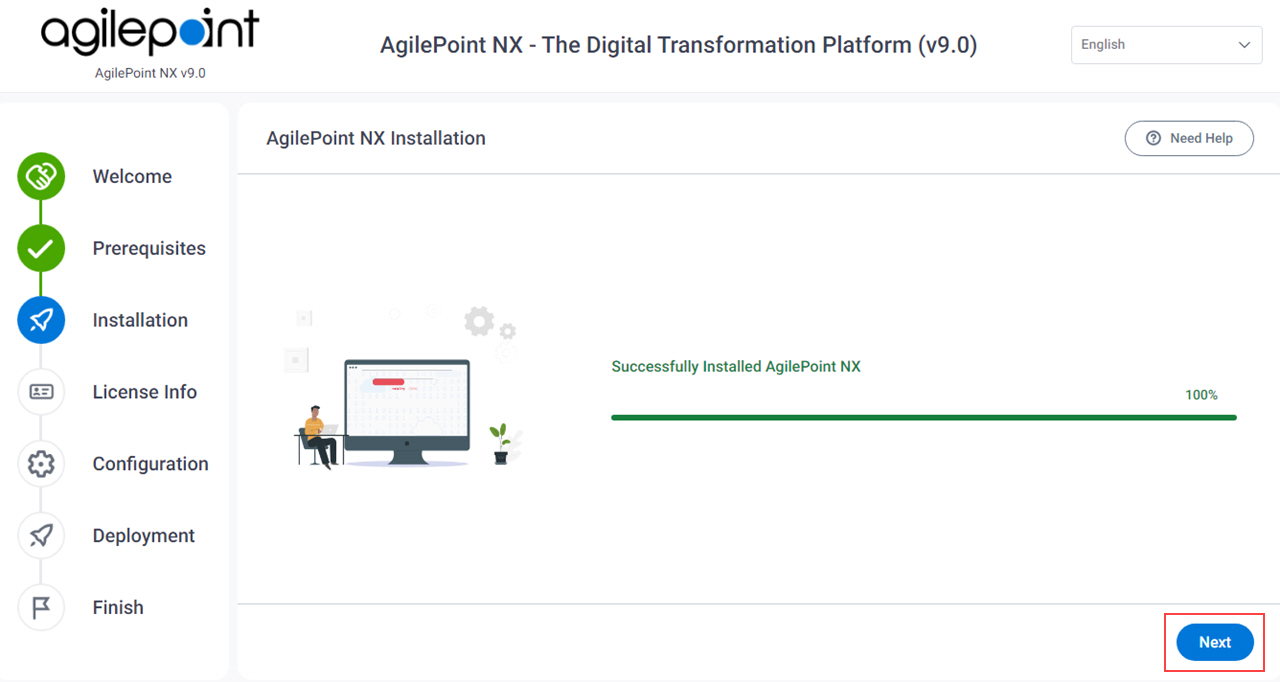
- After the installation completes, click Next.
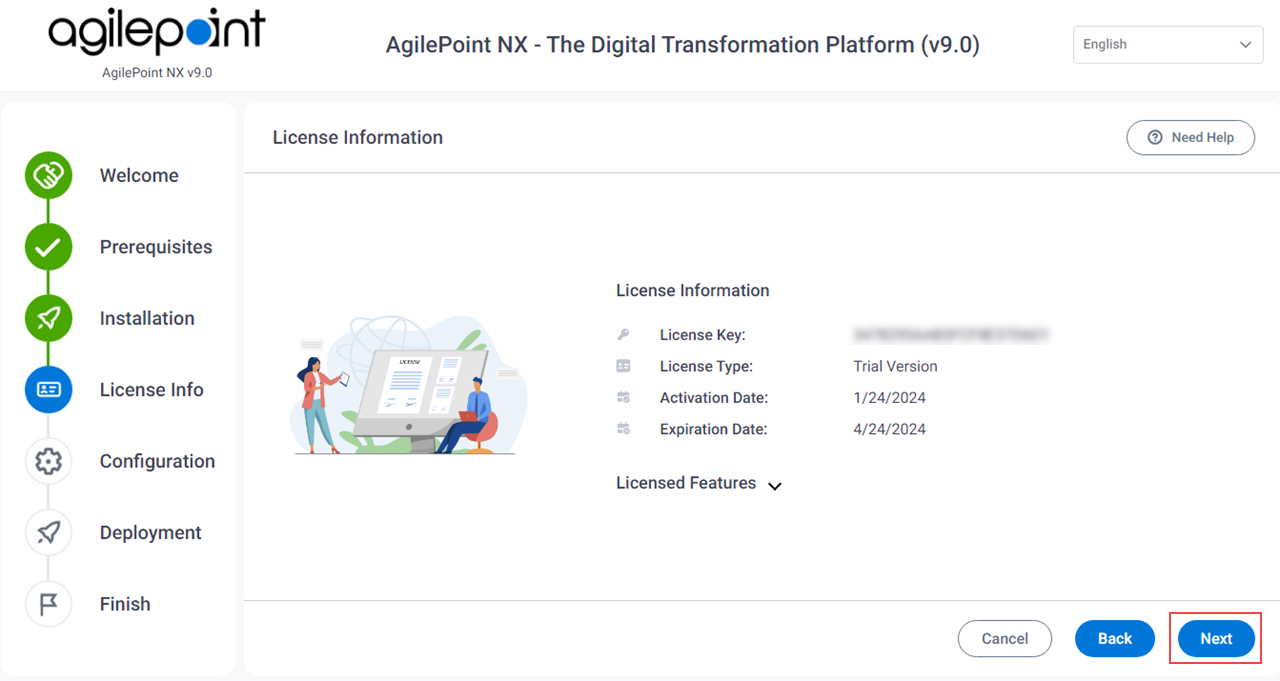
- On the License Information screen, click Next.
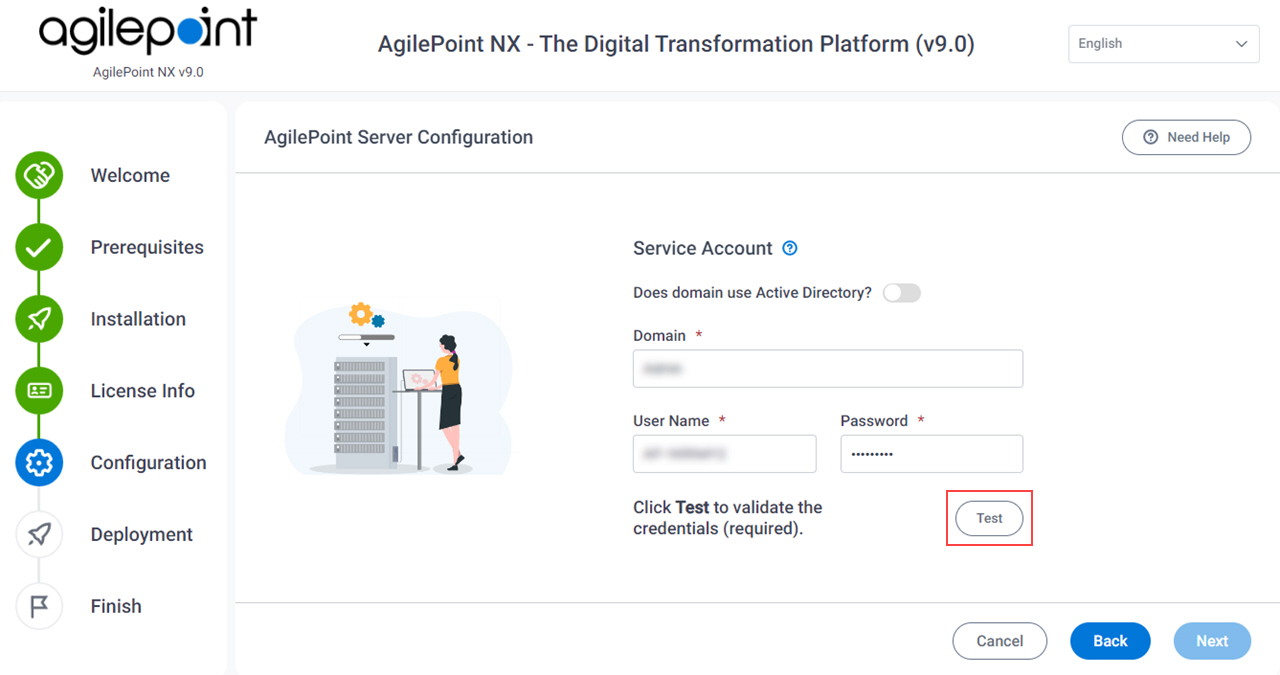
- On the AgilePoint Server Configuration screen, enter the credentials for
your AgilePoint Service Account.
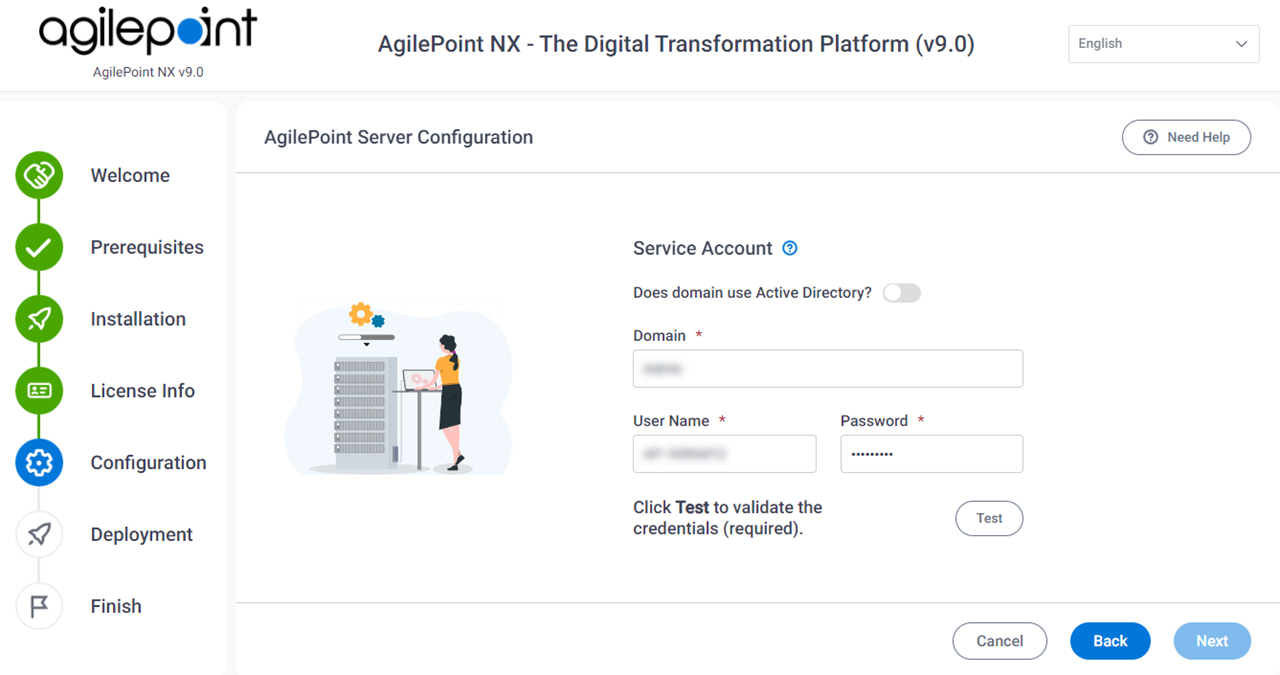
Field Name Definition Does domain use Active Directory?
- Description:
- Specifies whether the domain for your AgilePoint Service Account
uses on premises Active Directory.
If you want to integrate Active Directory with AgilePoint NX, this value must be Yes.
- Allowed Values:
- On - AgilePoint NX is configured to integrate with an existing AgilePoint Directory user store in your environment, and AgilePoint NX will use this Active Directory as the primary source for AgilePoint users. Do not select Yes unless you are certain that you have a specific AgilePoint Directory user store you want to integrate, and you have the authentication credentials for the Active Directory service account.
- Off - AgilePoint NX is not configured to use Active Directory as its primary user store. AgilePoint NX will provide the primary source for AgilePoint users.
- Default Value:
- Off
Domain
- Description:
- The authentication domain for the AgilePoint Service Account.
- Allowed Values:
- One line of text (a string) with no spaces that represents an authentication domain in your environment.
- Default Value:
- None
User Name
- Description:
- Specifies the user name for your
AgilePoint Service Account.
This account serves as your AgilePoint Service Account,
your AgilePoint System Account,
and the account
that AgilePoint uses to communicate with
SharePoint,
called the SharePoint impersonator.
This account must be set up before entering the account information here. The AgilePoint installer cannot create this account for you.
- Allowed Values:
- One line of text (a string) that represents a user name for an account with the required privileges detailed in Set Up the AgilePoint Service Account.
- Default Value:
- None
- Limitations:
- During installation, you must use the same AgilePoint Service account credentials for all AgilePoint systems. However, for security purposes, AgilePoint recommends you change separate these account credentials after installation.
For more information, refer to:
Password
- Description:
- The password for the AgilePoint Service Account.
- Allowed Values:
- An alphanumeric string that represents a password.
- Default Value:
- None
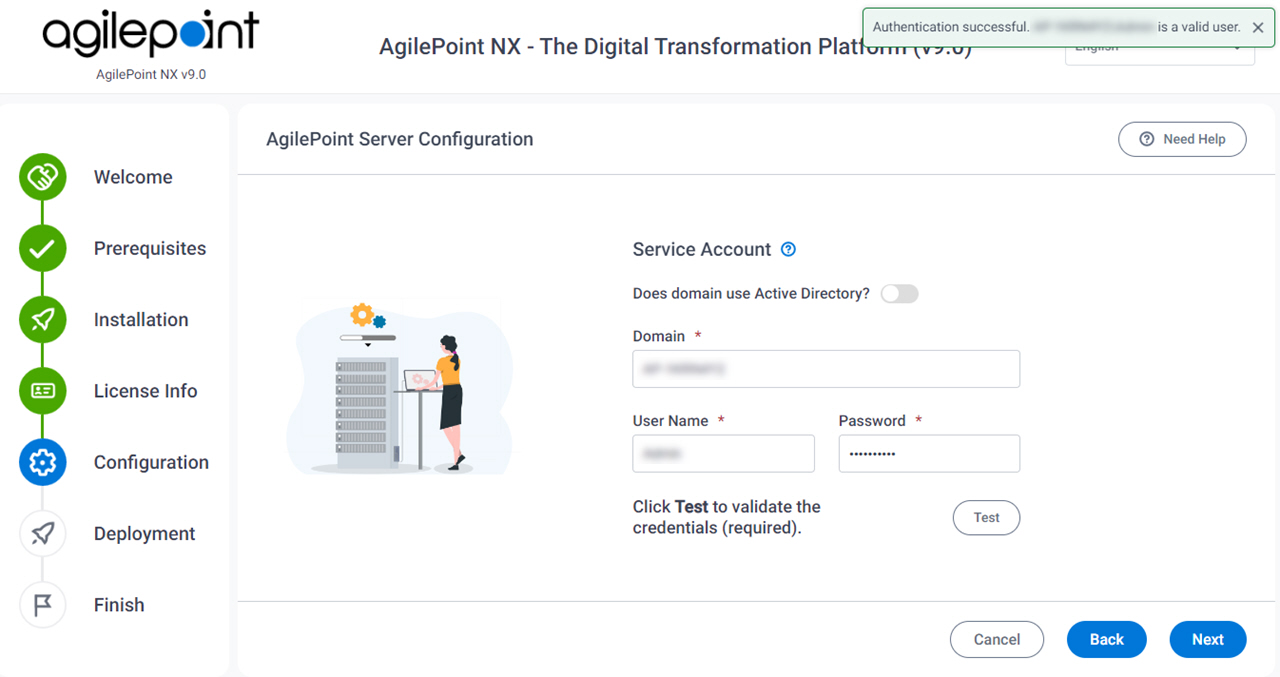
- To make sure the user credentials are valid, click Test.
If the user credentials are valid, the validation message shows.
- Click Next.
- On the Port Information screen, you can change the port numbers AgilePoint Server uses to communicate using various protocols. The default port numbers are verified as available for your system.
Note:You must create a firewall rule to allow AgilePoint Server to use these ports.
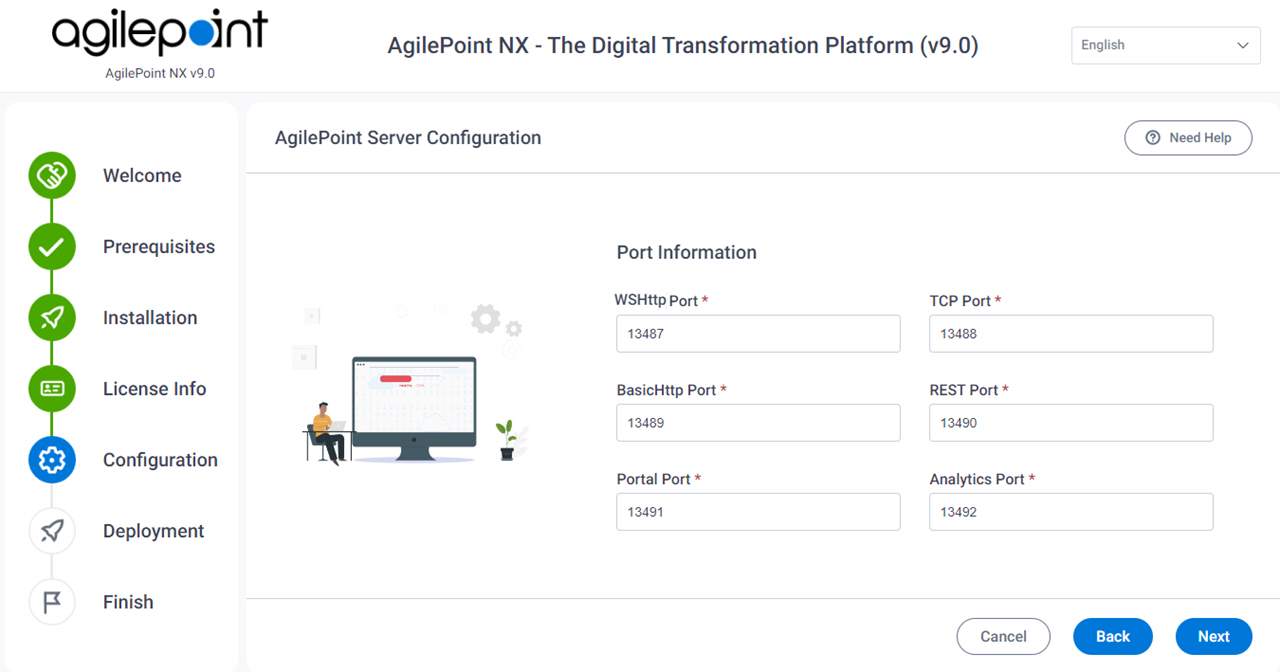
Field Name Definition WSHttp Port
- Description:
- A free, unique port AgilePoint Server instance can use for WSHttp binding.
This field is required.
- Allowed Values:
- A port number on your machine for WSHttp binding.
The port number must be unique (not used for any other purpose) and higher than 10000.
- Default Value:
- 13487
TCP Port
- Description:
- A free, unique port AgilePoint Server instance can use for TCP binding.
This field is required.
- Allowed Values:
- A port number on your machine for TCP binding.
The port number must be unique (not used for any other purpose) and higher than 10000.
- Default Value:
- 13488
BasicHttp Port
- Description:
- A free, unique port AgilePoint Server instance can use for BasicHttp binding.
This field is required.
- Allowed Values:
- A port number on your machine for
BasicHttp binding.
The port number must be unique (not used for any other purpose) and higher than 10000.
- Default Value:
- 13489
REST Port
- Description:
- A free, unique port AgilePoint Server instance can use for REST API calls.
- Allowed Values:
- A port number on your machine for REST API calls.
- Default Value:
- 13490
Portal Port
- Description:
- A free, unique port AgilePoint Server instance can use for
AgilePoint NX Portal.
This field is required.
- Allowed Values:
- A port number on your machine for AgilePoint NX Portal.
- Default Value:
- 13491
Analytics Port
- Description:
- A free, unique port AgilePoint Server instance can use for
Analytics Center.
This field is required.
- Allowed Values:
- A port number on your machine for Analytics Center.
- Default Value:
- 13492
- Click Next.
- On the Notification Email screen, enter this information for your SMTP email server.
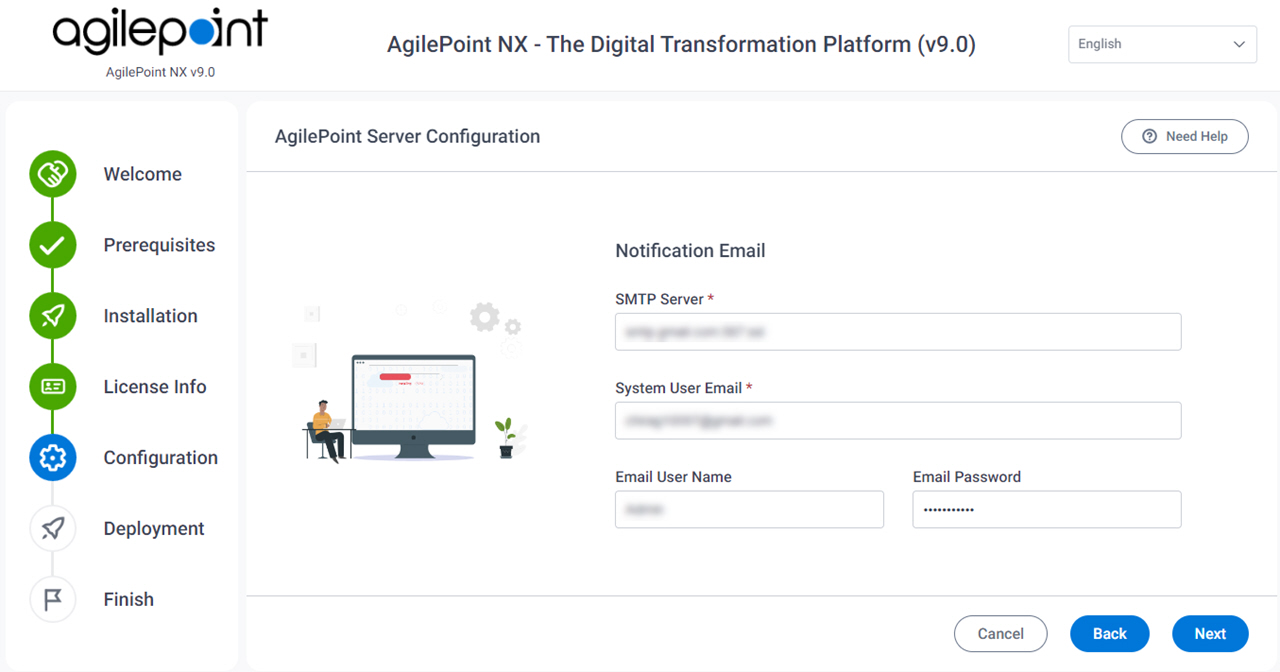
Field Name Definition SMTP Server
- Description:
- The URL for the SMTP email server for your organization.
- Allowed Values:
- One line of text (a string) in URL format.
- Default Value:
- None
System User Email
- Description:
- Specifies the email address for the
AgilePoint System Account.
This email address receives technical notifications from the AgilePoint NX system, such as important system errors.
- Allowed Values:
- One line of text (a string) in email address format.
- Default Value:
- None
Email User Name
- Description:
- Specifies the user name for an email account on the SMTP server AgilePoint NX can use to send emails. These include, but are not limited to, emails from apps and server-side components, such as AgilePoint Server.
- Allowed Values:
- One line of text (a string) that represents a user name for an email account on the SMTP server.
- Default Value:
- None
Email Password
- Description:
- Specifies the password for an email account on the SMTP server AgilePoint NX can use to send emails. These include, but are not limited to, emails from apps and server-side components, such as AgilePoint Server.
- Allowed Values:
- An alphanumeric string that represents a password.
- Default Value:
- None
- Click Next.
- On the AgilePoint Server Configuration screen, enter the connection information for your AgilePoint Server
workflow database.
For more information, refer to Create Databases for AgilePoint.
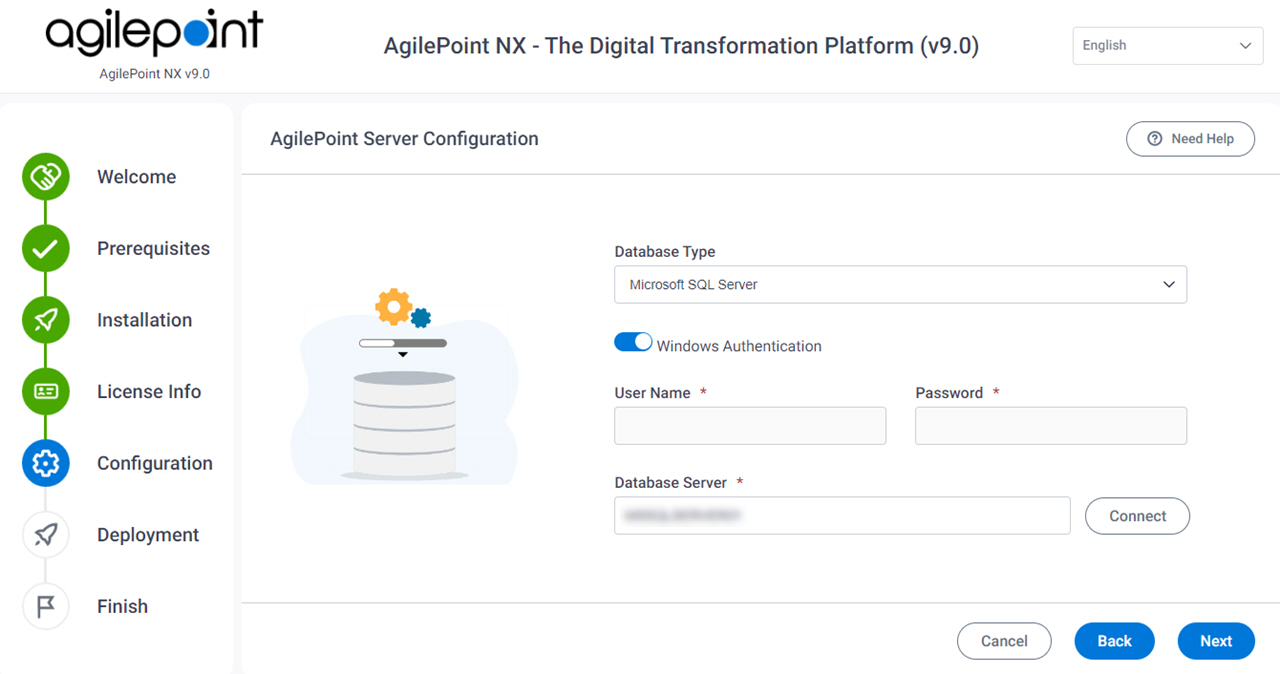
Field Name Definition Database Type
- Description:
- Specifies the database technology to store your data.
- Allowed Values:
-
- Microsoft SQL Server
- Default Value:
- Microsoft SQL Server
Windows Authentication
- Description:
- Specifies whether the database connection uses Windows authentication.
- Allowed Values:
-
- On - The database connection uses Windows Authentication, and the
machine's authenticated user connects to the database server.
If this option is selected, the User Name and Password fields are not required.
- Off - The database connection does not use Windows authentication.
If this option is selected, you must specify the user name and password for the authentication account AgilePoint Server uses to connect to the database.
- On - The database connection uses Windows Authentication, and the
machine's authenticated user connects to the database server.
- Default Value:
- On
User Name
- Description:
- The user name for the account AgilePoint Server uses to connect to the database.
- To Open this Field:
-
- Turn off Windows Authentication.
- Allowed Values:
- An alphanumeric string that contains a user name for the database.
- Default Value:
- None
Password
- Description:
- The password for the authentication account.
- To Open this Field:
-
- Turn off Windows Authentication.
- Allowed Values:
- An alphanumeric string that represents a password.
- Default Value:
- None
Database Server
- Description:
- Specifies the server name and domain for the AgilePoint database.
- Allowed Values:
- An alphanumeric string with no spaces that represents a database server name.
- Default Value:
- None
- Example:
-
- mydatabase
- mydatabase/WorkflowFolder
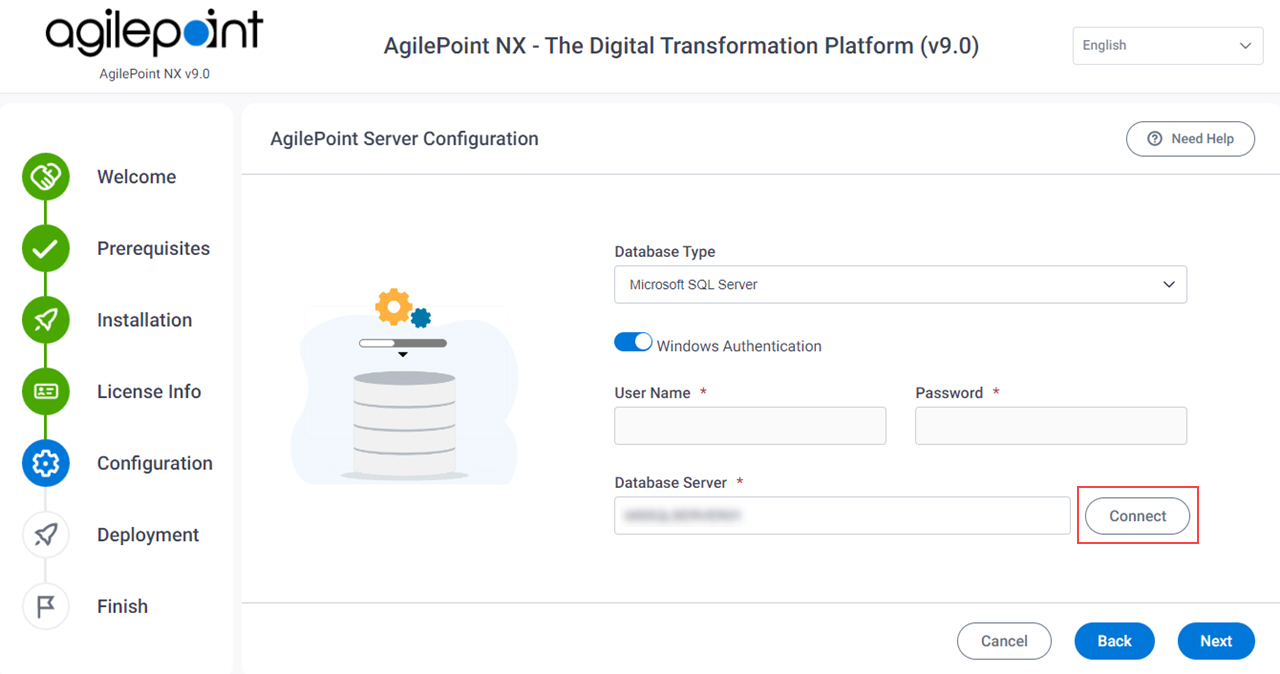
- Once you enter the database server name in Database Server field, click Connect to
authenticate the database user account and populate the names of the databases
on your database server.
- On the Database Location section, enter the following information
for your AgilePoint Server Workflow database.
This database holds the application data for AgilePoint NX. It is the main AgilePoint NX database.
For more information, refer to Create Databases for AgilePoint.
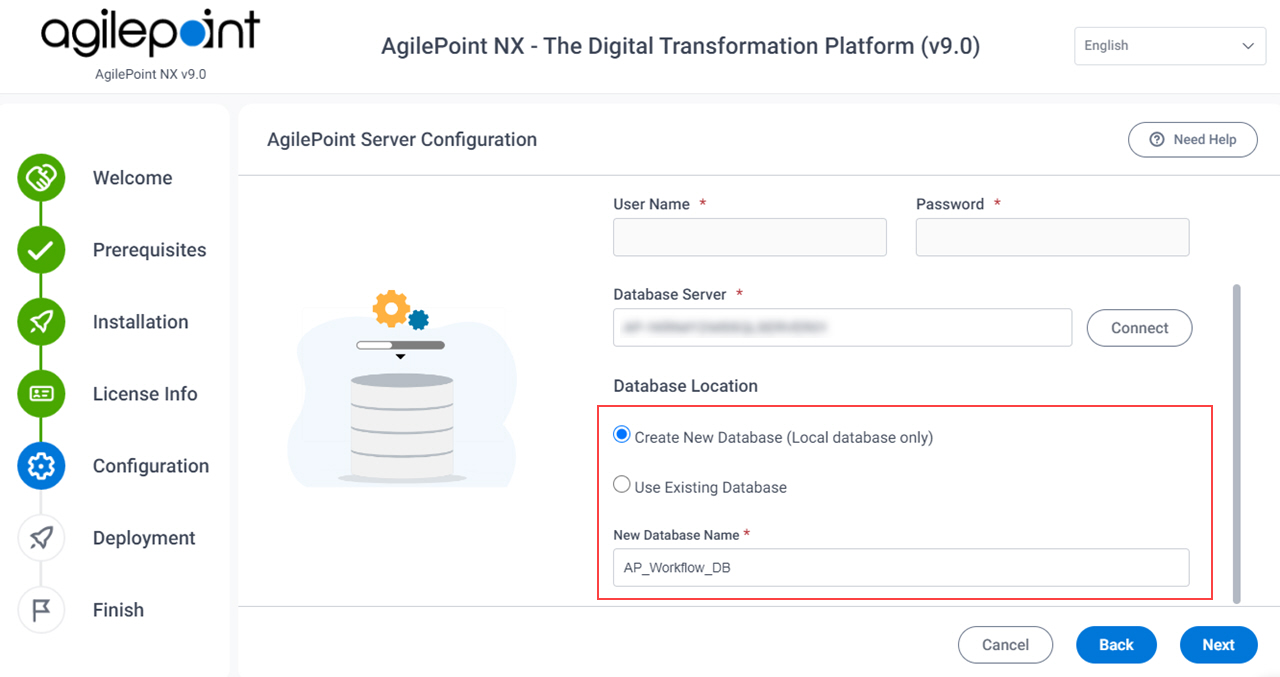
Field Name Definition Create New Database / Use Existing Database
- Description:
- Specifies whether to create a database for AgilePoint Server.
- Allowed Values:
-
- Create New Database - Specifies the name of a database to create for AgilePoint Server.
- Use Existing Database - Specifies the name of an existing database you want to use for AgilePoint Server.
- Default Value:
- Create New Database
New Database Name
- Description:
- Specifies the name of a new database you want to create
as your AgilePoint workflow database.
This option is only available if your database is installed on the same machine where you are installing this component.
- To Open this Field:
-
- Select Create New Database.
- Allowed Values:
- One line of text (a string).
Not Accepted:
- Spaces
- Default Value:
- AP_Workflow_DB
Database
- Description:
- Specifies the name of an existing database you want to use for AgilePoint Server.
- To Open this Field:
-
- Select Use Existing Database.
- Click Connect to populate the list.
- Allowed Values:
- A database name from the list.
- Default Value:
- None
- Click Next.
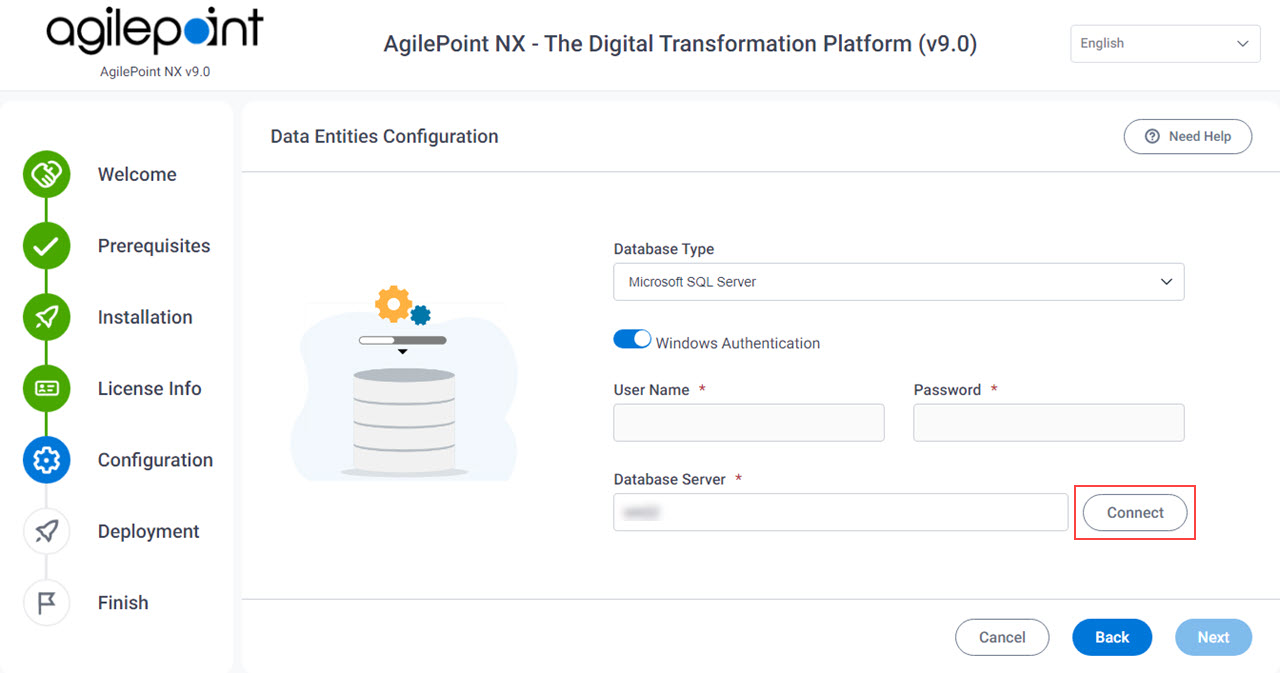
- On the Data Entities Configuration screen, enter the connection information for your AgilePoint NX Data Entities database.
For more information, refer to Create Databases for AgilePoint.
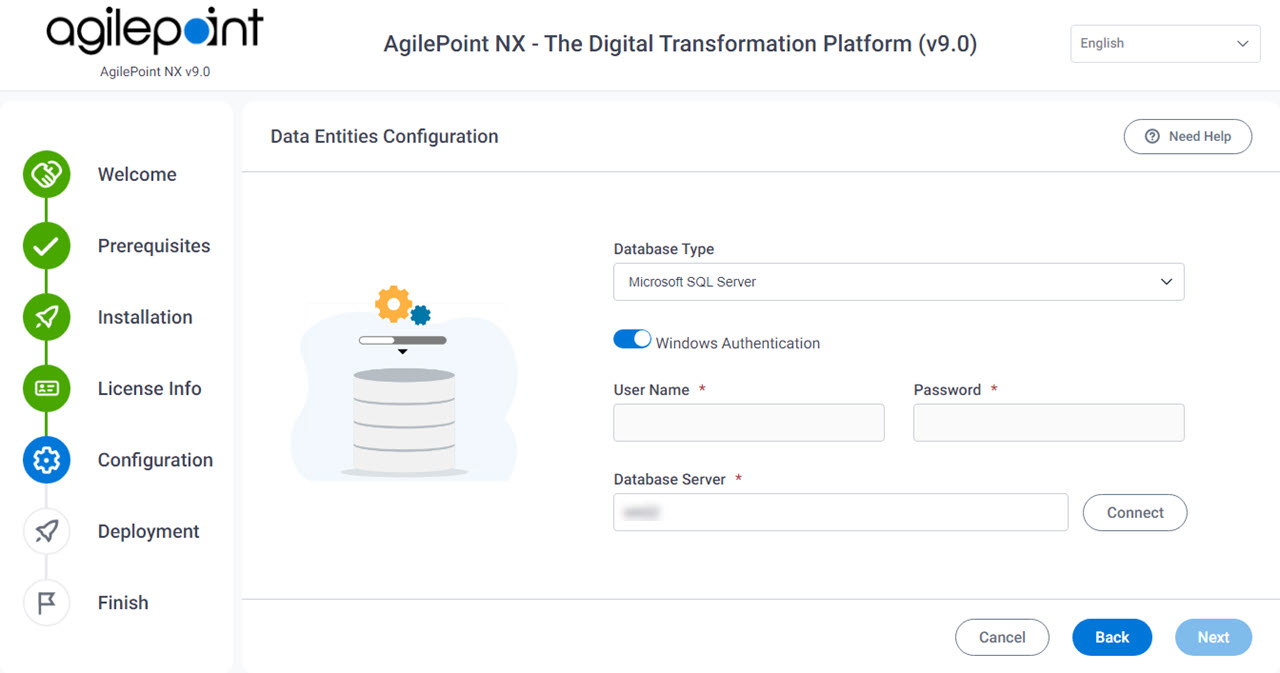
Field Name Definition Database Type
- Description:
- Specifies the database technology to store your data.
- Allowed Values:
-
- Microsoft SQL Server
- Default Value:
- Microsoft SQL Server
Windows Authentication
- Description:
- Specifies whether the database connection uses Windows authentication.
- Allowed Values:
-
- On - The database connection uses Windows Authentication, and the
machine's authenticated user connects to the database server.
If this option is selected, the User Name and Password fields are not required.
- Off - The database connection does not use Windows authentication.
If this option is selected, you must specify the user name and password for the authentication account AgilePoint Server uses to connect to the database.
- On - The database connection uses Windows Authentication, and the
machine's authenticated user connects to the database server.
- Default Value:
- On
User Name
- Description:
- The user name for the account AgilePoint Server uses to connect to the database.
- To Open this Field:
-
- Turn off Windows Authentication.
- Allowed Values:
- An alphanumeric string that contains a user name for the database.
- Default Value:
- None
Password
- Description:
- The password for the authentication account.
- To Open this Field:
-
- Turn off Windows Authentication.
- Allowed Values:
- An alphanumeric string that represents a password.
- Default Value:
- None
Database Server
- Description:
- Specifies the server name and domain for the AgilePoint database.
- Allowed Values:
- An alphanumeric string with no spaces that represents a database server name.
- Default Value:
- None
- Example:
-
- mydatabase
- mydatabase/WorkflowFolder
- Once you enter the database server name in Database Server field, click Connect to
authenticate the database user account and populate the names of the databases
on your database server.
- On the Database Location section, enter the following information for your AgilePoint NX Data Entities database.
This database holds the data for the Data Entities component.
For more information, refer to Create Databases for AgilePoint.
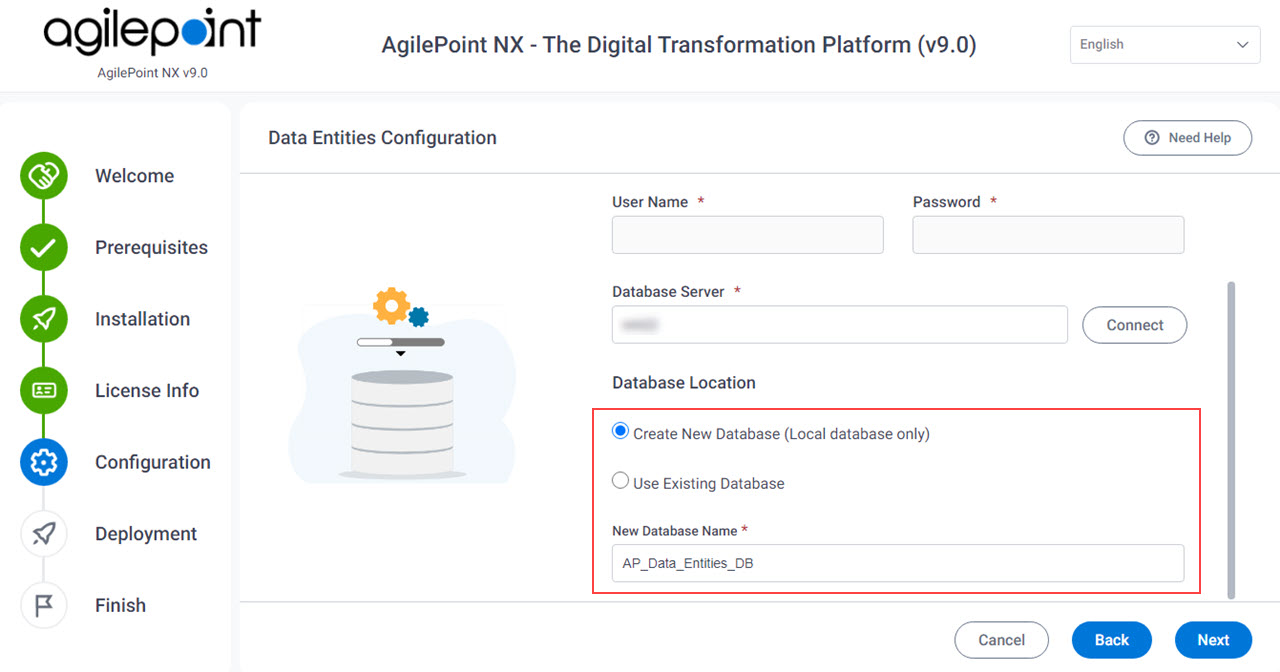
Field Name Definition Create New Database / Use Existing Database
- Description:
- Specifies whether to create a database for AgilePoint NX Data Entities.
- Allowed Values:
-
- Create New Database - Specifies the name of a database to create for Data Entities.
- Use Existing Database - Specifies the name of an existing database you want to use for Data Entities.
- Default Value:
- Create New Database
New Database Name
- Description:
- Specifies the name of a new database you want to create
as your
AgilePoint NX Data Entities database.
This option is only available if your database is installed on the same machine where you are installing this component.
- To Open this Field:
-
- Select Create New Database.
- Allowed Values:
- One line of text (a string).
Not Accepted:
- Spaces
- Default Value:
- AP_Data_Entities_DB
Database
- Description:
- Specifies the name of an existing database you want to use for AgilePoint NX Data Entities.
- To Open this Field:
-
- Select Use Existing Database.
- Click Connect to populate the list.
- Allowed Values:
- A database name from the list.
- Default Value:
- None
- Click Next.
- On the AgilePoint Analytics Configuration screen, enter the connection information for your Analytics Center database.
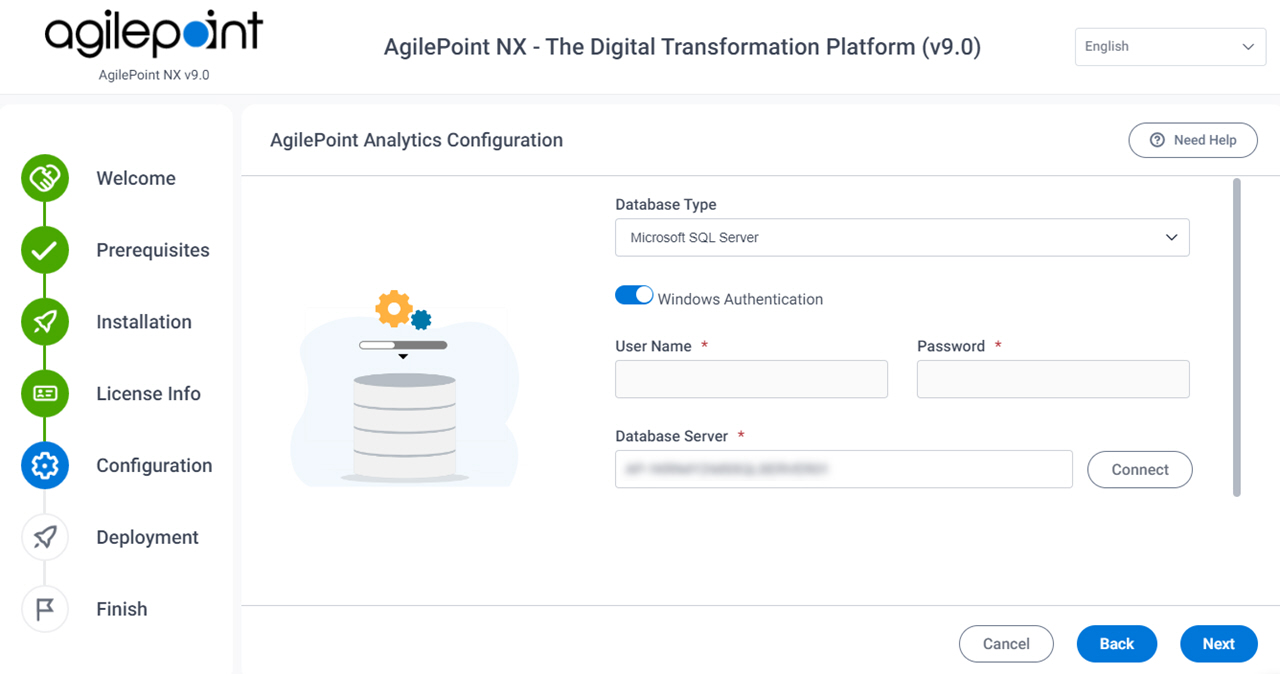
Field Name Definition Database Type
- Description:
- Specifies the database technology to store your data.
- Allowed Values:
-
- Microsoft SQL Server
- Default Value:
- Microsoft SQL Server
Windows Authentication
- Description:
- Specifies whether the database connection uses Windows authentication.
- Allowed Values:
-
- On - The database connection uses Windows Authentication, and the
machine's authenticated user connects to the database server.
If this option is selected, the User Name and Password fields are not required.
- Off - The database connection does not use Windows authentication.
If this option is selected, you must specify the user name and password for the authentication account AgilePoint Server uses to connect to the database.
- On - The database connection uses Windows Authentication, and the
machine's authenticated user connects to the database server.
- Default Value:
- On
User Name
- Description:
- The user name for the account AgilePoint Server uses to connect to the database.
- To Open this Field:
-
- Turn off Windows Authentication.
- Allowed Values:
- An alphanumeric string that contains a user name for the database.
- Default Value:
- None
Password
- Description:
- The password for the authentication account.
- To Open this Field:
-
- Turn off Windows Authentication.
- Allowed Values:
- An alphanumeric string that represents a password.
- Default Value:
- None
Database Server
- Description:
- Specifies the server name and domain for the AgilePoint database.
- Allowed Values:
- An alphanumeric string with no spaces that represents a database server name.
- Default Value:
- None
- Example:
-
- mydatabase
- mydatabase/WorkflowFolder
- Once you enter the database server name in Database Server field, click Connect to
authenticate the database user account and populate the names of the databases
on your database server.
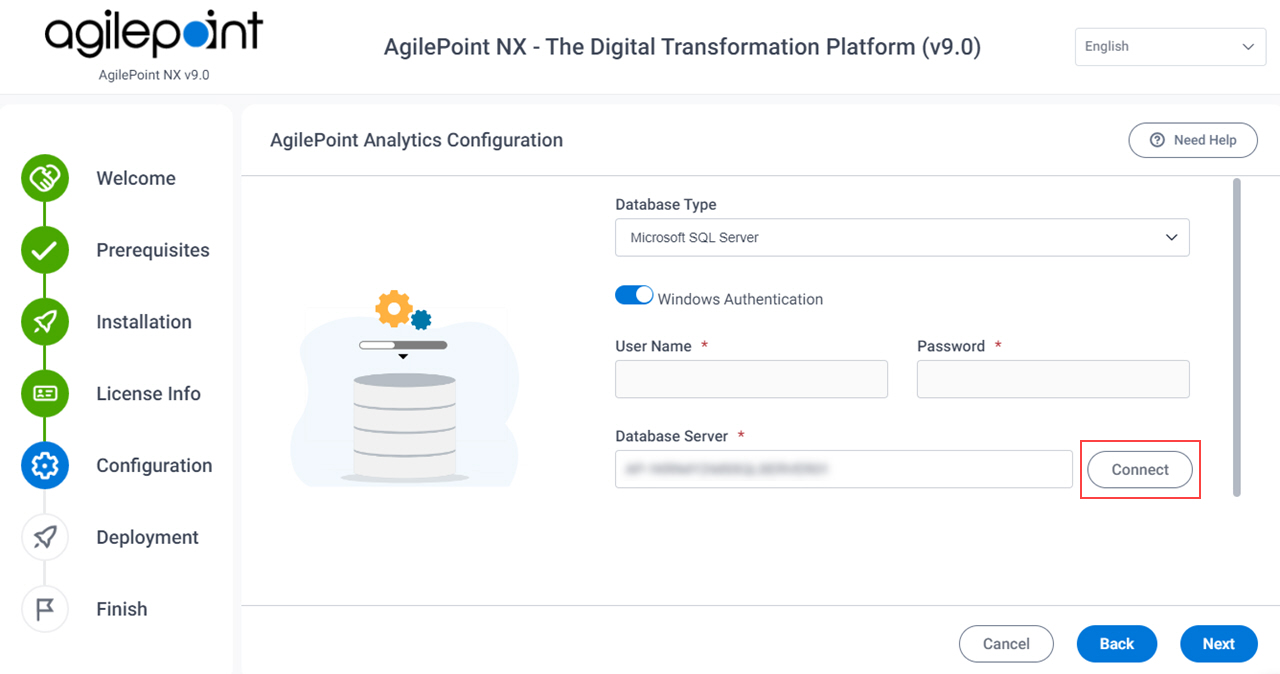
- On the Database Location section, enter this information for
your Analytics Center database.
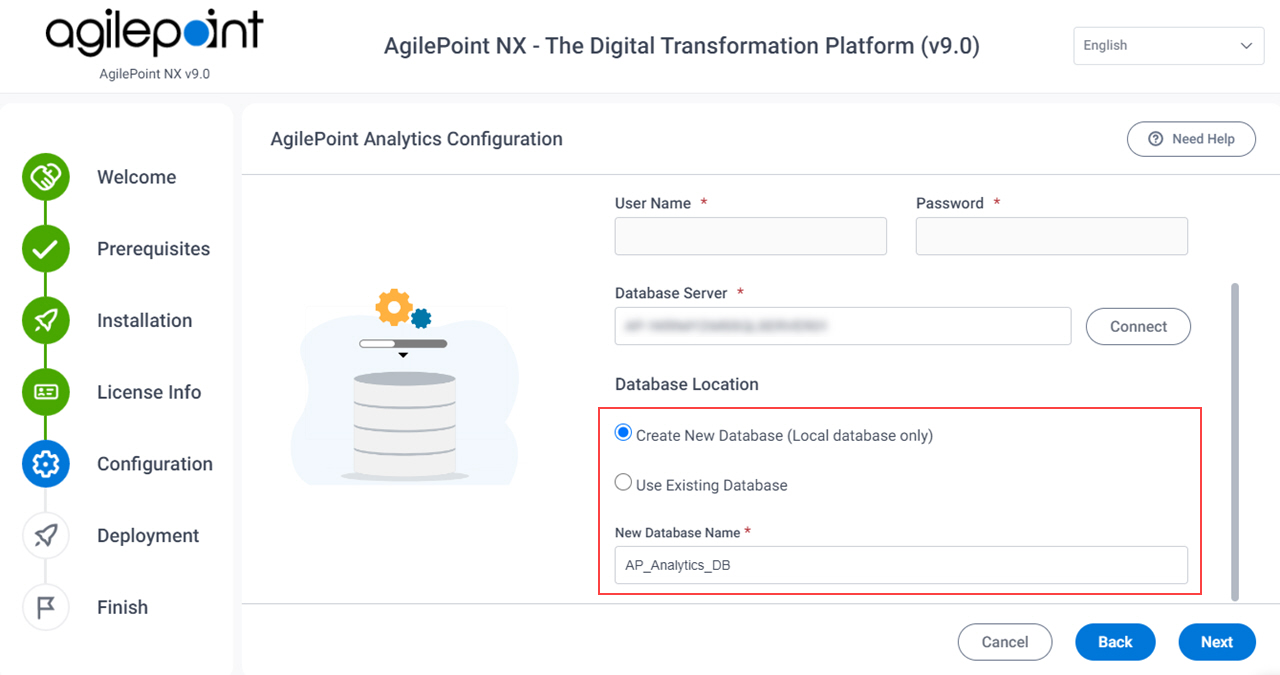
Field Name Definition Create New Database / Use Existing Database
- Description:
- Specifies whether to create a database for Analytics Center.
- Allowed Values:
-
- Create New Database - Specifies the name of a database to create for Analytics Center.
- Use Existing Database - Specifies the name of an existing database you want to use for Analytics Center.
- Default Value:
- Create New Database
New Database Name
- Description:
- Specifies the name of a new database you want to create
as your
Analytics Center database.
This option is only available if your database is installed on the same machine where you are installing this component.
- To Open this Field:
-
- Select Create New Database.
- Allowed Values:
- One line of text (a string).
Not Accepted:
- Spaces
- Default Value:
- AP_Analytics_DB
Database
- Description:
- Specifies the name of an existing database you want to use for Analytics Center.
- To Open this Field:
-
- Select Use Existing Database.
- Click Connect to populate the list.
- Allowed Values:
- A database name from the list.
- Default Value:
- None
- Click Next.
- On the Deployment screen, click Deploy.
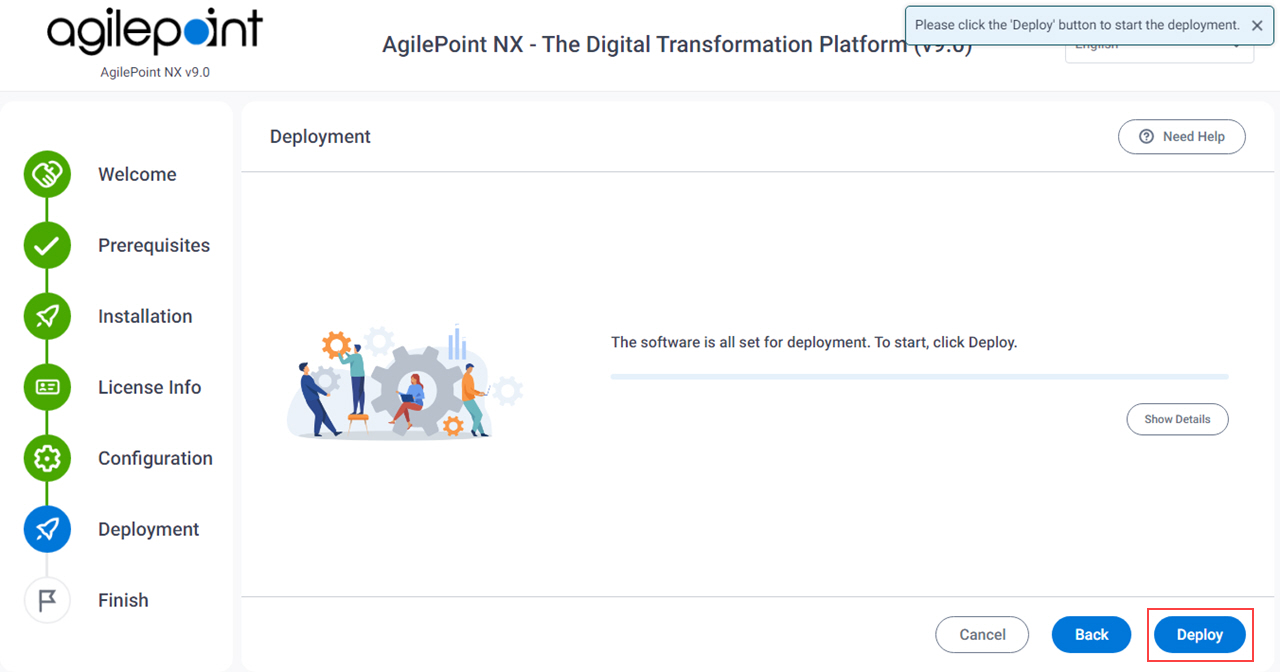
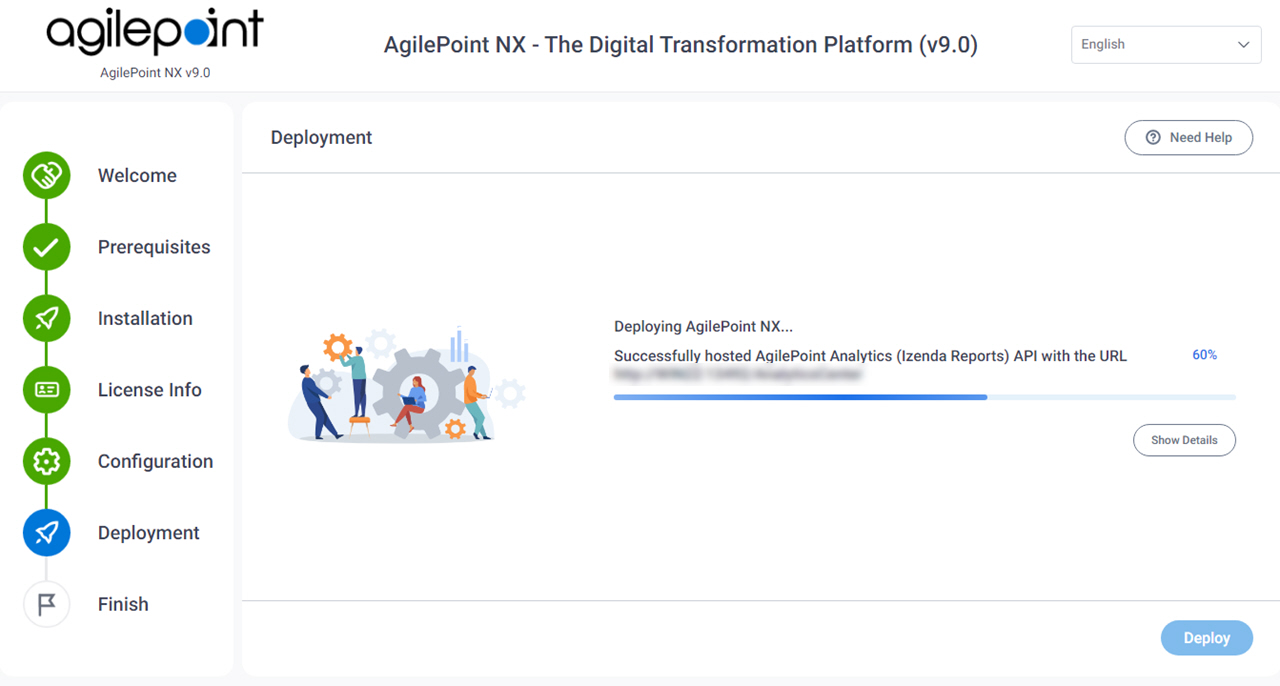
The AgilePoint Server installation runs. If any error messages shows on the screen, you can use the log messages to troubleshoot the errors. If an error exists, contact AgilePoint Customer Support.
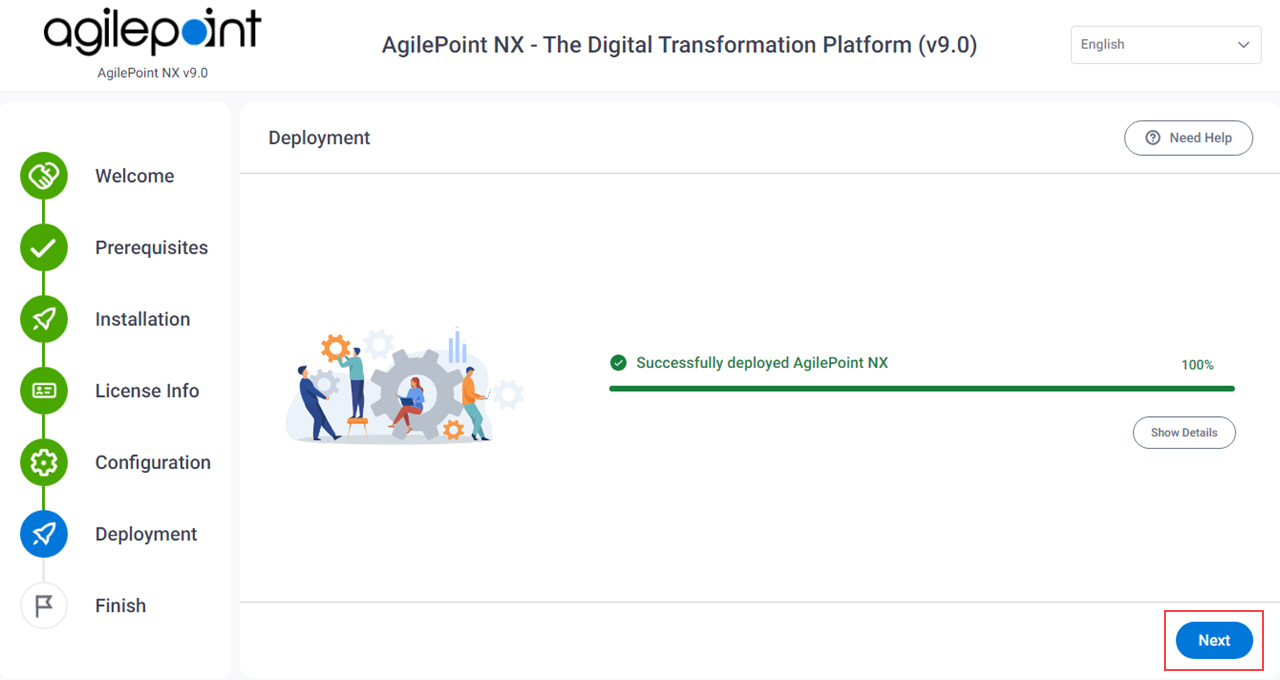
- After the AgilePoint Server installation is complete, click Next.
- On the Finish screen, take note of the important information about your environment. You will
need this information later.
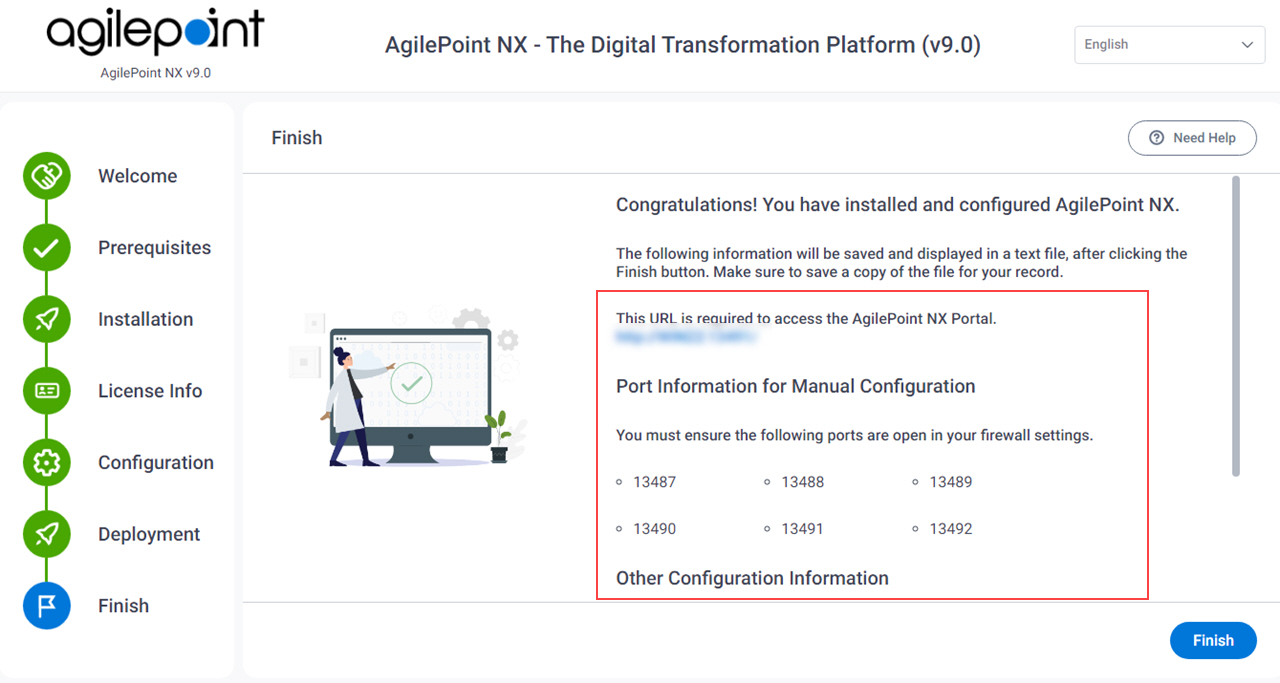
- Click Finish.
- A text file appears with the summary information for your installation. Save this file where you can find it. You will need this information later, especially when you install SharePoint Integration.


