(Example) How to Get the Access Token Credentials from OneDrive for Business
To get the access token credentials from OneDrive for Business, do the procedure in this topic.
Prerequisites
- One of these account types:
- Microsoft 365 Trial account.
- Microsoft 365 Business account. There is more than one type of Business accounts.
- Microsoft 365 Enterprise account. There may be more than one type of Enterprise account.
- SharePoint Online account. There is more than one type of SharePoint Online account.
For more information, refer to the Microsoft documentation in Third-Party Vendor Documentation.
Good to Know
- OAuth 2.0 access tokens require a 2-way exchange of credentials between AgilePoint NX and the external service. This means that you must get the credentials from the third-party service to paste in the AgilePoint NX access token, and get the redirect URI from AgilePoint NX to paste in the external service. This requires you to open both the AgilePoint NX access token and the third-party service at the same time, so you can copy and paste from one screen to the other.
This topic shows the suggested procedure for OneDrive for Business. The exact procedure for your access token depends on whether you already have a connection (usually called an app) configured in the external service.
- This topic gives one example. The procedure may vary depending on your configuration and account settings in the third-party service.
Step 1: Start Creating an Access Token in AgilePoint NX
First, create a new access token in AgilePoint NX for OneDrive for Business.
How to Start
- There is more than one way to create an access token.
For more information, refer to Access Token for OneDrive for Business.
Procedure
- In AgilePoint NX, open the access token configuration screen
for OneDrive for Business.
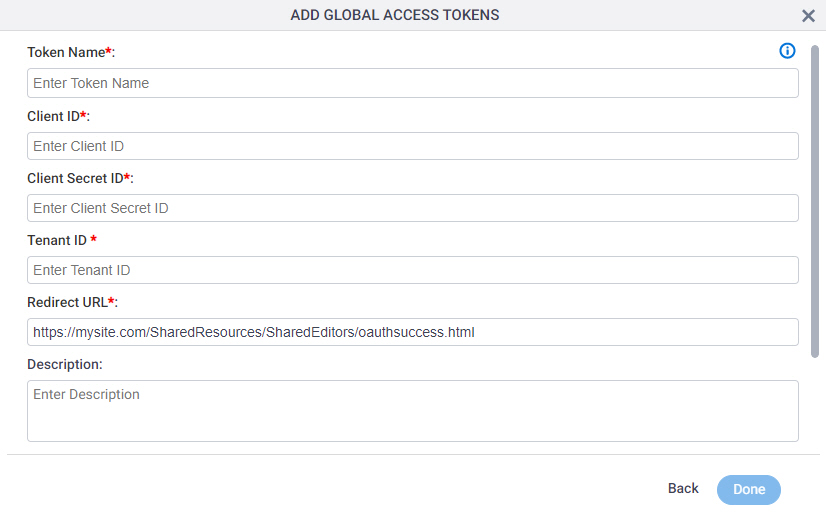
Do not configure the access token credentials.
Keep the access token configuration screen open in AgilePoint NX, but do not save it.
Step 2: Create an App in OneDrive for Business
Next, create an app in OneDrive for Business.
How to Start
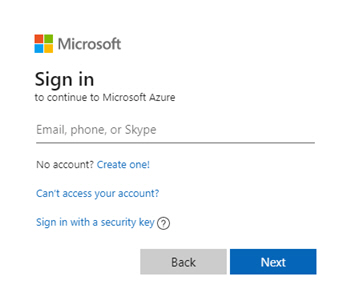
- In a new web browser tab, sign in to Microsoft Azure Portal with Microsoft 365:
Procedure
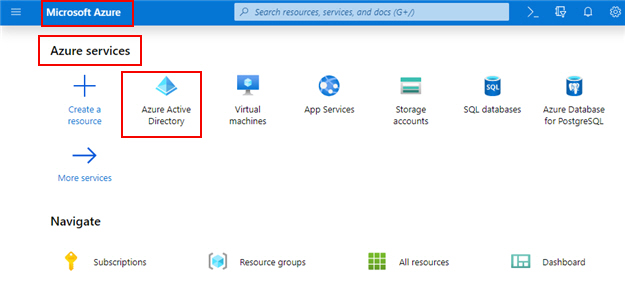
- On the Microsoft Azure screen, in the Azure services section, click Azure Active Directory.
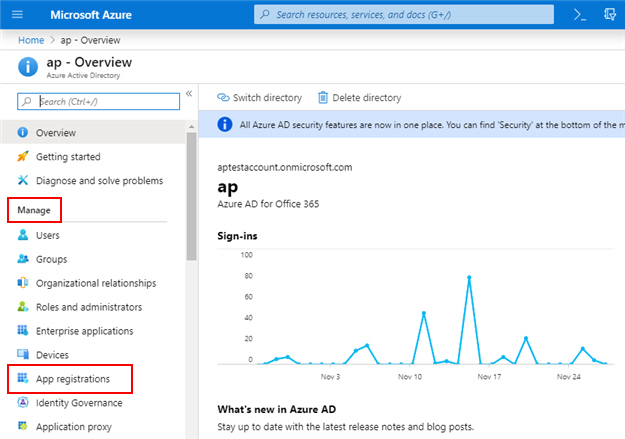
- On the navigation pane, in the Manage section, click App registrations.
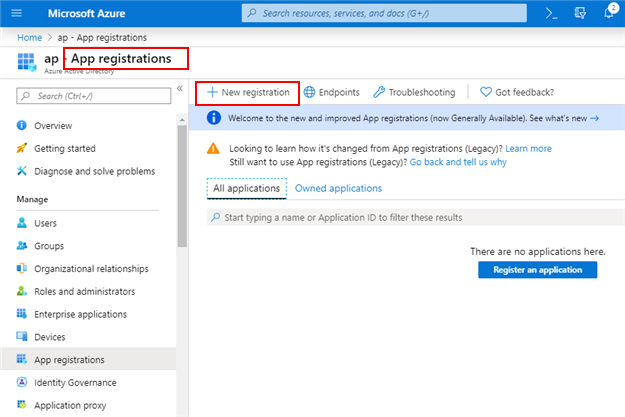
- On the App registrations screen, click New Registration.
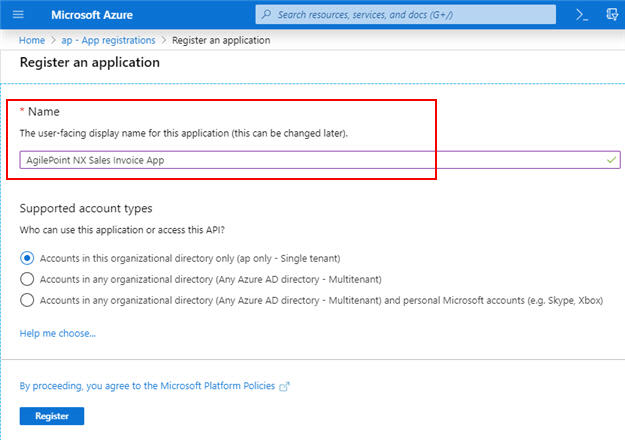
- On the Register an application screen, in the Name field,
enter an app name.
AgilePoint recommends you use an app name associated with your AgilePoint NX app or the way you want to use the app in AgilePoint NX.
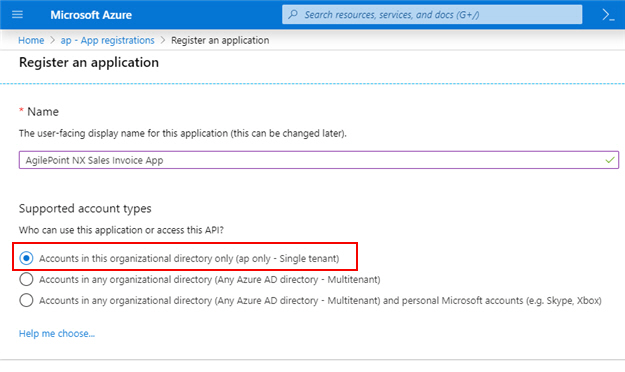
- On the Supported account types section, select the value that is associated with your OneDrive for Business account type.
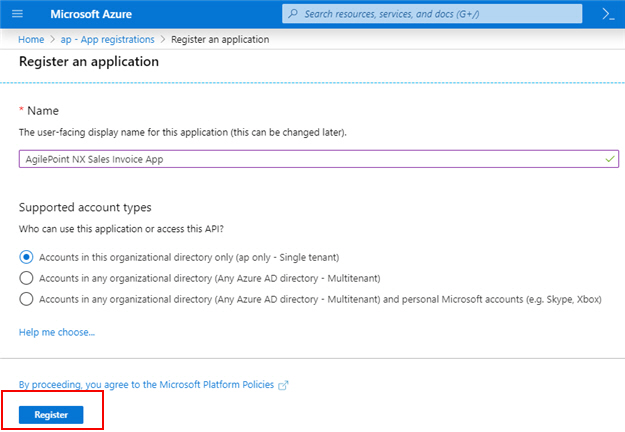
- Click Register.
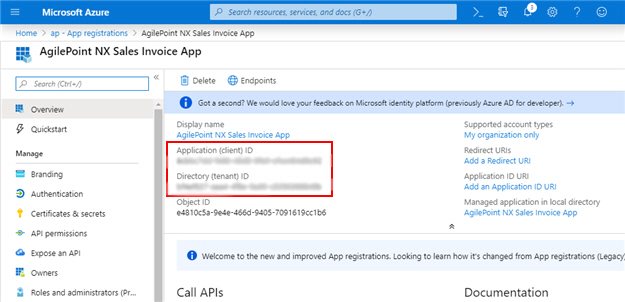
The AgilePoint NX Sales Invoice App screen shows the client ID and tenant ID.
Step 3: Copy the Client ID and Tenant ID from the OneDrive for Business App
Next, copy the client ID and tenent ID from the OneDrive for Business app to your AgilePoint NX access token.
How to Start
- In one web browser tab,
on the App registrations section, open the app you created in OneDrive for Business.
For more information, refer to Create an App in OneDrive for Business.
- In a different web browser tab, in AgilePoint NX, open the OneDrive for Business access token configuration screen.
Procedure
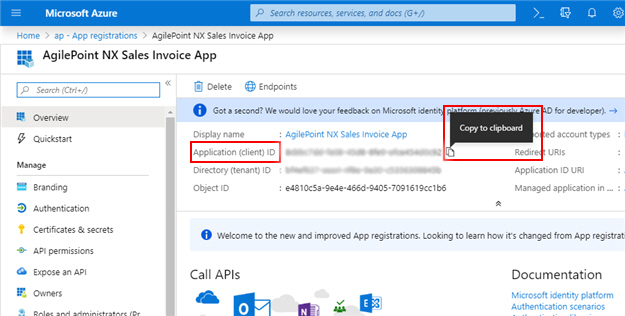
- In OneDrive for Business, hover over the Application (client) ID field,
and click Copy to clipboard.
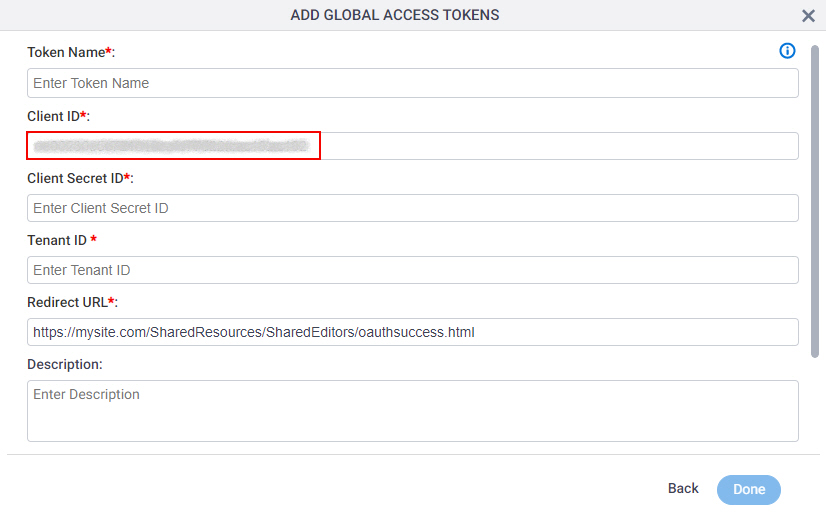
- In AgilePoint NX, on the OneDrive for Business Access Token Configuration screen, in the Client ID field,
paste the Application (client) ID value from OneDrive for Business.
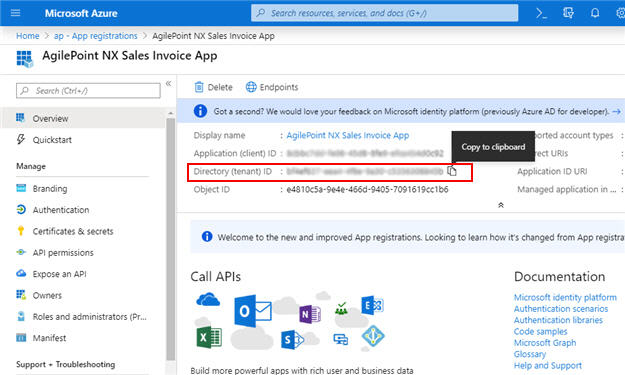
- In OneDrive for Business, on the Directory (tenant) ID field, keep the cursor over,
and click Copy to clipboard.
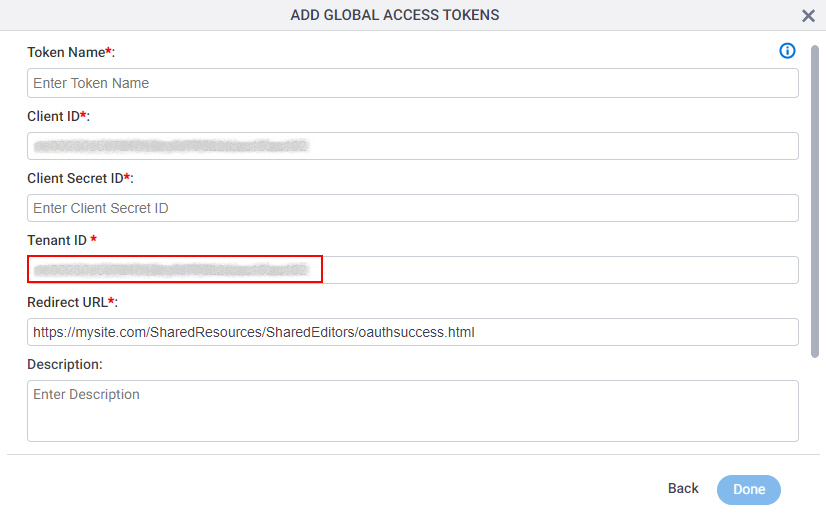
- In AgilePoint NX, on the OneDrive for Business Access Token Configuration screen, in the Tenant ID field, paste the Directory (tenant) ID value from OneDrive for Business.
Step 4: Configure the Redirect URI for the OneDrive for Business App
Next, configure the Redirect URI in the OneDrive for Business app that connects to your AgilePoint NX app.
How to Start
- In one web browser tab, in AgilePoint NX, open the OneDrive for Business access token configuration screen.
- In a different web browser tab,
open the OneDrive for Business app configuration screen.
For more information, refer to Copy the Client ID and Tenant ID from the OneDrive for Business App.
Procedure
- In AgilePoint NX, on the OneDrive for Business Access Token Configuration screen,
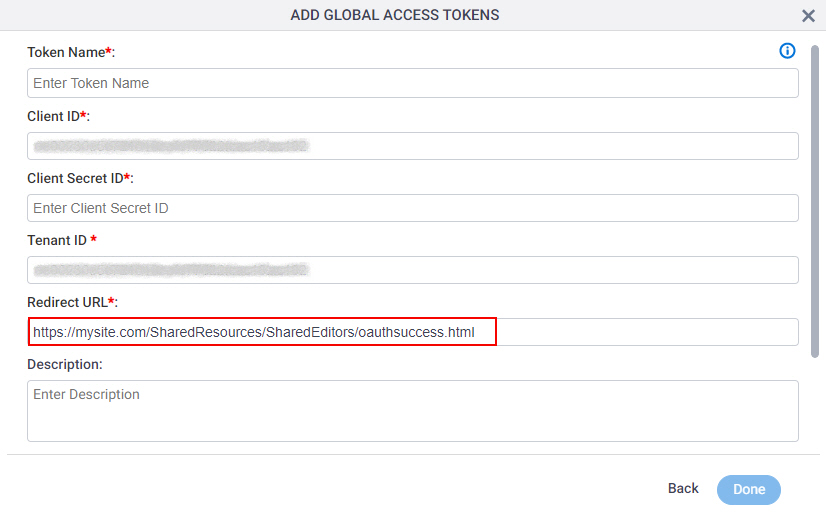
in the Redirect URL field, copy the value.
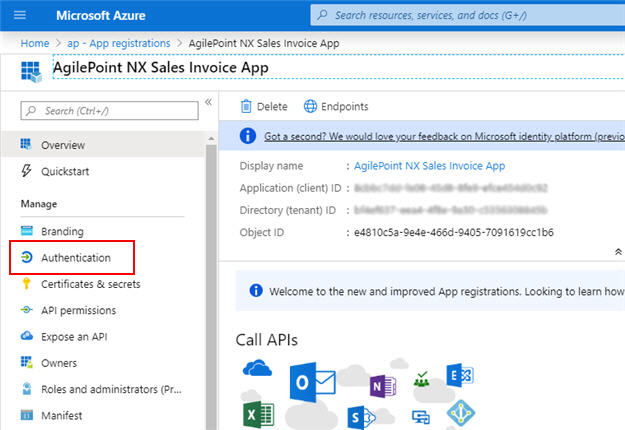
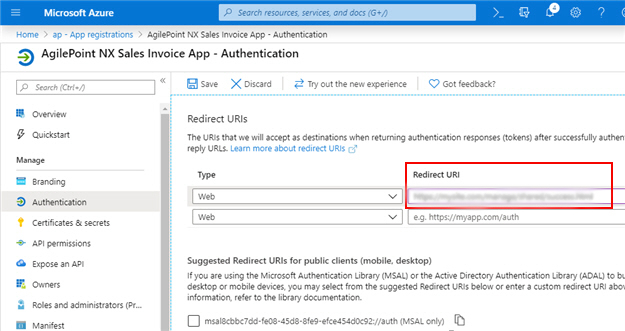
- In OneDrive for Business, on the AgilePoint NX Sales Invoice App screen, click Authentication.
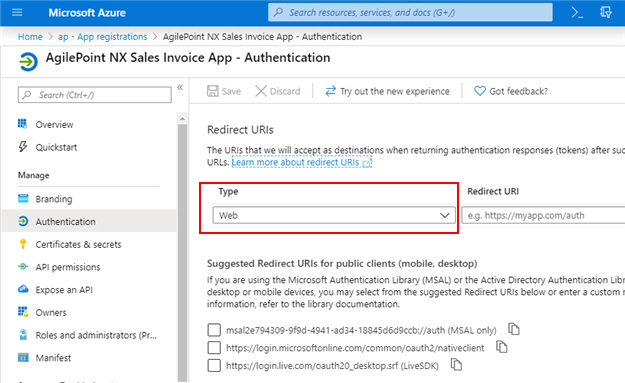
- In the Type field, select your application type.
For AgilePoint NX apps, this value will often be Web, but it depends how your app is used.
For more information, refer to the OneDrive for Business documentation in Third-Party Vendor Documentation.
- In the Redirect URI field, paste the Redirect URL value from AgilePoint NX.
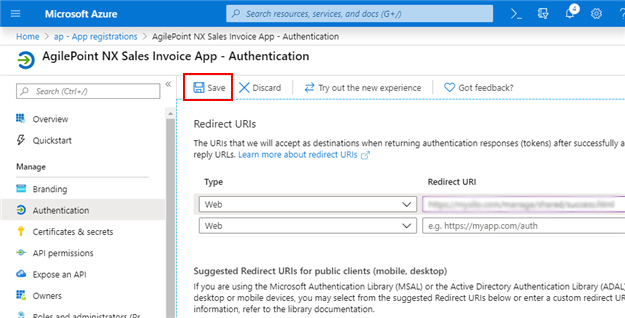
- Click Save.
Step 5: Configure the Client Secret for the OneDrive for Business App
Next, configure the Client Secret for the OneDrive for Business app.
Procedure
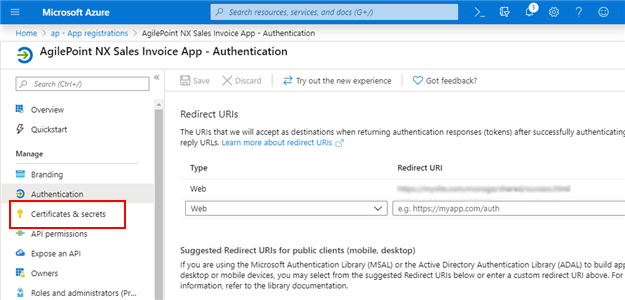
- In the left side, click Certificates & secrets.
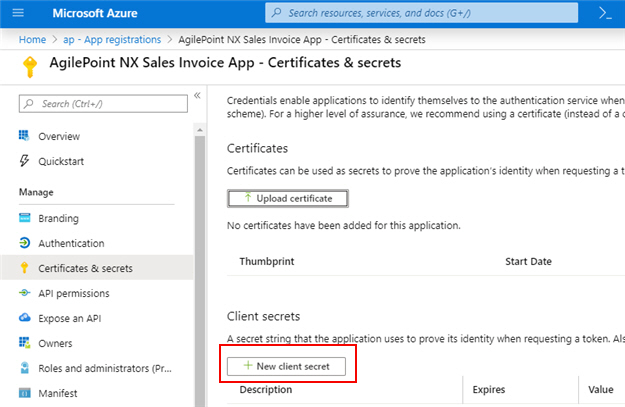
- On the Certificates & secrets screen, click New client secret.
- In the Description field, enter Client Secret ID.
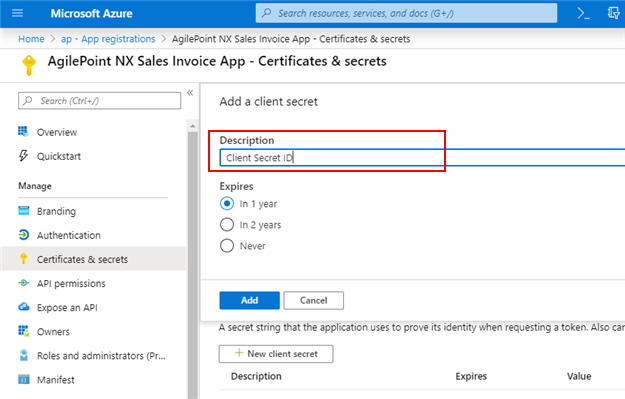
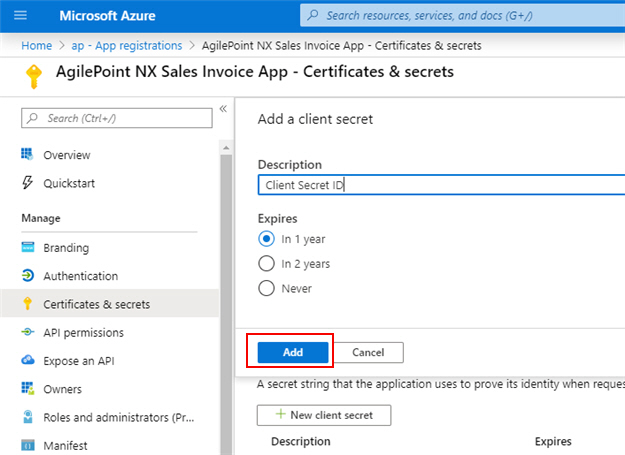
- Click Add.
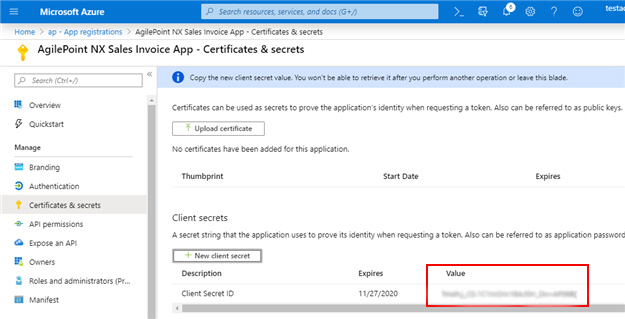
The client secret shows.
Step 6: Copy the Client Secret from the OneDrive for Business App
Next, copy the Client Secret from the OneDrive for Business app to your AgilePoint NX access token.
How to Start
- In one web browser tab,
on the App registrations section, open the app you created in OneDrive for Business.
For more information, refer to Create an App in OneDrive for Business.
- In a different web browser tab, in AgilePoint NX, open the OneDrive for Business access token configuration screen.
Procedure
- In OneDrive for Business, on the Certificates & secrets screen,
for the value associated with the Client Secret ID for your app,
click Copy to clipboard.
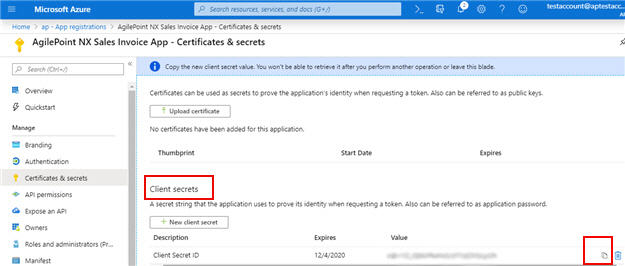
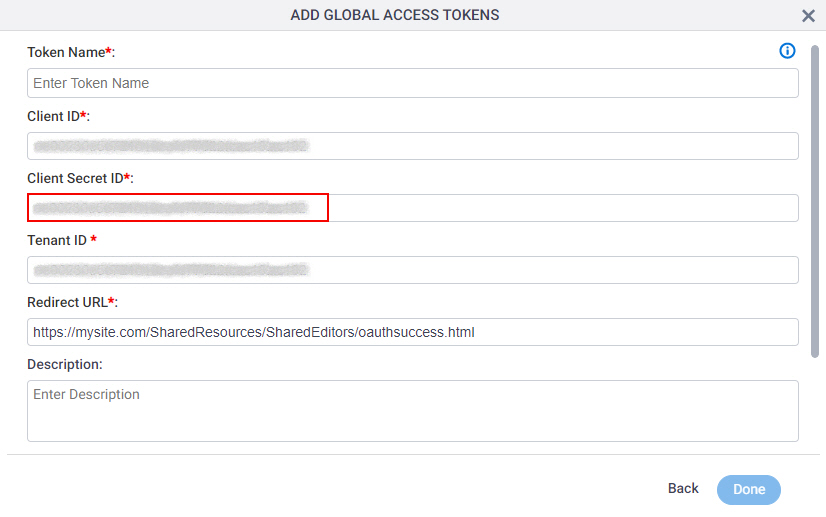
- In AgilePoint NX, on the OneDrive for Business Access Token Configuration screen, in the Client Secret ID field, paste the Client Secret ID value from OneDrive for Business.
Step 7: Configure the Permissions for the OneDrive for Business App
Next, configure the permissions for your OneDrive for Business app.
How to Start
- On the App registrations section, open the app you created in OneDrive for Business.
For more information, refer to Create an App in OneDrive for Business.
Procedure
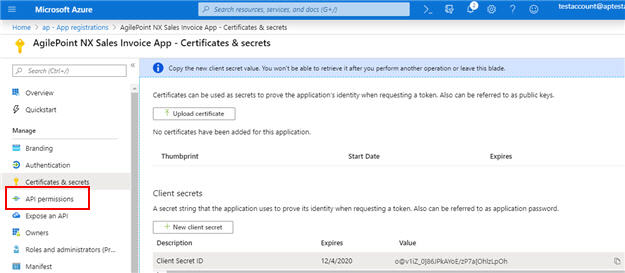
- On the Certificate & secrets screen, in the Manage section, click API permissions.
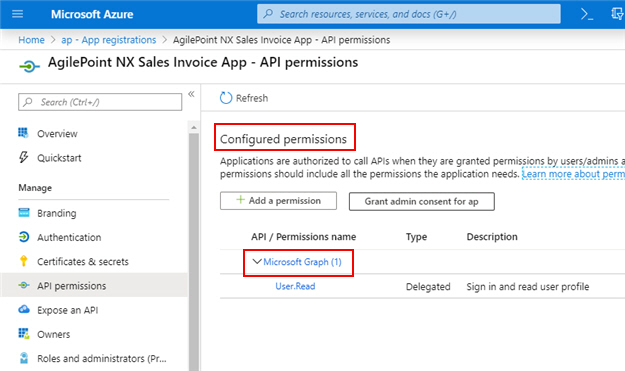
- On the Configured permissions screen, click Microsoft Graph.
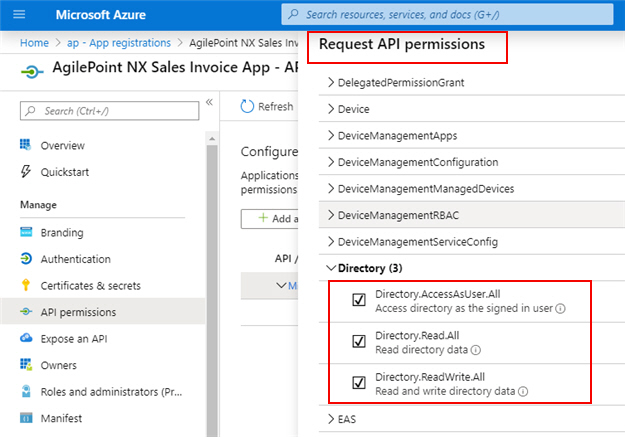
- On the Request API permissions screen, click Directory.
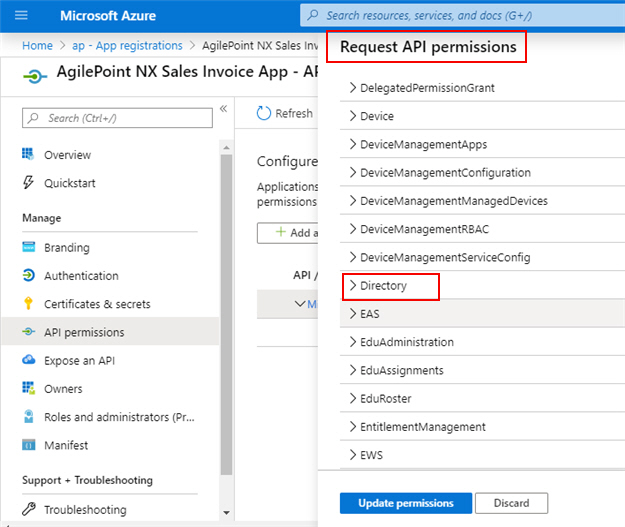
- On the Directory tab, select these checkbox:
- Directory.AccessAsUser.All
- Directory.Read.All
- Directory.ReadWrite.All
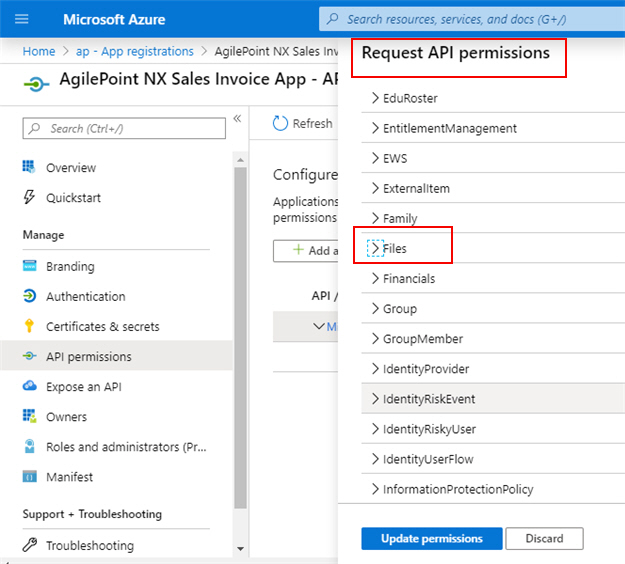
- On the Request API permissions screen, click Files.
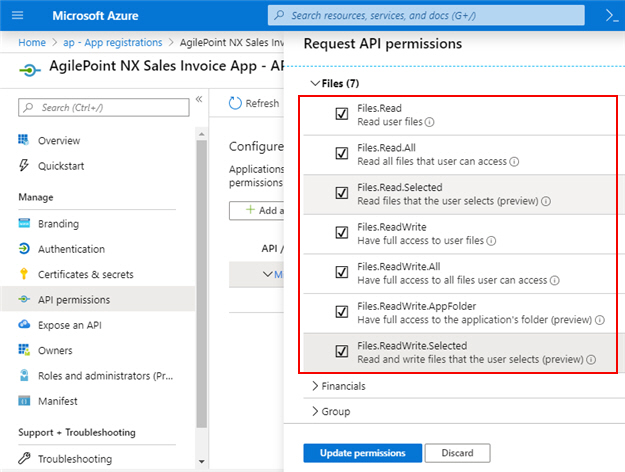
- On the Files tab, select these checkboxes.
- Files.Read
- Files.Read.All
- Files.Read.Selected
- Files.ReadWrite
- Files.ReadWrite.All
- Files.ReadWrite.AppFolder
- Files.ReadWrite.Selected
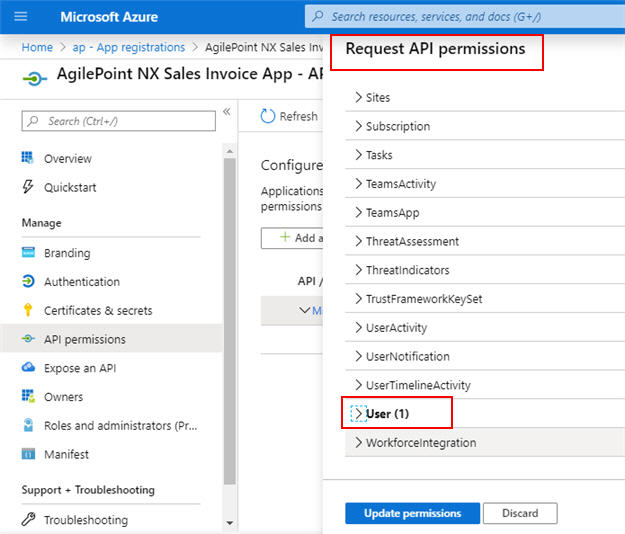
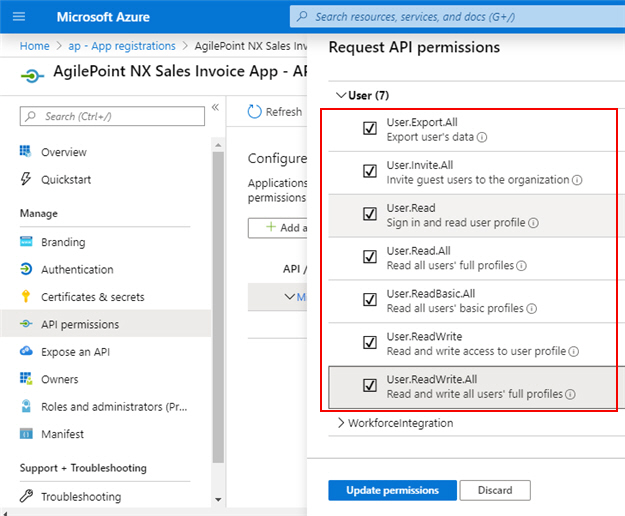
- On the Request API permissions screen, click User.
- On the User tab, select these checkboxes.
- User.Export.All
- User.Invite.All
- User.Read
- User.Read.All
- User.ReadBasic.All
- User.ReadWrite
- User.ReadWrite.All
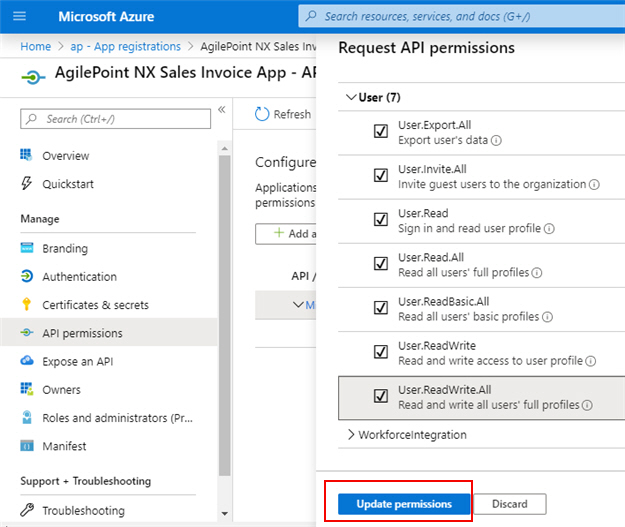
- Click Update permissions.
Step 8: Complete the AgilePoint NX Access Token
Next, complete the AgilePoint NX access token configuration for OneDrive for Business.
How to Start
- In AgilePoint NX, open the OneDrive for Business access token configuration screen.
Procedure
- In AgilePoint NX, on the OneDrive for Business Access Token Configuration screen,
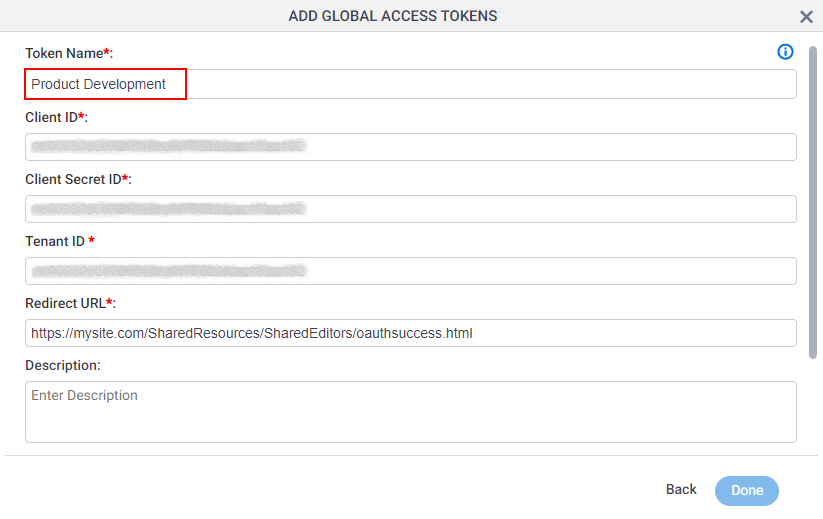
in the Token Name field, enter a name for the access token.
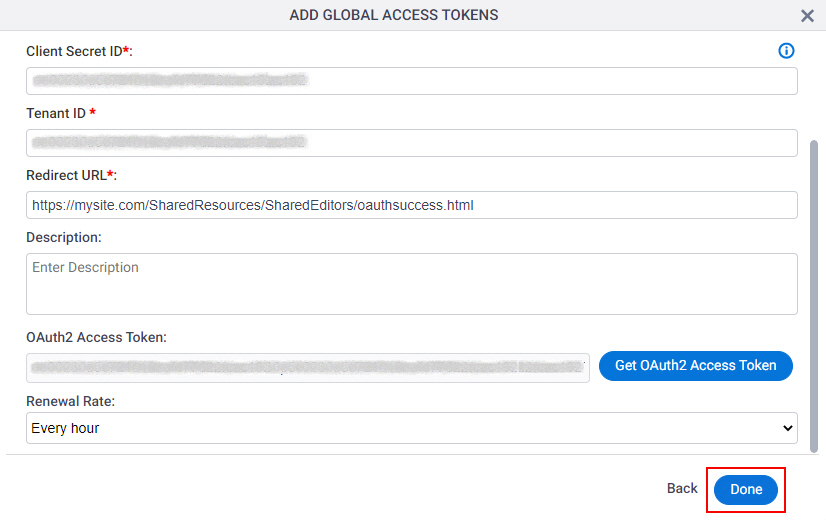
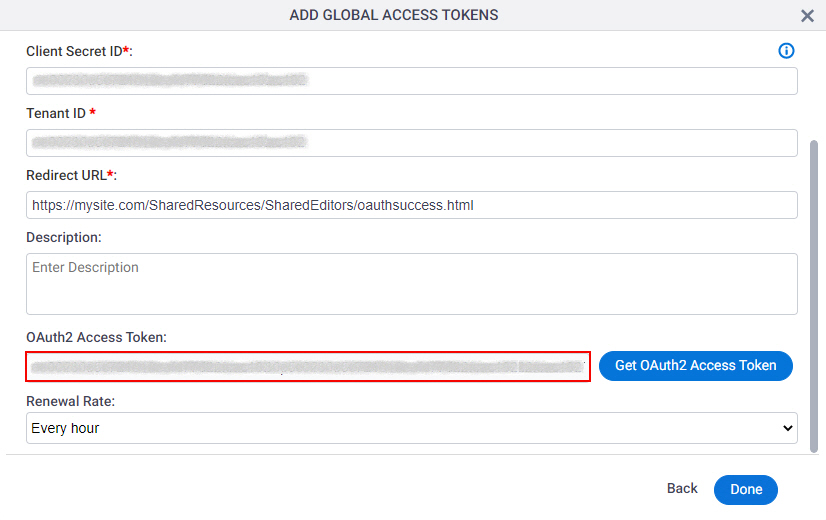
- Click Get OAuth2 Access Token.
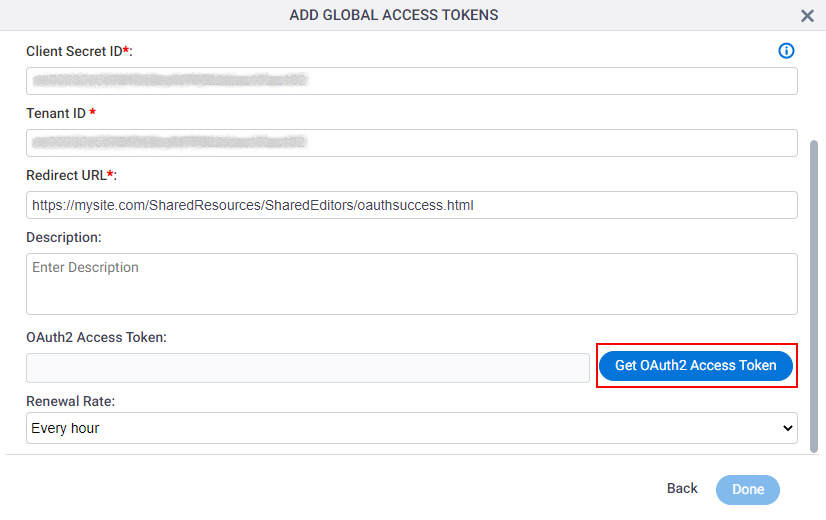
If you are not signed in to Microsoft Azure, the Microsoft Azure sign in screen opens in a new tab or window in your web browser. Sign in to Microsoft Azure with Microsoft 365 account credentials. The new tab or window closes in your web browser.
The OneDrive for Business access token screen shows the OAuth 2.0 access token in the OAuth 2.0 Access Token field.
- Click Done.
