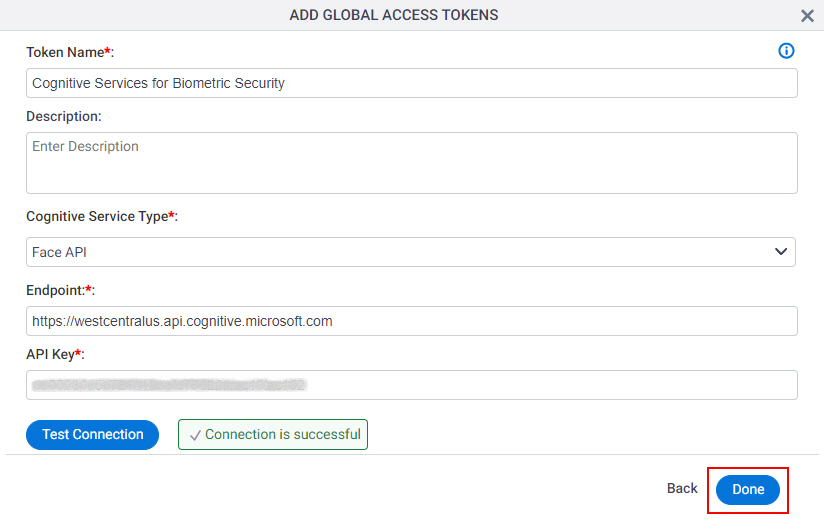
(Example) How to Get the Access Token Credentials from Microsoft Cognitive Services
This example shows how to get the access token credentials from Microsoft Cognitive Services.
Prerequisites
- One of these account types:
- Microsoft Azure Business
- Microsoft Azure Enterprise
- Microsoft Azure Personal
Good to Know
- You can use one of these APIs, which are supported in AgilePoint NX:
- Language > Text Analytics
- Decision > Content Moderator
- Vision > Face
- Vision > Computer Vision
This example uses the Face API.
- OAuth 2.0 access tokens require a 2-way exchange of credentials between AgilePoint NX and the external service. This means that you must get the credentials from the third-party service to paste in the AgilePoint NX access token, and get the redirect URI from AgilePoint NX to paste in the external service. This requires you to open both the AgilePoint NX access token and the third-party service at the same time, so you can copy and paste from one screen to the other.
This topic shows the suggested procedure for Microsoft Cognitive Services. The exact procedure for your access token depends on whether you already have a connection (usually called an app) configured in the external service.
- This topic gives one example. The procedure may vary depending on your configuration and account settings in the third-party service.
Step 1: Start Creating an Access Token in AgilePoint NX
First, create a new access token in AgilePoint NX for Microsoft Cognitive Services.
How to Start
- There is more than one way to create an access token.
For more information, refer to Access Token for Microsoft Cognitive Services.
Procedure
- In AgilePoint NX, open the access token configuration screen
for Microsoft Cognitive Services.
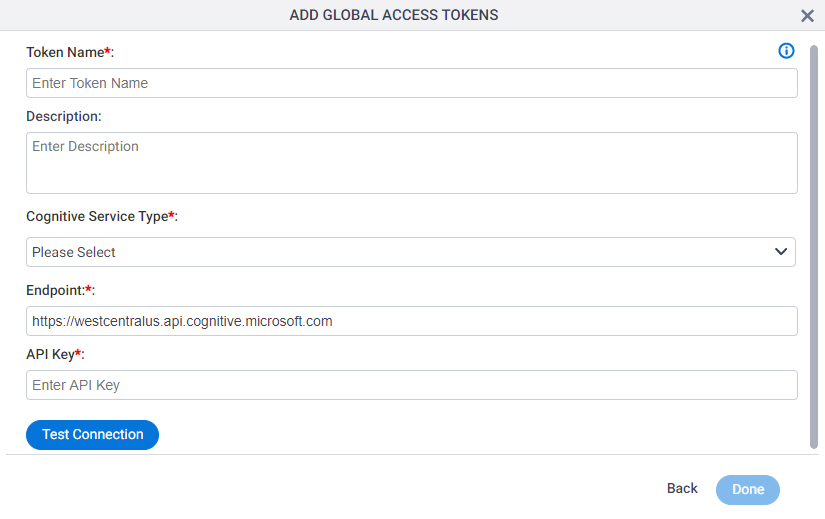
Do not configure the access token credentials.
Keep the access token configuration screen open in AgilePoint NX, but do not save it.
Step 2: Create an Azure Cognitive Services API
Next, create an Azure Cognitive Services API in Microsoft Cognitive Services.
How to Start
- In a new web browser tab, go to https://azure.microsoft.com/en-in/services/cognitive-services/.
Procedure
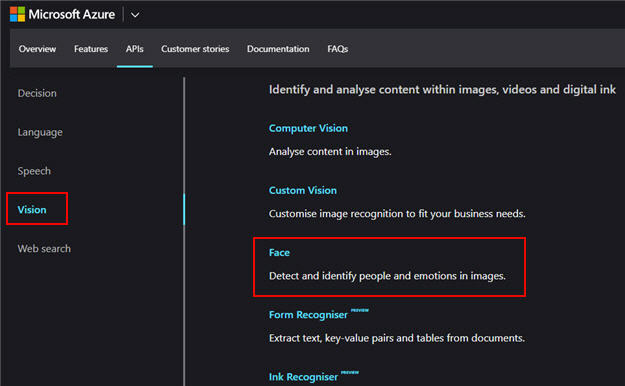
- On the Microsoft Azure screen, in the Azure Cognitive Services section,
select your API.
You can use one of these APIs, which are supported in AgilePoint NX:
- Vision > Face
- Language > Text Analytics
- Decision > Content Moderator
- Vision > Computer Vision
This example uses the Face API.
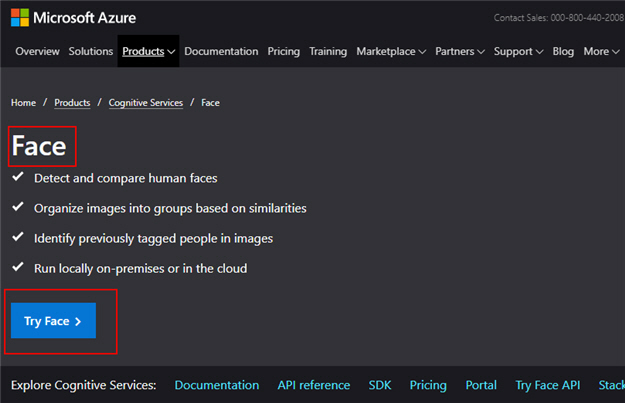
- On the Face screen, click Try Face.
- Go through the sign in process.
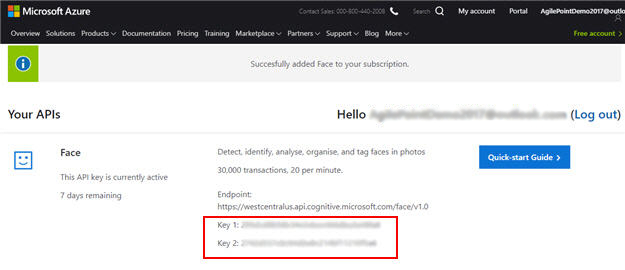
- After you sign in, the Your APIs screen shows the API keys.
Step 3: Copy the Azure Cognitive Services API Key
Next, copy the Azure Cognitive Services API keys from Microsoft Cognitive Services to your AgilePoint NX access token.
How to Start
- In one web browser tab,
open the Azure Cognitive Services API you created in Microsoft Cognitive Services.
For more information, refer to Create an Azure Cognitive Services API.
- In a different web browser tab, in AgilePoint NX, open the Microsoft Cognitive Services access token configuration screen.
Procedure
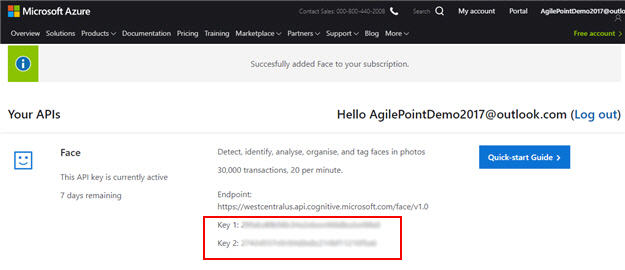
- In Microsoft Cognitive Services, on Your API screen, copy the API key value.
Only one API key value is required.
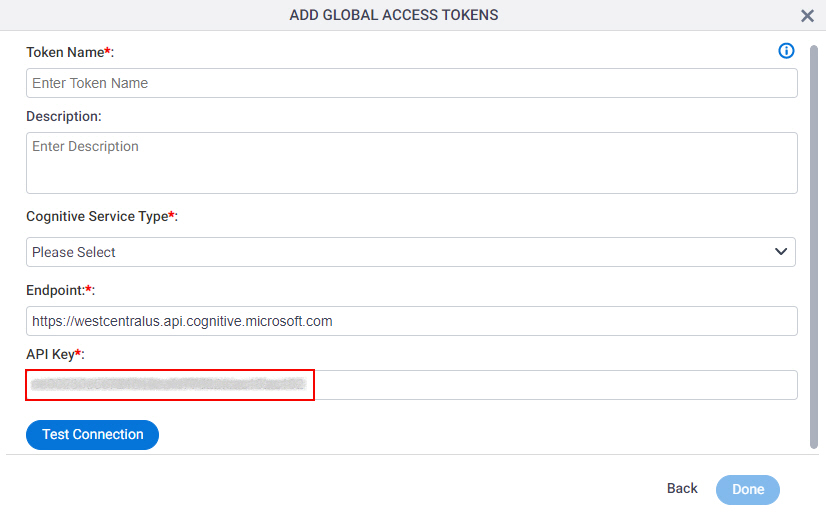
- In AgilePoint NX, on the Microsoft Cognitive Services Access Token Configuration screen, in the API Key field,
paste the API key value from Microsoft Cognitive Services.
Step 4: Complete the AgilePoint NX Access Token
Next, complete the AgilePoint NX access token configuration for Microsoft Cognitive Services.
How to Start
- In AgilePoint NX, open the Microsoft Cognitive Services access token configuration screen.
Procedure
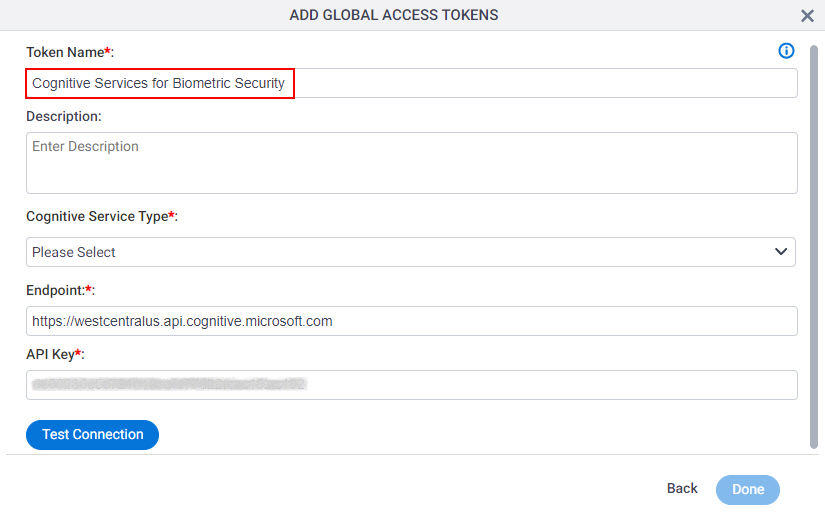
- In AgilePoint NX, on the Microsoft Cognitive Services Access Token Configuration screen,
in the Token Name field,
enter a name for the access token.
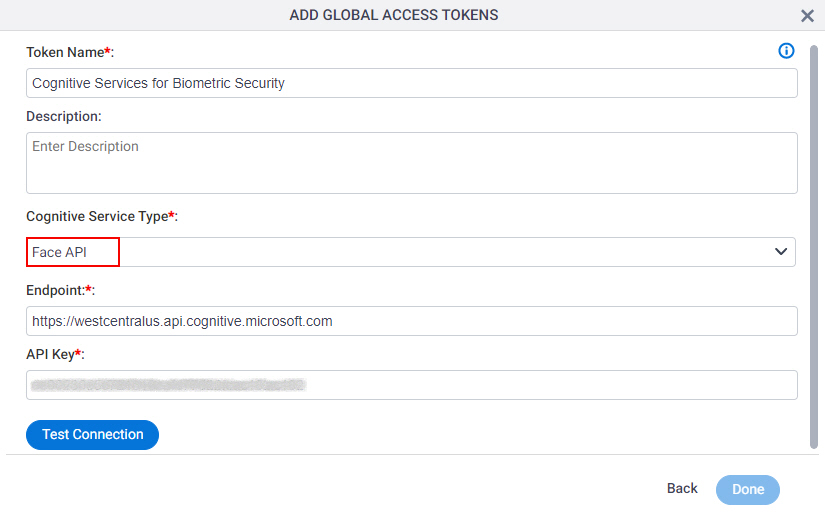
- In the MS Cognitive Service Type list, select your Azure Cognitive Services API.
You can use one of these APIs, which are supported in AgilePoint NX:
- Vision > Face
- Language > Text Analytics
- Decision > Content Moderator
- Vision > Computer Vision
This example uses the Face API.
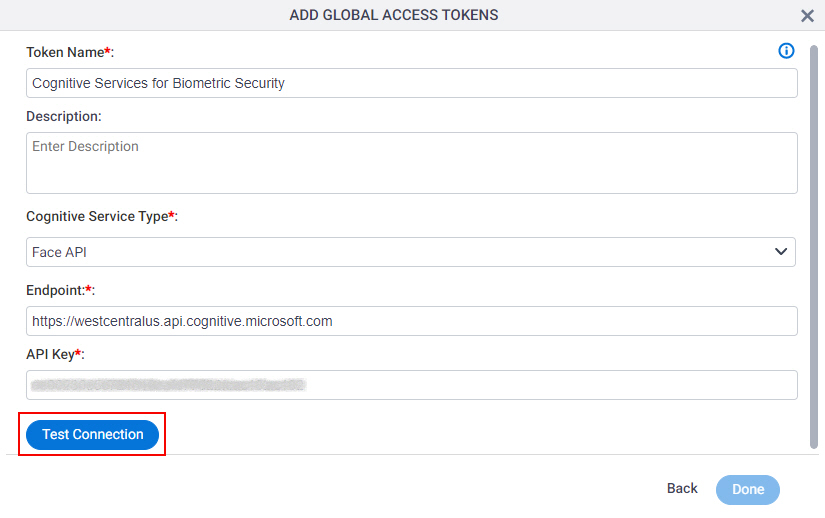
- Click Test Connection.
If the connection is successful, a confirmation message shows.
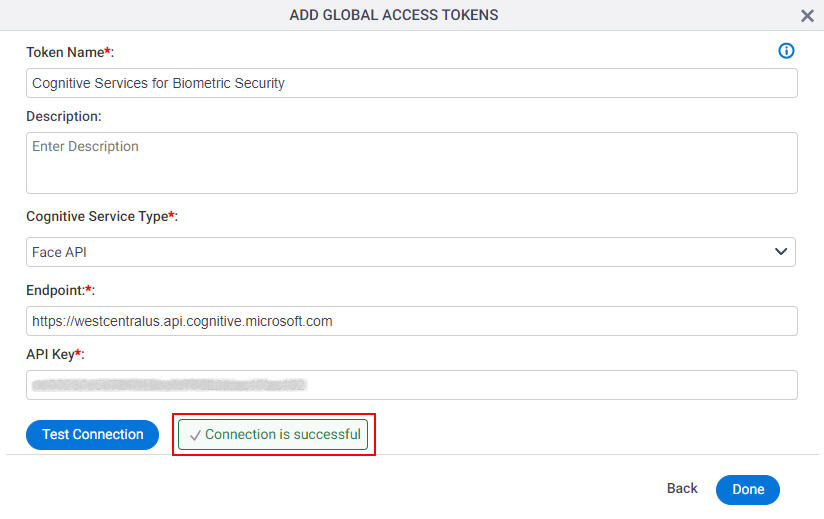
- Click Done.
