(Example) Hyperlink Widget in Page Builder
This example shows how to add a Hyperlink widget on a custom page.
Other Examples
- (Example) Custom Page in Page Builder
- Examples - Step-by-step use case examples, information about what types of examples are provided in the AgilePoint NX Product Documentation, and other resources where you can find more examples.
Prerequisites
- You must be a member of the Page Owners or Page Designers permission group.
For more information, refer to Page Builder Permissions Overview.
- AgilePoint NX OnDemand (public cloud), or AgilePoint NX Private Cloud or AgilePoint NX OnPremises v7.0 or higher.
Good to Know
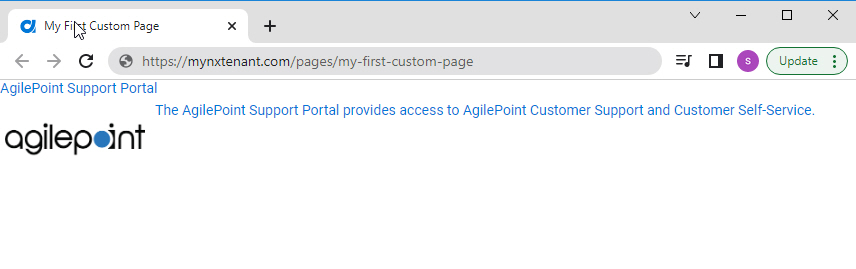
- This example shows how to create a hyperlink that uses the AgilePoint Support Portal as the target.
- This is a simple example. It is not intended as a real-world use case.
How to Start
- Do one of these:
- Create a custom page.
For more information, refer to (Example) Custom Page in Page Builder.
- Change a custom page.
- Create a custom page.
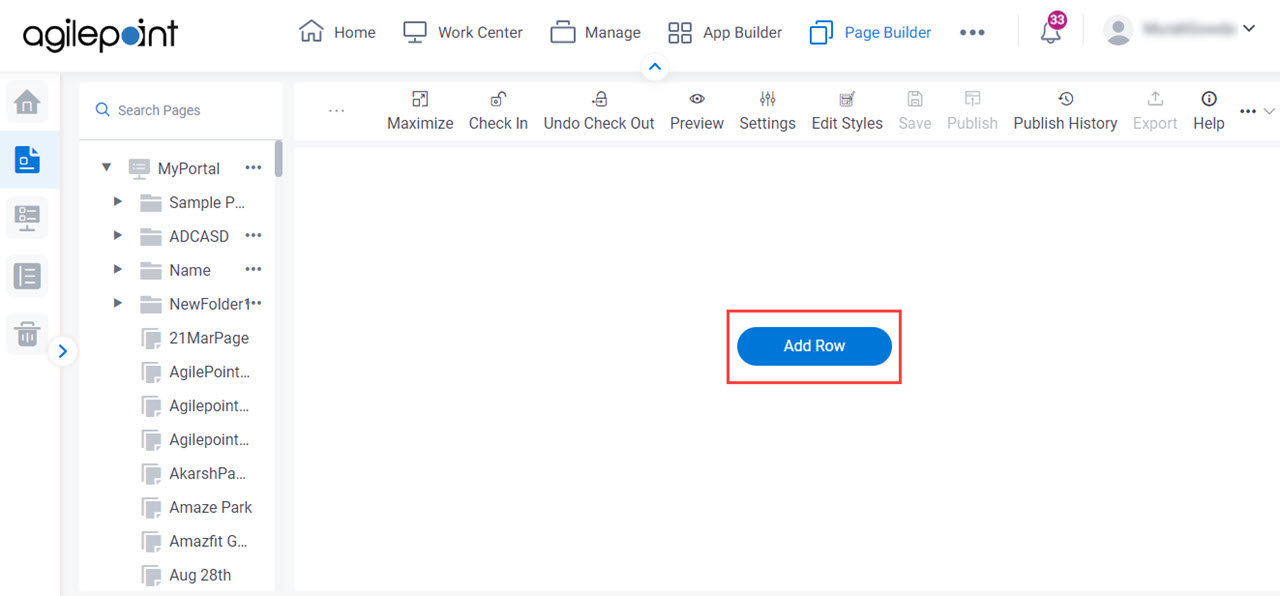
- On the Custom Page Design screen, click Add Row.
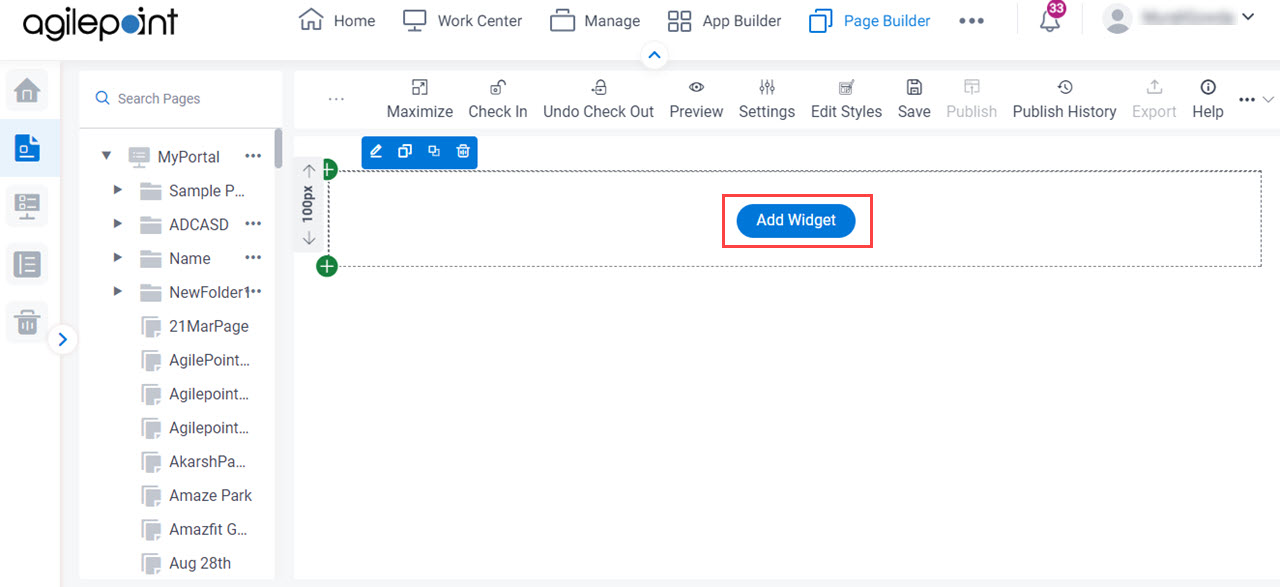
- Click Add Widget.
Procedure
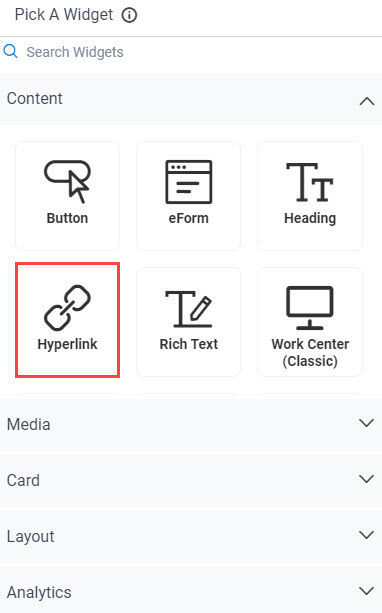
- On the Pick A Widget screen, click the Content tab.
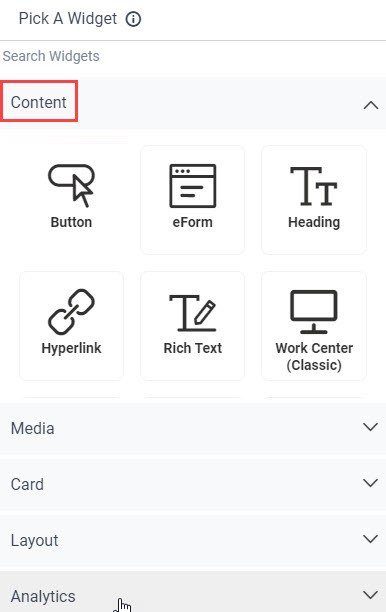
- On the Content tab, click
Hyperlink
 .
.
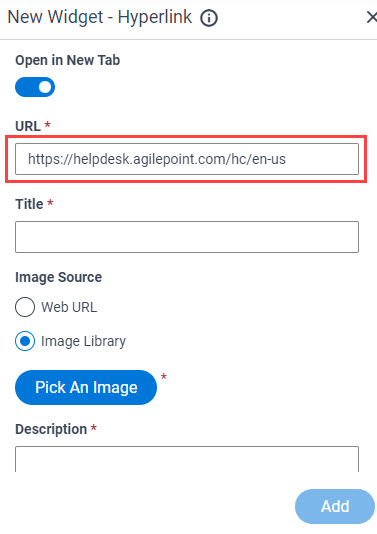
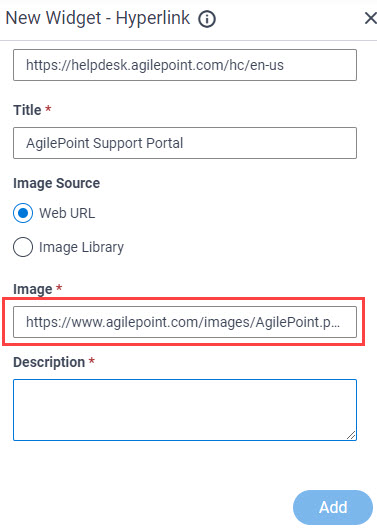
- On the New Widget - Hyperlink screen, in the URL field, enter https://helpdesk.agilepoint.com/hc/en-us.
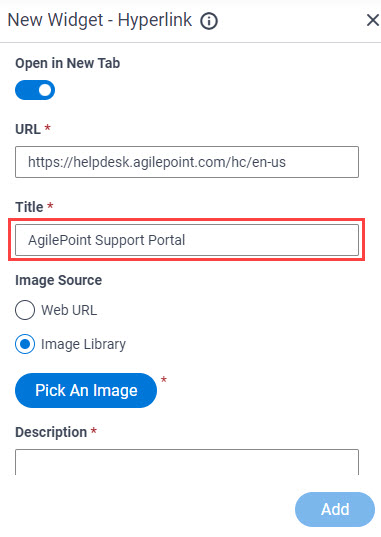
- In the Title field, enter AgilePoint Support Portal.
- In the Image Source field,
click Web URL.
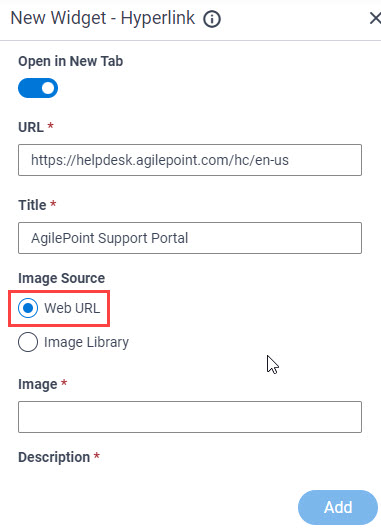
- In the Image field, enter https://www.agilepoint.com/images/AgilePoint.png.
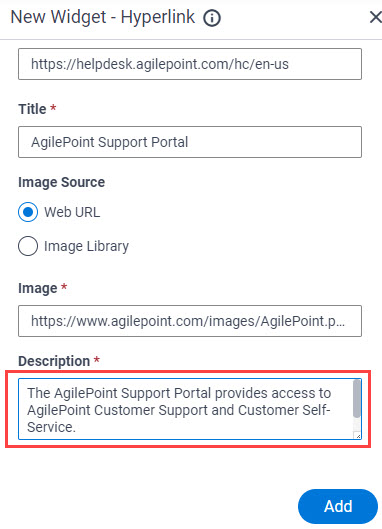
- In the Description field, enter The AgilePoint Support Portal provides access to AgilePoint Custom Support and Customer Self-Service.
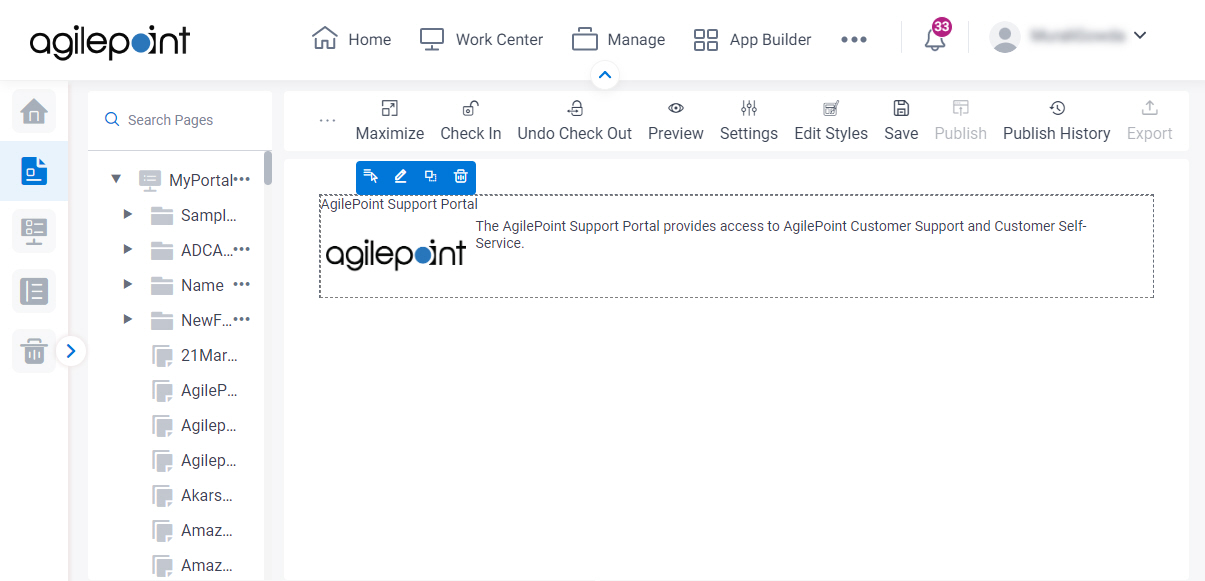
- Click Add.
The Page Builder shows the Hyperlink widget with your link.
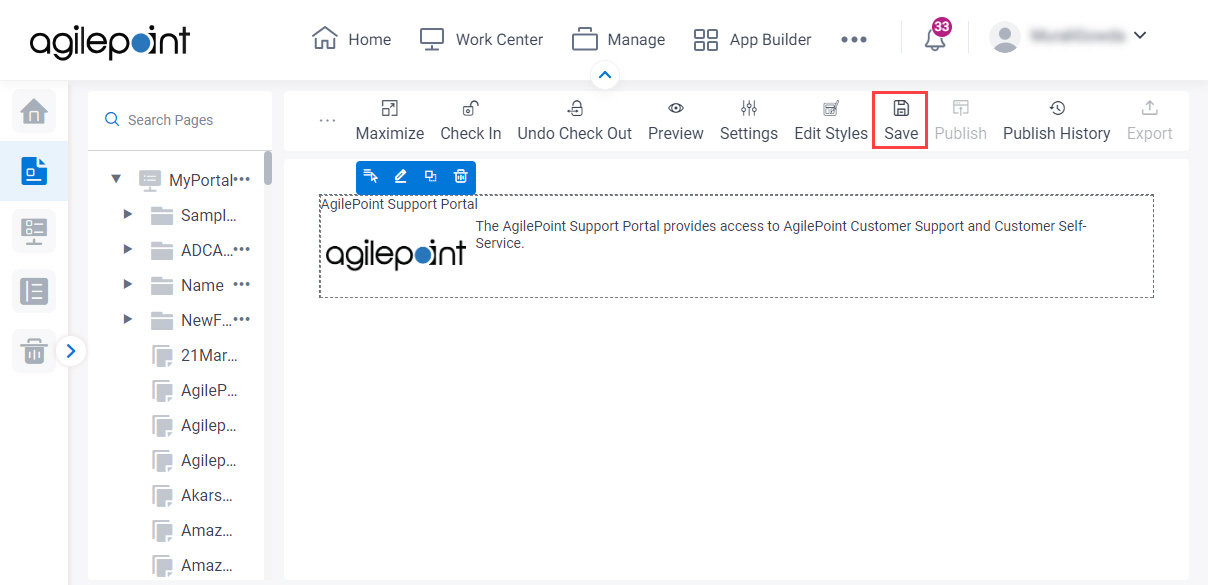
- Click Save.
- Publish a custom page.
For more information, refer to (Example) Custom Page in Page Builder.
The Hyperlink widget shows on the published page.