
(Example) Custom Menu in Page Builder
This example shows how to create a custom menu in Page Builder.
Background and Setup
Video: Page Builder Overview
Other Examples
- (Example) Custom Page in Page Builder
- (Example) Horizontal Menu Widget in Page Builder
- Examples - Step-by-step use case examples, information about what types of examples are provided in the AgilePoint NX Product Documentation, and other resources where you can find more examples.
Prerequisites
- You must be a member of the Page Owners or Page Designers permission group.
For more information, refer to Page Builder Permissions Overview.
- AgilePoint NX OnDemand (public cloud), or AgilePoint NX Private Cloud or AgilePoint NX OnPremises v7.0 or higher.
Good to Know
- This example shows how to create a custom menu that uses an example from AgilePoint NX as the use case.
- This is a simple example. It is not intended as a real-world use case.
Step 1: Create a Menu
How to Start
- Click Page Builder.
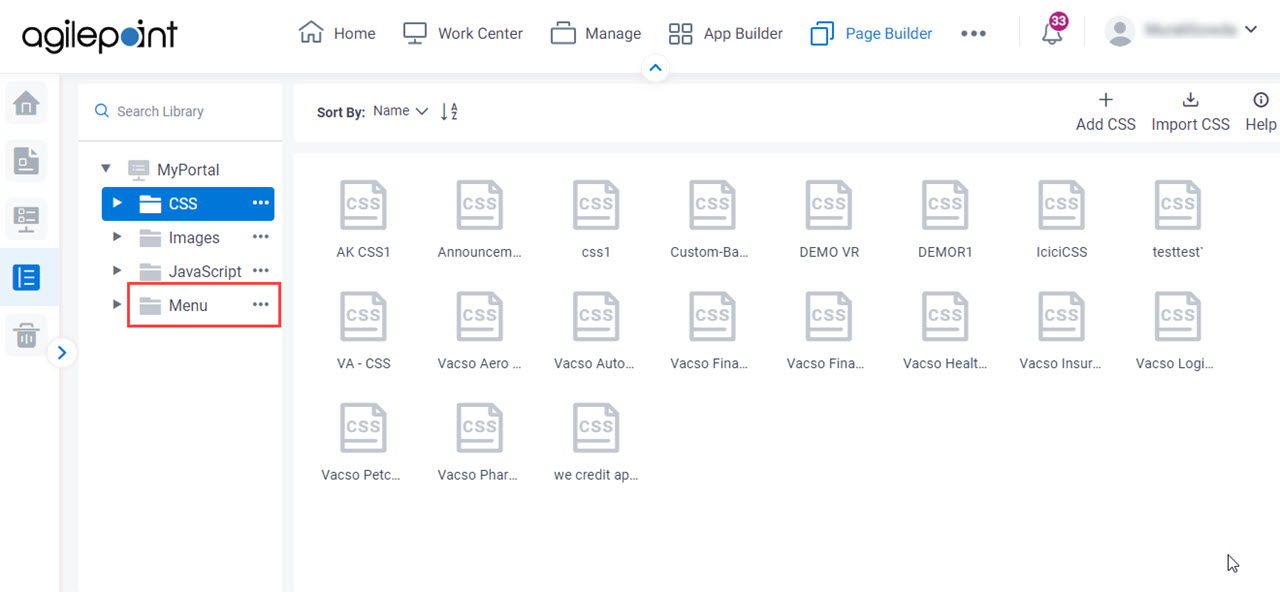
- On the Home screen, in the left pane,
click Library.
- In the left pane, click
Menu.
- On the Menu screen, click Add Menu.
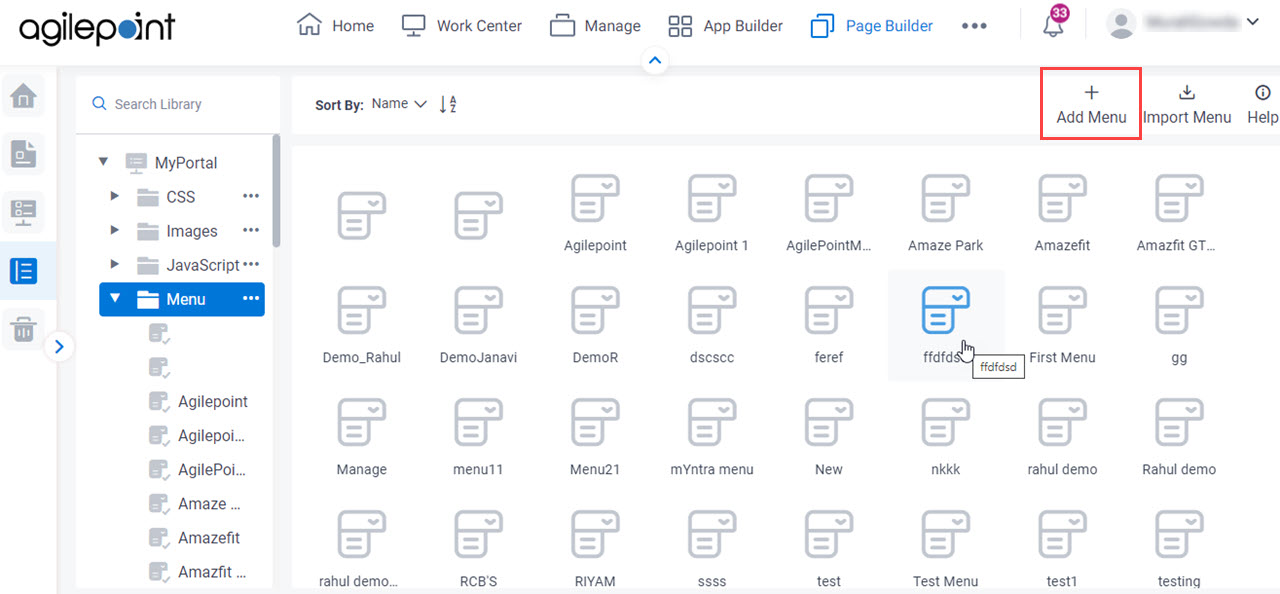
- On the Add New Menu, in the Display Name field,
enter AgilePoint.
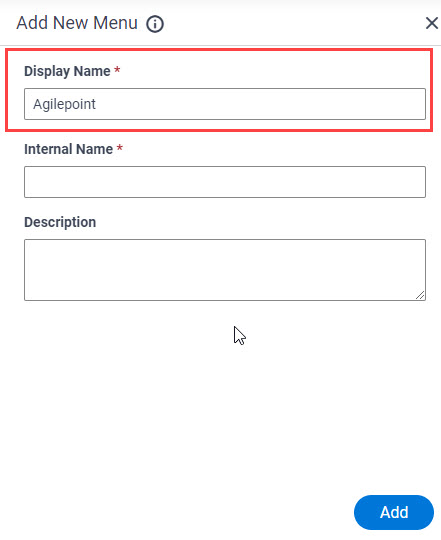
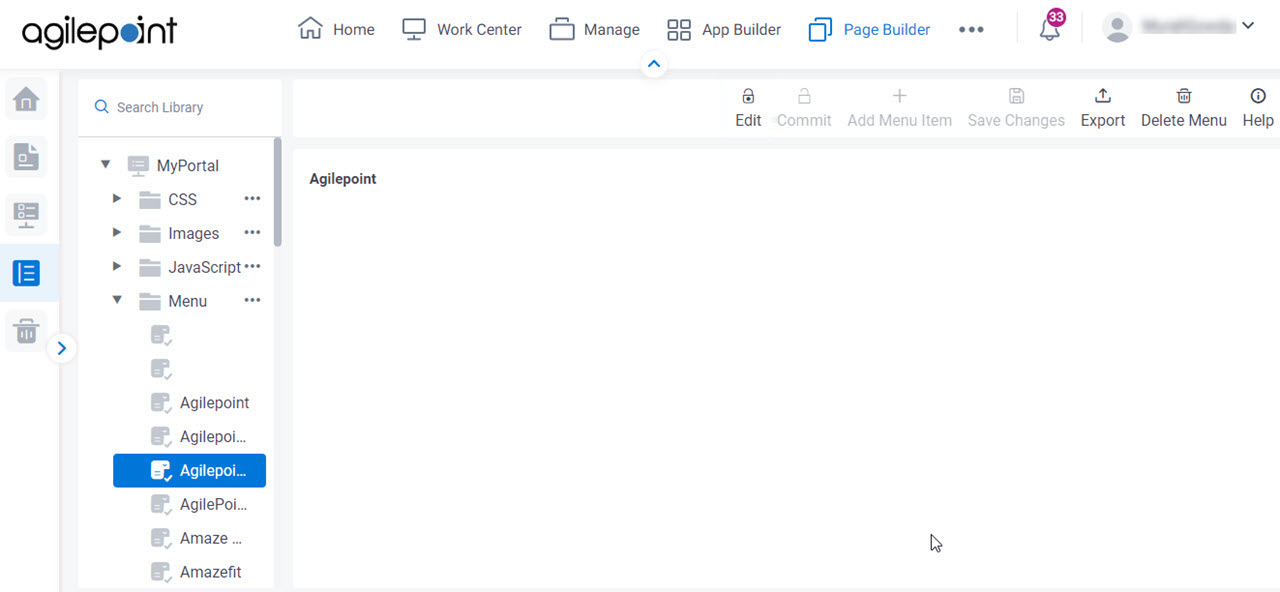
- Click Add.
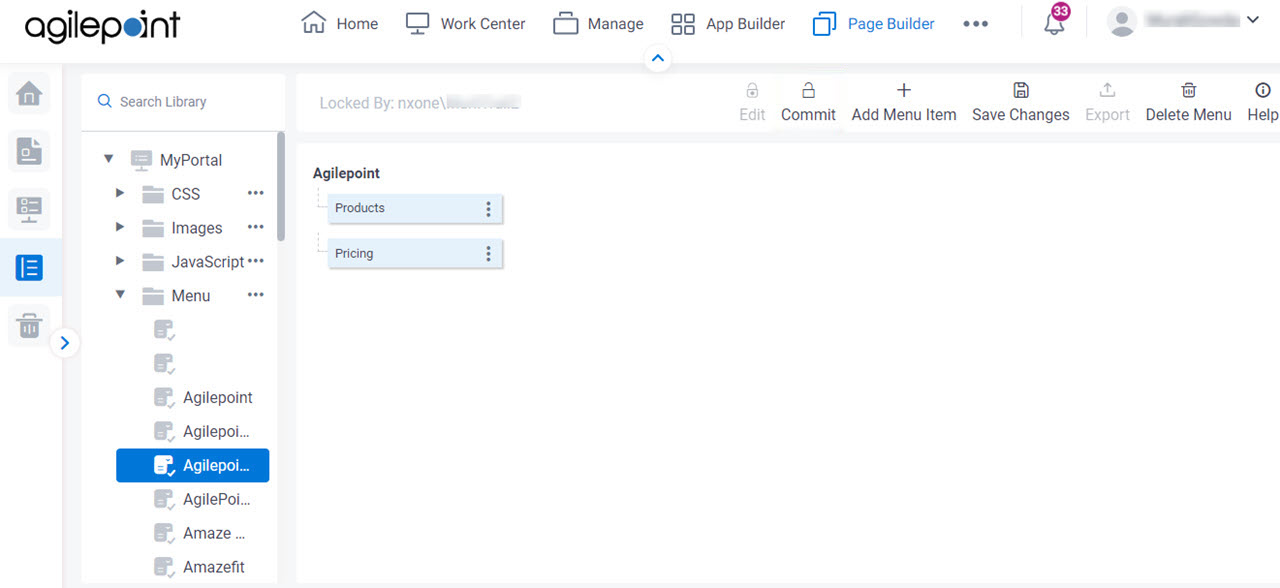
The AgilePoint menu is added to the Menu library.
Step 2: Create Menu Items
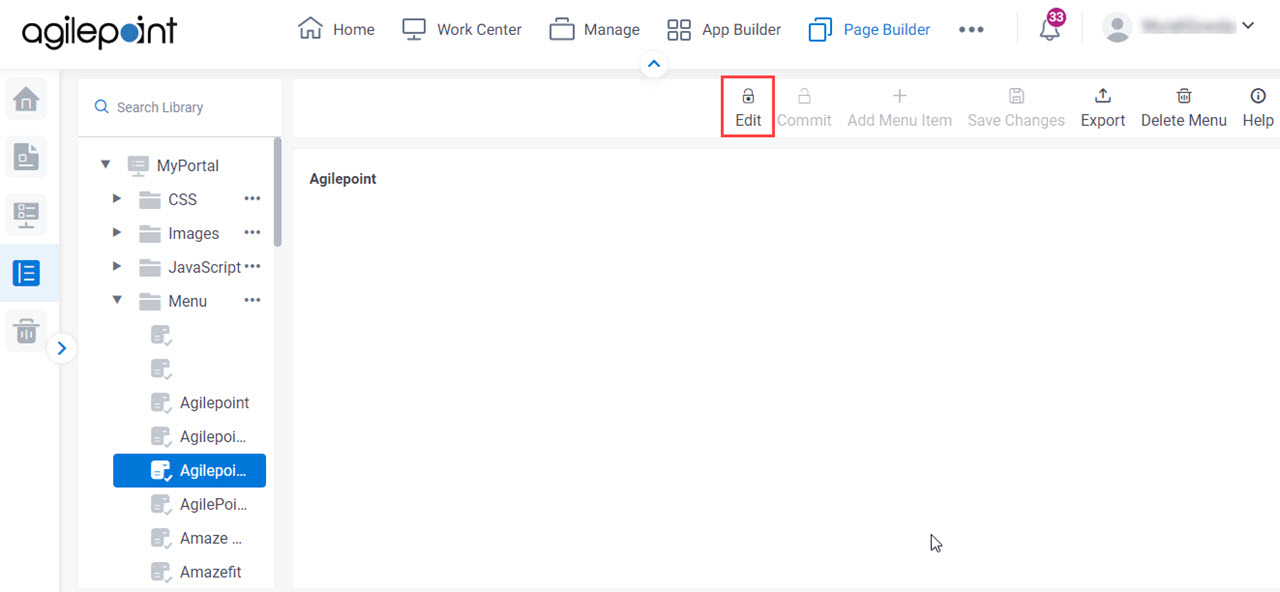
- Click Edit
 .
.
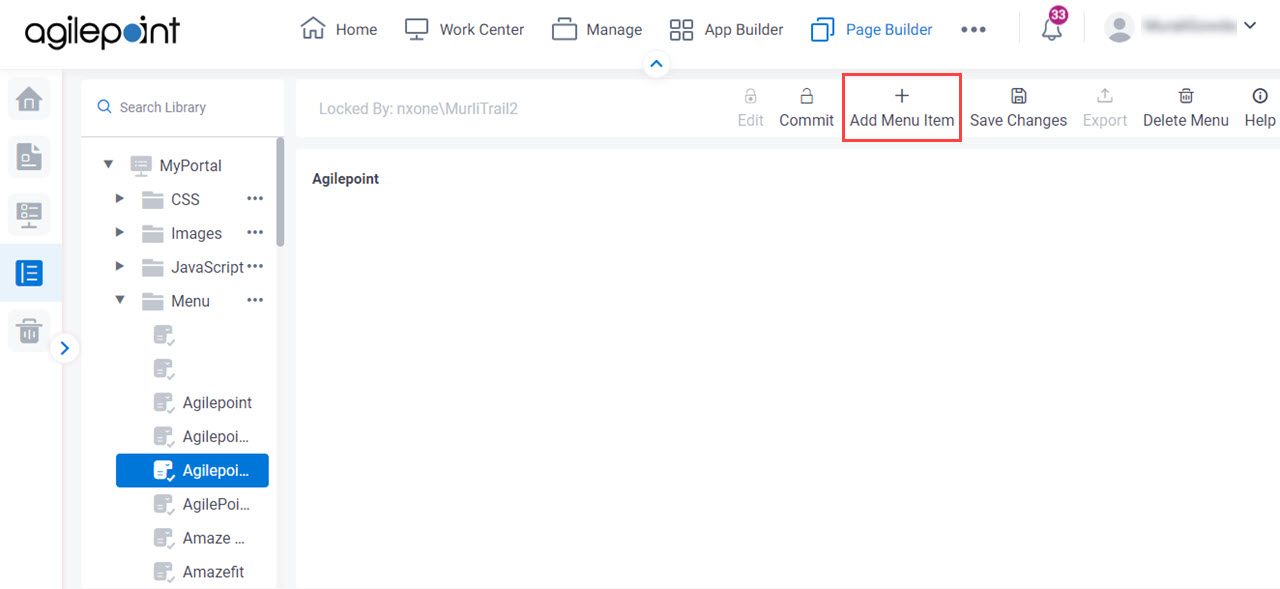
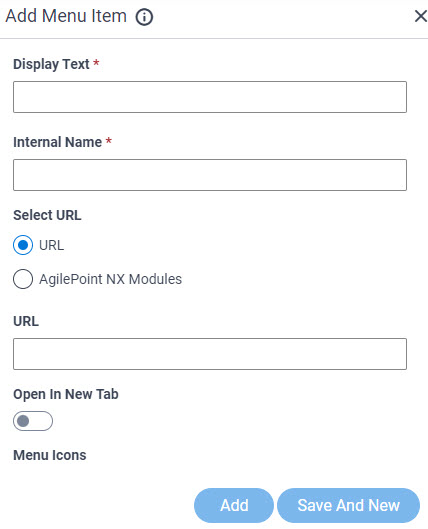
- Click Add Menu Item
 .
.
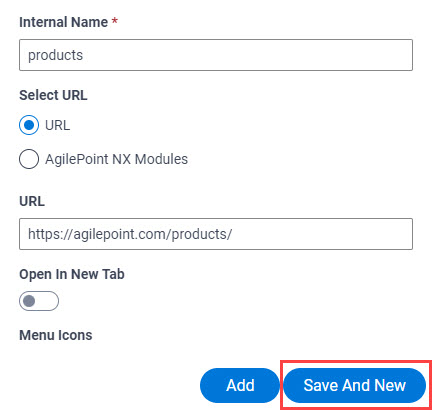
- On the Add Menu Item screen, enter Products.
When you click the Internal Name field, this field completes by default based on the value you enter in Display Text field. You can also specify your own internal name. After the internal name is created, you can not change it.

- In the URL field, enter https://agilepoint.com/products/.
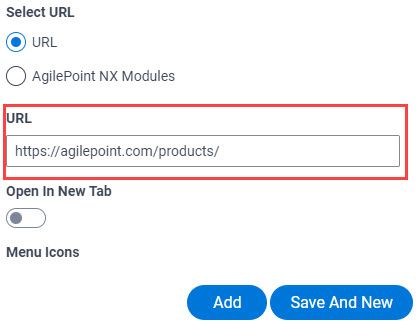
- Click Save and New.
The menu item Products is added to the AgilePoint menu and Add Menu Item screen opens to add a new menu item.
- On the Add Menu Item screen, enter Pricing.
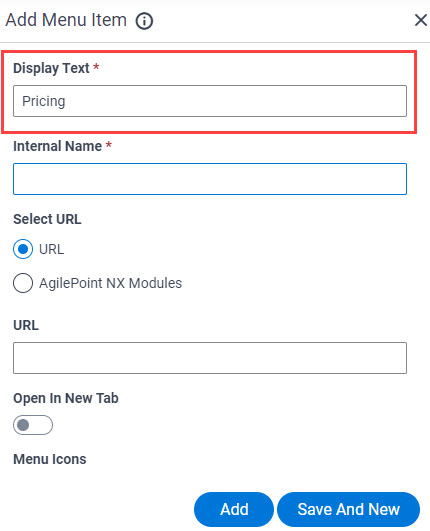
- In the URL field, enter https://agilepoint.com/pricing/.
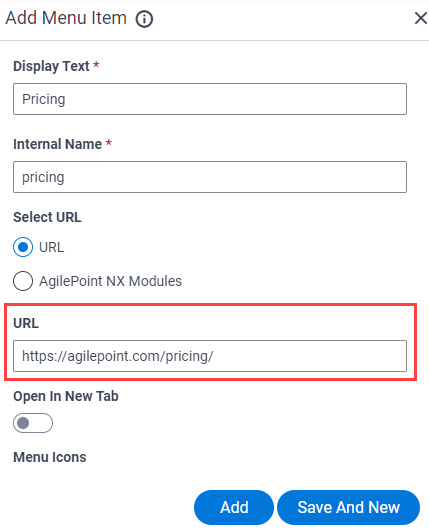
- Click Add.
The menu item Pricing is added to the AgilePoint menu.
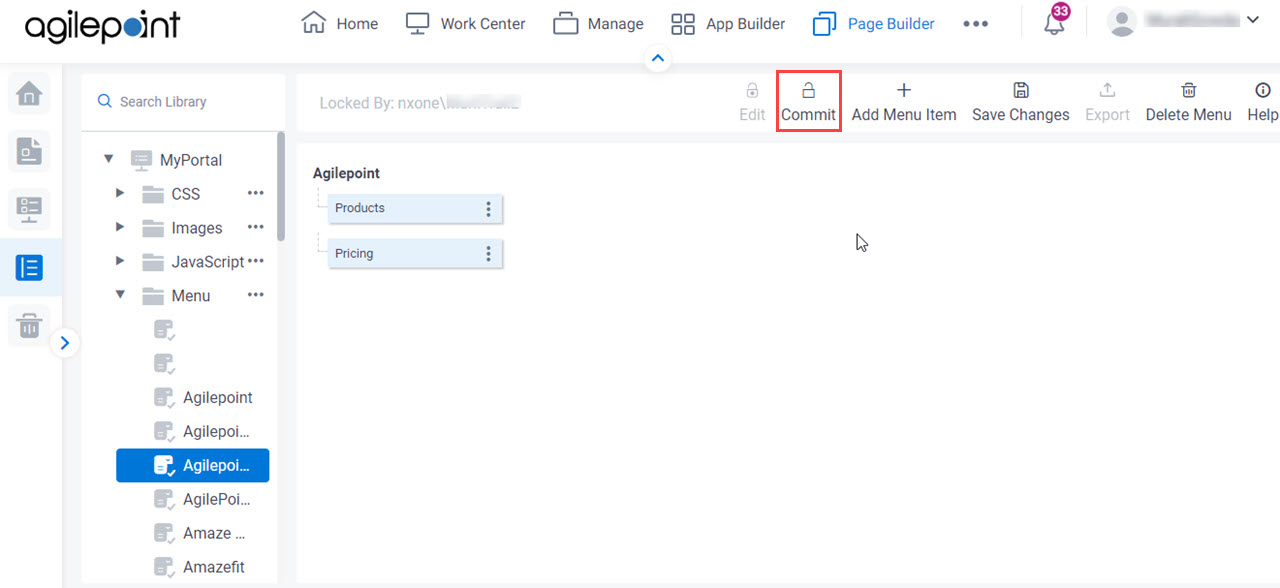
- Click Commit
 .
.
Step 3: Add Menu to a Custom Page
This example shows how to add a Horizontal Menu widget on a custom page.
How to Start
- Do one of these:
- Create a custom page.
For more information, refer to (Example) Custom Page in Page Builder.
- Change a custom page.
- Create a custom page.
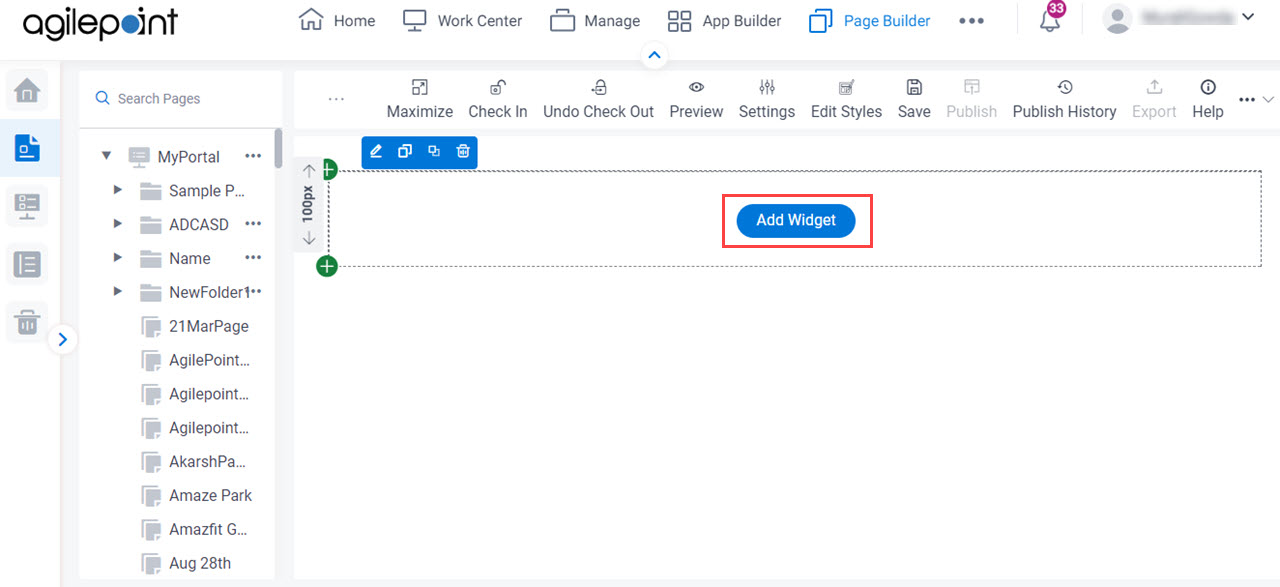
- On the Custom Page Design screen, click Add Row.
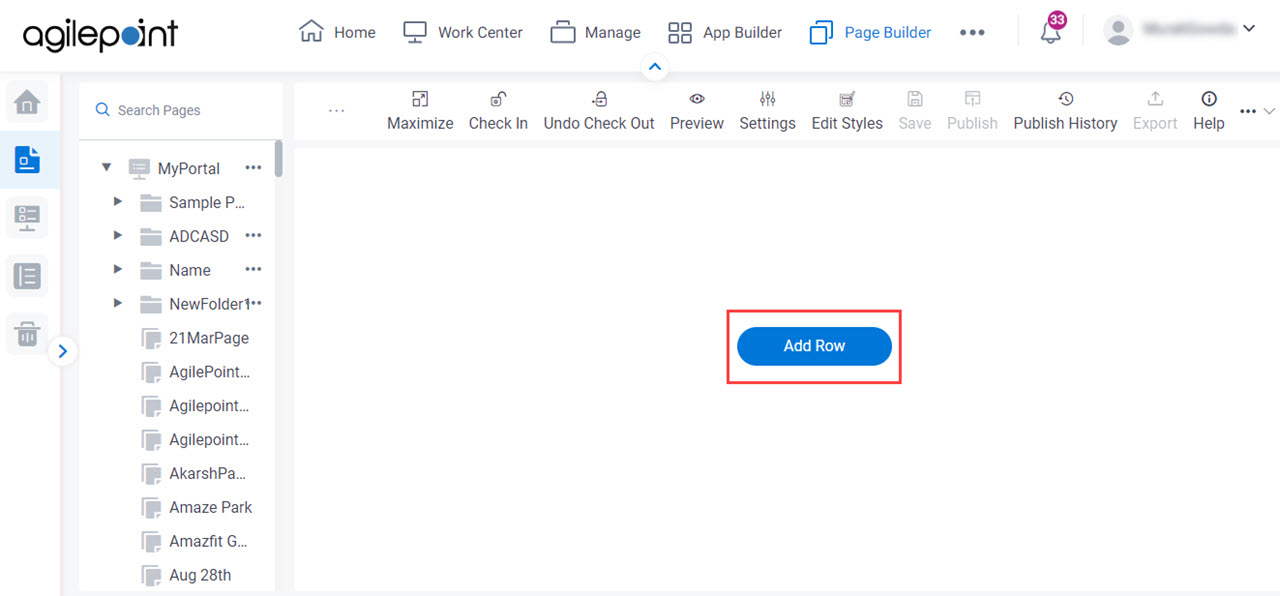
- Click Add Widget.
Procedure
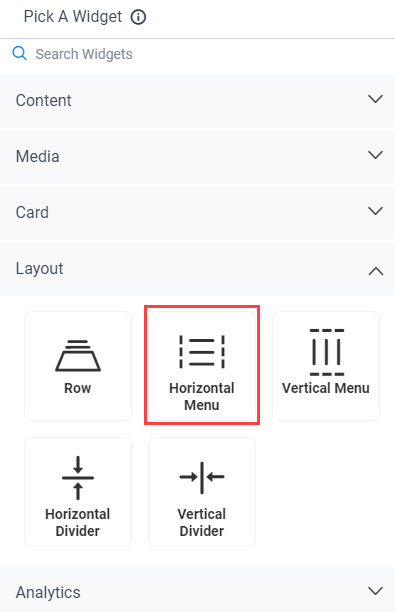
- On the Pick A Widget screen, click the Layout tab.
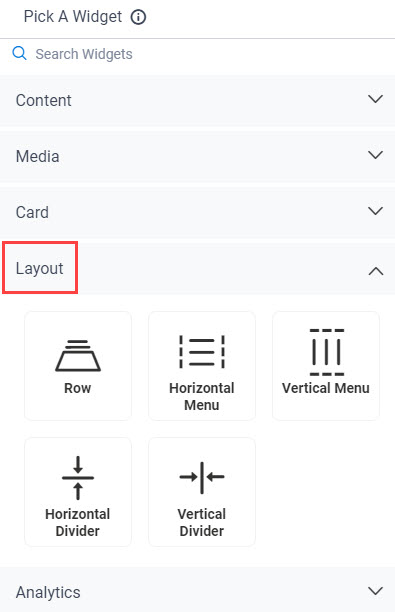
- On the Layout tab, click
Horizontal Menu
 .
.
- On the New Widget - Horizontal Menu screen, in the Menu list,
select AgilePoint.
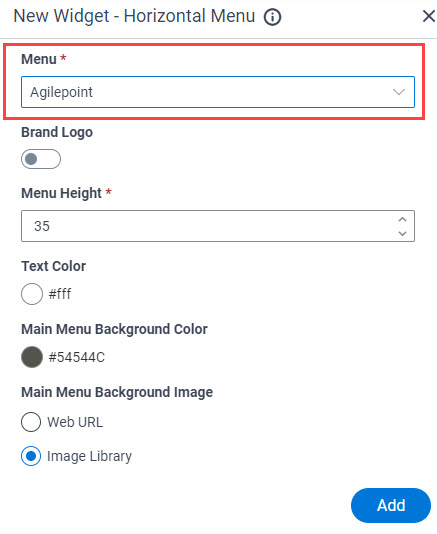
- Click Add.
The Page Builder shows a Horizontal Menu widget on the custom page.

- Click Save.
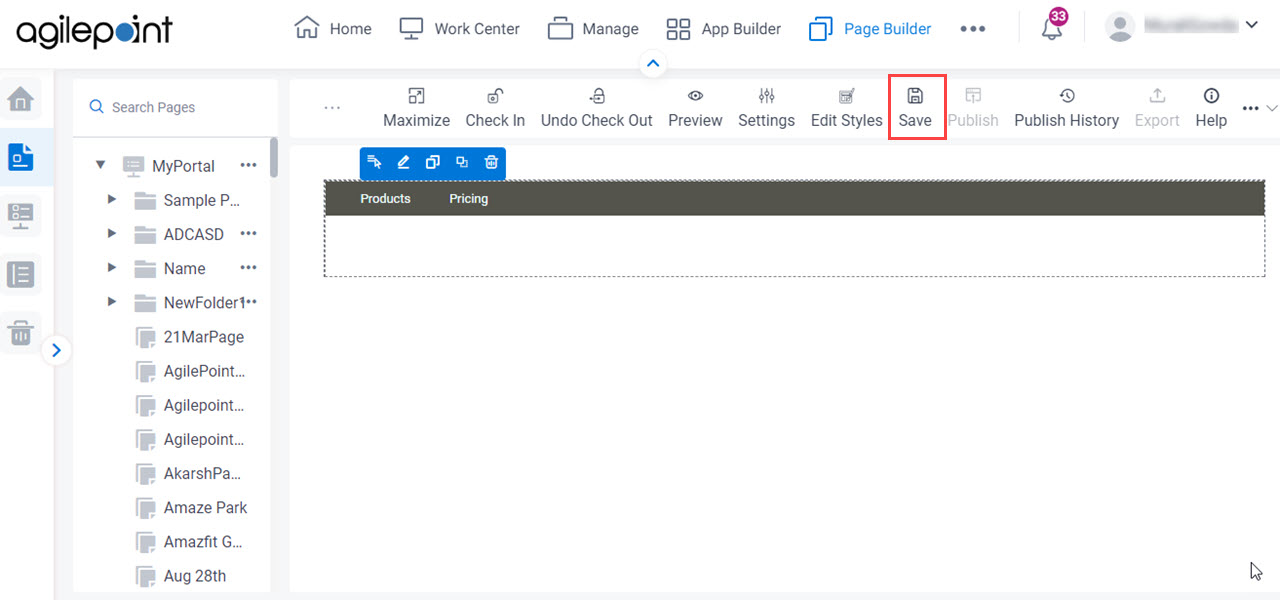
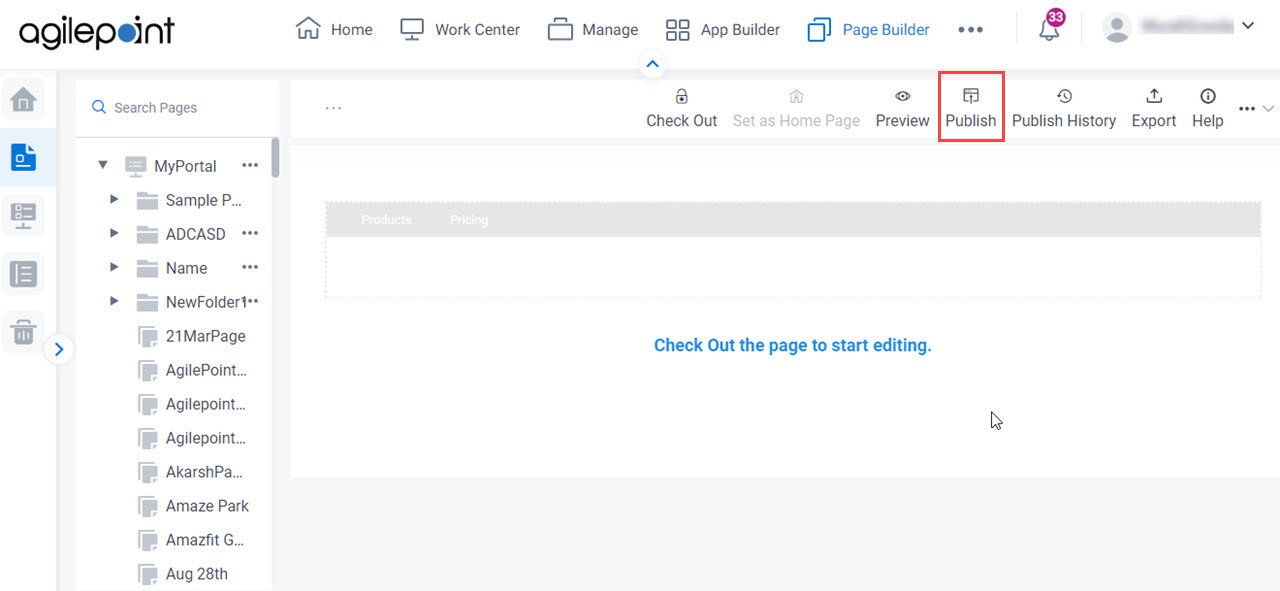
Step 4: Publish the Custom Page
- On the Custom Page Design screen,
click Check In
 .
.

- Click Publish.
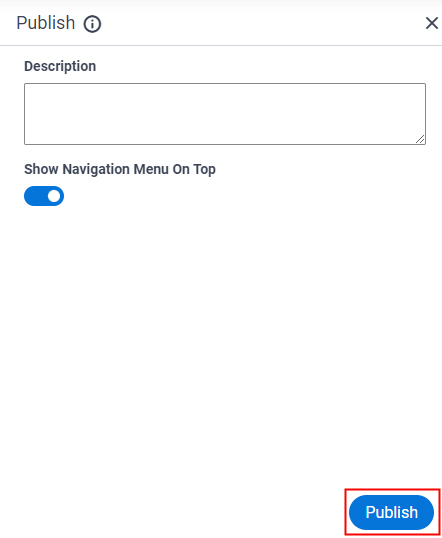
- On the Publish screen,
click Publish.
The Page Builder shows the published custom page screen.

Step 5: View the Published Page
- On the custom page, click Publish History
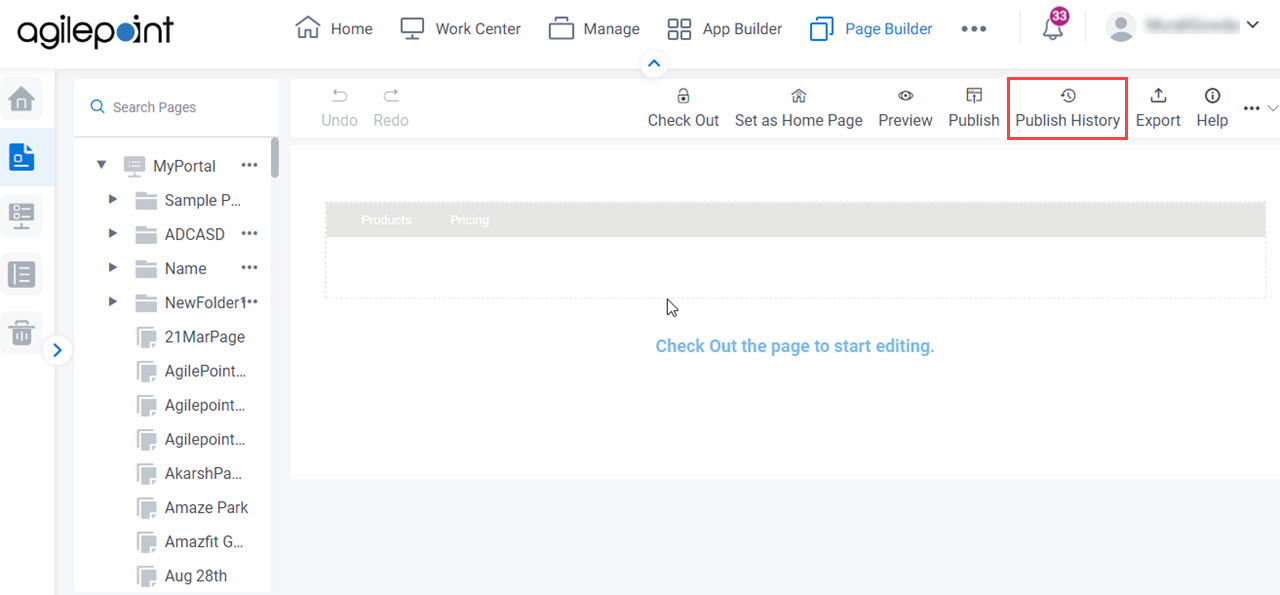
- On the Publish History screen, click
View

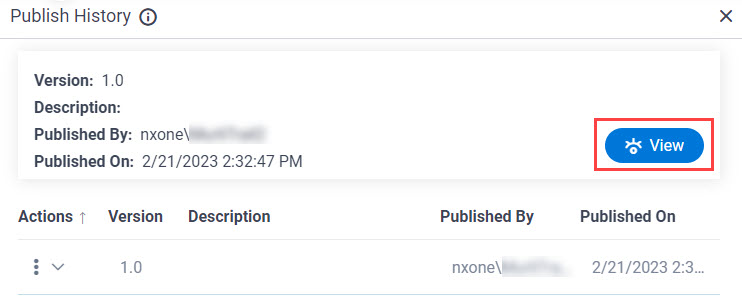
Your custom page opens in a new browser tab.
This view gives the production URL for the page. You can copy this URL to use in other locations, such as menus or links on other web sites.
