
Service Level Agreement activity
An activity that lets you track the time to complete a number of activities in a process instance. Within a process, you can have more than one timer with the same Service Level Agreement activity.
Configure the Service Level Agreement activity
To configure the Service Level Agreement activity, do the procedure in this topic.
Good to Know
- In most text fields, you can use process data variables as an alternative to literal data values.
- You can configure whether this activity waits for other activities before it runs.
For more information, refer to How Do I Configure an Activity to Wait for Other Incoming Activities?
How to Start
- On the Application Explorer screen, do one of these:
- Do one of these:
- Add an activity:
- In the Process Builder, in the Activity Library,
open the Extender
 tab.
tab. - On the Extender
tab, drag the Service Level Agreement
 activity onto your process.
- In the Process Builder, in the Activity Library,
open the Extender
- Change an activity:
- In your process, double-click your activity.
- Add an activity:
General Configuration
Specifies the basic settings for the Service Level Agreement activity.

Fields
| Field Name | Definition |
|---|---|
|
Display Name |
|
|
Description |
|
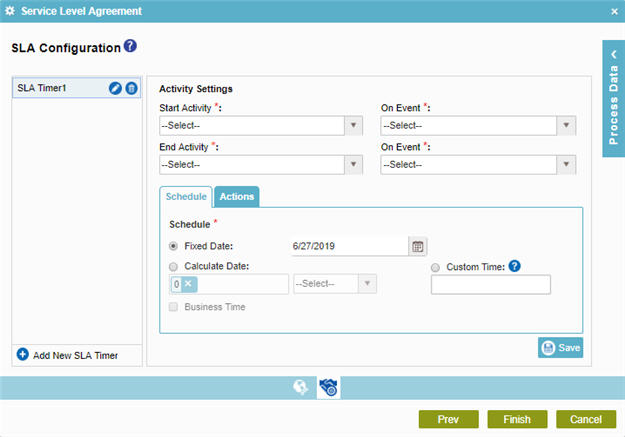
SLA Configuration > Schedule tab
Configures the SLA timer, including the set of activities with which you want to use a timer.
Fields
| Field Name | Definition |
|---|---|
|
Add New SLA Timer |
|
|
Edit |
|
|
Delete |
|
|
Start Activity |
|
|
End Activity |
|
|
On Event |
|
|
Fixed Date |
|
|
Calculate Date |
|
|
Custom Time |
|
|
Business Time |
|
|
Save |
|


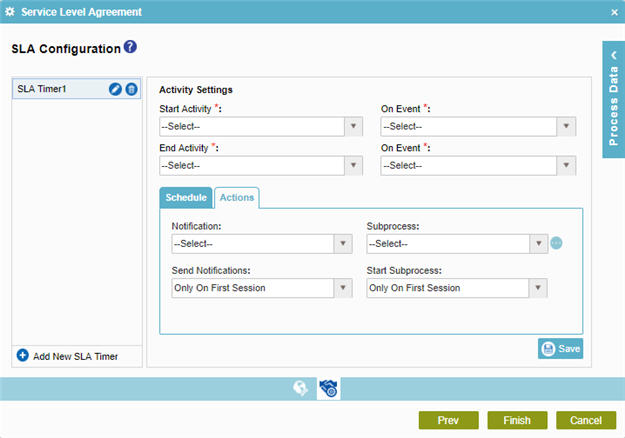
SLA Configuration > Actions tab
Specifies the information to send an e-mail notification, and start a subprocess when the timer expires.
Fields
| Field Name | Definition |
|---|---|
|
Add New SLA Timer |
|
|
Edit |
|
|
Delete |
|
|
Start Activity |
|
|
End Activity |
|
|
On Event |
|
|
Notification |
|
|
Send Notifications |
|
|
Subprocess |
|
|
Start Subprocess |
|
|
Save |
|
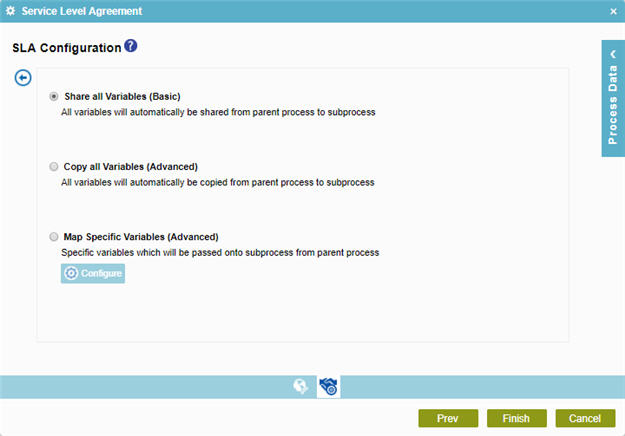
SLA Configuration > Mapping Variables
Specifies how to map variables in a subprocess.
Fields
| Field Name | Definition |
|---|---|
|
Share All Variables (Basic) / Copy All Variables (Advanced) / Map Specific Variables (Advanced) |
|

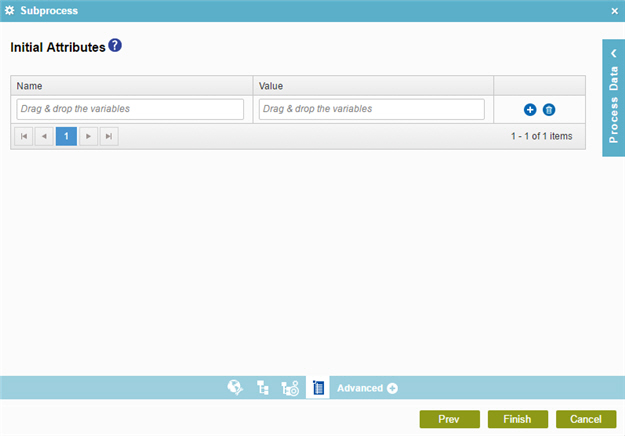
Specify Initial Attributes
Specifies a set of process variables to pass to a subprocess. You can share the parent process's variables with the subprocess if the subprocess uses the same data.
The subprocess can have its own data only within the subprocess, or it can share its data with the parent process. For example, a subprocess can access the data of the parent process, such as the reviewer name and review completion date.
Fields
| Field Name | Definition |
|---|---|
|
Name |
|
|
Value |
|
|
Add |
|
|
Delete |
|