
(Example) Use Anonymous Authentication in a Form-Based App
This example shows how to use an anonymous form in a form-based app.
An anonymous form is an eForm that a runtime app user can submit with no authentication credentials. This is useful if you want people to use your form-based app with no user account.
Background and Setup
Prerequisites
- AgilePoint NX OnDemand (public cloud), or AgilePoint NX PrivateCloud or AgilePoint NX OnPremises v7.0 or higher.
Good to Know
- This example uses the Customer Request app from the AgilePoint NX
App Store.
For more information, refer to How to Get the App
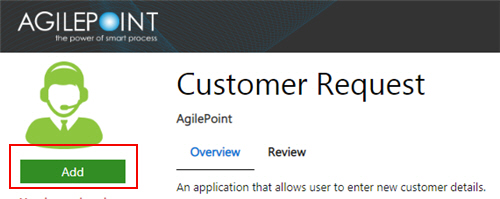
- Customer Request is an application that allows user to enter new customer details.
For the use case in this example, you configure the New Customer Request form for anonymous authentication in a Customer Request app so that the customer can access the Customer Request form with no AgilePoint NX account and enter the new customer details.
- To enforce strict security, AgilePoint highly recommends you use anonymous forms for data entry only, and avoid using lookups that connect to your backend systems.
However, the decision whether to use lookups in anonymous forms is based on your business requirements. If your requires you to use a lookup to backend system, make that design choice as necessary.
- An application designer who configures an eForm to use anonymous authentication (used with anonymous forms) must have a role with the Allow Enabling Anonymous Access
access right.
The Allow Enabling Anonymous Access role lets the application designer create an anonymous form in App Builder at design time. It does not control the security for the anonymous form or the anonymous form user at runtime. The user credentials used for the anonymous authentication access token do not require this access right.
- As a security best practice, in your access token for anonymous forms, AgilePoint recommends using a user with minimum access rights. This is a user with the Users role with the default access rights.
- Optionally, in AgilePoint NX OnPremises and AgilePoint NX PrivateCloud, anonymous forms can use the AgilePoint Service Account for authentication if you select User System Account when you configure an access token for anonymous forms. However, this practice carries security risks. It is not recommended unless you have a specific business requirement for Service Account access, and the security risks are mitigated.
If you use the AgilePoint Service Account, the credentials are not stored in the database.
- If you have questions about the security impacts or best practices for anonymous forms, contact AgilePoint Professional Services.
Step 1: Add the Acces Right "Allow Enabling Anonymous Access" to the Global Application Designer Role
Add the Allow Enabling Anonymous Access access right to the Application Designer role.
Good to Know
- An application designer who configures an eForm to use anonymous authentication (used with anonymous forms) must have a role with the Allow Enabling Anonymous Access
access right.
The Allow Enabling Anonymous Access role lets the application designer create an anonymous form in App Builder at design time. It does not control the security for the anonymous form or the anonymous form user at runtime. The user credentials used for the anonymous authentication access token do not require this access right.
How to Start
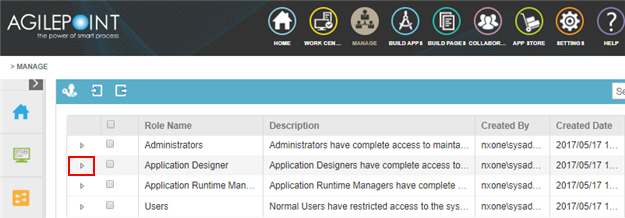
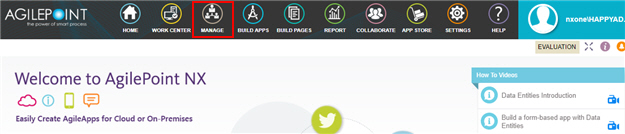
- In the Manage Center, click
Access Control
 > Roles.
 - On the Roles screen,
click Expand
 on the Application Designer role.
Procedure
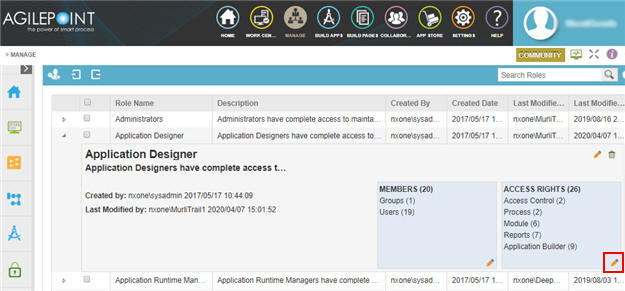
- On the Application Designer role, in the ACCESS RIGHTS section, click Edit Role
 .
.
- Click the Application Builder tab.
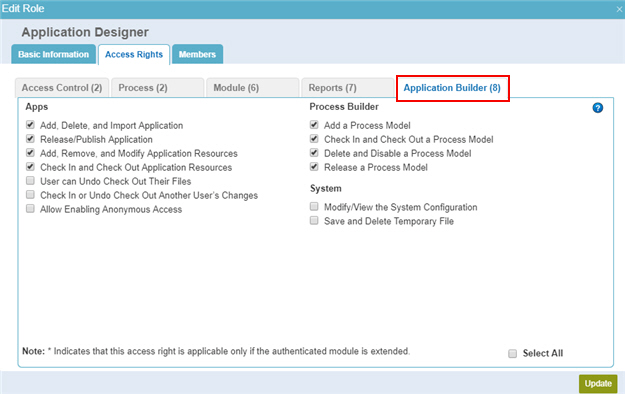
- On the Application Builder tab, select Allow Enabling Anonymous Access.
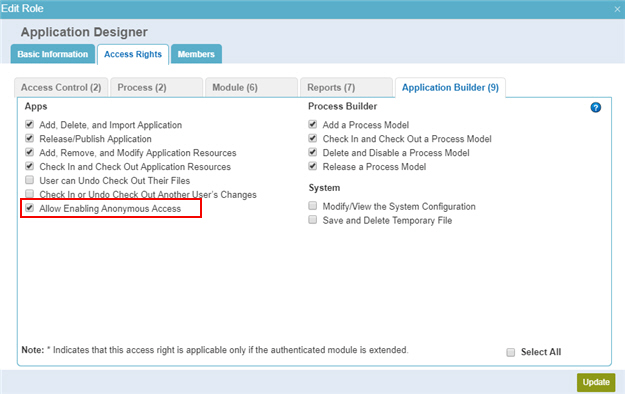
- Click Update.
Step 2: Create an NX User for the Anonymous Access Token
Create a user with an AgilePoint ID to use in the credentials for the anonymous access token.
Good to Know
- As a security best practice, in your access token for anonymous forms, AgilePoint recommends using a user with minimum access rights. This is a user with the Users role with the default access rights.
How to Start
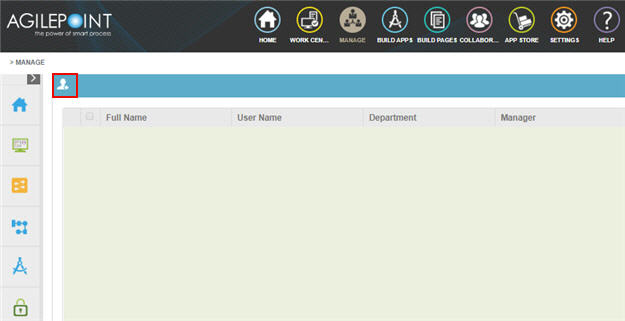
- In the Manage Center, click
Access Control
> Users.
- On the Users screen, click Add User
 .
.
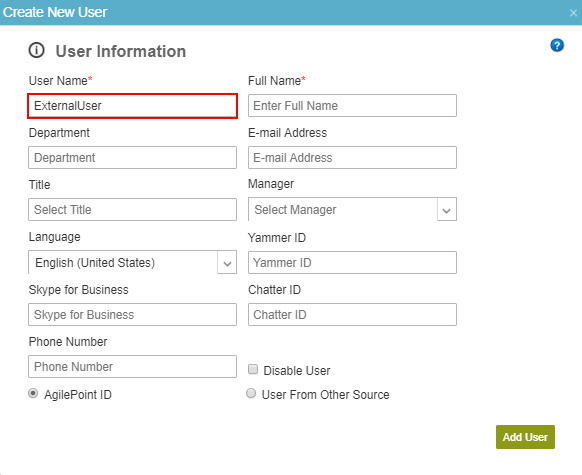
Procedure
- On the User Information screen, in the User Name field, enter ExternalUser.
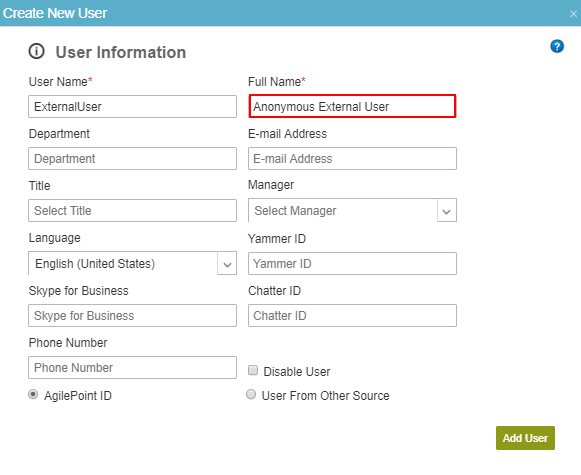
- In the Full Name field, enter Anonymous External User.
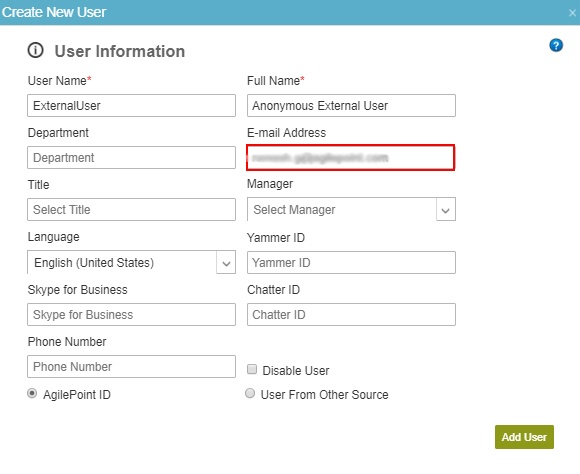
- In the E-mail Address field, enter the e-mail address for the user.
- Click Add User.
- On the Create New User screen, click Access Rights.
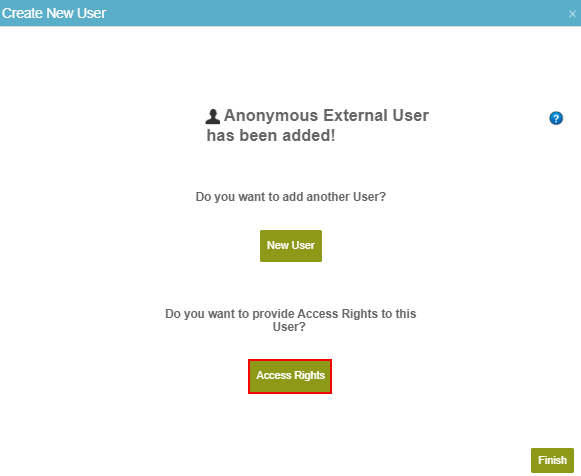
- On the Access Rights screen, select Users.
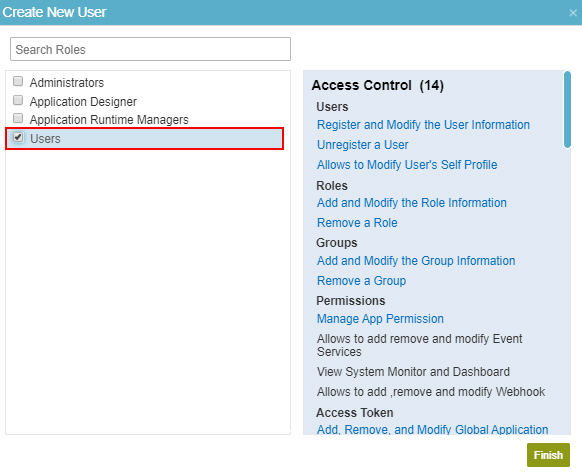
- Click Finish.
Step 3: Create an Access Token for Anonymous Authentication
Configure an access token to connect to an anonymous form. This type of access token provides credentials that let non-authenticated users complete an eForm in AgilePoint NX..
Prerequisites
- Account credentials for anonymous authentication. This is the account the eForm uses to connect to AgilePoint NX, and get and submit data in the application. You can use an
AgilePoint NX account
or an account in
Active Directory.
If you do not use any of these authentication methods in your organization, you can create an AgilePoint NX account to use for anonymous authentication.
Active Directory authentication is not available for AgilePoint NX OnDemand.
- As a security best practice, in your access token for anonymous forms, AgilePoint recommends using a user with minimum access rights. This is a user with the Users role with the default access rights.
- An application designer who configures an eForm to use anonymous authentication (used with anonymous forms) must have a role with the Allow Enabling Anonymous Access
access right.
The Allow Enabling Anonymous Access role lets the application designer create an anonymous form in App Builder at design time. It does not control the security for the anonymous form or the anonymous form user at runtime. The user credentials used for the anonymous authentication access token do not require this access right.
Good to Know
- Optionally, in AgilePoint NX OnPremises and AgilePoint NX PrivateCloud, anonymous forms can use the AgilePoint Service Account for authentication if you select User System Account when you configure an access token for anonymous forms. However, this practice carries security risks. It is not recommended unless you have a specific business requirement for Service Account access, and the security risks are mitigated.
If you use the AgilePoint Service Account, the credentials are not stored in the database.
- If you have questions about the security impacts or best practices for anonymous forms, contact AgilePoint Professional Services.
- This example shows how to create a global access token for anonymous forms. You can also create an application level access token for anonymous forms.
How to Start
- Click Manage
 .
.
- Click App Builder
 > Global Access Tokens.
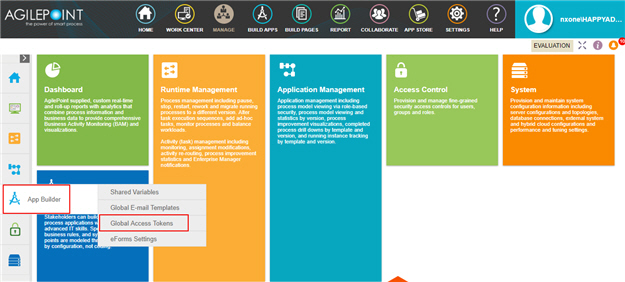
- On the Global Access Tokens screen,
click Add Token
 .
.
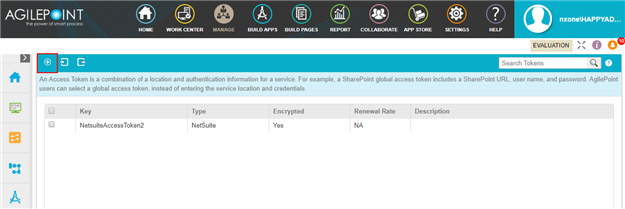
- On the Add Global Access Tokens screen,
select Anonymous Forms
 .
. - Click Next.
Procedure
- On the Add Global Access Tokens screen, in the Token Name field,
enter Anonymous Customer Request.
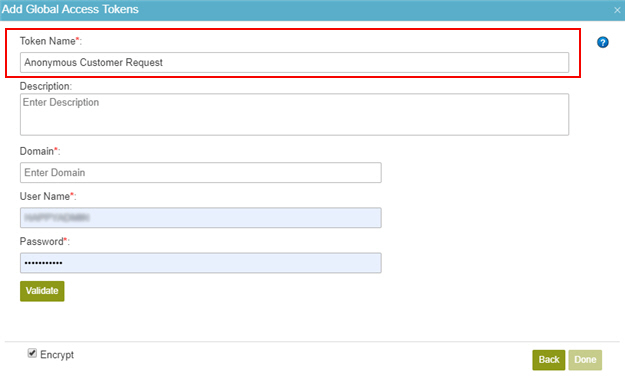
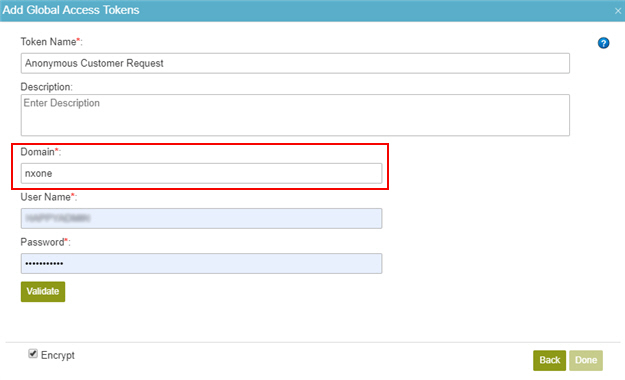
- In the Domain field, enter nxone.
You can find the domain name in the Portal Instance URL field on Tenant Settings.
For more information, refer to Find your Portal Instance URL.
- In the User Name field, enter ExternalUser.
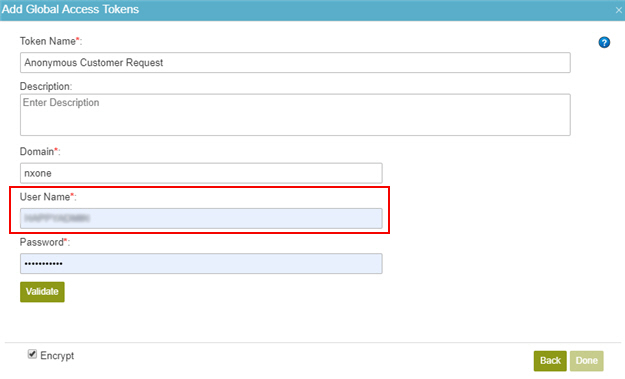
- In the Password field, enter the password of the user.
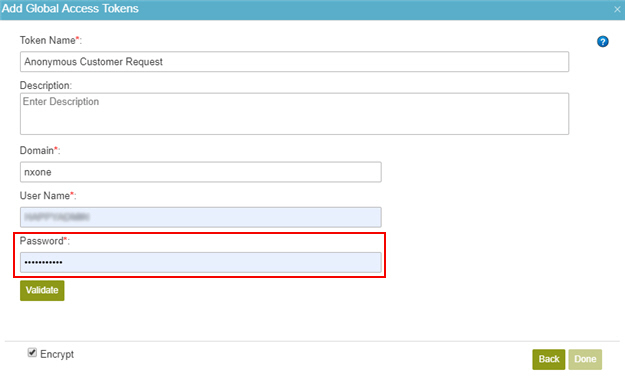
- To make sure the specified credentials are correct, click Validate .
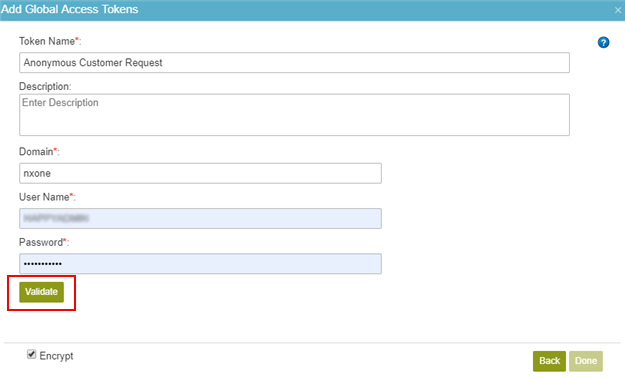
- Click Done.
Step 4: Configure Anonymous Access for an eForm
To configure the anonymous access for an eForm in a form-based app, do the procedure in this topic.
How to Start
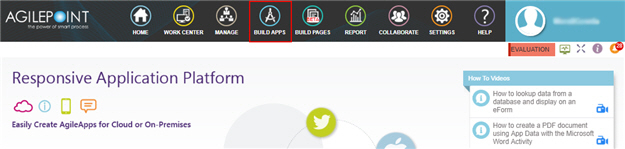
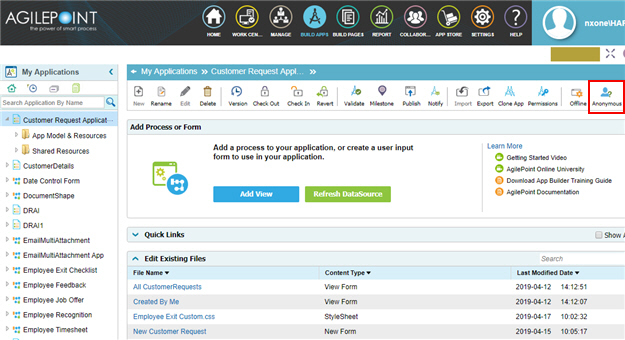
- Click Build Apps .
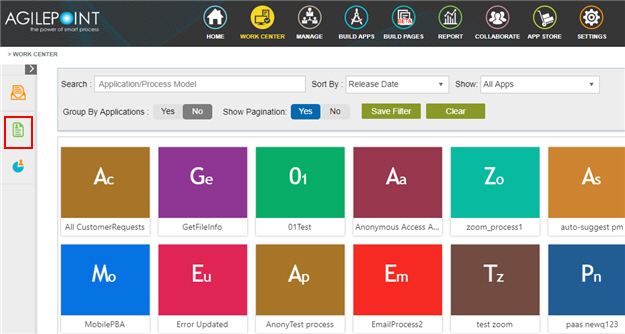
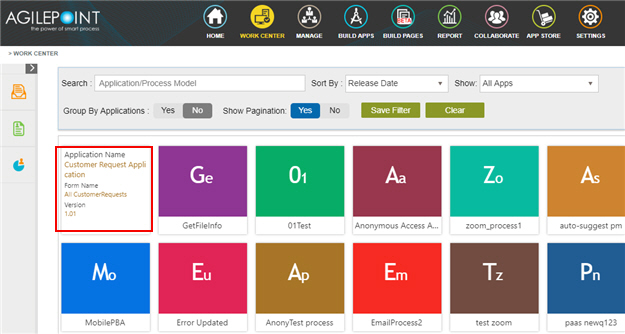
- On the Application Explorer screen, in the My Applications pane,
click Customer Request Application.
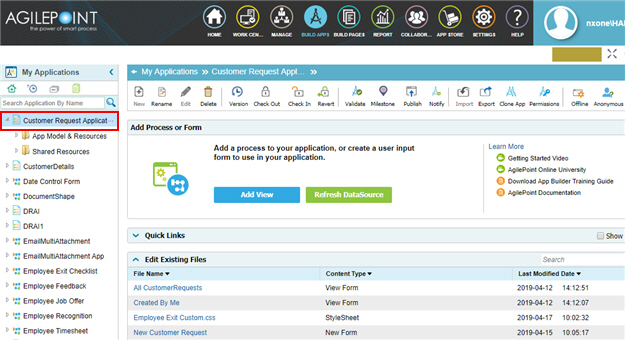
- Click Anonymous .
Procedure
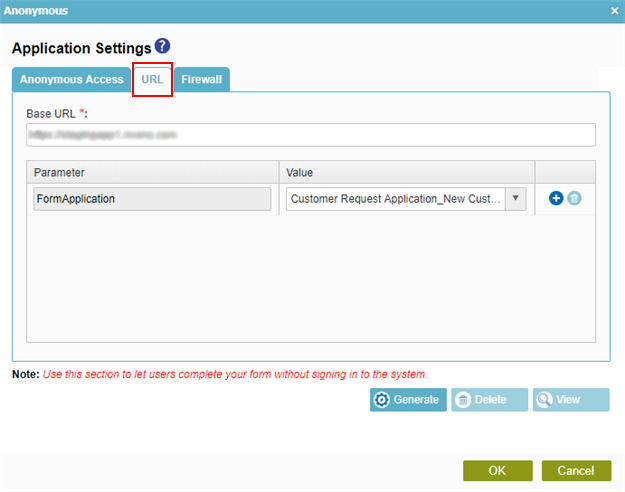
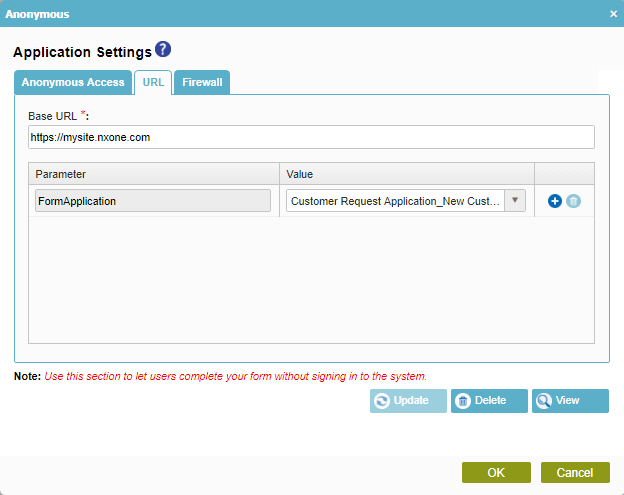
- On the Application Settings screen, click the Anonymous Access tab.
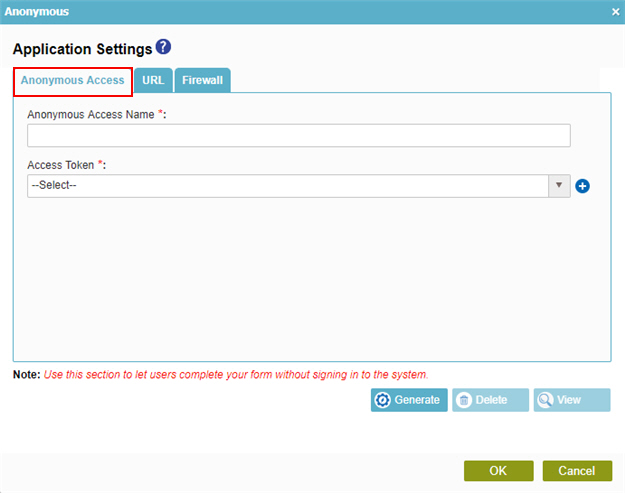
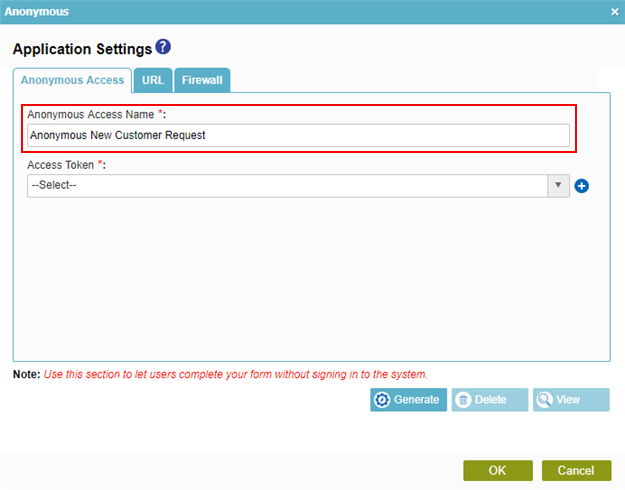
- On the Anonymous Access tab, in the Anonymous Access Name field,
enter Anonymous New Customer Request.
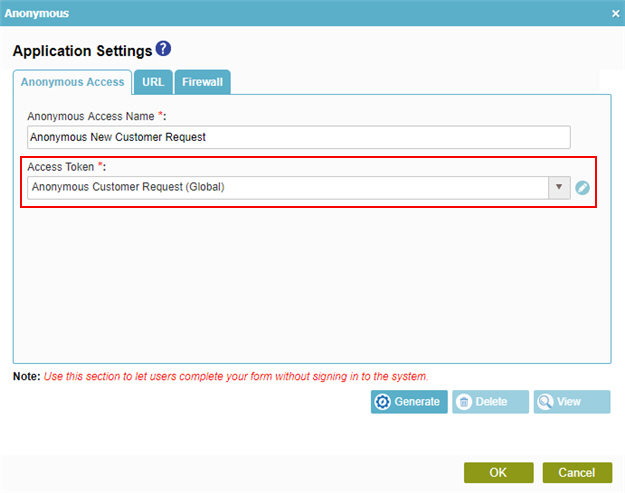
- In the Access Token list, select Anonymous Customer Request (Global).
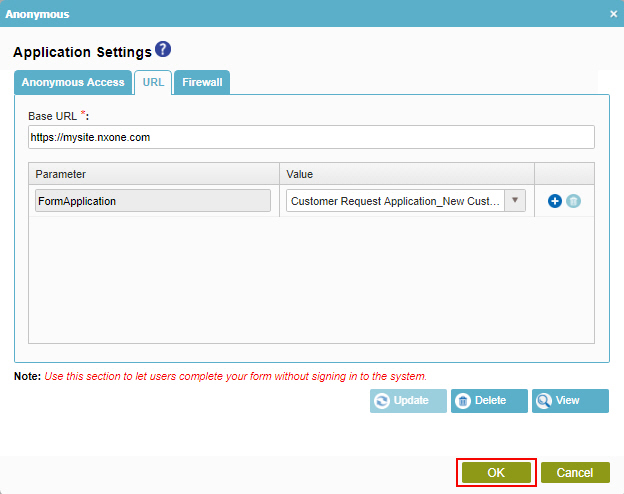
- Click the URL tab.
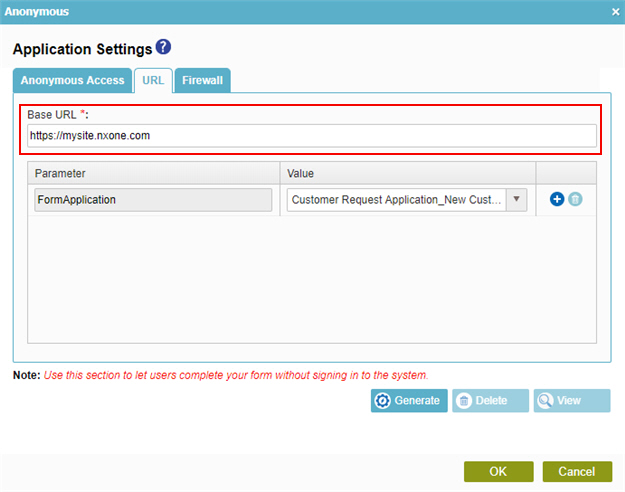
- In the Base URL field, enter https://mysite.nxone.com.
This URL is an example. You can find the actual value in the Portal Instance URL field on Tenant Settings.
For more information, refer to Find your Portal Instance URL.
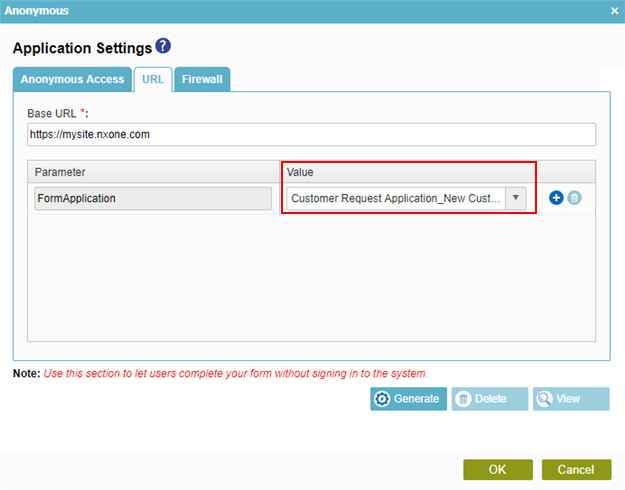
- In the Value list, select Customer Request Application_New Customer Request.
This is the value for the Create form. In a form-based app, anonymous access is usually desired for the Create form, but you can specify a different form.
You can specify your own query string parameters and values. Any custom values you specify are used in the URL for the anonymous form.
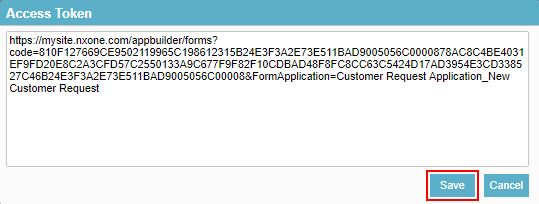
- Click Generate.
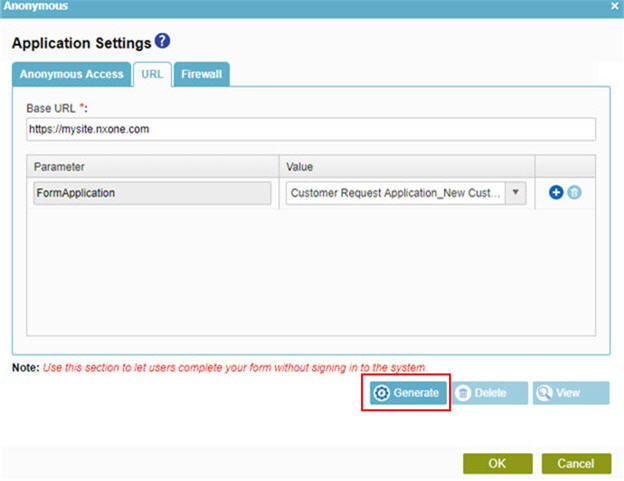
- On the Access Token screen, click Save.
You can use this URL to open and complete an eForm with no authentication.
The Application Settings screen shows.
Step 5: (Optional) Open Your eForm as an Anonymous User
To open your eForm as an anonymous user, do the procedure in this topic.
Procedure
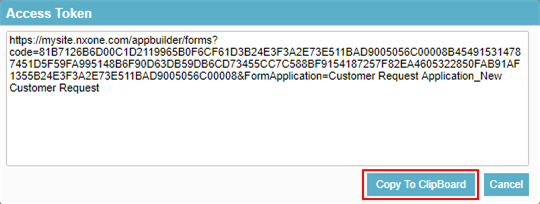
- On the Application Settings screen, click View.
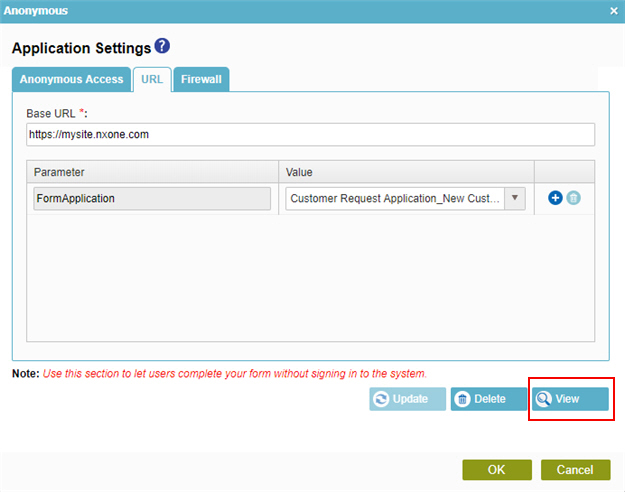
- On the Access Token screen, click Copy To ClipBoard.
- Click Cancel.
- On the Application Settings screen, click OK.
- On the Application Explorer screen, sign out of AgilePoint NX Portal.

- In your web browser, paste the URL for your eForm.
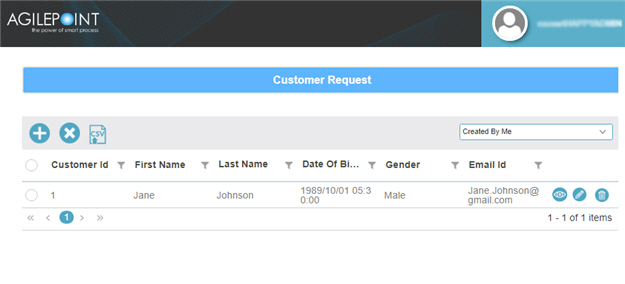
The Customer Request Form opens with no authentication.
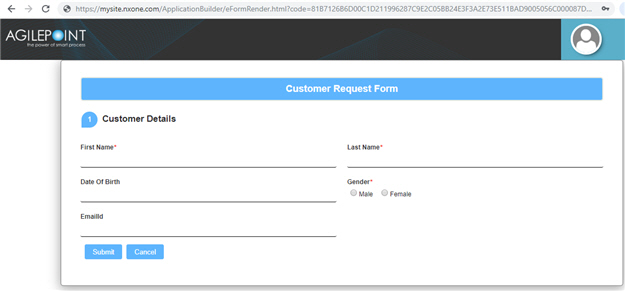
- Complete the fields on the eForm.
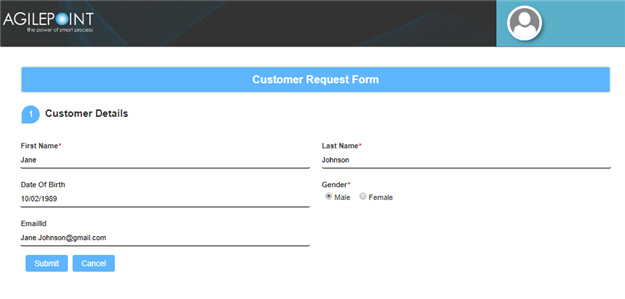
- Click Submit.
Step 6: (Optional) Verify the Records in Your eForm
To verify the records that you submitted in an anonymous form, do the procedure in this topic.
How to Start
- On the AgilePoint NX Portal, click Work Center
 .
.
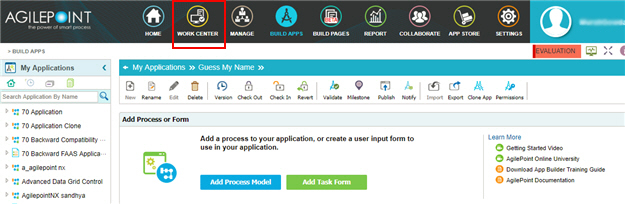
- On the Work Center screen, click Inbox
 .
.
Procedure

How to Get the App
This example is based on the Customer Request app from the AgilePoint NX App Store. Use this procedure to get the app.
Prerequisites
- AgilePoint NX OnDemand (public cloud), or AgilePoint NX PrivateCloud or AgilePoint NX OnPremises v7.0 or higher.
Good to Know
- This procedure is optional. It is provided so you can test the example with an out-of-the-box app.
- This is part of the Background and Setup procedures, but many users preferred this step to appear after the example, not before it.
Procedure
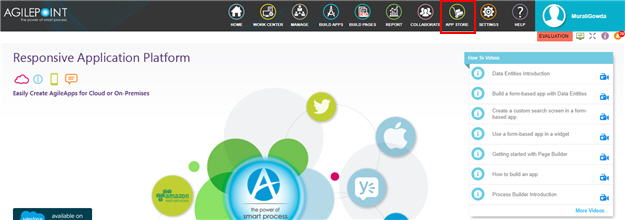
- Click App Store
 .
.
- In the PRODUCT section, click Form Based App.
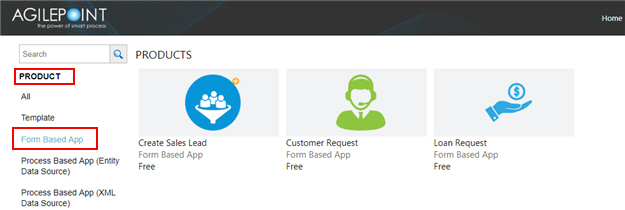
- Click Customer Request app.

- On the Customer Request screen, click Add.
- On the Trust App screen, click Trust it.
- Click Return to site.
- Publish the Customer Request app.
For more information, refer to Publish a form-based application.