(Example) How to Get the Access Token Credentials from NetSuite (Token-Based Authentication)
To get the access token credentials from NetSuite for token-based authentication, do the procedure in this topic.
Prerequisites
- One of these account types:
- NetSuite Limited Edition
- NetSuite Mid-Market Edition
- NetSuite Enterprise Edition
Good to Know
- AgilePoint recommends you use token-based authentication. User credentials authentication is planned for deprecation from NetSuite.
- OAuth 2.0 access tokens require a 2-way exchange of credentials between AgilePoint NX and the external service. This means that you must get the credentials from the third-party service to paste in the AgilePoint NX access token, and get the redirect URI from AgilePoint NX to paste in the external service. This requires you to open both the AgilePoint NX access token and the third-party service at the same time, so you can copy and paste from one screen to the other.
This topic shows the suggested procedure for NetSuite. The exact procedure for your access token depends on whether you already have a connection (usually called an app) configured in the external service.
- This topic gives one example. The procedure may vary depending on your configuration and account settings in the third-party service.
- Some information about third-party integrations is outside the scope of the AgilePoint NX Product Documentation, and it is the responsibility of the vendors who create and maintain these technologies to provide this information. This includes specific business uses cases and examples; explanations for third-party concepts; details about the data models and input and output data formats for third-party technologies; and various types of IDs, URL patterns, connection string formats, and other technical information that is specific to the third-party technologies. For more information, refer to Where Can I Find Information and Examples for Third-Party Integrations?
Step 1: Start Creating an Access Token in AgilePoint NX
First, create a new access token in AgilePoint NX for NetSuite.
How to Start
- There is more than one way to create an access token.
For more information, refer to Access Token for NetSuite.
Procedure
- In AgilePoint NX, open the access token configuration screen for NetSuite.
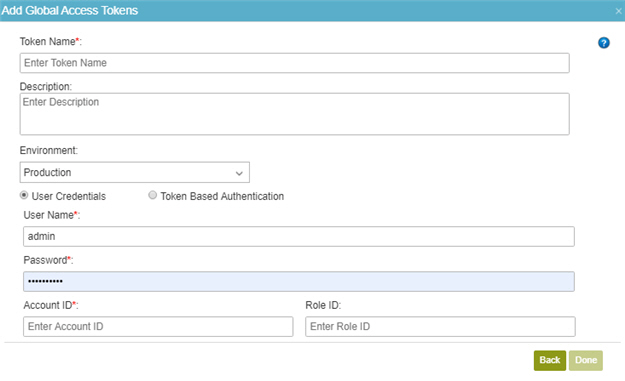
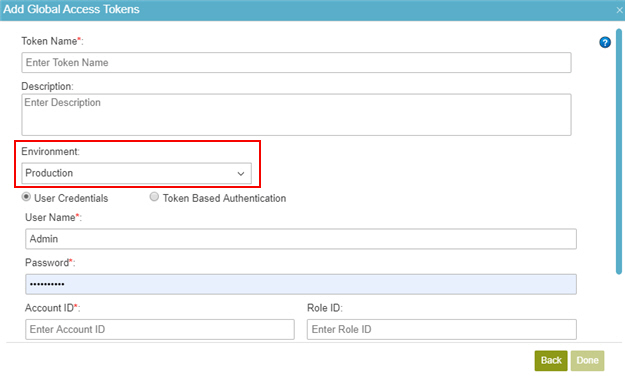
- On the NetSuite Access Token Configuration screen, in the Environment list, select your environment.
This environment type should match the account type you used to sign in to NetSuite.
This example uses a Production account and environment.
- Select Token Based Authentication.
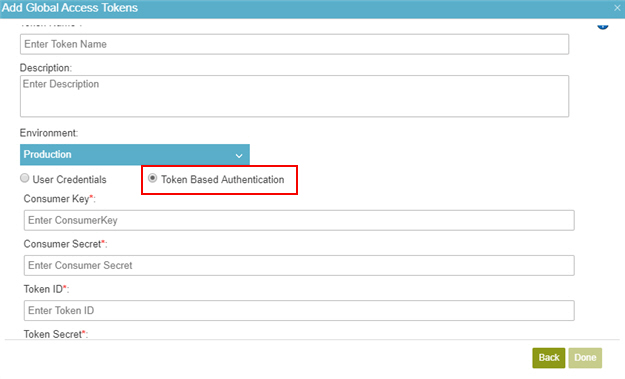
Do not configure the access token credentials.
Keep the access token configuration screen open in AgilePoint NX, but do not save it.
Step 2: Create an Integration Record for an Application in NetSuite
Next, create an integration record for an application in NetSuite.
How to Start
- In a new web browser tab, sign in to NetSuite:
Procedure
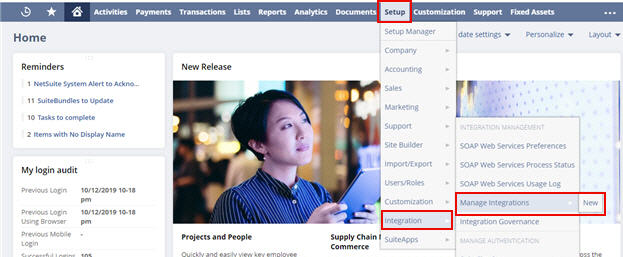
- On the NetSuite Home screen, click Setup > Integration > Manage Integrations > New.
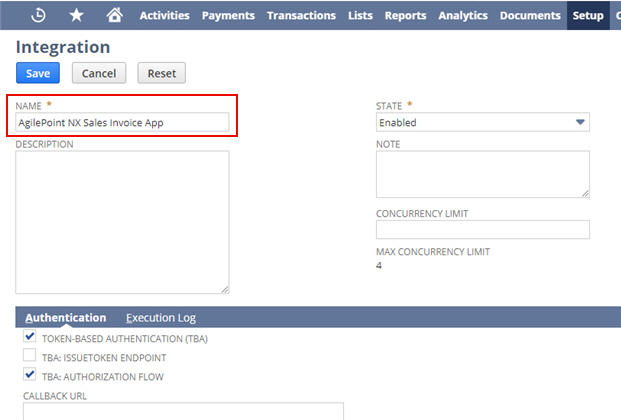
- On the Integration screen, in the Name field, enter an application name.
AgilePoint recommends you use an application name associated with your AgilePoint NX app or the way you want to use the application in AgilePoint NX.
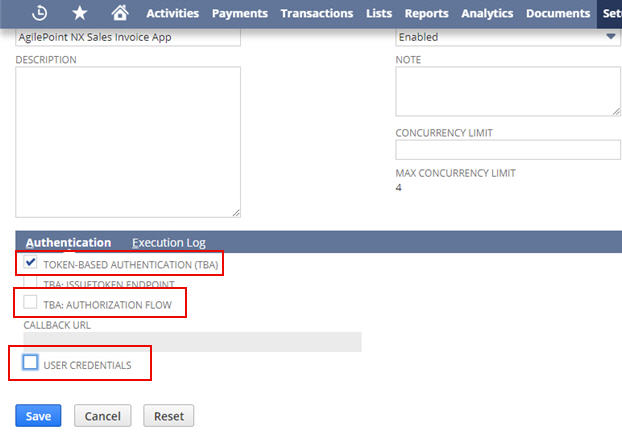
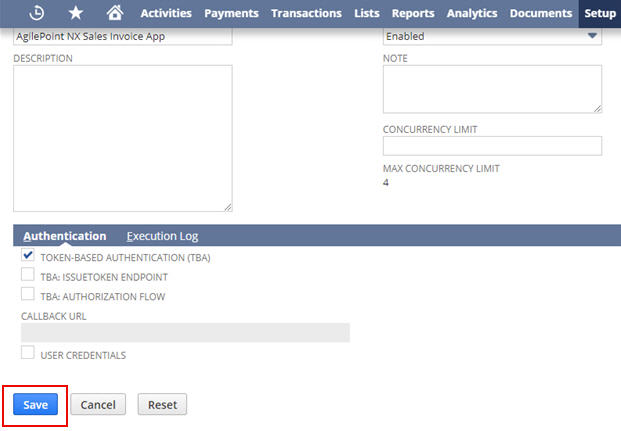
- In the Authentication tab, do this:
- Deselect TBA: AUTHORIZATION FLOW
- Deselect USER CREDENTIALS
- Select TOKEN-BASED AUTHENTICATION (TBA)
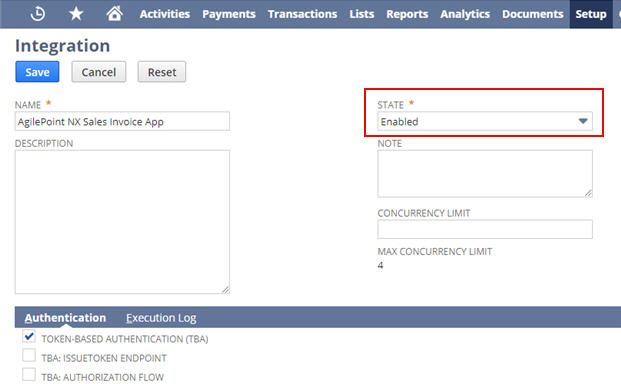
- In the STATE list, select Enabled.
- Click Save.
This Confirmation screen shows consumer key and consumer secret for your application.
Note: Do not close this screen before you copy the credentials. If you close the Confirmation screen, the credentials can not be retrieved from NetSuite. If you lose these credentials, you must start this procedure again to create new values.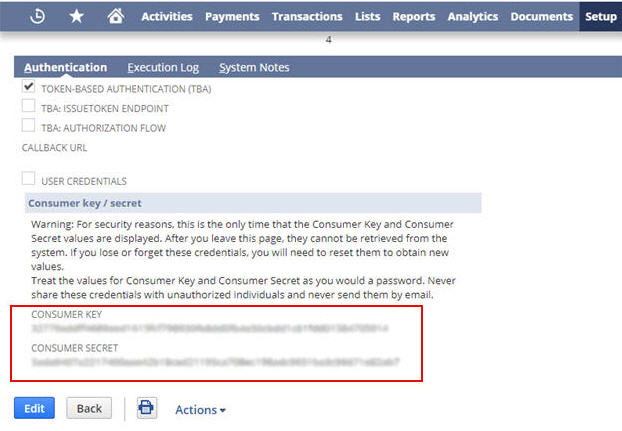
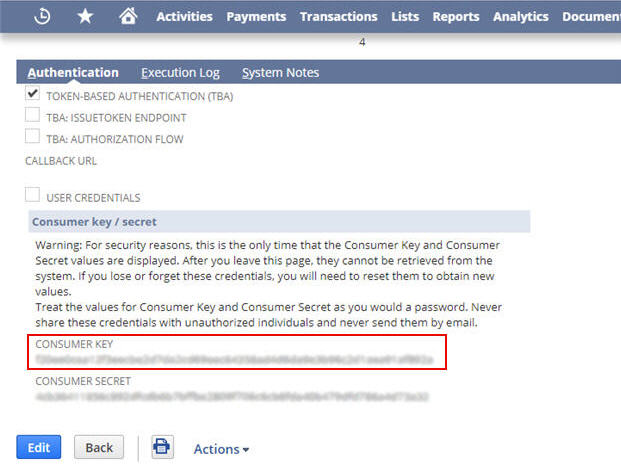
- On the Confirmation screen, in the Authentication tab,
copy the CONSUMER KEY value.
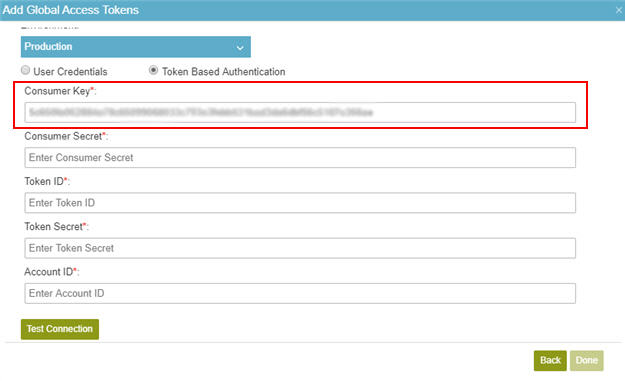
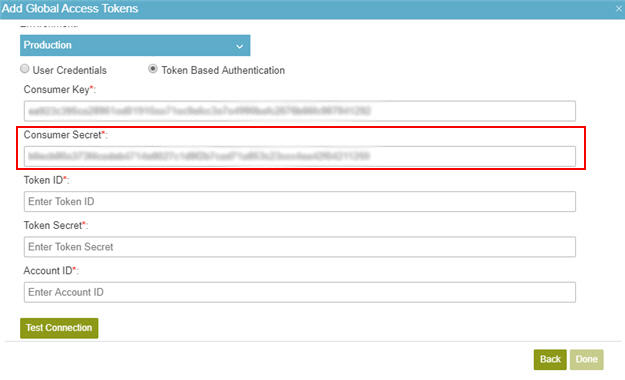
- In AgilePoint NX, on the NetSuite Access Token Configuration screen, in the
Consumer Key field, paste the CONSUMER KEY value from NetSuite.
- In NetSuite, on the Confirmation screen, in the Authentication tab,
copy the CONSUMER SECRET value.
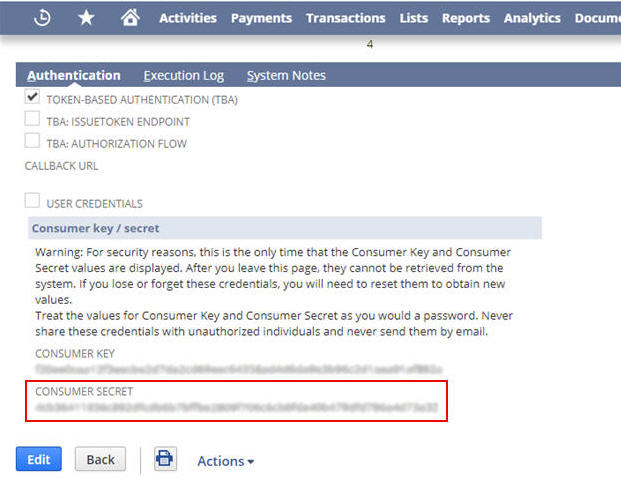
- In AgilePoint NX, on the NetSuite Access Token Configuration screen, in the
Consumer Secret field, paste the CONSUMER SECRET value from NetSuite.
Step 3: Create an Access Token in NetSuite
Next, create an access token in NetSuite.
How to Start
- In one web browser tab,
go to the NetSuite Home screen.
For more information, refer to Create an Integration Record for an Application in NetSuite.
- In a different web browser tab, in AgilePoint NX, open the NetSuite access token configuration screen.
Procedure
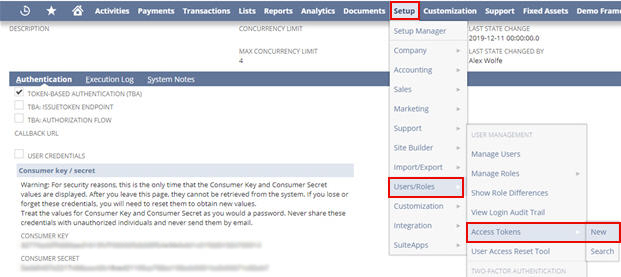
- On the NetSuite Home screen, click Setup > Users/Roles > Access Tokens > New.
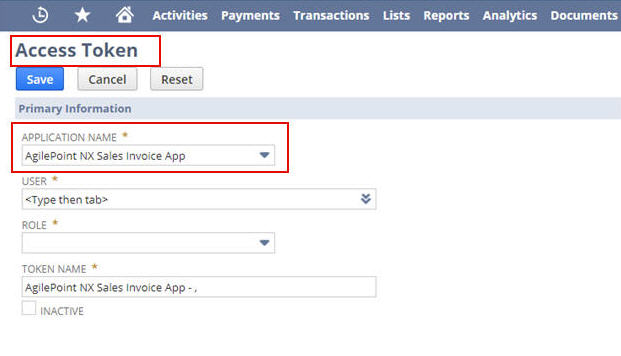
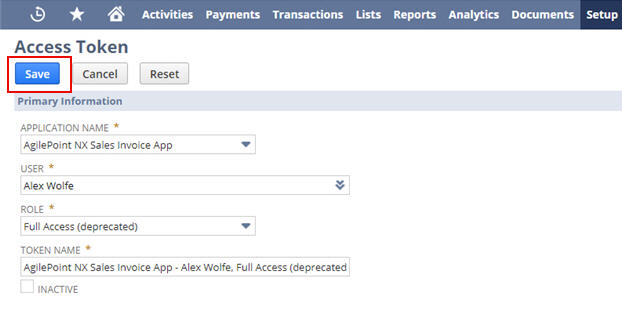
- On the Access Token screen, in the Application Name field, select the application name.
In this example, select the application name created in Step 2: Create an Integration Record for an Application in NetSuite.
- In the User field, click List.
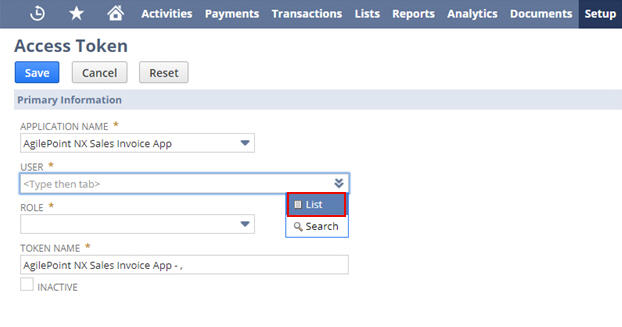
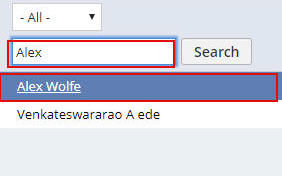
- In the Serach screen, search the user, and click the user name.
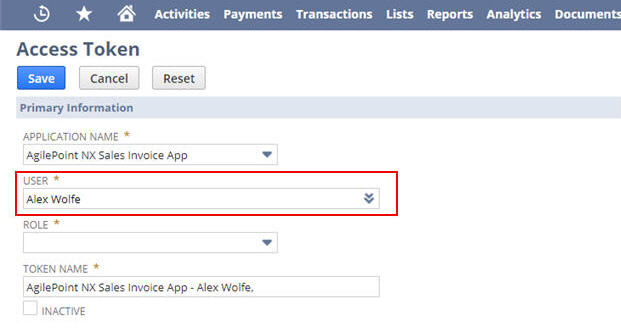
The user name shows in the USER field.
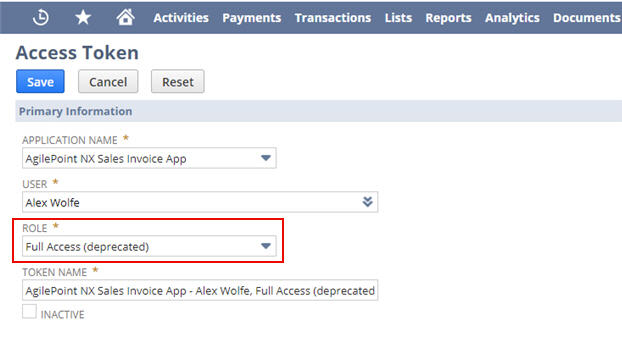
- In the ROLE field, select a role for the user.
- Click Save.
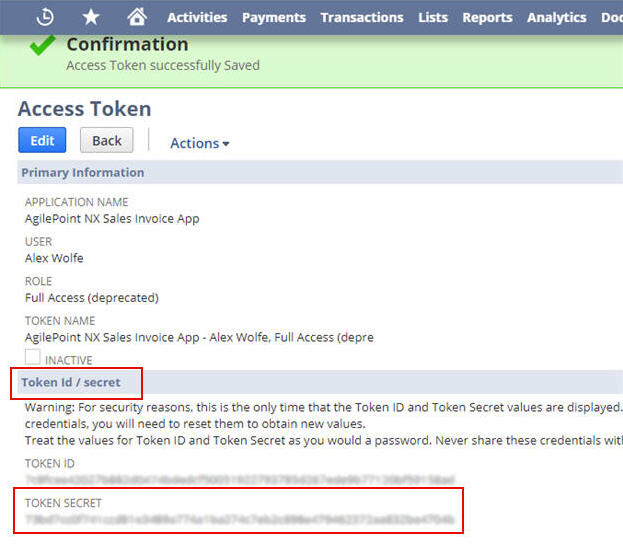
The Confirmation screen shows the TOKEN ID and TOKEN SECRET.
Note: Do not close this screen before you copy the credentials. If you close the Confirmation screen, the credentials can not be retrieved from NetSuite. If you lose these credentials, you must start this procedure again to create new values.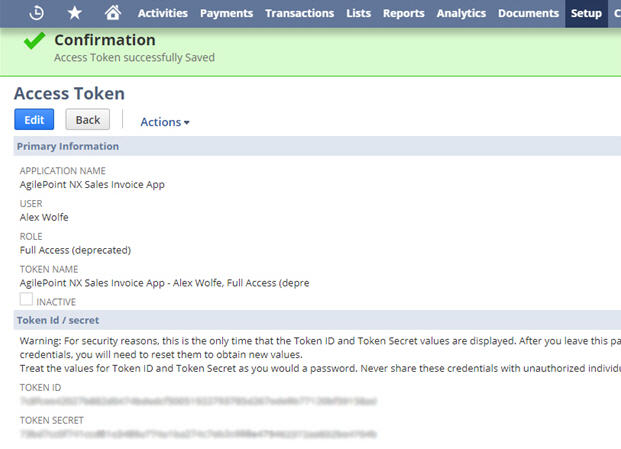
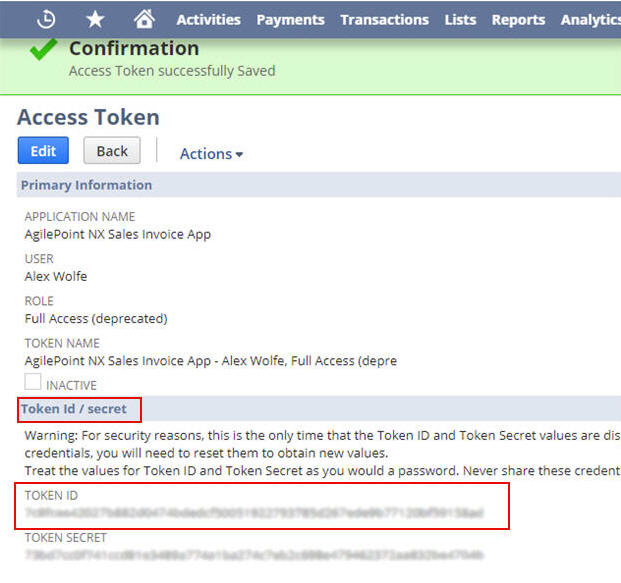
- On the Confirmation screen, in the Token Id / secret section,
copy the TOKEN ID value.
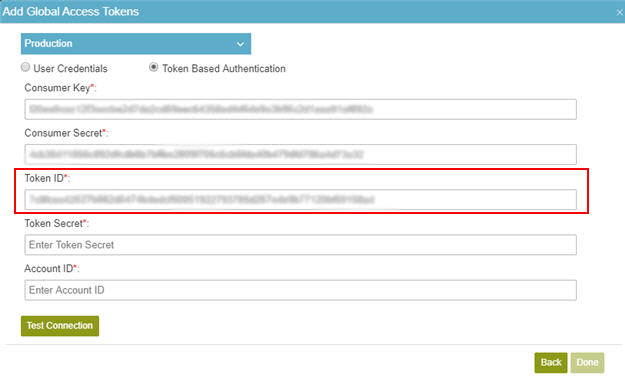
- In AgilePoint NX, on the NetSuite Access Token Configuration screen, in the
Token ID field, paste the TOKEN ID value from NetSuite.
- In NetSuite, on the Confirmation screen, in the Token Id / secret section,
copy the TOKEN SECRET value.
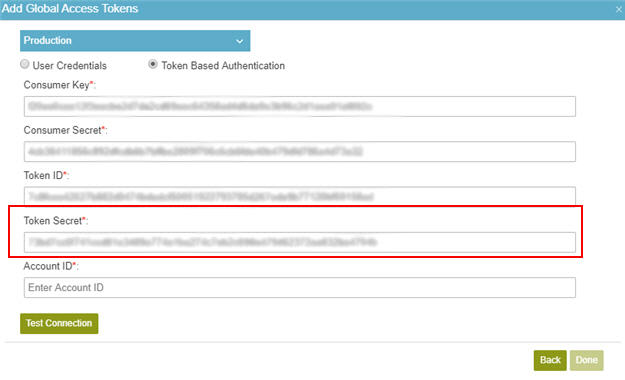
- In AgilePoint NX, on the NetSuite Access Token Configuration screen, in the Token Secret field, paste the TOKEN SECRET value from NetSuite.
Step 4: Copy the Account ID from NetSuite
Next, copy the account ID from NetSuite.
How to Start
- In one web browser tab, go to
the NetSuite Home screen.
For more information, refer to Create an Integration Record for an Application in NetSuite.
- In a different web browser tab, in AgilePoint NX, open the NetSuite access token configuration screen.
Procedure
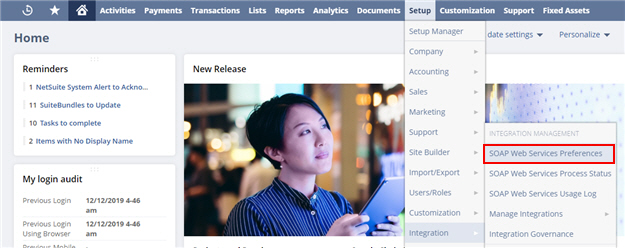
- In NetSuite, on the Home screen, click Setup > Integration > SOAP Web Services Preferences.
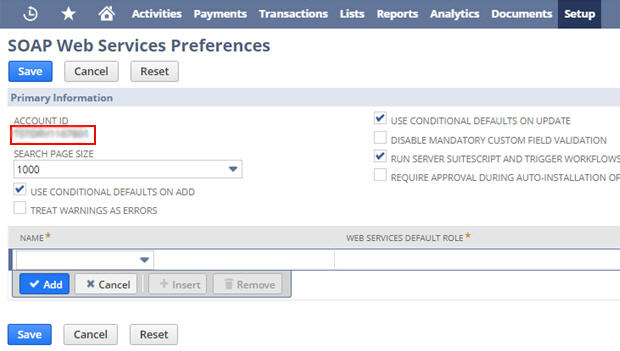
- On the SOAP Web Services Preferences screen, in the ACCOUNT ID field, copy the ACCOUNT ID value.
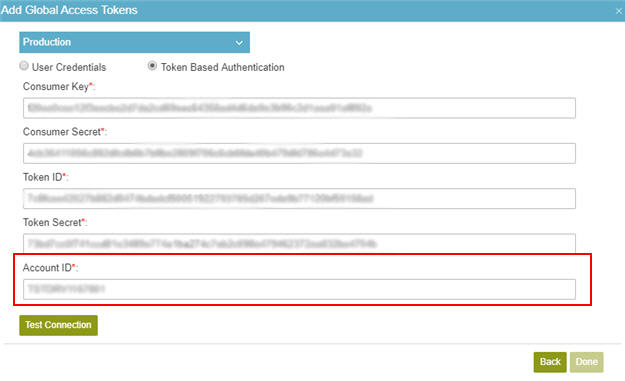
- In AgilePoint NX, on the NetSuite Access Token Configuration screen, in the Account ID field,
paste the ACCOUNT ID value from NetSuite.
Step 5: Complete the AgilePoint NX Access Token
Next, complete the AgilePoint NX access token configuration for NetSuite.
How to Start
- In AgilePoint NX, open the NetSuite access token configuration screen.
Procedure
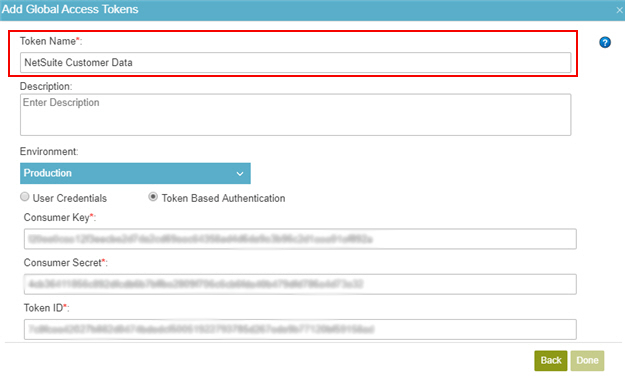
- In AgilePoint NX, on the NetSuite Access Token Configuration screen, in the Token Name field,
enter a name for the access token.
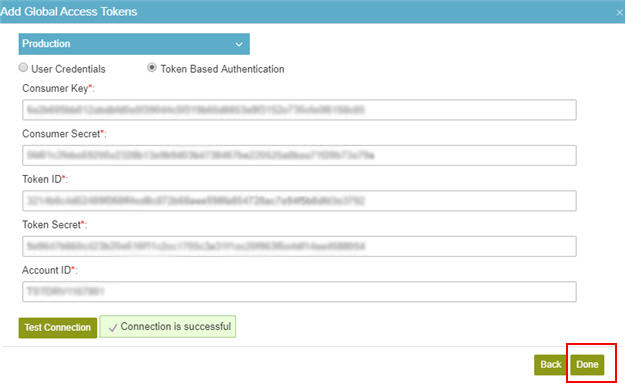
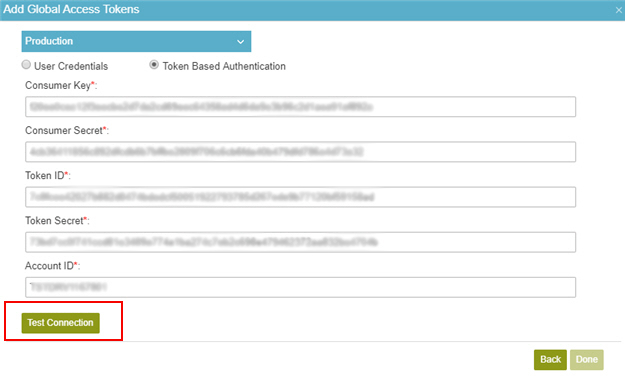
- Click Test Connection.
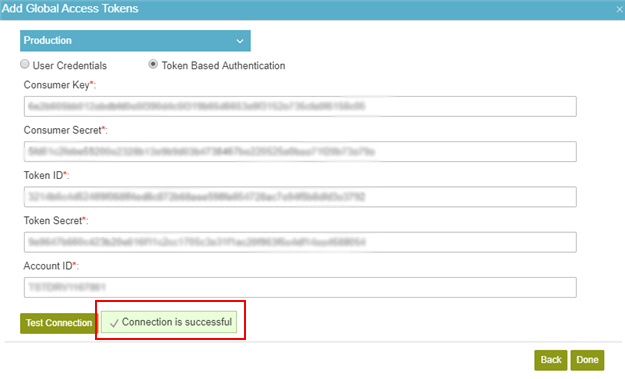
If the connection is successful, a confirmation message shows.
- Click Done.
