
(Example) Create a Webhook and Receive Notifications
This example shows how to create a webhook to send a webhook notification when an event occurs in an NX app.
Background and Setup
Prerequisites
- AgilePoint NX OnDemand (public cloud), or AgilePoint NX PrivateCloud or AgilePoint NX OnPremises v7.0 Software Update 2 or higher.
Good to Know
- This example topic uses a simple example for webhook based on this use case:
Faybey, a fictitious online fashion retailer, uses the Sales Invoice app to create and manage customer invoices. The company has problems with sales invoices that are not correctly executed. The CEO of Faybey wants to monitor the Sales Invoice app to find where the problems occur. The AgilePoint NX administrator creates a webhook to monitor possible problems in the Sales Invoice app. When an error occurs, the webhook sends a notification that the administrator can monitor.
- This example uses the Sales Invoice app from the AgilePoint NX App Store.
For more information, refer to How to Get the App
- This example topic uses the third-party web site https://webhook.site for example purposes. This is a free, open source app you can use to test webhooks and other types of HTTP/HTTPS requests. In a production environment, use an app that is appropriate for your business requirements.
Step 1: Get the Webhook Notification URL
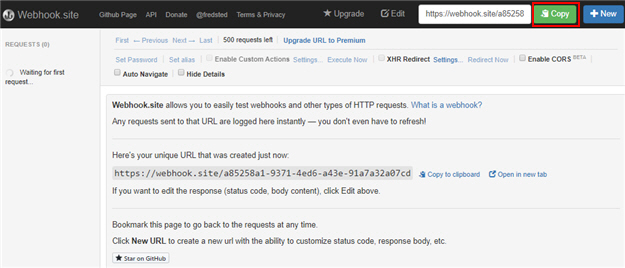
First, get the webhook notification URL from https://webhook.site.
Good to Know
- This example uses https://webhook.site to get the webhook notification URL that is required to create a webhook in AgilePoint NX. In a production environment, use a webhook notification URL that is associated with your webhook notification system.
How to Start
- In a web browser, go to https://webhook.site.
Procedure
- On the Webhook.site screen, to copy the webhook notification URL, click Copy.
Step 2: Create a Webhook
Next, create a webhook in AgilePoint NX.
Prerequisites
Good to Know
- This example shows how to create a webhook related to a process instance suspended event. You can also create a webhook related to other runtime events and security events such as role, group, and delegation.
How to Start
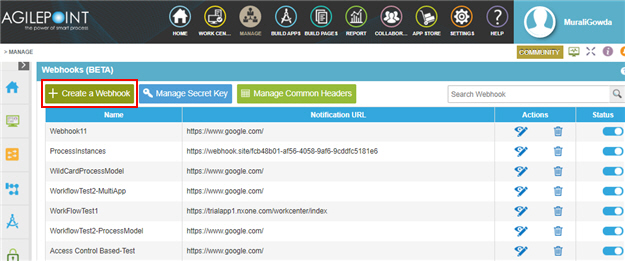
- In the Manage Center, click
System
 > Webhooks.
Procedure
- On the Webhooks screen, click Create a Webhook.
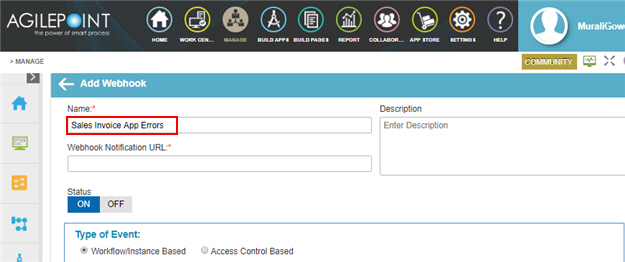
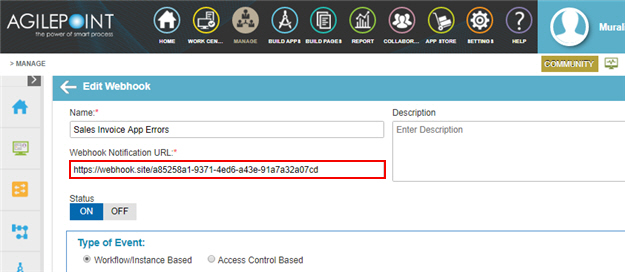
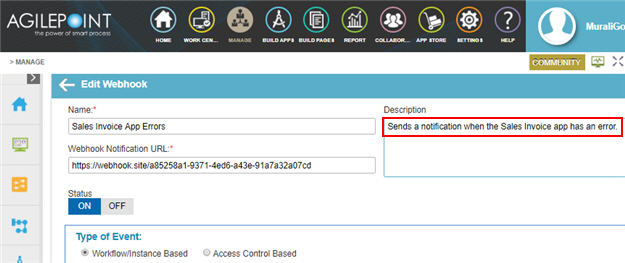
- On the Add Webhook screen, in the Name field, enter Sales Invoice App Errors.
- In the Webhook Notification URL field, enter https://webhook.site/a85258a1-9371-4ed6-a43e-91a7a32a07cd.
This is the example URL from webhook.site in Step 1: Get the Webhook Notification URL. In a production app, use the webhook notification URL for your business requirements.
- In the Description field, enter Sends a notification when the Sales Invoice app has an error.
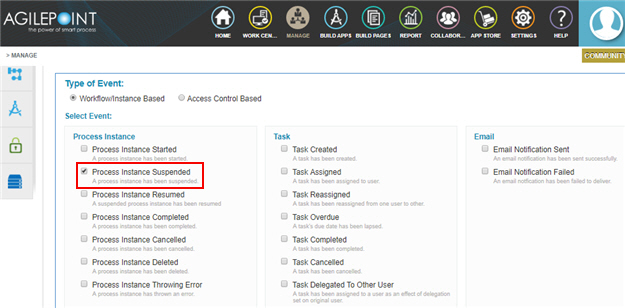
- In the Type of Event field, select Workflow/Instance Based.
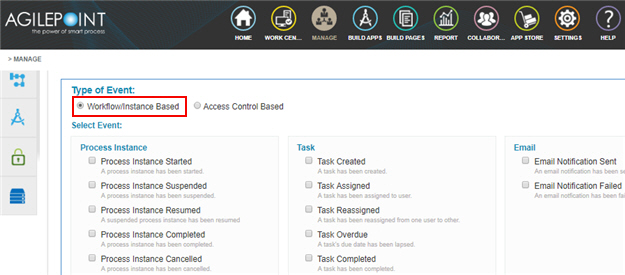
- In the Select Event section, select Process Instance Suspended.
- In the Application field, select Sales Invoice from the list.
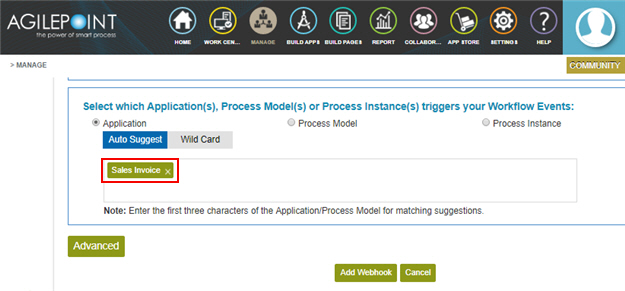
- Click Add Webhook.
Step 3: View a Webhook Notification for an Event
Next, view a webhook notification when a configured event occurs.
Prerequisites
- In this example, the webhook is configured to send a notification when a process instance is suspended for the Sales Invoice app. For this event to occur, the Sales Invoice app must be configured for the use case, started, and have one or more running process instances. When one of the process instances is suspended — for example, because of an error — it causes the webhook to send a notification.
In a production environment, a webhook notification is sent when the configured event occurs.
Good to Know
- This example uses https://webhook.site to view the webhook notification.
How to Start
- In a web browser, go to https://webhook.site.
Procedure
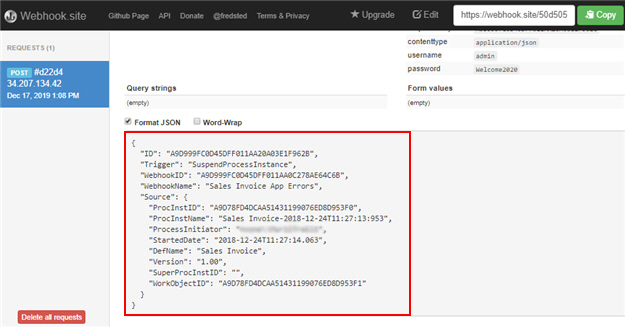
- On the Webhook.site screen, in the left pane, click the webhook notification.
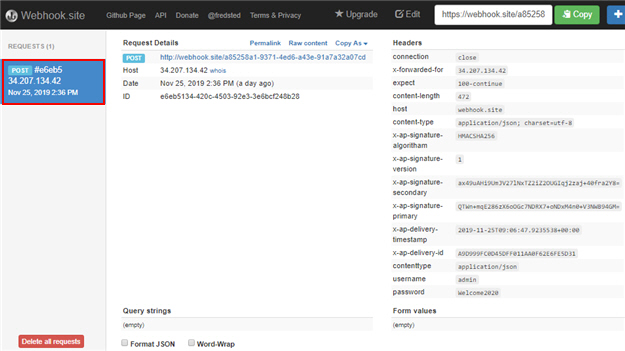
- Select Format JSON.
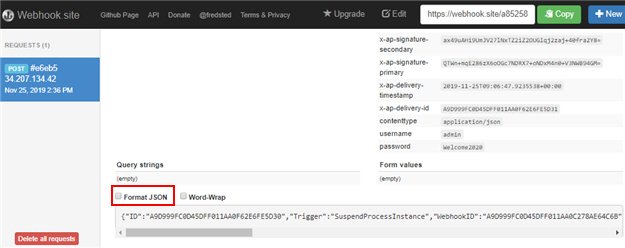
This page shows the webhook notification in JSON format.
Step 4: (Optional) Convert a Webhook Notification to a Human-Readable Format
Next, change a webhook notification from JSON format to user readable format.
Good to Know
- This example uses http://json2html.varunmalhotra.xyz/ to parse the JSON webhook notification response. This is a freely available open source tool you can use to view the JSON message in a human-readable format.
In a production environment, use an JSON parsing tool that is appropriate for your business requirements.
How to Start
- In one web browser tab, open the webhook notification you received in https://webhook.site.
For more information, refer to View a Webhook Notification.
- In a different web browser tab, go to http://json2html.varunmalhotra.xyz/.
Procedure
- In Webhook.site, copy the webhook notification in JSON format.
- Go to http://json2html.varunmalhotra.xyz/.
- On the Input Valid Jason field, paste the webhook notification in JSON format.

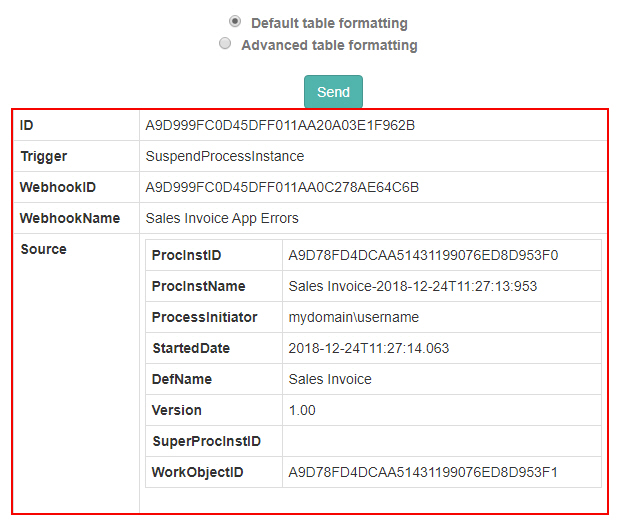
- Click Send.
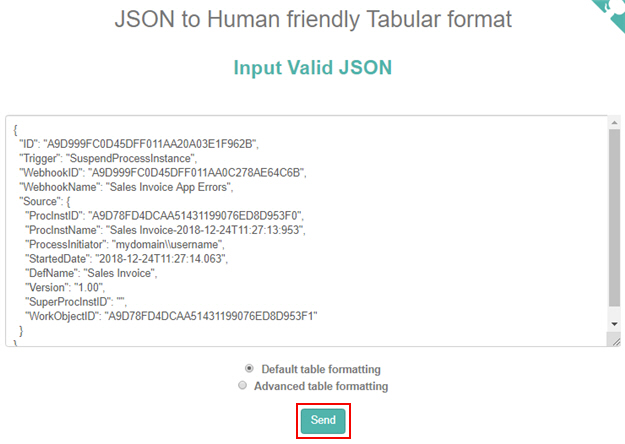
The results page shows the webhook notification in a tabular format. In this example, the webhook notification shows information such as the cause of the notification (SuspendProcessInstance), the process instance name and ID, and the date and time the event occurred.
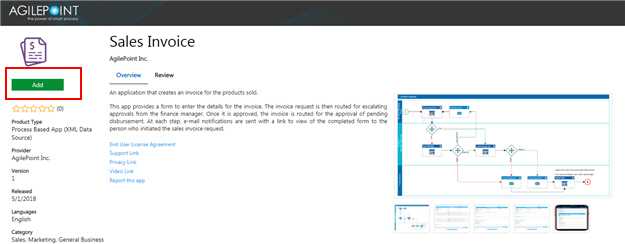
How to Get the App
This example is based on the Sales Invoice app from the AgilePoint NX App Store. Use this procedure to get the app.
Prerequisites
- AgilePoint NX OnDemand (public cloud), or AgilePoint NX PrivateCloud or AgilePoint NX OnPremises v7.0 or higher.
Good to Know
- This procedure is optional. It is provided so you can test the example with an out-of-the-box app.
- This is part of the Background and Setup procedures, but many users preferred this step to appear after the example, not before it.
Procedure
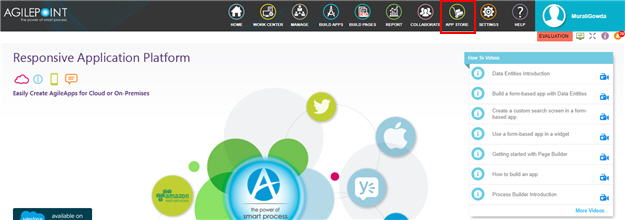
- Click App Store
 .
.
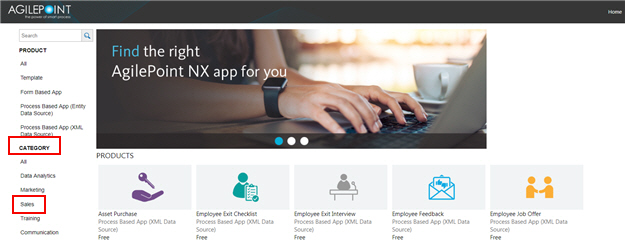
- In the CATEGORY section, click Sales.
- Click the Sales Invoice app.
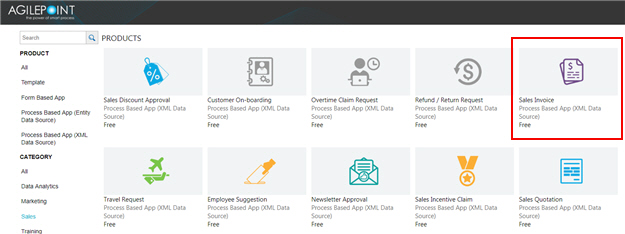
- On the Sales Invoice screen, click Add.
- On the Trust App screen, click Trust it.
- Click Return to site.