Report Designer/Schedule
The Report Designer/Schedule page allows users to
View scheduled deliveries
Add, copy, and remove schedules
Methods of Delivering Scheduled Reports
Delivery Method |
Recipient Options |
Delivery Options |
Sending Location |
Applied Filters |
|---|---|---|---|---|
Subscription |
Self (Current User) |
|
|
Configured in Subscription Scheduler window |
Scheduled |
All Users, Others and Self |
|
|
Configured in Report Scheduler window |
Instant Delivery |
All Users, Others and Self |
|
|
Currently configured filters in report |
View Schedule List
In Report Designer, click Schedule in the left menu.
Summaries of existing schedules are listed together with delivery options.
Each schedule can be edited, copied or deleted using the icons in Action field.
New schedule can be added using the Add Schedule button above the list.

Fig. 143 Report Schedule List
Note
To delete multiple schedules at the same time, tick the checkbox in front of them then click the delete icon above the list (that looks like a waste basket).
Search for Schedules

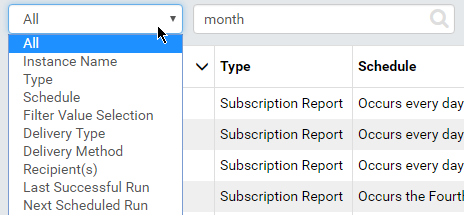
Fig. 144 Report Schedule Search
Select a field to search in from the drop-down, default is All.
Enter a partial text and click the search icon (🔍).
Only matching schedules will be displayed.
Add a Schedule
Click the Add Schedule button above the list to open the Add Schedule pop-up.
Enter a name for this schedule.
In Schedule tab:
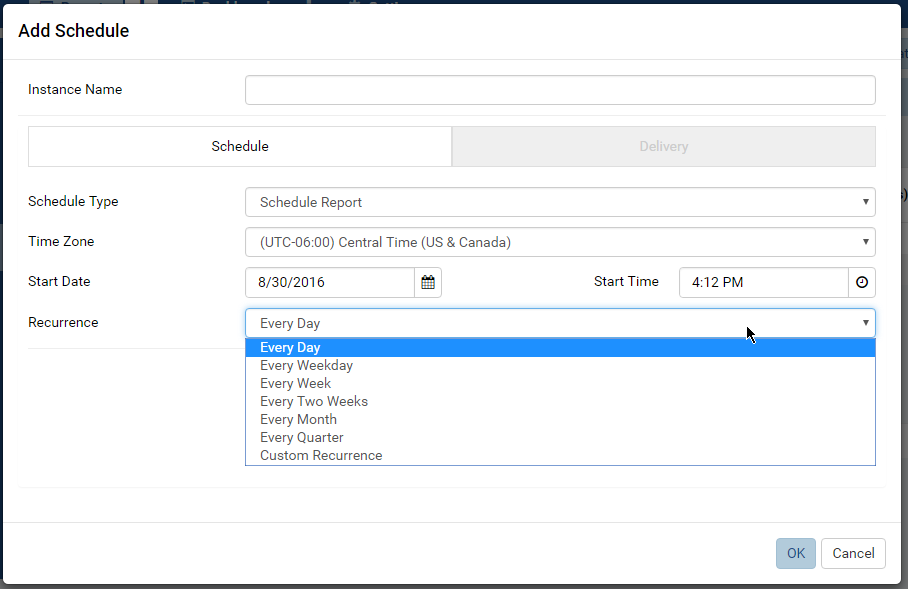
Select Scheduling Type:
Scheduled Alert: delivered only if report has data at scheduled time.
Scheduled Reporting Item: delivered regardless whether it has data or not at scheduled time.
Select desired time zone.
Select a start date in the future.
Enter the start time (some common values can be quickly selected from the pre-defined list).
Select a common recurrence period from the list, or select Custom Recurrence to define a different one.

Fig. 145 Report Schedule
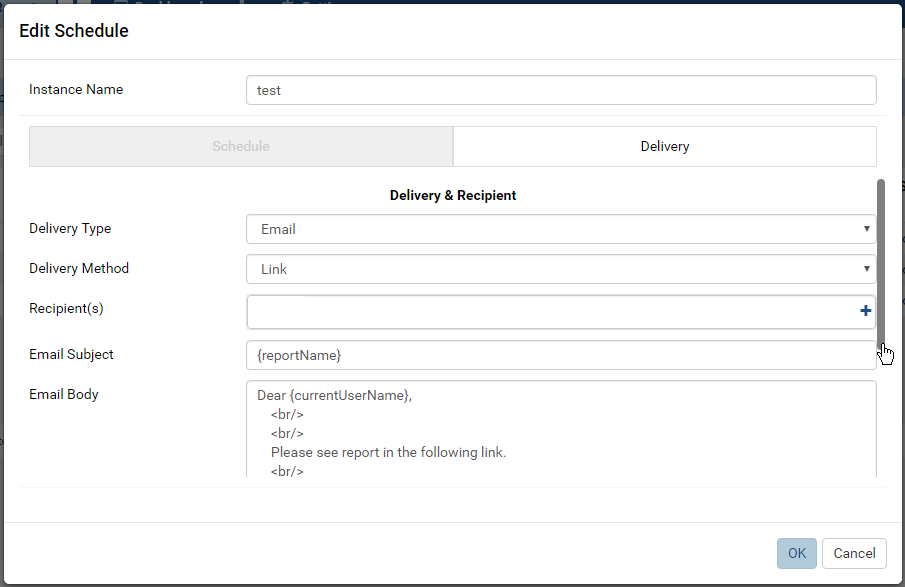
In Delivery tab, select:
“Email” Delivery Type: send the report to the email address of selected users.
Select Delivery Method: email a Link, email an Attachment, or email with Embedded HTML body.
Customize the default template if necessary.
“File Location” Delivery Type: save the report as a file.
Delivery Method is Send to disk.
Select the Export File Type: PDF, Word Doc, Excel or CSV.

Fig. 146 Report Schedule Delivery
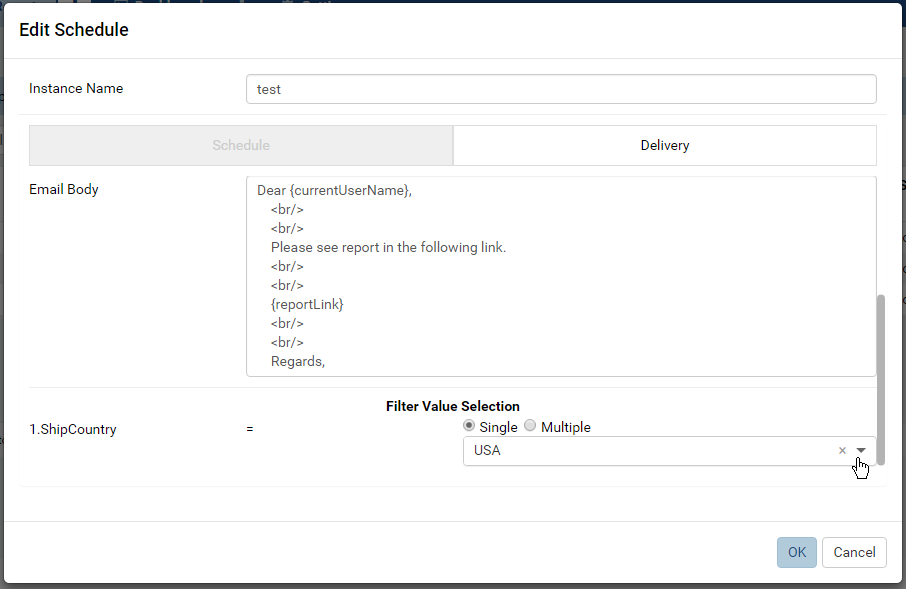
Optionally re-select values for report filters.

Fig. 147 Report Schedule Filter
Click OK to close Add Schedule pop-up.
Click Save at the top to save the Report.