Create a new Activity Entry Email Notification
- Access the Email Templates
Wizard. The Email Templates Wizard can be accessed using the
View > Email Templates Wizard menu command. It can also be
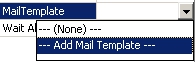
accessed by selecting the Add Mail Template option (shown below) in
the Activity Properties toolbar.
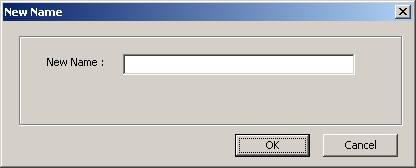
- Click the New button. The
New Name window appears.
- Type a name for the new
email template and click the OK button. The Email Templates Wizard reappears
with the name of the new email template.
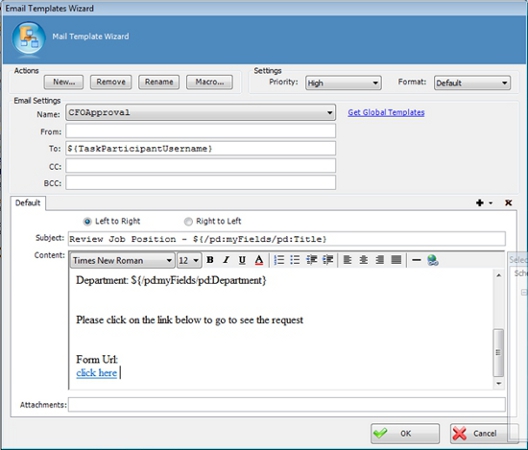
- Complete the From, To,
CC, and Subject fields. For more information, see Email Template Fields.
- Select the priority to be
assigned to the email. Normal is set as the default.
- Select the format for which
the email content will be displayed. Both HTML and plain text formats are
supported.
- Type the content of the
message. The Left to Right and Right to Left option buttons allow you to
customize the alignment of the content.
- (Optional) To attach a file
to the email, type the full path of the file in the Attachments text box
(e.g., C:\My Documents\sample.doc). To attach multiple files, use a semicolon.
- Click the OK button. The Email Notification is
now part of the process. The same steps can be repeated to create Outgoing, Reassigning, and
Activity Timeout Email Notifications.
For more information, see
Email Template Window.